Table of Contents
Advertisement
Quick Links
Download this manual
See also:
User Manual
Advertisement
Table of Contents

Related Manuals for Slinex RD-30


Summary of Contents for Slinex RD-30
- Page 1 RD-30 SERIES doorbell ACCESSORIES wireless kit User manual Thank you for choosing our equipment { Design. Uniqueness. Innovation s}...
-
Page 2: Table Of Contents
This manual can contain some inaccuracy or misprint. The owner reserves the right to 2.1 Outdoor panel speci cation ..........................3 make corrections to the information described in the user manual and device package. The last revision of this manual is available on www.slinex.com 2.2 Handset speci cation ............................. 4 3. Description....................................5 Safety instructions 4. -
Page 3: Package
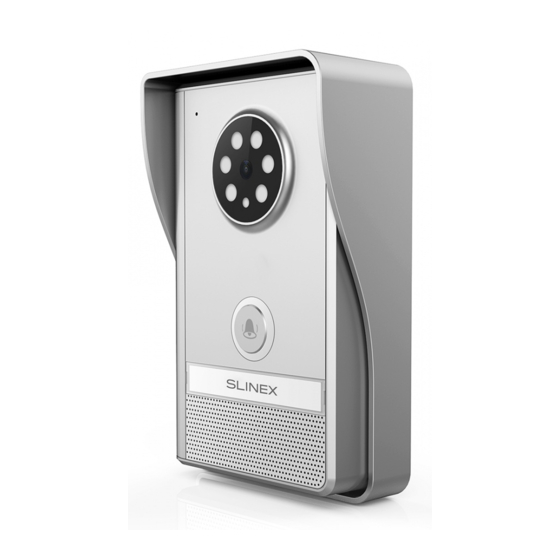
SERIES ACCESSORIES { Design. Uniqueness. Innovations } 1. Package 2.2 Handset speci cation Outdoor panel − 1 pc. Screen 2.4” color TFT Outdoor panel mounting bracket − 1 pc. Outdoor panel caps and screws − 1 kit (2 caps) Screen resolution 320 240 pixels Outdoor panel power supply −... -
Page 4: Description
SERIES ACCESSORIES { Design. Uniqueness. Innovations } 4. Battery installation 3. Description Handset battery included into doorbell kit. Slide o battery compartment cover, remove protection lm on the battery contacts and install it into battery compartment (pay attention on battery polarity while Microphone installation). -
Page 5: Charging Device Operation
SERIES ACCESSORIES { Design. Uniqueness. Innovations } 5. Charging device operation Diagram 2. Outdoor panel and electromagnetic lock connection. Power supply socket situated on the bottom side of the charging device. Connect power supply from the kit Exit to the charging device then connect it to the socket and put the handset to the charging device cup. button Fully charge the battery before the rst use. -
Page 6: Handset Turning On/O
SERIES ACCESSORIES { Design. Uniqueness. Innovations } 2) Take the surface mount bracket from the kit and place it 150-160 cm (5 ft.) up from the oor line. 9. Operation 3) Mark and drill two holes in the wall 60mm (2,36”) from each other horizontally. 4) Take two wall anchors from the kit and hammer them into the drilled holes. -
Page 7: Outdoor Panel Monitoring
SERIES ACCESSORIES { Design. Uniqueness. Innovations } 9.2 Outdoor panel monitoring 10.2 Settings menu structure Handset menu has the following structure: Standby mode Talking Volume Auto Snap Ringing Volume Press any key to activate handset screen. Then press «Mon» key which matches right program key on the handset main screen. -
Page 8: Taking Snapshots
SERIES ACCESSORIES { Design. Uniqueness. Innovations } 11. Taking snapshots Enter «Snap Set» menu on the 2 nd page of settings menu. If «Auto snap» function is on, then every time somebody calls the outdoor pnel, handset makes automatic snapshot. Also snapshot can be made manually by pressing right program key while manual image monitoring or talking with the visitor. -
Page 9: Connection Quality
SERIES ACCESSORIES { Design. Uniqueness. Innovations } 13. Engineering mode 14. Connection quality . 13.1 Outdoor panel registration Since working frequency of that product is 2.4GHz, wireless signal has poor penetration through di erent Two outdoor panels can be connected to one handset. Every outdoor obstacles. -
Page 10: Limited Warranty
SERIES ACCESSORIES { Design. Uniqueness. Innovations } 15. Limited warranty Manufacturer guarantees product normal functioning during the warranty period if the user keeps all safety instructions described in that manual. Warranty period is 12 months from the moment of the product purchasing (warranty period could be extended up to 24 months or more, depending on the local regulations).
Need help?
Do you have a question about the RD-30 and is the answer not in the manual?
Questions and answers