Table of Contents
Advertisement
Advertisement
Table of Contents

Related Manuals for Elmo MA-1


Summary of Contents for Elmo MA-1
- Page 1 VISUAL PRESENTER MA-1 / MO-2 INSTRUCTION MANUAL...
-
Page 2: Important Safeguards
■IMPORTANT SAFEGUARDS ■ Read Instructions All the safety and operating instructions should be read before the appliance is operated. ■ Retain Instructions The safety and operating instructions should be retained for future reference. ■ Heed Warnings All warnings on the product and in the operating instructions should be adhered to. ■... - Page 3 lightning and power-line surges. ■ Overloading Do not overload wall outlets, extension cords, or integral convenience receptacles as this can result in a risk of fire or electric shock. ■ A product and cart combination should be moved with care. Quick stops, excessive force, and uneven surfaces may cause the product and cart combination to overturn.
- Page 4 This symbol [crossed-out wheeled bin WEEE Annex IV] indicates separate collection of waste electrical and electronic equipment in the EU countries. Please do not throw the equipment into the domestic refuse. Please use the return and collection systems available in your country for the disposal of this product.
-
Page 5: Usage Precautions
USB flash drive) to a device such as a PC to save a backup copy. Malfunction of the product or repairs to it may cause the data to be deleted. ■ ELMO is not liable for any damage caused by the loss or damage of the data in the recording media. - Page 6 If operation time becomes substantially short at normal temperature (between 10°C and 30°C), the battery life seems to have come near its end. Replace it with a new battery. Contact your dealer or ELMO Customer Service for battery replacement (fee applies).
-
Page 7: Table Of Contents
■ ELMO shall not be liable for any claim for damage or loss of earnings or any claim raised by a third person due to the use, malfunction or repair of the product. HANDLING PRECAUTIONS The followings are special precautions against mishandling of the product. Pay close attention to them. -
Page 8: Table Of Contents
◆CONNECTING TO A PROJECTOR OR MONITOR ······························································· 20 ◆CONNECTING TO A PC ·································································································· 20 ◆TURNING ON OR OFF THE POWER ················································································ 21 ➌ USING THE PRODUCT ◆OPERATING MA-1 ········································································································· 22 ■ADJUSTING THE IMAGE SIZE ······················································································· 22 ■ADJUSTING THE FOCUS ······························································································ 22 ■ADJUSTING THE BRIGHTNESS ····················································································· 23 ■ROTATING THE IMAGE·································································································... -
Page 9: ➊ Before You Use
➊ BEFORE YOU USE ◆CHECKING PACKAGE CONTENTS The items below are included with the product. If any item is missing, contact the dealer from whom you purchased the product. MA-1 MO-2 MO-2 AC adapter Warranty Card (For Japan Quick Start Guide IMPORTANT SAFEGUARDS / North America only)... -
Page 10: Checking Name Of Each Part
◆CHECKING NAME OF EACH PART ① ① MA-1 MO-2 MO-2 ② ② ③ ③ ⑦ ④ ⑥ ⑥ ④ ⑤ ⑤ MA-1/MO-2 ⑤ ⑥ Name Camera head ① LED lighting ② ③ Operating panel ④ ⑤ Front panel ⑥ Rear panel ⑦... -
Page 11: Operating Panel
◆OPERATING PANEL ■MA-1 ⑨ ⑩ ⑧ ⑦ ⑥ ⑤ ④ ③ ② ① Name Description Long press=To turn on or off the power. Short press=To enter or cancel the standby mode. (⇒P.21) Power LED ① Power Power on:Turns blue Power off:Off(※When charging: Turns red)... - Page 12 ■MO-2 ⑦ ⑤ ⑥ ⑩ ⑪ ⑨ ⑧ ⑬ ⑫ ⑭ ⑰ ② ④ ③ ⑮ ① ⑯ Name Description Long press=To turn on or off the power. Short press=To enter or release the standby mode. (⇒P.21) Power LED ① Power Power on:Turns blue Power off:Off(※When charging: Turns red)...
-
Page 13: Front Panel
◆FRONT PANEL ① ② ③ Name Description To connect the microphone.(⇒P.33) ① Audio input Use the electret condenser microphone. ② USB2.0 (Type A) To connect the mouse or the USB flash drive.(⇒P.41) ③ SD card To insert the SD card.(⇒P.41) CAUTION Connecting the microphone other than the electret condenser microphone (a microphone for a PC) may cause malfunction. -
Page 14: Start Screen
At start up, the Document camera screen will be displayed. The Pen menu for drawing (⇒P.15) can be displayed by the following operations: For MA-1: Press the left tab or right tab on the touchscreen or click the left tab or right tab on the external monitor with the mouse. -
Page 15: Status Area
■STATUS AREA The status of the camera will be displayed with icons. Icon Name Function WiFi ※1 To display the WiFi status. LAN ※1 This icon will be displayed when the LAN cable is connected. Battery To display the battery level and the charging status.(⇒P.62) This icon will be displayed when the recording destination is set SD card ※2 to SD card. -
Page 16: Pen Menu For Drawing
■PEN MENU FOR DRAWING When either tab is selected in the Document camera screen(⇒P.13), the Pen menu, the Highlighter menu, the Eraser menu and the Hand tool menu will be displayed. Select the menu you want to use. Press or long press the menu to display the sub menu. You can change the type of Pen or Eraser from the sub menu. - Page 17 Eraser Type Icon Function To delete a line drawn by Pen or Highlighter. Eraser (A continuously drawn line can be erased.) Press the line or swing the finger while pressing the line to erase it. To delete all the lines that are drawn on the screen. This icon will be displayed when the Eraser menu is pressed after Delete all performing “Delete all”.
- Page 18 ■Menu area The Menu area will be displayed by selecting the bottom tab in the Document camera screen. (⇒P.13) The Menu area can be hidden by swiping a finger from inside the screen to the outside or selecting the bottom tab displayed on the external monitor with the mouse. ※The recording destination can be changed by long pressing the Capture icon or Recording icon.
-
Page 19: Checking Moving Parts Of The Product
Be careful not to let the top of the camera head hit the camera arm. 90° 90° 270° 180° 180° Touchscreen (For MA-1 only) CAUTION Do not move the parts over the angle specified here. By doing so may damage the product. 90°... -
Page 20: ➋ Preparation And Connection
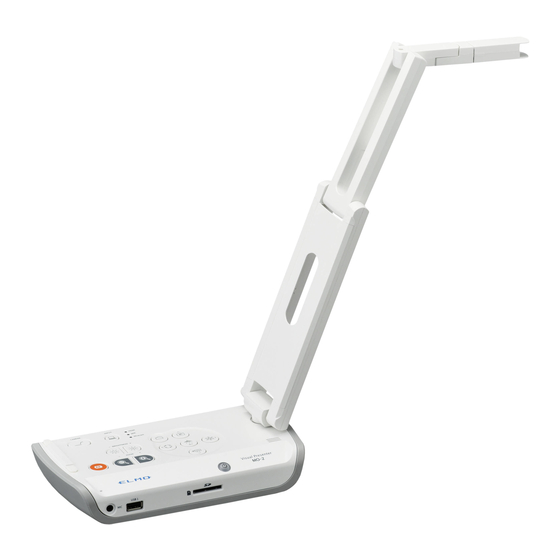
STEP1.Raise the camera head while holding the operating panel. STEP2.Raise the arm as indicated by an arrow. STEP3. Raise the camera head. Set it horizontally. STEP4. Raise the touchscreen monitor as indicated by an arrow. (For MA-1 only) Camera STEP1... -
Page 21: Connecting To A Projector Or Monitor
⇒ https://www.elmousa.com/software/ ⇒ https://www.elmoeurope.com/index.php/en/products/software-choice For details about the app (ELMO Interactive Toolbox), refer to the Instruction Manual in the website above. CAUTION ・This product does not support USB power supply. ・When the battery is not fully charged or when the remaining battery level is low, supply power by connecting the AC adapter to a wall outlet. -
Page 22: Turning On Or Off The Power
POWER LED STATUS Model Status AC adapter Charging status Disconnected Blue Power ON Charging Blue Connected Fully charged Blue Disconnected MA-1 Power OFF Charging Connected Fully charged Disconnected Standby Charging Connected Fully charged Disconnected Blue Power ON Charging Blue... -
Page 23: ➌ Using The Product
For MO-2: Button operations on the operating panel / mouse operations on the external monitor via USB ◆OPERATING MA-1 MA-1 can be operated by either one of the following ways: touchscreen operations or mouse operations on the external monitor via USB or button operations on the operating panel (⇒P.12) ■ADJUSTING THE IMAGE SIZE... -
Page 24: Adjusting The Brightness
■ADJUSTING THE BRIGHTNESS The Brightness adjustment slider [ ] will be displayed when the Brightness icon ] in the Menu area (⇒P.17) is tapped. The brightness of the image can be adjusted by moving the slider left and right. The Brightness adjustment slider will disappear when outside area of the Brightness adjustment slider is tapped. -
Page 25: Pausing The Image
■PAUSING THE IMAGE Pressing the Freeze button [ ] on the operating panel to pause the camera image. Press the button again to restart. ※Long press ⇒ To perform the Automatic Deskew function. (The product will automatically detect the skew angle of the document such as a printing paper and a textbook in the shooting area and correct it to fit the screen.) (⇒P.56)... -
Page 26: Selecting The Image Source
Recording status (to be displayed in the Status area) ---- Not recording Recording ※This icon will be displayed when the Status area (⇒P.14) is hidden. NOTE No matter whether the destination storage is external or internal, recorded videos will be saved with the following file name: MOV_record date_record time(MOV_yyyyMMdd_hhmmss_fff.mp4)... -
Page 27: Operating Mo-2
◆OPERATING MO-2 ■ADJUSTING THE IMAGE SIZE The size of the image can be adjusted using [ ] buttons on the operating panel. :To enlarge the camera image. :To shrink the camera image. NOTE ・The maximum zoom ratio is 16x (digital zoom). The image quality will be degraded when using the digital zoom. -
Page 28: Turning On Or Off The Led Lighting
the connected external monitor. Rotation Icon The Image rotation icon will be displayed on the connected external status monitor in the Menu area, which will be displayed by selecting the 0° bottom tab in the Document camera screen using the mouse. (⇒P.17) -... -
Page 29: Capturing Still Pictures
■CAPTURING STILL PICTURES Press the Capture button [ ] on the operating panel to capture the camera image. (Captured still pictures will be saved as JPEG file in the recording media.) The image capture can also be performed by clicking the Capture icon [ ] in the Menu area (⇒P.17) displayed on the external monitor using the mouse. -
Page 30: Selecting The Image Source
■SELECTING THE IMAGE SOURCE The source of the image to be displayed on the external monitor can be switched easily. Camera image: Press the Home button [ ] to open the Home screen. Then click the Camera icon ] or press the Camera button [ ] on the operating panel. -
Page 31: ➍ Advanced Operations
➍ ADVANCED OPERATIONS ◆OPERATING THE HOME SCREEN MA-1 Press the Home button [ ] on the operating panel to display the Home screen on the touchscreen or the connected external monitor. Select the item to operate by tapping the touchscreen or by clicking with the mouse. - Page 32 ⇒P.49 Digital textbook to open the digital textbook. ※To open PDF files or Excel files in the Gallery, the app “WPS” will be needed. (WPS is installed in the MA-1 as default. For MO-2, install it from ELMO Play. (⇒P.55))
- Page 33 ■How to uninstall the installed app Long press the icon of the app you want to uninstall to display the Trash can icon. Drag and drop the selected icon onto the Trash can icon to delete the app or hide the icon. ※Icons of the pre-installed apps will be hidden.
-
Page 34: Checking The Camera Settings
◆CHECKING THE CAMERA SETTINGS Select the Settings icon [ ] in the Home screen. The Settings screen will be displayed and you can configure various settings. (⇒P.30) Camera settings Auto FullHD 1920x1080 Resolution HD 1280x720 To set the output resolution. UXGA 1600x1200 XGA 1024x768 16:9... - Page 35 Product information Application To display the application version of the product. version To check whether the latest update version of the app is available. When the latest update version is available, a notice will be Application update displayed. Install the latest version accordingly. ※This function is available when the product is connected to the Internet via LAN or WiFi.
- Page 36 ◆CHECKING THE SYSTEM SETTINGS The System settings menu will be displayed when the System settings icon [ ] in the Settings screen is pressed. To return to the previous screen, press the Return icon [ Icon Name Selection item Function WiFi and network A list of network will be displayed.
- Page 37 Device Available capacity Apps (Data and content item) Still picture Total To display the total capacity for each and video item. capacity of Storage Audio (Music, internal ringtone, storage podcast etc.) Download Cache data Other Mount the SD To insert the SD card. card To reduce the battery consumption by Battery...
- Page 38 24-hour To select the way to display the time. display Date format To select the way to display the date. Legal Important legal information between the Customer information and Elmo is described here. Be sure to read it.
- Page 39 ◆USING A WHITEBOARD A white blank screen will be displayed. You can draw on the white blank screen by using Pen or Highlighter. Step 1. Select the Home button to display the Home screen. (⇒P.30) Step 2. Select the Whiteboard icon [ ] to display a whiteboard.
-
Page 40: Using The Drawing Function
・MA-1 Add drawings on the touchscreen. The drawn content will also be displayed on the external monitor. Drawings can also be added on the external monitor by using the mouse. ・MO-2 Add drawings on the external monitor by using the mouse. -
Page 41: Using The Browser
Pen menu for drawing Step 4. Start drawing. By selecting the Pen icon, you can start drawing over the live camera image. For details, refer to “PEN MENU FOR DRAWING” (⇒P.15) The drawings added to the camera image will be maintained while the Camera app is running. - Page 42 Step 4. When the security setting is enabled, a password setting window will be displayed. Enter the password and press “Enter”. Step 5. Press “Connect” to connect to the Internet. ◆USING SD CARD OR USB FLASH DRIVE By using this product, you can save or record still pictures or videos of the camera image onto the SD card, the USB flash drive or the internal storage.
-
Page 43: Displaying The External Input Image
“SELECTING THE IMAGE SOURCE (⇒P.25, P.29)”. The product will indicate as shown below that the image currently displayed on the monitor is the image being input to the HDMI IN port. MA-1 MO-2 The External input select icon in the... -
Page 44: List Of Content Items
◆LIST OF CONTENT ITEMS A list of all available content items in the active media (such as the SD card and the USB flash drive) will be displayed. For information about supported file extensions, refer to “❼SPECIFICATION”. Press the Gallery icon in the Home screen(⇒P.30)to display the List of content items screen. -
Page 45: Playback Of A Content Item
■Selecting a content item Select a content item by pressing the Content item select icon [ ] in the List of content items screen (⇒P.43) or by long pressing a content item in the List of content items screen. Press a content item to select. (A check mark will be displayed at the top right of the selected thumbnail.)... - Page 46 ①For landscape picture, horizontal position ②For portrait picture, vertical position will be will be adjusted and black bars will appear adjusted and black bars will appear on the on the top and bottom of the screen. left and right of the screen. ■Video The screen will change to the Video playback screen.
- Page 47 From the List of content items screen, press a desired digital document. The selected document will be displayed by the app “WPS Office” installed in the product. ※For MO-2, you need to install WPS Office from ELMO Play (chargeable). ◆USING SPLIT SCREEN Press the Split screen icon [ ] in the List of content items screen (⇒P.43) to display...
- Page 48 ■Displaying the split screen The selected content items will be displayed in the order selected in the Split screen select mode.(In the order ①~④ as shown below.) To return to the List of content items screen, press [ ※A portrait content item will be displayed after being adjusted to fit the 16:9 aspect ratio.(⇒P.45)...
-
Page 49: Using The Qr Code Reader
◆USING THE QR CODE READER Using the Camera app, you can read the QR code to access the specified website. The WiFi configuration or the Ethernet configuration needs to be completed in advance to connect to the Internet. (⇒P.40) Step 1. Select the QR code icon [ ] in the Menu area. -
Page 50: Using The Digital Textbook
◆USING THE DIGITAL TEXTBOOK You can access the Digital textbook server to read the digital textbook. Select “Digital textbook” from the Camera settings menu to display the Server URL input screen. Enter the information by using the keyboard.(⇒P.33) ※The Digital textbook app does not appear on the Home screen if the Digital textbook configuration is not completed. -
Page 51: Using The Share Menu
◆CONNECTING TO THE NETWORK This product can be connected to the network via WiFi or Ethernet. ※WiFi and Ethernet cannot be used at the same time. →Ethernet has a priority over WiFi. (When the product is connected to Ethernet while it is connected to WiFi, the WiFi connection will be disconnected automatically.) For MO-2 only The connection status will be indicated by the Status LED during WiFi connection. - Page 52 Press the area around the folder and a dialog for specifying the destination folder will open. Specify or select the folder and press “Save”. The selected content item will be copied to that folder with the specified file name. ※If the entire sub folders cannot be displayed in one screen, scroll the screen by flicking it to view the entire sub folders.
-
Page 53: Using Miracast
◆USING MIRACAST The product can be connected to a device which supports Miracast to perform Miracast output or Miracast input. By connecting the product to a display device with a receiver attached, you can transmit the image between the product and the display device wirelessly. ※It is not possible to perform Miracast output and Miracast input at the same time. - Page 54 ④The image of the connected Miracast device will be displayed on the screen of the product once the connection is successfully established. To finish Mirroring, press the External input button of the product. For MA-1: External input select icon (⇒P.31) For MO-2: External input button (⇒P.11) or External input switching (⇒P.31)
-
Page 55: Using The Timer
To display the camera image. <How to set the timer> Step 1. Tap the Time select icon (when using MA-1) or click the Time select icon with the mouse (when using MO-2) to set the time. Step 2. Press the Operation button (Play). The timer will start counting down and the gauge will decrease. -
Page 56: Using Elmo Play
◆USING ELMO PLAY You can download apps from the portal run by ELMO. The selected apps will be downloaded and installed automatically, which can be used with the product. For further information, visit the ELMO portal. ◆USING THE FILE MANAGER By selecting the File Manager [ ] (⇒P.30) in the Home screen, you can access the... -
Page 57: Using The Automatic Deskew Function
Also, you can operate the product (such as zooming in or out) from the Wireless tablet or the Portable IWB. For details, visit our Official website: For Wireless tablet (CRA-1) ⇒ https://www.elmousa.com/product/cra-1/ ⇒ https://www.elmoeurope.com/index.php/en/products/elmo-interactiv/cra-1 For Portable IWB(CRB-1/CRB-2) ⇒ https://www.elmousa.com/product/crb-2/ ⇒ https://www.elmoeurope.com/index.php/es/productos/elmo-interactivo/crb-1... -
Page 58: ➎ List Of Error Messages
➎ LIST OF ERROR MESSAGES Error item Error message Possible cause SD card Could not play file. ・The file is broken. ・The file extension is not supported. ・The SD card was removed. Check if the file is broken. Check if the file extension is supported by the product. - Page 59 content item ・The file is broken. ・The file size is too large. Check if the file is broken. Check if the file extension is supported by the product. Check if the file size is too large. (⇒P.66) Browser Not connected to internet. ・The product is not connected to WiFi or Ethernet.
-
Page 60: ➎ List Of Error Messages 57 ➏ Trouble Shooting
・ Adjust the focus by pressing the AF button on the operating panel. The image is too dark. ・ The intensity of the lighting is insufficient. MA-1: Press the LED lighting icon in the Menu area to turn on the LED lighting. MO-2:... - Page 61 ・ Adjust the brightness from the Camera quality settings. MA-1: Press the Brightness icon in the Menu area to adjust the brightness by moving the Brightness adjustment slider. MO-2: Press the Brightness button (+) on the operating panel or click the Brightness icon in the Menu area on the external monitor to adjust the brightness.
- Page 62 The UVC video stream ・ The displayed image may pause for a brief second when the sometimes freezes. object moves quickly. In that case, adjusting the brightness manually may improve the problem. There is a distortion of the ・ Use a high-spec PC. Also, reducing the resolution or frame rate image.
-
Page 63: ❼ Specification
❼ SPECIFICATION ◆RESOLUTION RGB/HDMI The output resolution of the product (RGB / HDMI) can be set Auto as shown to the right. FHD 1920x1080 The output resolution can be changed from the Resolution HD 1280x720 menu in the Camera settings menu. (⇒P.33) ※When this setting is set to Auto, the output resolution will be automatically set based on the information from the connected monitor. - Page 64 When the battery is fully charged: about 2 hours and 50 minutes ※When only transmitting the image to the external monitor via WiFi using Miracast function with MA-1 ※The battery operating time may vary depending on the operating condition. ■Battery charging time...
-
Page 65: How To Use The Fixing Screws
◆HOW TO USE THE FIXING SCREWS When installing the product to a desk Use a M3 screw, with 0.5mm thread pitch, and 7-12mm long. ■Installation image M3 screwx2 ■Mounting dimension M3 screw M3 screw NOTE Select an appropriate screw according to the thickness of the desk. If the screw is too short, it is not possible to secure the product to the desk properly. -
Page 66: Main Camera
Power source DC5V Power consumption 15W (when in use and charging) W:220mm D:115mm H:343mm (When setup) Outside dimensions W:220mm D:115mm H:57mm (When folded) Weight MA-1:Approx.1,100g MO-2:Approx.950g Ext. control terminal USB2.0 Type A × 2 USB2.0 Type B × 1 Lens F=2.0... -
Page 67: Video Quality
PowerPoint PowerPoint file ※ docx,doc Word Word file ※ ※For MO-2, the app “WPS” will be needed. (WPS is installed in the MA-1 as default. For MO-2, install it from ELMO Play. (⇒P.55)) ◆SETTINGS Setting item/Setting Function Default setting Note... - Page 68 Dhcp / Static ip / Gateway / Mask / Dns / Ethernet Proxy / Proxy host / Proxy port Japanese / English / To be set according to the Language German / French / destination Chinese WiFi On / Off...
-
Page 69: Trademarks And Licenses
■ TRADEMARKS AND LICENSES and Image Mate are registered trademarks of ELMO Co., Ltd. HDMI, logo and High-Definition Multimedia interface are trademarks or registered trademarks of HDMI Licensing LLC. Windows and/or other Microsoft products referenced herein are either registered trademarks or trademarks of Microsoft Corporation in the United States and/or other countries. - Page 70 OVERSEAS SUBSIDIARY COMPANIES ELMO USA CORP. □Headquarters 6851 Jericho Turnpike Suite 145 Syosset, NY 11791 Tel. (516) 501-1400 Fax.(516) 501-0429 E-mail: elmo@elmousa.com Web:https://www.elmousa.com/ ELMO Europe SAS □Headquarters 12 place de la Défense Maison de la Défense 92974 Paris la Défense Cedex FRANCE Tel.
Need help?
Do you have a question about the MA-1 and is the answer not in the manual?
Questions and answers