
Related Manuals for Elmo MX-P


Summary of Contents for Elmo MX-P
- Page 1 VISUAL PRESENTER MX-P...
-
Page 3: Important Safeguards
■ IMPORTANT SAFEGUARDS ■ Read Instructions All the safety and operating instructions should be read before the appliance is operated. ■ Retain Instructions The safety and operating instructions should be retained for future reference. ■ Heed Warnings All warnings on the product and in the operating instructions should be adhered to. ■... - Page 4 ■ Overloading Do not overload wall outlets, extension cords, or integral convenience receptacles as this can result in a risk of fire or electric shock. ■ A product and cart combination should be moved with care. Quick stops, excessive force, and uneven surfaces may cause the product and cart combination to overturn.
- Page 5 This symbol [crossed-out wheeled bin WEEE Annex IV] indicates separate collection of waste electrical and electronic equipment in the EU countries. Please do not throw the equipment into the domestic refuse. Please use the return and collection systems available in your country for the disposal of this product.
-
Page 6: Before You Use
■ It is prohibited under copyright law to use or copy any part or the whole of this document without our prior written consent. ■ ELMO shall not be liable for any claim for damage or loss of earnings or any claim raised by a third person due to the use, malfunction or repair of this product. -
Page 7: Table Of Contents
◆OUTPUT RESOLUTION ................11 ➌ PREPARATION AND CONNECTION ............12 ◆SETTING UP ..................12 ◆MOVING PARTS OF THE MX-P ..............13 ◆CONNECTING TO A PROJECTOR OR MONITOR .......... 14 ◆CONNECTING TO A COMPUTER ............... 14 ❹ USING THE PRODUCT ................15 ◆ADJUSTING THE SIZE ................ -
Page 8: ➊ Preparation
➊ PREPARATION ◆PACKAGE CONTENTS The items below are included with this product. If any item is missing, contact the dealer from whom you purchased this product. MX-P Quick Start Guide DC power cord USB3.0 cable Warranty Card (For Japan/ North America only)... -
Page 9: ➋ Basic Operations
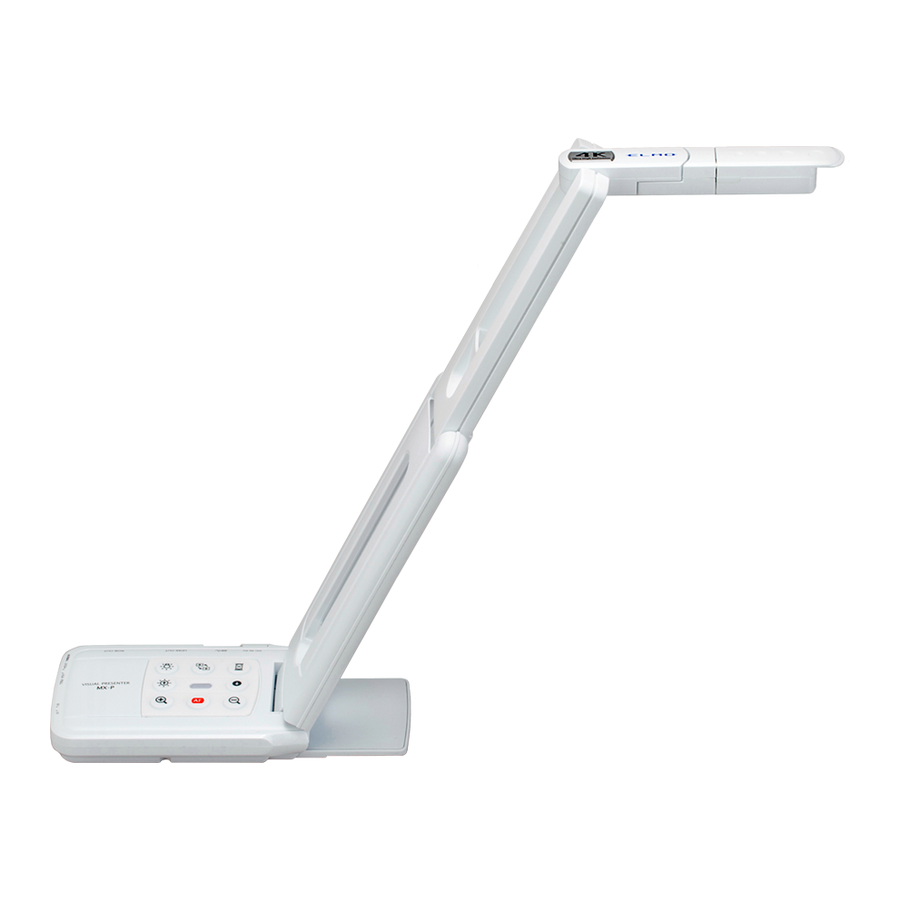
➋ BASIC OPERATIONS ◆THE NAME OF EACH PART ① ② ⑤ ③ ⑦ ⑥ ④ Name ① Camera head ② LED lighting ③ ④ Operating panel ⑤ Connection ports ⑥ Setting switches ⑦ Stage... -
Page 10: Operating Panel
Mark Description To connect the supplied DC power cable. ① To connect a PC and the MX-P to save images. (USB3.0 cable is included in the package.) ② Max. resolution 4:3=UXGA1600×1200 16:9=1920×1080 To output digital images by connecting to a monitor via the HDMI cable. -
Page 11: Setting Switchs
◆SETTING SWITCHS ① ② Function Description To change the resolution and output mode. When connecting RGB only:XGA⇔UXGA UXGA ← → XGA ① Normal Full When connecting HDMI:Full⇔Normal (For details about changing the aspect ratio, refer to Page11.) Flicker correction Select the same value as used for the power supply frequency.(50Hz / 60Hz) ②... -
Page 12: Output Resolution
The output resolution can be changed with the Resolution/Output mode selection switch. The MX-P can capture aspect ratio ①. Pay attention to the shooting conditions. RGB output and HDMI output ・The video output is automatically set to 720p when a monitor which does not support 1080p is connected. -
Page 13: ➌ Preparation And Connection
CAUTION ・Be careful not to pinch your fingers when moving the arm. ・Do not hold the arm or camera head when carrying the MX-P. ・Be careful not to give an impact to the camera head. STEP4. Rotate the camera head according to the shooting direction. -
Page 14: Moving Parts Of The Mx-P
◆MOVING PARTS OF THE MX-P The MX-P can be moved as shown below. 350° ° CAUTION Be careful not to let the top of the camera head hit the camera arm. 270° 90° Camera head 120° 90° Rotating part 180°... -
Page 15: Connecting To A Projector Or Monitor
3. The MX-P turns on. (MX-P of LED:blue) ◆CONNECTING TO A COMPUTER The MX-P is compliant to uvc (video class) standard. You can transfer the image via USB by connecting the MX-P to a computer using the USB3.0 cable (bus power). -
Page 16: ❹ Using The Product
❹ USING THE PRODUCT ◆ADJUSTING THE SIZE The size of the image can be adjusted using [ buttons on the operating panel. NOTE The maximum zoom ration is 16x (digital zoom). The image quality will be degraded when using the digital zoom. -
Page 17: ➎ About Image Mate4
➎ ABOUT IMAGE MATE4 The following operations can be performed by connecting the MX-P to a computer with Image Mate 4 installed via the USB cable: - Save live video streaming or still images to a computer - Operate the MX-P from a computer, etc. -
Page 18: Installing Image Mate 4
・We recommend using the supplied USB cable. ・It may take some time to display the image after the resolution is changed via UVC (with the USB cable). Do not turn off the power of the MX-P or disconnect the USB cable before the image is displayed. -
Page 19: ➏ Trouble Shooting
・ Image Mate 4 is not started correctly. Restart Image Mate 4 and try to connect again. ・ The MX-P is not selected in the setting of Image Mate 4. ・ When the HDMI monitor is connected to the MX-P, the... - Page 20 ・ The software may recognize it as error when it takes time No UVC video stream is displayed. (An error to prepare the image output. Restart the MX-P and message appears.) reconnect it to the computer. Then restart the software.
- Page 21 About the light (LED lighting) The brightness of the LED lighting will diminish with long-term use. If its brightness has significantly diminished, consult the dealer from whom you purchased this product or our nearest branch/office for replacement (subject to charge). About long-term usage of this product Due to the lifetime of its parts, if this product is used for longer than the warranty period, its performance and quality may deteriorate.
-
Page 22: ➐ Specification
➐ SPECIFICATION ■MAIN CAMERA Item Specifications Power source DC5V 3.2W(when connecting USB) Power consumption 4.6W(when connecting HDMI/RGB) W:343mm D:82mm H:302mm(When setup) Outside dimensions W:290mm D:82mm H:22mm(When folded) Weight Approx. 550g(Main body only) Ext. control terminal USB3.0 type microB × 1 Lens F=2.0 Frame rate... -
Page 23: Illumination Device
Possible(Set value -180~180) Default value: 0 ✔ Possible(Set value 0~31) Default value: 10 ✔ Saturation Possible(Set value 5~15) Default value: 10 ✔ Definition Possible(Set value 100~200) Default value: 160 ✔ Gamma WhiteBalance Auto/Manual(Set value 2000~8000) ✔ Default setting: Auto 6500 ON/OFF Default setting: OFF ✔... -
Page 24: Trademarks And Licenses
■TRADEMARKS AND LICENSES 、Image Mate are the registered trademarks of ELMO Co., Ltd. HDMI、 logo and High-Definition Multimedia interface are trademarks or registered trademarks of HDMI Licensing LLC. Windows and/or other Microsoft products referenced herein are either registered trademarks or trademarks of Microsoft Corporation in the United States and/or other countries. - Page 25 株式会社エルモ社 OVERSEAS SUBSIDIARY COMPANIES 〒457-0078 ELMO USA CORP. 名古屋市南区塩屋町一丁目3番地4 □Headquarters Web:https://www.elmo.co.jp 1478 Old Country Road Plainview, NY 11803, U.S.A. 製品のお問い合わせは、下記営業所へ Tel. (516) 501-1400 Fax.(516) 501-0429 □ 北海道営業所 E-mail: elmo@elmousa.com Web:https://www.elmousa.com/ 〒001-0021 札幌市北区北 21 条西 8 丁目 3 番 8 号 バックスビル...
Need help?
Do you have a question about the MX-P and is the answer not in the manual?
Questions and answers