
Related Manuals for Elmo MX-P3


Summary of Contents for Elmo MX-P3
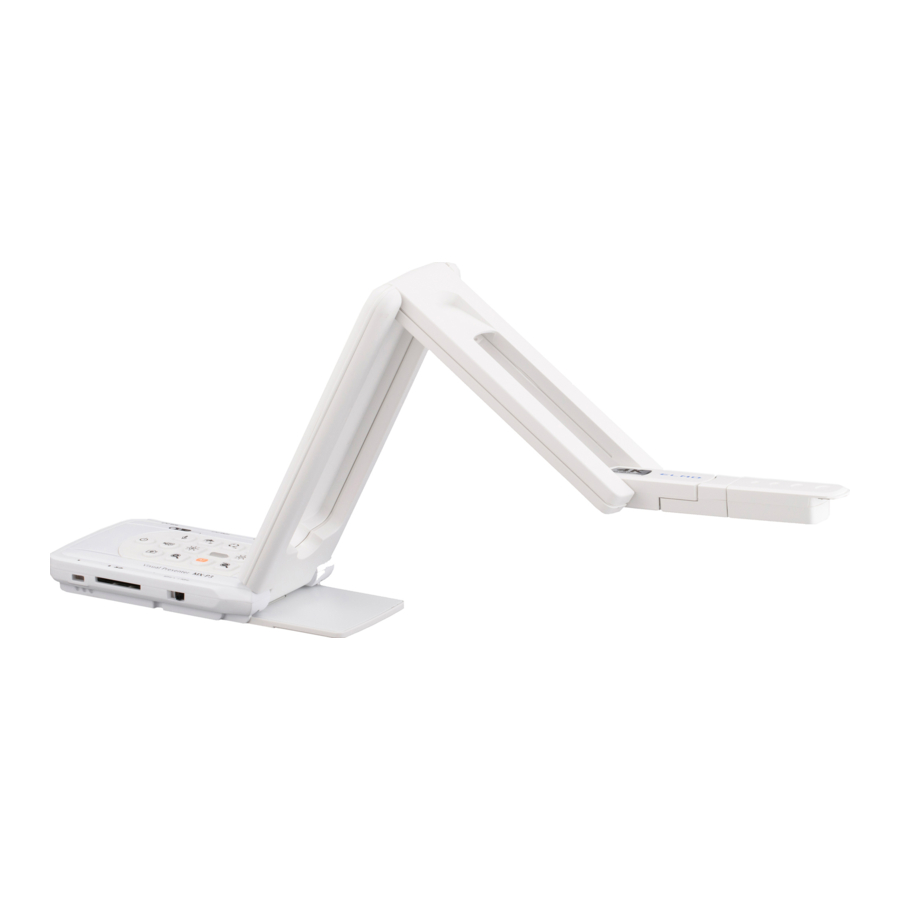
- Page 1 VISUAL PRESENTER MX-P3...
-
Page 2: Important Safeguards
■IMPORTANT SAFEGUARDS Make sure to read the “IMPORTANT SAFEGUARDS” in this guide before using this product. For details about specifications and instruction manual of the product, refer to the following official website. https://www.elmousa.com https://www.elmoeurope.com ■Read Instructions All the safety and operating instructions should be read before the appliance is operated. ■Retain Instructions The safety and operating instructions should be retained for future reference. - Page 3 (grounding) pin. If the 2-Wire polarized plug will not fit in the outlet, try reversing the plug. If the plug still fails to fit, contact your electrician to replace your obsolete outlet. Do not defeat the safety purpose of the polarized plug. The 3-wire grounding type plug will fit into a grounding type power outlet.
- Page 4 hazards. ■Safety Check Upon completion of any service or repairs to this product, ask the service technician to perform safety checks to determine that the product is in proper operating condition. ■Heat The product should be situated away from heat sources such as radiators, heat registers, stoves, or other products (including amplifiers) that produce heat.
-
Page 5: Before Use
BEFORE USE ■Be sure to use the cable supplied with the product. ■The supplied power cord is designed for exclusive use with this product. Do not use them with other products. ■Be sure to use the power cord applicable to your local power specifications. If the product was sold in Japan, use the AC adapter sold with the product with 100 VAC and 50 or 60 Hz. -
Page 6: Handling Precautions
HANDLING PRECAUTIONS The followings are special precautions against mishandling of the product. Pay close attention to them. ①Installation ②Setting up Do not place the product on an When setting up the product, hold unstable place. the body around the operating panel. -
Page 7: Table Of Contents
■ TABLE OF CONTENTS ■IMPORTANT SAFEGUARDS ······································································ 2 BEFORE USE ··························································································· 5 HANDLING PRECAUTIONS ········································································ 6 ■ TABLE OF CONTENTS············································································ 7 ➊ PREPARATION ······················································································ 9 ◆PACKAGE CONTENTS ····················································································· 9 ➋ BASIC OPERATIONS ············································································· 10 ◆THE NAME OF EACH PART ············································································· 10 ◆CAMERA OPERATIONS ··················································································... - Page 8 ➏ CONFIGURING THE SETTINGS ······························································ 25 ◆HOW TO CONFIGURE THE SETTINGS ····························································· 25 ◆SETTINGS MENU ·························································································· 25 ➐ FW UPDATE PROCEDURE ···································································· 28 ➑ ABOUT VIEWER SOFTWARE ································································· 29 ◆INSTALLING THE SOFTWARE ········································································· 30 ➒ TROUBLE SHOOTING ··········································································· 31 ◆SYMPTOMS AND POSSIBLE CAUSES/REMEDIES ·············································· 31 ➓...
-
Page 9: ➊ Preparation
➊ PREPARATION ◆PACKAGE CONTENTS The items below are included with this product. If any item is missing, contact the dealer from whom you purchased this product. NOTE MX-P3 ( For Europe only) Warranty Card IMPORTANT 3S service 3S Service Quick Start Guide... -
Page 10: ➋ Basic Operations
➋ BASIC OPERATIONS ◆THE NAME OF EACH PART ① ② ③ ⑤ ⑦ ⑧ ⑥ ④ Name ① Camera head ② LED lighting ③ ④ Operating panel ⑤ Connection ports ⑥ Anti theft lock hole/ SD card slot/ Setting switches ⑦... -
Page 11: Camera Operations
◆CAMERA OPERATIONS ⑪ ⑫ ⑦ ⑧ ⑨ ⑩ ⑬ ⑥ ① ⑤ ⑭ ② ④ ③ Function Description Power ON The product enters the standby status in 5 – 10 seconds after the DC power cord is connected to the product.(Status LED:Red) To turn on the product, press the Power button. -
Page 12: Menu Operations
To indicate the status of the audio output. This LED turns blue when Audio status LED ⑪ the audio output is on. To turn on or off the audio. ※ This function is available only when outputting images to a Audio ON/OFF ⑫... -
Page 13: Status Led
◆STATUS LED The connection status of the AC adapter and USB cable, power supply status, or image output status can be checked with the Status LED. Interactive Status LED Power supply Image output Power Whiteboard Freeze Freeze Power Button HDMI adapter supply R1 mode... -
Page 14: Cable Connection
◆CABLE CONNECTION ① ④ ② ③ Mark Description ① To connect the supplied DC power cord. To connect to a computer to save images. ② Max. resolution: 4:3=4160×3120 16:9=3840×2160 To output digital images by connecting to a monitor via the HDMI cable. ③... -
Page 15: Resolution/Frame Rate
◆RESOLUTION/FRAME RATE (WHEN DISPLAYING ON A COMPUTER VIA USB) The following table shows the output resolution and frame rate when connecting with the USB cable. If a low-spec computer is used, the actual frame rate may be slower than what is specified in the table. -
Page 16: Size Of Images Being Output
◆SIZE OF IMAGES BEING OUTPUT The output resolution is different according to the setting of the Resolution/Output mode selection. The product can output images with the following aspect ratio. Pay attention to the shooting conditions. RGB output and HDMI output When HDMI output is possible, both RGB output and HDMI output are output in the same resolution. -
Page 17: Anti Theft Lock Hole
◆Anti theft lock hole The product can be secured with a security wire using this hole. (Size of the hole: 7×3mm) Anti theft lock hole... -
Page 18: ➌ Preparation And Connection
➌ PREPARATION AND CONNECTION ◆SETTING UP 1. Raise the body while holding the operating panel. 2. Raise the arm as indicated by an arrow. Camera head 3. Raise the camera head. Set it horizontally. Operating panel CAUTION ・Be careful not to pinch your fingers when moving the arm. ・Do not hold the arm or camera head when carrying the product. -
Page 19: Moving Parts Of The Product
◆MOVING PARTS OF THE PRODUCT The product can be moved as shown below. 350° CAUTION Be careful not to let the top of the camera head hit the camera arm. 270° 90° Camera head 120° 90° Rotating part 180° 90°... -
Page 20: Connecting To A Projector Or Monitor
◆CONNECTING TO A PROJECTOR OR MONITOR To the AC adapter DC IN 5V HDMI OUT RGB OUT DC power cord HDMI cable RGB cable Flicker correction Select the same value as the power supply frequency of the location where the product is used. (50Hz/60Hz) 1. -
Page 21: Connecting To A Projector (Or Monitor) And Computer Simultaneously
◆CONNECTING TO A PROJECTOR (OR MONITOR) AND COMPUTER SIMULTANEOUSLY 1. Connect the product to a projector or monitor with the HDMI cable or RGB cable. 2. Connect the supplied DC power cord to [ ]. Connect the USB plug to the supplied AC adapter. Then connect it to a wall outlet. -
Page 22: ➍ Using The Product
➍ USING THE PRODUCT ◆ADJUSTING THE SIZE The size of the image can be adjusted using [ ] buttons on the operating panel. (The size of the image cannot be adjusted if YUY2 format is selected when the product is connected to a computer via the USB cable.) The current zoom ratio and operation status do not appear when outputting images to a computer via the USB cable. -
Page 23: Pausing The Image
◆ PAUSING THE IMAGE Press [ ] on the operating panel to pause the camera image. Press the button again to restart. ※The Status LED flashes yellow. ◆ ROTATING THE IMAGE Press [ ] on the operating panel to rotate the image by 180°. ◆... -
Page 24: ➎ Recording Camera Images
➎ RECORDING CAMERA IMAGES You can record camera images to an SD card as a still image or as a video. Insert an SD card (SD/SDHC, commercially available) into the SD card slot before recording. ※Recording is not possible without inserting an SD card. ・Video recording: H.264 ・Still image recording: JPEG ◆VIDEO RECORDING... -
Page 25: ➏ Configuring The Settings
➏ CONFIGURING THE SETTINGS Each setting of the product can be configured through the menu displayed on the screen (HDMI/RGB/USB). ◆HOW TO CONFIGURE THE SETTINGS 1. Long press (for about 2 seconds) the Lighting/MENU button [ ] on the operating panel to display the Settings menu. - Page 26 Default Name Selection item Function setting ✓ Auto HD(1280×720) To set the resolution of the output Resolution image. FHD(1920×1080) UHD(3840×2160) 2. Viewing angle ※The viewing angle setting cannot be configured when the product is connected to a running computer via the USB cable . Default Name Selection item...
- Page 27 4. Language Default Name Selection item Function setting Japanese ✓ English To set the display language for the Language Deutch product. francais Chinese 5. Formatting Default Name Selection item Function setting When “YES” is selected, the product Formatting ✓ will be reset to factory default settings. 6.
-
Page 28: ➐ Fw Update Procedure
1.Download the FW from the following website and save the FW (*fex ) to the SD card. (Save it to the top level of the SD card, no other files, etc.) https://www.elmoeurope.com/index.php/en/download-service/firmware-updates 2.Insert the SD card into MX-P3. 3.Connect the AC adapter and confirming that the status LED is lit in red, ] button and [... -
Page 29: ➑ About Viewer Software
The following operations can be performed by connecting the product to a computer with our touchscreen electronic blackboard software “EIT (ELMO Interactive Toolbox)” installed via the USB cable and by connecting the computer to a large monitor or tablet computer: ・Operating the product or enlarging the computer screen... -
Page 30: Installing The Software
◆INSTALLING THE SOFTWARE You need to install the software to your computer to use “Image Mate 4” or “EIT (ELMO Interactive Toolbox)”. Access the respective website described above. ※If the software is already installed in your computer, update the version of the existing software. -
Page 31: ➒ Trouble Shooting
➒ TROUBLE SHOOTING ◆SYMPTOMS AND POSSIBLE CAUSES/REMEDIES Check the following items. If any abnormality is found, consult the dealer from whom you purchased this product or our nearest branch/office. Symptom Possible cause/ remedy ・The cable is not correctly connected. No image is displayed. ・The DC power cord is disconnected from the power supply socket of the product. - Page 32 ・This may be interference fringes between dots of printed matter The image is striped. and TV scanning lines or CMOS pixels. Changing the shooting range may help the problem. ・If you shoot a monitor screen that is displaying a live video, the image may be distorted.
-
Page 33: ➓ Specification
➓ SPECIFICATION ◆MAIN CAMERA Item Specifications Power source DC5V 2.5W (when connecting USB) Power consumption 6.0W (when connecting HDMI/RGB) W: 343 mm D: 82 mm H: 302mm (When setup) Outside dimensions W: 290 mm D: 82 mm H: 22mm (When folded) Weight Approx. -
Page 34: Illumination Device
✔ ✔ Resolution Manual Flicker ✔ ✔ ✔ 60Hz / 50Hz (Default setting: 60Hz) correction Contrast Possible (Settable values: 0~20) ✔ ✔ adjustment Default setting: 10 -180 ~ 180) Possible (Settable values: ✔ ✔ Hue adjustment Default setting: 0 Saturation Possible (Settable values: 0~31) ✔... -
Page 35: Trademarks And Licenses
■ TRADEMARKS AND LICENSES , Image Mate, and ELMO Interactive Toolbox are the registered trademarks of TECHNO HORIZON CO., LTD. Windows and/or other Microsoft products referenced herein are either registered trademarks or trademarks of Microsoft Corporation in the United States and/or other countries. - Page 36 テクノホライゾン株式会社 エルモカンパニー OVERSEAS SUBSIDIARY COMPANIES 〒457-0071 ELMO USA CORP. 愛知県名古屋市南区千竈通二丁目 13 番地 1 □Headquarters Web:https://www.elmo.co.jp 6851 Jericho Turnpike Suite 145 製品のお問い合わせは、下記オフィスへ Syosset, NY 11791 Tel. (516) 501-1400 □ 札幌オフィス Fax.(516) 501-0429 〒060-0908 E-mail: elmo@elmousa.com 北海道札幌市東区北 8 条東 3 丁目 1-1 宮村ビル 3 階...
Need help?
Do you have a question about the MX-P3 and is the answer not in the manual?
Questions and answers