Chapters
Table of Contents

Subscribe to Our Youtube Channel
Related Manuals for Viessmann Vitodens 100 Series


Summary of Contents for Viessmann Vitodens 100 Series
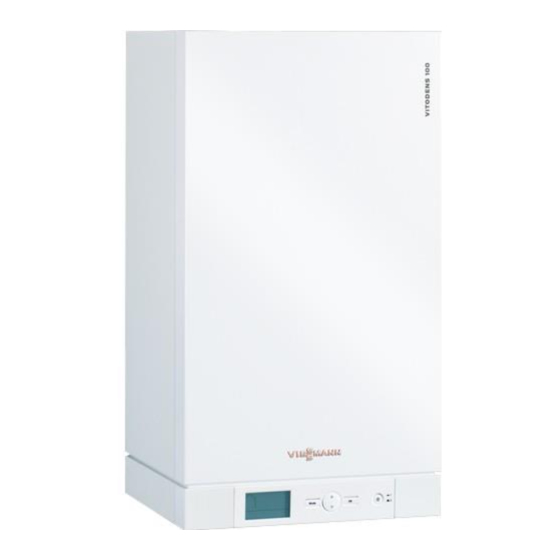
- Page 1 VIESMANN Installation and service instructions for contractors Vitodens 100 6.5 to 35.0 kW Wall mounted gas condensing boiler Natural gas version For applicability, see the last page VITODENS 100 Please keep safe. 5837148 HK 11/2018...
- Page 2 Safety instructions Safety instructions Please follow these safety instructions closely to prevent accidents and material losses. Safety instructions explained Danger Note This symbol warns against the Details identified by the word "Note" risk of injury. contain additional information. Please note This symbol warns against the risk of material losses and envi- ronmental pollution.
- Page 3 ■ Isolate the system from the power system. supply, e.g. by removing the separate Replace faulty components only fuse or by means of a mains isolator, with genuine Viessmann spare and check that it is no longer live. parts. ■ Safeguard the system against recon- nection.
- Page 4 Safety instructions Safety instructions (cont.) Safety instructions for operating the system If you smell gas What to do if water escapes from the appliance Danger Escaping gas can lead to explo- Danger sions which may result in seri- If water escapes from the appli- ous injury.
- Page 5 Safety instructions Safety instructions (cont.) Danger Danger Leaking or blocked flue sys- The simultaneous operation of tems, or an inadequate supply the boiler and appliances that of combustion air can cause life extract air to the outside can threatening poisoning from car- result in life threatening poison- bon monoxide in the flue gas.
-
Page 6: Table Of Contents
Index Index Service instructions Warning notices Warning notices according to GB25034-2010............Frost protection....................Intended use......................Notes on siting, installation and operation............10 Information Symbols........................ 11 Installation instructions Preparing for installation................... 12 Installation sequence Mounting the boiler and making connections............15 Opening the control unit enclosure............... - Page 7 Index Index (cont.) Designs Connection and wiring diagram................83 Parts lists Ordering parts...................... 85 Overview of assemblies..................86 Casing assembly....................87 Heat cell assembly....................89 Burner assembly....................91 Hydraulic assembly....................93 Hydraulic assembly, system boiler............... 95 Hydraulic assembly, combi boiler................. 97 Control unit assembly...................
-
Page 8: Warning Notices
Warning notices Warning notices according to GB25034-2010 Warning against incorrect use: ■ Do not use caustic cleaning agents to ■ A faulty installation can lead to injury clean the appliance. and material losses. ■ The appliance must not be installed ■... -
Page 9: Frost Protection
Warning notices Frost protection Please note Following installation or repairs, Frost protection is only guaran- switch ON the power supply teed with a reliable power sup- (MCB/fuse, mains isolator) and ply, gas supply and sufficient the control unit ON/OFF switch. heating water content. -
Page 10: Notes On Siting, Installation And Operation
Warning notices Notes on siting, installation and operation ■ Installation, maintenance and service ■ After installation, the heating contrac- must be carried out by an authorised tor should mark the position of the contractor. flue system and instruct the system ■... -
Page 11: Information
Information Symbols Sym- Meaning The sequences of steps for commis- sioning, inspection and maintenance are summarised in the section "Com- Reference to another docu- missioning, inspection and mainte- ment containing further infor- nance" and are identified as follows: mation Sym- Meaning Step in a diagram: The numbers correspond to... -
Page 12: Preparing For Installation
The boiler is equipped with a hydraulic to the lower outside temperatures. system with the following components: If a Viessmann DHW cylinder is con- ■ Circulation pump nected, the request for cylinder heating ■ 3-way diverter valve is made via a cylinder temperature sen- ■... - Page 13 Preparing for installation Preparing for installation (cont.) Dimensions and connections 58 58 A Heating flow G ¾ E Heating return G ¾ B Gas condensing system boiler: F Condensate drain/safety valve Cylinder flow G ¾ drain: Plastic hose 7 22 mm Gas condensing combi boiler: DHW G ½...
- Page 14 Preparing for installation Preparing for installation (cont.) Preparing for boiler installation Preparing the connections 3. Prepare the electrical connections. ■ The appliance is delivered fitted Please note with a 1.3 m long (outside the To prevent appliance damage, boiler) power cable NYM-J connect all pipework free of load 3 x 1.5 mm with plug.
-
Page 15: Installation Sequence
Installation sequence Mounting the boiler and making connections Fitting the wall mounting bracket Ø10 A Vitodens installation template... - Page 16 Installation sequence Mounting the boiler and making connections (cont.) 1. Position the supplied installation 4. Fit the wall mounting bracket with template on the wall. the screws supplied. 2. Mark out the rawl plug holes. 3. Drill 7 10 mm holes and insert the rawl plugs supplied.
- Page 17 Installation sequence Mounting the boiler and making connections (cont.) Removing the front panel and mounting the boiler 1. Undo the screws on the underside 3. Hook the boiler into the wall mount- of the boiler; do not remove them ing bracket. completely.
- Page 18 Installation sequence Mounting the boiler and making connections (cont.) Fitting connections on water side ¨ A Heating flow D Gas condensing system boiler: B Gas condensing system boiler: Cylinder return Cylinder flow Gas condensing combi boiler: Gas condensing combi boiler: Cold water E Heating return C Gas connection...
- Page 19 Installation sequence Mounting the boiler and making connections (cont.) Connection set for gas condensing Connection set for gas condensing boiler (accessories) combi boiler (accessories) Gas connection ■ Gas supply pressure: 15 - 30 mbar (1.5 - 3.0 kPa) ■ Set value: 20 mbar (2.0 kPa) 1.
- Page 20 Installation sequence Mounting the boiler and making connections (cont.) 2. Carry out a tightness test. Note Only use suitable and approved leak detection agents (EN 14291) and devices for the tightness test. Leak detection agents with unsuita- ble constituents (e.g. nitrides, sul- phides) can cause material dam- age.
- Page 21 Installation sequence Mounting the boiler and making connections (cont.) Connecting the safety valve and condensate drain Connect condensate pipe A to the public sewage system with a constant fall and a pipe vent. Treating and draining off condensate: ■ A neutralising system is available as an accessory on request.
- Page 22 Installation sequence Mounting the boiler and making connections (cont.) Balanced flue connection The shutdown threshold of the integral flue gas temperature sensor is 110 °C maximum, so that the maximum per- missible flue gas temperature cannot be exceeded. This shutdown threshold cannot be changed.
- Page 23 Installation sequence Mounting the boiler and making connections (cont.) Installing a flue system for external wall connection 1. Create a wall opening with a min. 3. Secure wall bezel C internally. diameter of 105 mm. 4. If the external wall connection ter- 2.
- Page 24 Installation sequence Mounting the boiler and making connections (cont.) 5. Connect the balanced flue connec- tion pipe from the inside and route with a fall of min. 3° (approx. 50 mm/m) towards the boiler in order to prevent condensate escap- ing to the outside.
-
Page 25: Opening The Control Unit Enclosure
Installation sequence Opening the control unit enclosure 1. 2x Please note Prior to commencing any work, Electronic assemblies can be touch earthed objects such as damaged by electrostatic dis- heating or water pipes to dis- charge. charge static loads. -
Page 26: Electrical Connections
Installation sequence Electrical connections X111 CN3 Ext. extension AUX 900101 A X11 WLAN module (internet inside) X13 Power supply WLAN module (accessories) (internet inside) Cylinder temperature sensor E (only for gas system boilers) Power supply F (230 V, 50 Hz) A power cable with plug is con- nected in the delivered condition. - Page 27 Installation sequence Electrical connections (cont.) Information on connecting accessories When connecting accessories observe the separate installation instructions provided with them. Cable entry A Room temperature controller con- necting cable B LV leads (sensor leads) Outside temperature sensor or room temperature sensor (accessories) 1.
- Page 28 Installation sequence Electrical connections (cont.) Connection Vitotrol 100, type UTDB Note Observe parameter "P07", see page 58. Recommended connecting cable ■ 2-core cable for low voltage A Vitotrol 100, type UTDB B Terminals on the control unit...
- Page 29 Installation sequence Electrical connections (cont.) Connection Vitotrol 100, type UTDB-RF Note Observe parameter "P08", see page 59. Recommended connecting cable ■ 2-core cable for low voltage 220 V∼ A Vitotrol 100, type UTDB-RF B Terminals on the control unit...
- Page 30 Installation sequence Electrical connections (cont.) Connection OpenTherm accessories Note Observe parameter "P07", see page 58. Recommended connecting cable ■ 2-core cable for low voltage A OpenTherm accessories B Terminals on the control unit Connecting system to equipotential bonding of the building Danger The appliance and pipework The absence of system compo-...
- Page 31 Installation sequence Electrical connections (cont.) A Boiler D Earthing clip B Domestic distribution box E Equipotential bonding bar C Gas line F Metal pipes Cross-section of earth cables and earth conductors: 2.5 mm to 6 mm...
- Page 32 Installation sequence Electrical connections (cont.) Power supply Regulations and directives Power supply to boiler: ■ Protect with a fuse/MCB of up to Danger 16 A. Incorrectly executed electrical ■ Install residual current device (RCD). installations can result in injuries ■ Fit a secure earth connection. from electrical current and dam- ■...
-
Page 33: Commissioning, Inspection, Maintenance
Commissioning, inspection, maintenance Steps - commissioning, inspection and maintenance For further information regarding the individual steps, see the page indicated Commissioning steps Inspection steps Maintenance steps Page • • • 1. Filling the heating system..........35 • 2. Setting the time and date..........40 •... -
Page 34: Commissioning Steps
Commissioning, inspection, maintenance Steps - commissioning, inspection and… (cont.) Commissioning steps Inspection steps Maintenance steps Page • • 21. Mounting the front panel..........53 • 22. Marking the position of the flue system • 23. Instructing the system user........... 54... -
Page 35: Further Details Regarding The Individual Steps
> 450 mg/l a water softening – Sentinel (www.sentinel-solu- system must be installed. tions.net) ■ Small softening systems for heating water are available from Viessmann. 01. Check the pre-charge pressure of the diaphragm expansion vessel (see page 52). 02. Close the gas shut-off valve. - Page 36 Commissioning, inspection, maintenance Further details regarding the individual steps (cont.) 03. Turn ON the system ON/OFF switch on the control unit. If the system pressure is too low, the pressure will be shown on the main display after a short time: ■...
- Page 37 Commissioning, inspection, maintenance Further details regarding the individual steps (cont.) 05. Open shut-off valves A and B (if fitted). 06. Fill the heating system: ■ Gas condensing system boiler: Via fill valve C in the connection set (if supplied) or via on-site fill valve.
- Page 38 Commissioning, inspection, maintenance Further details regarding the individual steps (cont.) Please note If the system pressure falls below 0.08 MPa, the circu- lation pump will suffer dam- age. In the event of a pressure drop immediately top up the water. Ensure a minimum system pressure of >...
- Page 39 Commissioning, inspection, maintenance Further details regarding the individual steps (cont.) Venting the boiler by flushing 1. Connect the drain hose fitted at shut-off valve A to a drain connec- tion. 2. Close shut-off valve B. 3. Open valves A and C and flush at mains pressure until no sound of escaping air can be heard.
-
Page 40: Setting The Time And Date
Commissioning, inspection, maintenance Further details regarding the individual steps (cont.) Filling and venting function is ■ The 3-way valve is switched to its active: central position. This ensures the ■ "Air", entire heating system is filled. and the remaining time ■... -
Page 41: Making The Settings For Operation With Outside Temperature Sensor Or Room Temperature Sensor
Commissioning, inspection, maintenance Further details regarding the individual steps (cont.) Making the settings for operation with outside temperature sensor or room temperature sensor If an outside temperature sensor or 06. OK to confirm room temperature sensor has been ■ "PL:2" is shown on the addi- connected to the control unit: tional display Set the function at the control unit. -
Page 42: Making The Settings For Operation With External Extension
Connecting the heating system to the following display appears: WLAN and the Viessmann server Register the heating system on the Viessmann server via the relevant app. Display shows: ■ The message "COnn" is displayed while the connection is being estab- lished until P06 is displayed. -
Page 43: Switching Off Dhw Heating
Commissioning, inspection, maintenance Further details regarding the individual steps (cont.) ■ "SEt" and 09. OK to confirm flash ■ "PL:1" is shown on the addi- 10. Use to select "On". tional display ■ is shown in the upper display 11. OK to confirm area 12. -
Page 44: Checking The Static Pressure And Supply Pressure
Commissioning, inspection, maintenance Further details regarding the individual steps (cont.) 08. Use to select "P13". 12. MODE to exit the parameter level. DHW heating and all functions 09. OK to confirm associated with it are deactivated. 10. Use to select "On". Note If DHW heating is to be activated 11. -
Page 45: Checking The Co 2 Content
Commissioning, inspection, maintenance Further details regarding the individual steps (cont.) 8. Shut down the boiler and close the 9. Open the gas shut-off valve and gas shut-off valve. Remove the start the appliance. pressure gauge and seal test con- Danger nector A with screw. - Page 46 Commissioning, inspection, maintenance Further details regarding the individual steps (cont.) 3. Setting the upper heating output 5. Select the lower heating output: Ensure heat is being drawn off by to switch directly between the heating system. the upper and lower heating output. 1.
-
Page 47: Limiting The Maximum Heating Output
Commissioning, inspection, maintenance Further details regarding the individual steps (cont.) Limiting the maximum heating output 1. Hold down MODE and simulta- 4. OK to confirm neously for approx. 5 s. ■ "SEt" and 5. Use to set the max. heating flash. -
Page 48: Checking The Burner Gasket And Burner Gauze Assembly
Commissioning, inspection, maintenance Further details regarding the individual steps (cont.) 3. Disconnect the cables from fan 6. Undo 4 screws F and remove the motor A, gas train B and electro- burner. des C. Please note To prevent damage, 4. Disconnect Venturi extension D never rest the burner on the from the fan. -
Page 49: Checking And Adjusting The Electrode
Commissioning, inspection, maintenance Further details regarding the individual steps (cont.) 1. Remove electrode B. 5. Mount thermal insulation ring C. Torque for fixing screws: 3.5 Nm 2. Undo 2 Torx screws and remove 6. Fit electrode B. thermal insulation ring C. Torque for fixing screws: 4.5 Nm 3. -
Page 50: Cleaning The Heat Exchanger
Commissioning, inspection, maintenance Further details regarding the individual steps (cont.) Cleaning the heat exchanger Please note Scratches to the surfaces of the heat exchanger that come into contact with hot gas can result in corrosion damage. Brushing can cause deposits to become lodged in the gaps between the coils. -
Page 51: Installing The Burner
Commissioning, inspection, maintenance Further details regarding the individual steps (cont.) 6. Fill trap A with water. For this, pour approx. 0.3 l of water into the combustion chamber. 7. Check that condensate can drain freely and that the connections are tight. -
Page 52: Checking The Diaphragm Expansion Vessel And System Pressure
Commissioning, inspection, maintenance Further details regarding the individual steps (cont.) 5. Re-establish gas supply. Switch ON 6. Check the gas connections for the power supply. leaks. Danger Escaping gas leads to a risk of explosion. Check the fitting for gas tightness. - Page 53 Commissioning, inspection, maintenance Further details regarding the individual steps (cont.) Checking gas equipment for leaks at operating pressure Danger Please note Escaping gas leads to a risk of The use of leak detection spray explosion. can result in faulty operation. Check gas equipment for leaks.
- Page 54 Commissioning, inspection, maintenance Further details regarding the individual steps (cont.) 2. Tighten screws on the underside of the boiler. Instructing the system user ■ Instruct the system user about opera- tion and the safety regulations. ■ Hand over the operating instructions to the system user.
-
Page 55: Parameter
Parameter Main parameter level Calling up the main parameter level: Note The settings shown depend on the 1. Press MODE to select the required equipment level of the heating system. settings. 2. Use to select the required value. ■ Use OK to confirm and exit the menu. - Page 56 Parameter Main parameter level (cont.) Time program, switching central heating mode on/off Symbols Main display Additional display Flashing constant "SEt" "On" "OFF" Time program, set heating water temperature Symbols Main display Additional display Flashing constant Temperature in °C "L:1" and I for stage 1 "L:2"...
-
Page 57: Parameter Level 1
Parameter Main parameter level (cont.) Standby mode Symbols Main display Additional display Flashing constant "SEt" Parameter level 1 Calling up parameter level 1: 2. Press MODE. ■ "P01" is shown on the main dis- 1. Hold down MODE and simulta- play. - Page 58 Parameter Parameter level 1 (cont.) Limiting the maximum heating output Parameter Possible change Main display Additional display "P03" Max. heating output in % Heating output of the upper rated heating in % output. Setting range 40 to 100 % Activating WLAN module Parameter Possible change Main display Additional display...
-
Page 59: Parameter Level 2
Parameter Parameter level 1 (cont.) Note OpenTherm fully activated: The Open- OpenTherm basic function: Room ther- Therm room thermostat functions as mostat works only as a "remote control master, all relevant functions (time pro- (on/off)". All time programs and temper- grams, temperature settings) on the ature settings of the room thermostat programming unit of the boiler control... - Page 60 Parameter Parameter level 2 (cont.) 9. OK to confirm Switching DHW heating on/off Parameter Possible change Main display Additional display "P13" "ON" DHW heating switched off "OFF" DHW heating switched on External temperature sensor (room temperature sensor/outside temperature sensor) Parameter Possible change Main display Additional display "P14"...
-
Page 61: Diagnostics
Diagnostics Function sequence and possible faults Display Measure Control unit is- Increase set value sues a heat de- and ensure heat is mand drawn off Fan starts After approx. Check the fan, fan 1 min, fault F05 connecting ca- bles, fan power supply and fan control Ignition... -
Page 62: Overview Of Checks
Diagnostics Function sequence and possible faults (cont.) Burner in opera- Shuts down below Check the flue tion the set boiler water system for leaks temperature and (flue gas recircula- restarts immediate- tion); check the gas flow pressure Resetting the appliance Press MODE and OK simultaneously and hold until Ð... - Page 63 Diagnostics Status checks (cont.) Check Display Symbols Flashing Constant Set heating water temperature "IF02" °C Set maximum heating output "IF03" Actual DHW temperature "IF04" °C Set DHW temperature "IF05" °C DHW flow rate "IF06" Actual collector temperature (only in "IF07" conjunction with external extension) °C Actual cylinder temperature, bottom...
-
Page 64: Meter Checks
Diagnostics Status checks (cont.) Check Display Symbols Flashing Constant Cylinder type "IF21" OpenTherm/WLAN access ("On" or "IF22" "OFF") Meter checks The display is split into 3 blocks. Display "Ct01": "002" Display "Ct02": "540" Example: Burner hours run: 2540 h Check Display Symbols Flashing... - Page 65 Diagnostics Meter checks (cont.) Check Display Symbols Flashing Constant Heat demands, heating mode (in mil- "Ct11" lions) Heat demands, heating mode (in "Ct12" thousands) Heat demands, heating mode (in "Ct13" units) Faults (in thousands) "Ct14" Faults (in units) "Ct15"...
-
Page 66: Troubleshooting
Troubleshooting Fault display Faults are indicated by a flashing fault code (e.g. "F30") and fault symbol Ö or Ð. Displayed System character- Cause Measures fault code istics Burner locked out System pressure Check the system pres- too low sure. If required, top up heating water (see page 35). - Page 67 Troubleshooting Fault display (cont.) Displayed System character- Cause Measures fault code istics Burner in a fault Flame signal is al- Check ionisation elec- state ready present at trode and connecting ca- burner start ble. Turn the ON/OFF switch off and back on again, or perform a reset –...
- Page 68 Troubleshooting Fault display (cont.) Displayed System character- Cause Measures fault code istics Continuous opera- Lead break, out- Check the sensor (see tion side temperature page 72). sensor or room temperature sen- Burner locked out Short circuit, boiler Check the boiler water water temperature temperature sensor (see sensor...
- Page 69 Troubleshooting Fault display (cont.) Displayed System character- Cause Measures fault code istics Function at the ex- Lead break, col- Checking the sensor ternal extension faul- lector temperature sensor S1 at the Installation and external extension service instruc- tions for external extension Function at the ex- Short circuit, lower...
-
Page 70: Repairs
Troubleshooting Fault display (cont.) Displayed System character- Cause Measures fault code istics Burner locked out Lead break, flue Check flue gas tempera- gas temperature ture sensor (see sensor page 77). Burner locked out Flue gas tempera- Check heating system fill ture too high level. - Page 71 Troubleshooting Repairs (cont.) Removing the front panel 1. Undo the screws on the underside 2. Remove front panel. of the boiler. Do not remove.
- Page 72 Troubleshooting Repairs (cont.) Outside temperature sensor or room temperature sensor A Outside temperature sensor or room temperature sensor B Terminals on control unit enclosure 1. Open the control unit enclosure. See page 25. 2. Disconnect leads from outside tem- perature sensor. 3.
- Page 73 Troubleshooting Repairs (cont.) Boiler water temperature sensor 1. Disconnect leads from boiler water temperature sensor A § and check the resistance. 2. Check the sensor resistance and compare it to the curve. 3. In the case of severe deviation, drain the boiler on the heating water side and replace the sensor.
- Page 74 Troubleshooting Repairs (cont.) Checking the cylinder temperature sensor (gas condensing system boiler) 1. Disconnect plug % from the cable harness and check the resistance. X100 2. Compare the sensor resistance to the curve. 3. In the event of severe deviation replace the sensor.
- Page 75 Troubleshooting Repairs (cont.) Checking the outlet temperature sensor (gas condensing combi boiler) 1. Disconnect leads from outlet tem- perature sensor A $. 2. Check the sensor resistance and compare it to the curve. 3. In the event of severe deviation replace the sensor.
- Page 76 Troubleshooting Repairs (cont.) Checking the temperature limiter If the burner control unit cannot be reset after a fault shutdown although the boiler water temperature is below approx. 95 °C, check the temperature limiter. 1. Disconnect the leads from tempera- ture limiter A. 2.
- Page 77 Troubleshooting Repairs (cont.) Checking the flue gas temperature sensor 1. Disconnect the leads from flue gas temperature sensor A aG. 2. Check the sensor resistance and compare it to the curve. 3. In the event of severe deviation replace the sensor. 10 30 50 70 90 110 Temperature in °C...
- Page 78 Troubleshooting Repairs (cont.) Replace flow limiter and clean filter (gas condensing combi boiler) 1. Drain the boiler on the DHW side. 2. Undo the fitting on the cold water inlet A. 3. Remove faulty flow limiter B. 4. Select new flow limiter B accord- ing to the boiler serial no.
- Page 79 Troubleshooting Repairs (cont.) Checking or replacing the plate heat exchanger (gas condens- ing combi boiler) C Heating water flow F DHW D Heating water return E Cold water 1. Shut off and drain the boiler on the 3. Undo 2 screws A on plate heat heating water and DHW sides.
- Page 80 Troubleshooting Repairs (cont.) 4. Check the connections on the DHW 6. Install in reverse order using new side for scaling; clean or replace gaskets. the plate heat exchanger if required. Note During installation, ensure the fixing 5. Check the connections on the heat- holes are aligned and the gaskets ing water side for contamination;...
-
Page 81: Weather-Compensated Operation
Control unit Weather-compensated operation In weather-compensated mode (with connected outside temperature sen- sor), the boiler water temperature is regulated according to the outside tem- perature. Heating curve for weather-compensated operation Outside temperature in °C Heating curve settings: E = delivered condition A = 1 F = 5 B = 2... -
Page 82: Control Unit Weather-Compensated Operation
Control unit Weather-compensated operation (cont.) Frost protection function The boiler must be switched on to Frost protection with connected out- ensure frost protection. side temperature sensor Boiler frost protection If the outside temperature falls below 1 °C, the internal circulation pump Frost protection without outside switches on. -
Page 83: Designs
Designs Connection and wiring diagram Hall +5VDC PCB inside the control unit C Outside temperature Power supply sensor or room temper- ature sensor ! (acces- External extension AUX 900101 sories) Gas pressure switch (acces- sories) D Room temperature con- Gas train troller (OpenTherm accessories) Internal circulation pump... - Page 84 Designs Connection and wiring diagram (cont.) Power supply WLAN module Flue gas temperature sensor (24 V) Circulation pump 230 V~ sÖ T5/TR1-1 Ignition/ionisation Motor, diverter valve dÖ Boiler water temperature § Gas solenoid valve sensor Temperature limiter Outlet temperature sensor Fan control a-ÖA (gas condensing combi...
-
Page 85: Parts Lists
Parts lists Ordering parts The following information is required: ■ Serial no. (see type plate A) ■ Assembly (from this parts list) ■ Position number of the individual part within the assembly (from this parts list) -
Page 86: Overview Of Assemblies
Parts lists Overview of assemblies A Type plate D Hydraulic assembly B Casing assembly E Control unit assembly C Heat cell assembly F Miscellaneous assembly... -
Page 87: Casing Assembly
Parts lists Casing assembly 0006 0002 0001 0002 0003 0003 0005 0004... - Page 88 Parts lists Casing assembly (cont.) Pos. Part 0001 Front panel 0002 Profiled seal 0003 Viessmann logo 0004 Strain relief, upper part 0005 Air box floor 0006 Wall mounting bracket...
-
Page 89: Heat Cell Assembly
Parts lists Heat cell assembly 0001 0005 0001 0003 0002 0003 0014 0004 0014 0014 0015 0006 0004 0013 0013 0014 0015 0012 0007 0011 0010 0008 0011 0009 0016 0017... - Page 90 Parts lists Heat cell assembly (cont.) Pos. Part 0001 Gasket DN 60 0002 Boiler flue connection 0003 Boiler flue connection plug 0004 Flue gasket 0005 Flue gas temperature sensor 0006 Heat exchanger 0007 Condensate hose 0008 Splash trap 0009 Tee connector 0010 Gas connection 0011...
-
Page 91: Burner Assembly
Parts lists Burner assembly 0003 0002 0001 0004 0001 0004 0006 0008 0005 0004 0006 0007 0006 0012 0008 0012 0010 0012 0008 0009 0012 0011 0012 0011... - Page 92 Parts lists Burner assembly (cont.) Pos. Part 0001 Burner gasket 7 187 (wearing part) 0002 Thermal insulation ring 0003 Cylinder burner gauze assembly 0004 Burner gauze assembly gasket 0005 Burner door 0006 Gasket, ionisation electrode (5 pce) 0007 Ignition/ionisation electrode (wearing part) 0008 Gasket, burner door flange (wearing part) 0009...
-
Page 93: Hydraulic Assembly
Parts lists Hydraulic assembly 0002 0003 0001 0010 0007 0010 0005 0003 0007 0004 0003 0007 0006 0004 0009 0011 0010 0007 0016 0009 0010 0015 0007 0012 0003 0007 0014 0003 0004 0007 0017 0008 0008 0013... - Page 94 Parts lists Hydraulic assembly (cont.) Pos. Part 0001 Diaphragm expansion vessel 0002 Padding profile, diaphragm expansion vessel 0003 Gaskets (set) 0004 Connection line, diaphragm expansion vessel G 1/2 0005 Connection elbow HR (heating return) 0006 Profile hose HR (heating return) 0007 Spring clip DN 25 (5 pce) 0008...
-
Page 95: Hydraulic Assembly, System Boiler
Parts lists Hydraulic assembly, system boiler 0008 0004 0013 0009 0013 0005 0001 0021 0013 0016 0005 0012 0013 0008 0009 0017 0001 0006 0020 0019 0006... - Page 96 Parts lists Hydraulic assembly, system boiler (cont.) Pos. Part 0001 Quick-action air vent valve 0004 Safety valve 3 bar 0005 Fuse elements (set) 0006 Pump motor 0008 Stepper motor 0009 Cartridge, stepper motor 0012 Heating flow 0013 Gaskets (set) 0016 Return unit, system boiler 0017 Circulation pump...
-
Page 97: Hydraulic Assembly, Combi Boiler
Parts lists Hydraulic assembly, combi boiler 0004 0003 0008 0002 0003 0009 0005 0005 0013 0003 0007 0016 0005,0007 0021 0010,0011 0013,0014 0012 0008 0001 0009 0017 0013 0006 0015 0018 0014 0010 0019 0011 0006... - Page 98 Parts lists Hydraulic assembly, combi boiler (cont.) Pos. Part 0001 Quick-action air vent valve 0002 Plate heat exchanger 0003 Profiled gasket (4 pce) 0004 Safety valve 3 bar 0005 Fuse elements (set) 0006 Pump motor 0007 Flow switch (set) 0008 Stepper motor 0009 Cartridge, stepper motor...
-
Page 99: Control Unit Assembly
Parts lists Control unit assembly 0011 0003 0002 0009 0002 0010 0001 0012 0004 0005 0006 0007 0008 0013... - Page 100 Parts lists Control unit assembly (cont.) Pos. Part 0001 VBC LCV control unit 0002 Clip hinge 0003 Profiled seal 0004 Cable harness X1/100 0005 Connecting cable, gas valve 0006 Fan connecting cable 100 0007 Power cable, stepper motor 0008 Connecting cable X7 0009 Fuse, 2.5 A (slow), 250 V (10 pce) 0010...
-
Page 101: Miscellaneous Assembly
Parts lists Miscellaneous assembly 0001 0002 0003 0004 0005 Pos. Part 0001 Touch-up spray paint, white, 150 ml 0002 Touch-up paint stick, white 0003 Special grease 0004 Installation and service instructions 0005 Operating instructions... -
Page 102: Specification
Specification Specification Gas condensing system boiler Type LN1GBQ LN1GBQ LN1GBQ 18-CC 24-CC 33-CC Rated heat input (heating mode) kW 6.1 – 17.8 6.1 – 24.3 8.2 – 32.7 Rated heat input (DHW heating) kW 6.1 – 17.8 6.1 – 24.3 8.2 –... - Page 103 Specification Specification (cont.) Type LN1GBQ LN1GBQ LN1GBQ 18-CC 24-CC 33-CC Rated heat input (heating mode) kW 6.1 – 17.8 6.1 – 24.3 8.2 – 32.7 Rated heat input (DHW heating) kW 6.1 – 17.8 6.1 – 24.3 8.2 – 32.7 Flue gas parameters Flue gas temperature at 30 °C heat- °C...
- Page 104 Specification Specification (cont.) Type LL1GBQ24- LL1GBQ33- Rated heat input (heating mode) 6.1 – 24.3 8.2 – 32.7 Rated heat input (DHW heating) 6.1 – 30.5 8.2 – 36.5 Sound power level At full load (100 %) dB (A) < 50 <...
- Page 105 Specification Specification (cont.) Type LL1GBQ24- LL1GBQ33- Rated heat input (heating mode) 6.1 – 24.3 8.2 – 32.7 Rated heat input (DHW heating) 6.1 – 30.5 8.2 – 36.5 Flue gas temperature at 30 °C heating wa- °C ter return temperature Flue gas temperature at 60 °C heating wa- °C ter return temperature...
- Page 106 Specification Specification (cont.) Residual head of the integral circulation pump UPS 15-50 (rated heating output 19 kW) Flow rate in m³/h A Stage 1 B Stage 2 C Stage 3...
- Page 107 Specification Specification (cont.) UPS 15-60 (rated heating output 26 kW) Flow rate in m³/h A Stage 1 B Stage 2 C Stage 3...
- Page 108 Specification Specification (cont.) UPS 15-70 (rated heating output 35 kW) Flow rate in m³/h A Stage 1 B Stage 2 C Stage 3...
-
Page 109: Certificates
Certificates Manufacturer's declaration for Vitodens 100 CC We, Viessmann Heating Technology Dachang Co., Ltd., declare as sole responsi- ble body, that the product Vitodens 100 CC complies with the following standards: GB25034-2010 CJ/T395-2012 CECS215:2006 This product meets the requirements of the efficiency standard GB20665-2015 and is classified as an energy saving product. -
Page 110: Keyword Index
Keyword index Keyword index Flue pipe..........22 Boiler water temperature sensor ..73 Front panel, mounting......53 Burner gasket........48 Front panel removal......17 Burner gauze assembly..... 48 Frost limit........... 82 Burner installation......51 Frost protection........82 Burner removal........47 Function sequence......61 Fuse........... - Page 111 Keyword index Keyword index (cont.) Reset..........62 Unlocking........... 62 Room temperature controller..28, 29 Room temperature sensor....72 – Setting..........41 Ventilation air pipe......22 Venting..........39 Vitotrol 100 Safety chain ........76 – Connection type UTDB....28 Safety valve........21 – Connection type UTDB-RF.....29 Specification......102, 103 Static pressure........
- Page 112 7637260 7637261 7639524 7639525 7639526 7639527 7639528 Viessmann Werke GmbH & Co. KG Viessmann China Ltd. D-35107 Allendorf Unit 16,17/F., Millennium City 2 Telephone: +49 6452 70-0 378 Kwun Tong Road Fax: +49 6452 70-2780 Kwun Tong, Kowloon, Hong Kong www.viessmann.com...
Need help?
Do you have a question about the Vitodens 100 Series and is the answer not in the manual?
Questions and answers