Advertisement
Quick Links
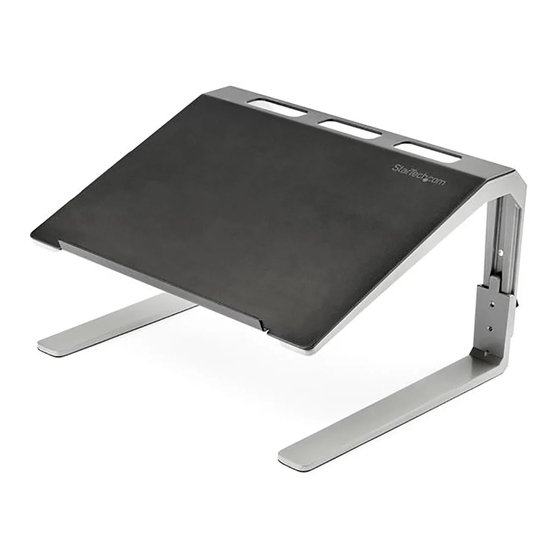
Laptop Stand - Height Adjustable
Product Diagram (LTSTND)
Angled View
1
2
3
4
Part
1
Top Plate
• A platform for a Laptop
• Attaches to the Top Plate
2
Upper Leg
• Configurable with three height-adjustment
Cable-Management
3
• Organize and route Cables
Slots
4
Lower Leg
• Attaches to the Upper Leg
• Secure the Upper Legs and Lower Legs
Height-Adjustment
5
Knob
• Can be removed to adjust height settings
To view manuals, FAQs, videos, drivers, downloads, technical drawings, and more, visit www.startech.com/support.
5
Function
settings
together
Requirements
• Clean, Flat, and Stable Surface x 1
For the latest requirements please visit: www.startech.com/LTSTND.
Installation
Assembly
1. Place the Top Plate, top side down, onto a Clean, Flat, and Stable Surface.
Note: The lip on the Top Plate can overhang off the edge of the Surface for a level
installation.
2. Place the Upper Legs onto the Top Plate. Ensure the Holes in the Upper Legs
are aligned with the Threaded Posts on the Top Plate. The slanted portion of the
Upper Legs should be aligned with the slanted portion of the Top Plate.
3. Secure the Upper Legs to the Top Plate, using two Nuts for each side. Fasten the
Nuts using the Wrench. (Figure 1)
Note: Align the outside edges of the Upper Legs with the outside edges of the Top
Plate before tightening the Nuts.
Figure 1
Wrench
Threaded
Upper Leg
Quick-Start Guide
Nut
Post
Top Plate
Manual Revision: July 4, 2019
Advertisement

Subscribe to Our Youtube Channel
Related Manuals for StarTech.com LTSTND


Summary of Contents for StarTech.com LTSTND
- Page 1 • Attaches to the Upper Leg • Secure the Upper Legs and Lower Legs Top Plate Height-Adjustment together Knob • Can be removed to adjust height settings To view manuals, FAQs, videos, drivers, downloads, technical drawings, and more, visit www.startech.com/support. Manual Revision: July 4, 2019...
- Page 2 StarTech.com. Where they occur these references are for illustrative purposes 2. Place the Laptop Stand Assembly, top side down, on a Clean, Flat, and Stable only and do not represent an endorsement of a product or service by StarTech.com, or an endorsement of the product(s) to Surface.
Need help?
Do you have a question about the LTSTND and is the answer not in the manual?
Questions and answers