
Related Manuals for Hanseatic 65M40M1-E11314A


Summary of Contents for Hanseatic 65M40M1-E11314A
- Page 1 65M40M1-E11314A Gebrauchsanleitung Einbaubackofen Anleitung/Version: 93895 DE 20180828 Bestell-Nr.: 219851 Nachdruck, auch aus zugs wei se, nicht ge stat tet!
-
Page 2: Table Of Contents
Seite DE-2 Inhaltsverzeichnis Inhaltsverzeichnis Lieferung ......DE-3 Fehlersuchtabelle ....DE-20 Verpackungs-Tipps . -
Page 3: Lieferung
Seite DE-3 Lieferung Lieferung Lieferumfang 1× Einbaubackofen mit 1× Backofen ① 1× Grillrost ② 1× Backblech ③ ① 1× Fettpfanne ④ Montagematerial 2× Montageschraube ⑤ Zubehör: 1× Gebrauchsanleitung 1× Broschüre „Backen - Braten - Garen“ ② Lieferung kontrollieren 1. Transportieren Sie den Backofen an einen geeigneten Standort und packen Sie ihn ③... -
Page 4: Bedienelemente Und Geräteteile
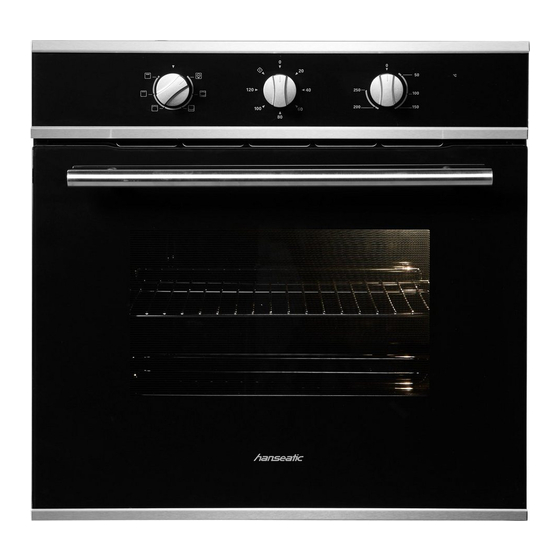
Seite DE-4 Bedienelemente und Geräteteile Bedienelemente und Geräteteile Bedienblende Funktionsschalter Zeitschaltuhr Temperaturregler Temperaturkontrollleuchte (rot) Beleuchtung Ober- und Unterhitze Unterhitze Oberhitze Grill Intensivgrill Backofen Wrasenabzug (Lüftung) Backblechträger... -
Page 5: Sicherheit
Seite DE-5 Sicherheit Sicherheit Bestimmungsgemäßer Begriffserklärung Gebrauch Folgende Si gnal begriffe fi nden Sie in dieser Gebrauchsanleitung. Der Backofen ist zum Kochen, Bra- ten, Backen, Grillen und Warmhalten WARNUNG von Speisen bestimmt. Zum Auftauen Dieser Signalbegriff bezeichnet eine von rohem Fleisch oder Fisch darf der Gefährdung mit einem mittleren Risi- Backofen nicht verwendet werden. - Page 6 Seite DE-6 Sicherheit Netzkabel so verlegen, dass es nicht ■ WARNUNG zur Stolperfalle wird. Risiken im Umgang mit Netzstecker und -kabel von offenem ■ elektrischen Haushaltsgeräten Feuer und heißen Flächen fernhalten. Netzkabel nicht knicken oder klemmen Stromschlaggefahr! ■ und nicht über scharfe Kanten legen. Das Berühren spannungsführender Tei- Wenn das Netzkabel des Geräts be- le kann zu schweren Verletzungen oder...
- Page 7 Seite DE-7 Sicherheit Risiken im Umgang mit dem Gerät VORSICHT Brandgefahr! Risiken für bestimmte Das Gerät grundsätzlich nur mit ge- ■ Personengruppen schlossener Backofentür betreiben. Gefahren für Kinder und Personen mit Braten oder Ku chen im Gerät nicht ■ verringerten physischen, sensorischen mit Papier abdecken.
- Page 8 Seite DE-8 Sicherheit Wenn das Außenkühlgebläse defekt Gesundheitsgefahr! ■ ist, kann das Gerät schnell überhitzen. Fleisch und Fisch nicht im Gerät auf- ■ Dadurch kann das Gerät noch mehr tauen. Das Gefriergut frühzeitig aus Schaden nehmen und angrenzende, dem Gefrierfach nehmen und abge- brennbare Gegenstände in Brand ste- deckt im Kühlschrank auftauen lassen.
-
Page 9: Bedienung
Seite DE-9 Bedienung Bedienung Das richtige Backofen- Geschirr HINWEIS – Töpfe mit hit ze be stän di gen Griffen, er kenn- Aufgestaute Hitze kann die Emaille des bar an der Kenn zeich nung „tem pe ra tur be- stän dig bis 280 °C“. Back ofens beschädigen. -
Page 10: Funktionsschalter
Seite DE-10 Bedienung Funktionsschalter Zugängliche Teile können bei Benut- ■ zung heiß werden. Kleine Kinder fern- halten. Direkte Berührung vermeiden. ■ Die Backofentür nur am Griff anfassen. ■ Aus dem Wrasen abzug strömt beim ■ Back ofen betrieb heißer Dampf. Vor- sicht auch beim Öff nen der Back - –... -
Page 11: Backofen Einschalten
Seite DE-11 Bedienung Backofen einschalten 1. Stellen Sie den Funktionsschalter (1) auf das Beleuchtungssymbol Der Backofen arbeitet erst, wenn die 2. Stellen Sie die Zeitschaltuhr (2) auf den Zeitschaltuhr (2) auf eine bestimmte Betriebsmodus . Zeit oder auf dem Betriebssymbol eingestellt ist. -
Page 12: Tabelle Prüfgerichte
Seite DE-12 Tabelle Prüfgerichte Tabelle Prüfgerichte Diese Gerichte wurden gemäß den Normen DIN 44547 und EN 60350 zubereitet. Einschubebene Temperatur Gardauer Speise Beheizungsart (siehe unten) in °C in Min. Spritzgebäck Ober-/Unterhitze 150-170 20-30 Wasserbiskuit Ober- /Unterhitze 170-180 25-35 Apfelkuchen mit Streusel Ober-/Unterhitze 180-190 35-45... -
Page 13: Gehäusefront Reinigen
Seite DE-13 Reinigung Reinigung Garraum reinigen VORSICHT! – Schalten Sie zum Reinigen nur die Back- Verbrennungsgefahr! ofenbe leuchtung ein . Den Backofen vollständig abkühlen ■ – Reinigen Sie den Garraum und die Back- lassen, bevor Sie ihn reinigen. blechträger nach je dem Ge brauch mit war- Niemals Wasser direkt in den heißen mem Spülwasser. -
Page 14: Backblechträger Reinigen
Seite DE-14 Reinigung Backblechträger reinigen Backblechträger einsetzen 1. Setzen Sie den Backblechträger (6) zu- nächst mit den gebogenen Halterungen HINWEIS oben in die Löcher an der Wand ein (c), Beschädigungsgefahr! und klappen Sie ihn unten an die Wand (b). Die Backblechträger sind nicht spülma- 2. - Page 15 Seite DE-15 Reinigung Back ofentür aushängen 6. Korrigieren Sie ggf. den Sitz der Scharnie- re und der Bügel, bis sich die Back ofentür Um bequem alle Bereiche Ihres Backofens zu wieder leichtgängig öffnen und schließen reinigen, können Sie die Back ofentür wie folgt lässt.
-
Page 16: Leuchtmittel Der Backofen Beleuchtung Auswechseln
Seite DE-16 Reinigung Leuchtmittel der Backofen- 1. Schalten Sie die Sicherungen aus bzw. drehen Sie sie heraus. beleuchtung aus wech seln 2. Legen Sie ein weiches Tuch in den abge- kühlten Garraum, für den Fall, dass die Als Backofenbeleuchtung benötigen Sie Glas ab de c kung oder das Leuchtmittel ein hitzefestes Back ofen-Leuchtmitttel vom he runterfällt. -
Page 17: Einbau Und Installation
Seite DE-17 Einbau und Installation Einbau und Installation Backofen einbauen WARNUNG Der Backofen ist für den Einbau in handels- Verletzungsgefahr! übliche Kü chen-Ein bau mö bel vorgesehen. Er Der Backofen ist schwer und unhand- ■ kann sowohl in einen Hochschrank als auch lich. -
Page 18: Backofen Anschließen
Seite DE-18 Einbau und Installation – Die Einbaunische darf keine Rückwand Einbau in einen Hochschrank besitzen, son dern höchstens eine Anstell- kante von maximal 50 mm. – Der Einbauschrank kann wahl wei se mit Lei sten oder einem Zwi schen bo den mit Lüf tungs aus schnitt aus ge stat tet sein. -
Page 19: Backofen Einsetzen
Seite DE-19 Einbau und Installation 1. Schalten Sie die Steckdose für den Dabei darf die Netz an schluss lei tung nicht Backofen vor dem Einbau stromlos. Dre- geknickt, ein ge klemmt oder auf andere hen Sie dazu die Sicherung für die Steck- Weise be schä... -
Page 20: Fehlersuchtabelle
Seite DE-20 Fehlersuchtabelle Fehlersuchtabelle Problem Mögliche Lösungen / Tipps Temperaturkontrollleuch- Die eingestellte Backofentemperatur ist erreicht. Die Temperatur- te erlischt. kontrollleuchte schaltet sich bei sinkender Temperatur automatisch wieder ein. Temperaturkontroll- Überprüfen Sie zunächst, ob der Backofen noch funktioniert. Ist leuchte leuchtet nicht. die Temperaturkontroll leuchte defekt, lassen Sie sie nur durch den Kundendienst aus wech seln (siehe „Unser Service“... -
Page 21: Unser Service
Unser Service Unser Service Damit wir Ihnen schnell helfen können, nennen Sie uns bitte: Gerätebezeichnung Modell Bestellnummer Einbaubackofen 65M40M1-E11314A 219851 Beratung, Bestellung und Reparaturen und Ersatzteile Reklamation Kunden in Deutschland Wenden Sie sich bitte an die Produktberatung – Wenden Sie sich bitte an unseren Technik-... -
Page 22: Umweltschutz
Seite DE-22 Umweltschutz Umweltschutz Elektro-Altgeräte Tipps zum Energiesparen umweltgerecht entsorgen – Heizen Sie den Backofen nur dann vor, wenn es im Rezept oder in den mitgeliefer- Elektrogeräte enthalten Schadstoffe ten Gartabellen angegeben ist. und wertvolle Ressourcen. – Verwenden Sie möglichst dunkle Backfor- Jeder Verbraucher ist deshalb ge- men und -bleche. -
Page 23: Technische Daten
Seite DE-23 Technische Daten Technische Daten Datenblatt für Elektrobacköfen nach der Verordnung (EU) Nr. 65/2014 und Verordnung (EU) Nr. 66/2014 Marke Typ/Bezeichnung Einbaubackofen 65M40M1-E11314A Bestellnummer 219851 Energieeffizienzindex EEI 106,9 cavity Energieeffizienzklasse des Backofens 1) 2) Energieverbrauch konventionelle Beheizung 0,93 kWh Anzahl der Garräume... - Page 25 65M40M1-E11314A User manual Built-in oven Manual/version: 93895 GB 20180828 Article no.: 219851 Reproduction, even of excerpts, is not permitted!
- Page 26 Page GB-2 Table of contents Table of contents Delivery ......GB-3 Environmental protection ... . .GB-22 Packaging tips .
-
Page 27: Delivery
Page GB-3 Delivery Delivery Package contents 1× Built-in oven with 1× Oven ① 1× Oven rack ② ① 1× Baking tray ③ 1× Dripping pan ④ Installation materials 2× Mounting screws ⑤ Accessories: 1× User manual 1× “Baking, roasting and cooking” brochure ②... -
Page 28: Controls And Appliance Parts
Page GB-4 Controls and appliance parts Controls and appliance parts Control panel Function switch Timer Temperature controller Temperature indicator light (red) Lighting Top and bottom heat Bottom heat Top heat Grill Intensive grill Oven Extraction hood (ventilation) Baking tray guides... -
Page 29: Safety
Page GB-5 Safety Safety Intended use Explanation of terms The oven is designed for cooking, roast- The following symbols can be found in ing, baking, grilling and keeping food this user manual. warm. The oven should not be used to WARNING defrost raw meat or fi... - Page 30 Page GB-6 Safety Take care to prevent the risk of trip- ■ WARNING ping when laying the mains cord. Risks in handling household Keep the mains plug and cord away ■ electrical appliances from naked fl ames and hot surfaces. Do not kink or pinch the mains cord Risk of electric shock! ■...
- Page 31 Page GB-7 Safety Risks when handling the CAUTION appliance Risks for certain groups of people Fire hazard! Danger to children and persons with Only ever operate the appliance with ■ reduced physical, sensory or mental the oven door closed. abilities (e.g. people with disabilities Do not cover cakes or roasts being ■...
- Page 32 Page GB-8 Safety Once the fi re has been extinguished, Health hazard! ■ have the appliance checked by our Do not defrost meat and fi sh in the ■ service team (see „Our Service Cen- appliance. Take the frozen food out tre“...
-
Page 33: Operation
Page GB-9 Operation Operation The right oven cookware NOTICE – Pots with heat-resistant handles can be Pent-up heat can damage the oven’s recognised by the label indicating ‘heat re- enamel. sistant up to 280°C’. Do not place baking trays or alumini- ■... -
Page 34: Function Switch
Page GB-10 Operation Function switch CAUTION! Risk of burns! Elements, sides, baking trays, etc. get very hot during operation. Accessible parts may become hot ■ during use. Keep small children away. Avoid direct contact. ■ – Use the function switch (1) to select the Only touch the oven door by the han- ■... -
Page 35: Switching On The Oven
Page GB-11 Operation Switching on the oven Switching off the oven The oven will only start working when 1. Turn the temperature controller (3) an- the timer (2) is set to a certain time or ti-clockwise to zero. to the operating symbol 2. -
Page 36: Test Report' Table
Page GB-12 ‘Test report’ table ‘Test report’ table These dishes were prepared in accordance with DIN 44547 and EN 60350 standards. Shelf level Temperature Cooking duration Dish Heating method (see below) in °C in min. Shortbread biscuits Top/bottom heat 150–170 20–30 Water sponge cake Top/bottom heat... -
Page 37: Cleaning The Front Of The Housing
Page GB-13 Cleaning Cleaning Cleaning the cooking CAUTION! compartment Risk of burns! – Only switch on the oven light for cleaning. Allow the oven to cool completely be- ■ – Clean the cooking compartment and bak- fore cleaning. ing trays after every use, and rinse with Never pour water directly onto the ■... -
Page 38: Cleaning The Oven Door
Page GB-14 Cleaning Cleaning the baking tray Inserting the baking tray guides guides 1. First insert the baking tray guide (6) using the curved brackets into the holes in the wall (c) and fold it down against the wall NOTICE (b). - Page 39 Page GB-15 Cleaning Taking the oven door off its hinges Cleaning the glass panes The oven door can be removed from its The oven door contains two glass panes that hinges to enable easy cleaning of all areas should occasionally be cleaned on both sides. of the oven: 1.
-
Page 40: Replacing Oven Lightbulbs
Page GB-16 Cleaning Replacing oven lightbulbs 1. Switch off the circuit breakers or unscrew fuses. For oven lighting, you need a heat-resistant 2. Place a soft cloth in the cooled cooking oven lightbulb: 250 V~, 25 W, G9, T 300 °C. compartment in the event that the glass cover falls or the bulb falls off. -
Page 41: Fitting And Installation
Page GB-17 Fitting and installation Fitting and installation Installing the oven WARNING The oven is designed for installation in Risk of injury! standard kitchen units. It can be installed at The oven is heavy and bulky. Get an- ■ eye-level and underneath the worktop. other person to help with moving and installation. -
Page 42: Connecting The Oven
Page GB-18 Fitting and installation – Your built-in furniture may need to be mod- Installation in an upright cabinet ified. If you do not have the manual skills to do this, you should hire a professional. – Veneers or plastic coverings on the built- in furniture require heat-resistant adhesive (100 °C). -
Page 43: Inserting The Oven
Page GB-19 Fitting and installation Inserting the oven WARNING Risk of electric shock! Incorrect installation/dismantling can cause electric shock. Before installing/dismantling ■ appliance, check that the socket to 3. Once the oven is correctly positioned, open the oven door and screw into the which the appliance is connected is unit using the fitting screws supplied. -
Page 44: Troubleshooting Table
Page GB-20 Troubleshooting table Troubleshooting table Problem Possible solutions/tips Temperature indicator The set oven temperature has been reached. The temperature in- light disappears. dicator light switches on again automatically when the temperature drops. Temperature indicator First check if the oven still works. If the temperature indicator light light does not light up. -
Page 45: Our Service Centre
Our Service Centre In order for us to help you quickly, please tell us: Name of appliance Model Article number Built-in oven 65M40M1-E11314A 219851 Advice, order and complaint Repairs and spare parts Please contact your mail order company’s customer service centre if Customers in Germany –... -
Page 46: Environmental Protection
Page GB-22 Environmental protection Environmental protection Disposing of old electrical Tips for saving energy devices in an environmentally- – Preheat the oven only if it is called for in the recipe or stipulated in the cooking tables friendly manner provided. Electrical appliances contain harm- –... -
Page 47: Technical Specifications
Page GB-23 Technical specifications Technical specifications Datasheet for electric ovens pursuant to (EU) Regulation No. 65/2014 and Regulation (EU) No. 66/2014 Brand Type/description Built-in oven 65M40M1-E11314A Article number 219851 Energy efficiency index EEI 106.9 cavity Energy efficiency class of the oven... - Page 49 65M40M1-E11314A User manual Built-in oven Manual/version: 93895 GB 20180828 Article no.: 219851 Reproduction, even of excerpts, is not permitted!
- Page 50 Page GB-2 Table of contents Table of contents Delivery ......GB-3 Environmental protection ... . .GB-22 Packaging tips .
-
Page 51: Delivery
Page GB-3 Delivery Delivery Package contents 1× Built-in oven with 1× Oven ① 1× Oven rack ② ① 1× Baking tray ③ 1× Dripping pan ④ Installation materials 2× Mounting screws ⑤ Accessories: 1× User manual 1× “Baking, roasting and cooking” brochure ②... -
Page 52: Controls And Appliance Parts
Page GB-4 Controls and appliance parts Controls and appliance parts Control panel Function switch Timer Temperature controller Temperature indicator light (red) Lighting Top and bottom heat Bottom heat Top heat Grill Intensive grill Oven Extraction hood (ventilation) Baking tray guides... -
Page 53: Explanation Of Terms
Page GB-5 Safety Safety Intended use Explanation of terms The oven is designed for cooking, roast- The following symbols can be found in ing, baking, grilling and keeping food this user manual. warm. The oven should not be used to WARNING defrost raw meat or fi... - Page 54 Page GB-6 Safety Take care to prevent the risk of trip- ■ WARNING ping when laying the mains cord. Risks in handling household Keep the mains plug and cord away ■ electrical appliances from naked fl ames and hot surfaces. Do not kink or pinch the mains cord Risk of electric shock! ■...
- Page 55 Page GB-7 Safety Risks when handling the CAUTION appliance Risks for certain groups of people Fire hazard! Danger to children and persons with Only ever operate the appliance with ■ reduced physical, sensory or mental the oven door closed. abilities (e.g. people with disabilities Do not cover cakes or roasts being ■...
- Page 56 Page GB-8 Safety Once the fi re has been extinguished, Health hazard! ■ have the appliance checked by our Do not defrost meat and fi sh in the ■ service team (see „Our Service Cen- appliance. Take the frozen food out tre“...
-
Page 57: Operation
Page GB-9 Operation Operation The right oven cookware NOTICE – Pots with heat-resistant handles can be Pent-up heat can damage the oven’s recognised by the label indicating ‘heat re- enamel. sistant up to 280°C’. Do not place baking trays or alumini- ■... -
Page 58: Function Switch
Page GB-10 Operation Function switch CAUTION! Risk of burns! Elements, sides, baking trays, etc. get very hot during operation. Accessible parts may become hot ■ during use. Keep small children away. Avoid direct contact. ■ – Use the function switch (1) to select the Only touch the oven door by the han- ■... -
Page 59: Switching On The Oven
Page GB-11 Operation Switching on the oven Switching off the oven The oven will only start working when 1. Turn the temperature controller (3) an- the timer (2) is set to a certain time or ti-clockwise to zero. to the operating symbol 2. -
Page 60: Test Report' Table
Page GB-12 ‘Test report’ table ‘Test report’ table These dishes were prepared in accordance with DIN 44547 and EN 60350 standards. Shelf level Temperature Cooking duration Dish Heating method (see below) in °C in min. Shortbread biscuits Top/bottom heat 150–170 20–30 Water sponge cake Top/bottom heat... -
Page 61: Cleaning The Front Of The Housing
Page GB-13 Cleaning Cleaning Cleaning the cooking CAUTION! compartment Risk of burns! – Only switch on the oven light for cleaning. Allow the oven to cool completely be- ■ – Clean the cooking compartment and bak- fore cleaning. ing trays after every use, and rinse with Never pour water directly onto the ■... -
Page 62: Cleaning The Oven Door
Page GB-14 Cleaning Cleaning the baking tray Inserting the baking tray guides guides 1. First insert the baking tray guide (6) using the curved brackets into the holes in the wall (c) and fold it down against the wall NOTICE (b). - Page 63 Page GB-15 Cleaning Taking the oven door off its hinges Cleaning the glass panes The oven door can be removed from its The oven door contains two glass panes that hinges to enable easy cleaning of all areas should occasionally be cleaned on both sides. of the oven: 1.
-
Page 64: Replacing Oven Lightbulbs
Page GB-16 Cleaning Replacing oven lightbulbs 1. Switch off the circuit breakers or unscrew fuses. For oven lighting, you need a heat-resistant 2. Place a soft cloth in the cooled cooking oven lightbulb: 250 V~, 25 W, G9, T 300 °C. compartment in the event that the glass cover falls or the bulb falls off. -
Page 65: Fitting And Installation
Page GB-17 Fitting and installation Fitting and installation Installing the oven WARNING The oven is designed for installation in Risk of injury! standard kitchen units. It can be installed at The oven is heavy and bulky. Get an- ■ eye-level and underneath the worktop. other person to help with moving and installation. -
Page 66: Connecting The Oven
Page GB-18 Fitting and installation – Your built-in furniture may need to be mod- Installation in an upright cabinet ified. If you do not have the manual skills to do this, you should hire a professional. – Veneers or plastic coverings on the built- in furniture require heat-resistant adhesive (100 °C). -
Page 67: Inserting The Oven
Page GB-19 Fitting and installation Inserting the oven WARNING Risk of electric shock! Incorrect installation/dismantling can cause electric shock. Before installing/dismantling ■ appliance, check that the socket to 3. Once the oven is correctly positioned, open the oven door and screw into the which the appliance is connected is unit using the fitting screws supplied. -
Page 68: Troubleshooting Table
Page GB-20 Troubleshooting table Troubleshooting table Problem Possible solutions/tips Temperature indicator The set oven temperature has been reached. The temperature in- light disappears. dicator light switches on again automatically when the temperature drops. Temperature indicator First check if the oven still works. If the temperature indicator light light does not light up. -
Page 69: Our Service Centre
Our Service Centre In order for us to help you quickly, please tell us: Name of appliance Model Article number Built-in oven 65M40M1-E11314A 219851 Advice, order and complaint Repairs and spare parts Please contact your mail order company’s customer service centre if Customers in Germany –... -
Page 70: Environmental Protection
Page GB-22 Environmental protection Environmental protection Disposing of old electrical Tips for saving energy devices in an environmentally- – Preheat the oven only if it is called for in the recipe or stipulated in the cooking tables friendly manner provided. Electrical appliances contain harm- –... -
Page 71: Technical Specifications
Page GB-23 Technical specifications Technical specifications Datasheet for electric ovens pursuant to (EU) Regulation No. 65/2014 and Regulation (EU) No. 66/2014 Brand Type/description Built-in oven 65M40M1-E11314A Article number 219851 Energy efficiency index EEI 106.9 cavity Energy efficiency class of the oven...
Need help?
Do you have a question about the 65M40M1-E11314A and is the answer not in the manual?
Questions and answers