ELECRAFT K3 Upgrade Instructions
Af stage line out and speaker amplifier
Hide thumbs
Also See for K3:
- Assembly manual (84 pages) ,
- Owner's manual (82 pages) ,
- Installation and operation manual (55 pages)
Advertisement
Quick Links
Introduction
While the K3's speaker and line outputs meet the original K3 specifications, we've found that further improvement in
performance is possible with minor changes. Both harmonic and intermodulation products can be reduced by 10 to 30 dB at
both outputs. These changes are already being incorporated into new K3s.
The K3AFUPKT modification kit contains the parts to make both speaker amplifier and line audio output modifications, but
you can choose to do either or both, as they are independent:
The line audio output modification is on page 8.
The speaker amplifier modification is below.
Tools Required
You will need a DMM for making resistance checks, No. 1 Phillips screwdriver, diagonal cutters, long nose pliers and a
temperature controlled ESD-safe soldering iron with rosin core small diameter solder. A grounded wrist strap and ESD
dissipating mat are recommended whenever you work inside your K3.
Observe ESD precautions when working inside your K3. Wear an ESD wrist strap or touch an unpainted,
metal ground frequently while working.
Speaker Amplifier Modification
This mod changes RFC 47, 100 µH radio frequency choke that supplies power to the K3 audio amplifier. The
original choke has a resistance of about 1.5 ohms. This resistance is high enough to cause some clipping of the audio
signal at moderate volume settings, resulting in distortion products about 40 dB down. Replacing this choke with a
physically larger unit with a resistance of about 0.2 ohms results in a 20 to 30 dB reduction in most distortion
products.
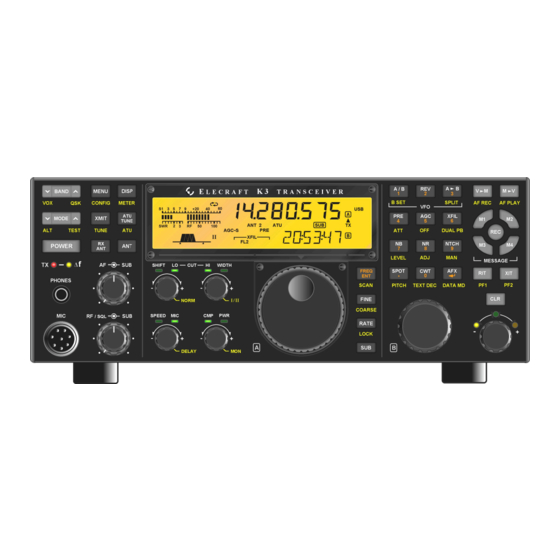
RFC47 is located on the main K3 main RF board on the right side (viewed from the front) near the front panel
shield. (See Figure 9). The replacement RFC is Elecraft part number E690017 shown in Figure 1 and Figure 10.
Choose Which Procedure You Want to Perform
Two procedures are provided for replacing the RFC. Do only one of them. Choose the procedure that best fits your
skills:
1. First is a short procedure that simply disconnects the RFC by cutting a pc board trace and adds the new
RFC across the open circuit. This is done entirely from the bottom of the K3. You need only remove the
forward part of the bottom cover.
2. The second, longer procedure avoids cutting a pc board trace by removing the original RFC. You'll need to
remove and replace the KRX3 RF module (if installed) and the right side panel to gain access to the
original RFC. A complete step-by-step procedure to do this is provided.
Some soldering is required but no work with SMDs is required by either procedure. In either procedure the new
RFC is mounted on the bottom of the RF board.
Elecraft K3 AF Stage Upgrade Instructions
(LINE OUT and Speaker Amplifier)
Revision B, November 20, 2008
Copyright © 2008, Elecraft, Inc. All Rights Reserved
Elecraft
•
www.elecraft.com
•
831-662-8345
Advertisement

Related Manuals for ELECRAFT K3


Summary of Contents for ELECRAFT K3
-
Page 1: Tools Required
RFC47 is located on the main K3 main RF board on the right side (viewed from the front) near the front panel shield. (See Figure 9). The replacement RFC is Elecraft part number E690017 shown in Figure 1 and Figure 10. - Page 2 K3. That completes the installation of the new RFC using the short procedure. Figure 1. Short Procedure – Installing new RFC Without Removing the Original RFC. Elecraft K3 Line Output and Speaker Output Upgrade Instructions Page 2 of 11...
- Page 3 Figure 2. Removing the Top Cover. Removing the KRX3 Module If you do not have the KRX3 module installed in your K3, skip this section and go directly to Removing the Right Side Panel on page 4. Remove the chassis stiffener bar that runs across the top of the K3 chassis and is attached to the side panels. If the KPA3 option is installed, the stiffener is also attached to the shield with two screws.
- Page 4 As you lift the KRX3 module, it will unplug from two small interface circuit boards. One is at the front and the other is at the rear. These small boards may come out with the module or they may remain attached to the K3 main RF board.
- Page 5 2D fastener to the rear panel near the SO239 antenna connector shown in Figure 6. Do not lose the lock washer inside the K3. It is easier to keep the hardware from falling inside if you set the K3 on its side feet and remove the screw and lock washer holding the KANT3 or KAT3 board first, then set it on its bottom feet and remove the flat head screw from the 2D fastener.
- Page 6 If you did not clear the solder pads, trim the leads as needed to reach the pads and solder them directly on top of the existing leads still in the pads. Elecraft K3 Line Output and Speaker Output Upgrade Instructions Page 6 of 11...
- Page 7 REPLACE ALL THE SCREWS! The structural and electrical integrity of the K3 requires that all the screws holding the components, including the enclosure panels, be replaced and secure. Position the bottom cover on the K3 and ensure that it is not pressing against the new RFC. Replace the bottom cover screws (see Figure 8).
- Page 8 Replace the top cover, placing the rear tab under the top edge of the rear cover and routing the speaker cable under the stiffener bar. Plug the speaker wire into the KIO3 board at the left rear of the K3 as shown in Figure 11.
- Page 9 The SMDs are best mounted on top of the existing resistors as shown. You may remove the lower standoff and the KIO3 Audio I/O module from the main KIO3 board to make working on it easier, if desired. Elecraft K3 Line Output and Speaker Output Upgrade Instructions Page 9 of 11...
- Page 10 If you removed the lower standoff earlier to work in the KIO3 board, replace it using the 1/4” 4-40 pan head screw and inside tooth lock washer. Elecraft K3 Line Output and Speaker Output Upgrade Instructions Page 10 of 11...
- Page 11 K1. Replace the KIO3 main board by reversing the procedure shown in Figure 13: 1. Install the KIO3 main board in the K3. Be sure the Audio I/O module connectors line up with the openings in the rear panel.
Need help?
Do you have a question about the K3 and is the answer not in the manual?
Questions and answers