Table of Contents
Advertisement
Advertisement
Table of Contents

Related Manuals for Flex innovations Mamba 60E+ Super PNP


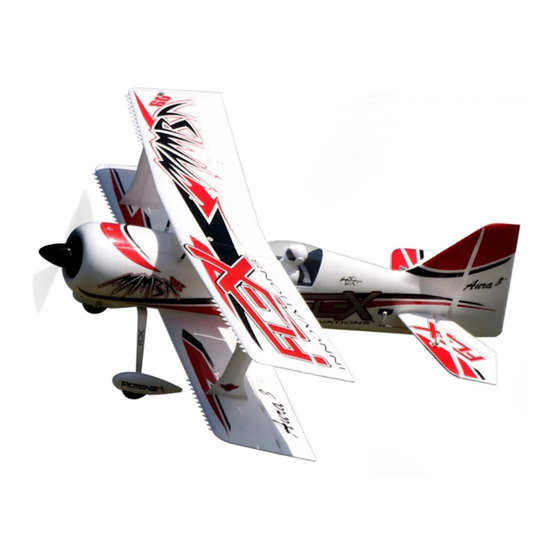
Summary of Contents for Flex innovations Mamba 60E+ Super PNP
- Page 2 STOP BEFORE CONTINUING WITH THIS INSTRUCTION MANUAL OR ASSEMBLY OF YOUR AIRCRAFT, PLEASE VISIT OUR WIKI PAGE SUPPORT SITE FOR THE LASTEST PRODUCT UPDATES, FEATURE CHANGES, MANUAL ADDENDUMS, AND FIRMWARE CHANGES FOR BOTH YOUR AIRCRAFT AND THE INSTALLED AURA 8 ADVANCED FLIGHT CONTROL SYSTEM. wiki.flexinnovations.com/wiki/MAMBA60 wiki.flexinnovations.com/wiki/Aura...
-
Page 3: Table Of Contents
TABLE OF CONTENTS Introduction ..................2 Rudder and Elevator Linkage Installation ......13,14 Box Contents ..................2 Horizontal Stabilizer Installation..........15 Main Wing Installation.............16,17,18 Replacement Parts Listing............3 Optional Completion Items............3 Completion Items ................3 Control Direction Test ..............21 Battery Charging Guidelines ............3 Flight Contol Sensing Direction Test ........22 Pre-Flight Checks................23 Important Information Regarding Warranty...... -
Page 4: Replacement Parts Listing
FPM3970A Mamba 60E+ Super PNP Red Scheme (FPMP1606E) FPM3970B Mamba 60E+ Super PNP Yellow Scheme FPM3980A Mamba 60E+ Super PNP Night Red Scheme 3500-5200mAh 6S 22.2v 40C LiPo FPM3980B Mamba 60E+ Super PNP Night Yellow Scheme NEEDED TO (FPZB42006S40 ) -
Page 5: Important Information Regarding Warranty
All instructions, warranties and other collateral documents are subject to change at the sole This product is not intended for use by discretion of Flex Innovations LLC, Inc. For up-to-date product literature, please visit our website children under 14 years without direct adult supervision. -
Page 6: Tailwheel And Rudder Installation
RUDDER AND TAIL WHEEL INSTALLATION Required Tools and Fasteners Medium CA (or 5-15 min epoxy) #1 Phillips Screwdriver (3) M3x8 Phillips head self-tapping screw (QTY 3) (1) M3x10 Phillips head self-tapping screw (QTY 1) 1. Locate the Tail wheel, Tail wheel retaining plate, and the three M3x8 self-tapping Phillips head screws. Insert the tail wheel wire into the base of the rudder orienting the tail wheel so the wire is angled towards the rear of the airframe as it moves away from the fuselage. -
Page 7: Main Landing Gear Installation
MAIN LANDING GEAR INSTALLATION Required Tools, Parts, and Fasteners (2) M4 Lock Nuts #1 Phillips Screwdriver (2) M4 washers 7mm open end wrench (2) (QTY 2) (2) M3 X 10 Machine Screw (QTY 2) (4) M3 X 14 Machine Screw (QTY 2) (QTY 4) Blue Thread Lock... -
Page 8: Main Landing Gear Installation
MAIN LANDING GEAR INSTALLATION (CONTINUED) With the fuselage inverted on your work space, place the landing gear on the landing gear mount. Be sure to orient the landing so that it sweeps forward towards the front of the airframe NOSE TAIL Apply a small amount of Blue thread lock to all 4 M3x14 Phillips head screws. -
Page 9: Aura 8 Acfs
AURA 8 AFCS The Aura 8 Advanced Flight Control System (AFCS) installed in Works conveniently with all major radio systems your Mamba 60 is a giant leap forward in aircraft flight control system technology. Compatible with virtually every receiver on the market Accepts signals from DSM Remote Receiver(s), Spektrum today, the Aura features special configuration for DSM systems via SRXL, Futaba S.Bus, Graupner Hott (Sum D of 8), JR... -
Page 10: Transmitter Setup
WARNING DO NOT ATTEMPT RADIO SETUP WITH PROPELLER INSTALLED. INADVERTENT POWER UP COULD CAUSE DEATH OR SERIOUS INJURY. TRANSMITTER SETUP The Aura 8 AFCS is designed to work seamlessly with all major transmitter and receiver brands. When programming your transmitter, start with a freshly reset new model memory in your transmitter. -
Page 11: Connecting Batttery/Arming Esc
CONNECTING A BATTERY/ARMING THE ESC Observe the following procedures to safely power up your model after it has been bound. Ensure propeller is removed unless sequence is followed to power up befo Lower the throttle stick and trim to their lowest setting and turn on the transmitter. -
Page 12: Receiver Installation/Servo Connections
RECEIVER INSTALLATION/SERVO CONNECTIONS Aura will auto-detect modern digital receiver connection(s). Using DEFAULT AURA CONNECTIONS a modern digital receiver connection gives the Aura access to Throttle (ESC/BEC) precise data of each channel for additional gyro-enabled outputs, L. Aileron (TOP) L. Aileron (BOTTOM) connect a modern digital receiver connection, follow the steps on R. - Page 13 RECEIVER INSTALLATION/SERVO CONNECTIONS (CONTINUED) Spektrum Remote Receivers Please note, for optimum connection reliability and performance using Spektrum, the Flex Team HIGHLY recommends the use of a traditional receiver with SRXL (like the AR8010T or AR9030T). Remote receivers may still be used at your own risk, however. Connect (2) matching Spektrum remote receivers to Mini Port 'A' and Mini Port 'B' at the top of the Aura case.
-
Page 14: Rudder And Elevator Linkage Installation
RUDDER AND ELEVATOR LINKAGE INSTALLATION Required Tools and Fasteners Elevator and Rudder Pushrod Assemblies #1 Phillips Screwdriver M2x10 Phillips Head Machine Screws #0 Phillips Screwdriver M2 Flat Washer Needle-Nosed Pliers (or Hemostats) (QTY 2) M2 Lock Nut Blue Thread Lock (QTY 2) (QTY 2) M3x6 Phillips Head Machine Screws... - Page 15 RUDDER AND ELEVATOR LINKAGE INSTALLATION (CONTINUED) Use a #0 Phillips screwdriver, M2x10 machine screw, M2 washer and M2 lock nut to secure the linkage to the control horn. Use the chart Required Fasteners M2x10 Phillips Head Machine Screw M2 Flat Washer Servo Arm or Control Horn M2 Lock Nut SERVO ARMS...
-
Page 16: Horizontal Stabilizer Installation
HORIZONTAL STABILIZER INSTALLATION Required Tools and Fasteners (4) Clear Mounting Tape Carbon Stab Tube 1. Locate both horizontal stabilizer and elevator assemblies, stabilizer tube, and the provided clear tape ( to secure stabalizers to fuse). 2. Slide the horizontal stabilizer tube into the fuselage (approximately centered). 3. -
Page 17: Main Wing Installation
MAIN WING INSTALLATION Required Tools and Fasteners M2.5x8 Phillips Head Self-Tapping Screws #1 Phillips Screwdriver Medium (150) Grit Sandpaper Low Tack Tape 15 Minute Epoxy (QTY 8) Isopropyl Alcohol Locate the fuselage, top wing center section, the (4) carbon tubes (cabane struts), and the (8) M2.5x8 Phillips head self-tappi The long carbon tubes are the rear cabane struts and the short carbon tubes are the front cabane struts. - Page 18 MAIN WING INSTALLATION (CONTINUED) Required Tools and Fasteners #1 Phillips Screwdriver M3x25 Phillips Head Machine Screw M3x20 Phillips Head Machine Screw (lower wing) (4) Interplane strut retaining pins (QTY 2) (QTY 2) Locate the lower wing panels, the short wing tube, and the M3x20 Phillips head machine screws. Slide the wing tube through the fuselage then slide one of the wing panels onto the wing tube and connect the servo leads.
- Page 19 MAIN WING INSTALLATION (CONTINUED)
- Page 20 PROPELLER, SPINNER, AND BAFFLE INSTALLATION Required Tools and Fasteners M3x10 Socket Head Machine Screw Adjustable Wrench M3x10 Phillips Head Machine Screw #1 Phillips Screwdriver Prop Adapter 15 Minute Epoxy Prop Nut Blue Thread Lock (QTY 4) (QTY 1) Place propeller adapter on front of motor. Apply a a small amount of Blue thread lock on each of the four M3x10 socket head screws. Install them through the prop adapter and to the motor.
- Page 21 BATTERY INSTALLATION WARNING CAUTION When making adjustments to linkages, transmitter Always keep limbs clear from the propeller when the battery is connected. After the ESC arms, the propeller the propeller to guard against accidental spool up. will rotate when the throttle is moved. Unlike an internal combustion engine, electric motors apply more voltage to counteract resistance, therefore any object that is entangled in the propeller will be severely damaged...
-
Page 22: Control Direction Test
CONTROL DIRECTION TEST Refer to the chart below to determine the proper control surface directions. If controls are reversed, DO NOT REVERSE CONTROLS IN TRANSMITTER OR IN THE AURA CONFIG TOOL. Email us at Flight Controller Sensor Direction Test MUST BOTH BE PASSED! IF ONE DOES NOT PASS, DO NOT FLY! movement of these control surfaces with rudder input is intentional and completely NORMAL. -
Page 23: Flight Contol Sensing Direction Test
FLIGHT CONTROL SENSING DIRECTION TEST Perform a test of the gyro system to verify the corrections made for a given movement are correct. If any of the tests do not result in the correct reaction from the airplane's gyro system, in the drawings below for clarity. -
Page 24: Pre-Flight Checks
PRE-FLIGHT CHECKS and stabilize the wing with your other hand. Give the control surface a good pull away from the wing. The control surface should not come unhinged from the wing. Be sure to avoid over-stressing the part as an aggressive pull may cause the control surface to come un- hinged even though it was hinged properly. -
Page 25: Flying Your Mamba 60
FLYING YOUR MAMBA 60 Selecting a Flying Site Trimming require a lot more room than other R/C products, therefore, a dedicated to trimming and setup. Fly the airplane at 2/3 power in Mode 2 Land, adjust linkages and ensure that there are no houses, playgrounds, or other buildings that may be damaged if the airplane were to crash. -
Page 26: Advanced Mamba 60 Setup
ADVANCED MAMBA 60 AURA CONFIGURATION ed WITHOUT THE USE OF A WINDOWS BASED PC OR TABLET High Speed, and Slow Speed 3D. Flight Mode 1- Sport Flight Mode 2 - High Speed 3D Flight Mode 3 - Slow Speed 3D For sport or precision aerobatics. -
Page 27: Aircraft Troubleshooting Guide
AIRCRAFT TROUBLESHOOTING GUIDE Should you encounter any abnormal situations with your Mamba 60E+, refer to the matrix below to determine the probable cause and a recommended solution for the action. If the required solution does not rectify the problem, please contact product support for further assistance. NOTICE DISCREPANCY PROBABLE CAUSE... -
Page 28: Airframe Repairs
AIRFRAME REPAIRS The Mamba 60E+ is molded from durable EPO foam and is repairable with most adhesives. Similar to building and repairing wood or composite airplanes, the correct glue for a given application is critical to the repair holding and not breaking again. For major repairs, such as a broken fuselage, epoxy is preferred because it allows time to correct any misalignment. -
Page 29: Limited Warranty
Warranty Coverage Visit for customer support in your region. Flex Innovations, LLC. and its authorized resellers (“Flex”) warrant to the original purchaser that the product purchased (the “Product”) it Inspection or Services will be free from defects in materials and workmanship at the date of purchase. -
Page 30: Ama Safty Code
Academy of Model Aeronautics National Model Aircraft Safety Code GENERAL: A model aircraft is a non-human-carrying aircraft capable 4. RC model aircraft must use the radio-control frequencies currently allowed by the Federal Communications Commission (FCC). Only code and is intended exclusively for sport, recreation, education and/or individuals properly licensed by the FCC are authorized to operate equipment on Amateur Band frequencies. - Page 31 © 2019 Flex Innovations, Inc. Potenza™ is a trademark or registered trademark of Flex Innovations, Inc. DSM®, DSM2™, and DSMX™ are trademarks of Horizon Hobby, Inc. Futaba is a registered trademark of Futaba Denshi Kogyo Kabushiki Kaisha Corporation of Japan.
Need help?
Do you have a question about the Mamba 60E+ Super PNP and is the answer not in the manual?
Questions and answers