Table of Contents
Advertisement
Quick Links
Advertisement
Table of Contents

Related Manuals for Flex innovations Cessna 170 60E G2


Summary of Contents for Flex innovations Cessna 170 60E G2
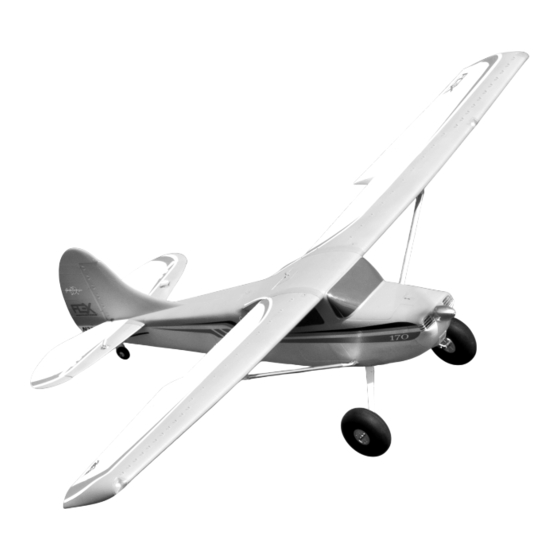
- Page 1 DESIGNED BY: w w w.f lexi nn ovations. com...
- Page 2 STOP BEFORE CONTINUING WITH THIS INSTRUCTION MANUAL OR ASSEMBLY OF YOUR CESSNA 170 60E G2, PLEASE VISIT OUR WIKI SUPPORT SITE FOR THE LATEST PRODUCT UPDATES , FEATURE CHANGES, MANUAL ADDENDUMS AND FIRMWARE CHANGES FOR BOTH YOUR CESSNA 170 60E G2 AND THE INSTALLED AURA 8 ADVANCED FLIGHT CONTROL SYSTEM.
-
Page 3: Table Of Contents
The Cessna 170 60E G2 is the go-to, all around perfect airplane for maximum fun and minimal hassle. From sport flying, touch and goes, to 3D aerobatics and float flying, the Cessna 170 60E G2 is sure to be your favorite daily flier that can do it all! -
Page 4: Specifications
Cessna 170 60E G2: Spinner FPM317013 Cessna 170 60E G2: Main Scale Wheel Set The assembly of the Cessna 170 60E G2 can be accomplished in less than one FPZDS34 Potenza DS34 Digital Metal Gear Mini Servo hour. Prior to assembling the airplane, it is advisable to charge your battery so... -
Page 5: Special Language Definitions
This model must be assembled according to these instructions. Do not alter or modify the model outside of these instructions provided by Flex Innovations, LLC, as doing so may render it unsafe and/or un-flyable. It is your responsibility to ensure the airworthiness of the model. -
Page 6: Rudder And Tailwheel Installation
RUDDER AND TAIL WHEEL INSTALLATION Required Tools and Fasteners: Medium CA or 15min Epoxy (3) M3x10 Phillips Head Self-Tapping Screw #2 Phillips Screw Driver (1) M2 x 10 Phillips Head Machine Screw #1 Phillips Screwdriver (2) M2 Flat Washer Needle Nose Pliers (1) M2 Lock Nut 1. -
Page 7: Main Landing Gear Installation
MAIN LANDING GEAR INSTALLATION Required Tools and Fasteners: #2 Phillips Screw Driver (4) M3x10 Phillips Head Self-Tapping Screw 1.5mm Hex Driver (2) M5 Lock Collars, with Set Screws (2) M5 Spacers 1. Slide an M5 spacer over the landing gear wire. 2. -
Page 8: Horizontal Stabilizer Installation
HORIZONTAL STABILIZER INSTALLATION Required Tools and Fasteners: Clear Tape (4 Strips) (1) M2x10 Phillips Head Machine Screw #1 Phillips Screwdriver (2) M2 Flat Washer Needle Nose Pliers (1) M2 Lock Nut 1. Insert the horizontal stabilizer tube into one of the horizontal stabilizer halves. 2. -
Page 9: Main Wing Installation
MAIN WING INSTALLATION Required Tools and Fasteners: #2 Phillips Screw Driver (4) M3x25 Phillips Head Machine Screws (4) 6mm Strut Retaining Pins (4) Strut Retaining Pin Keepers 1. Insert the main wing tube into one of the main wing halves. 2. -
Page 10: Main Wing Installation (Continued)
MAIN WING INSTALLATION (CONTINUED) 5. Note which wing strut goes to each wing panel, and which end goes to the wing and to the fuselage The struts are labeled R and L at one end of the strut. Also note that there are two different strut retaining pins; one that is shorter (A) and one that is longer with a "D" shaped head (B). Pin A goes to the fuselage side, and Pin B goes to the wing side of the strut. -
Page 11: Night Cessna 170 60E G2 Led Connections
NIGHT CESSNA 170 60E G2 LED CONNECTIONS If you have purchased the Night version of the Cessna 170 60E G2, this page will cover all LED light connections. If you did not purchase the night version, skip ahead to the next page. -
Page 12: Linkage Setup
Aura. Changes on gain value can only be made through the Aura. The Aura 8 AFCS Profile for the Cessna 170 60E G2 can be changed from the Stock Cessna 170 60E G2 Profile to the Advanced Cessna 170 60E G2 Profile without the need of a computer. -
Page 13: Transmitter Setup
Choosing a Receiver Aura will auto-detect modern serial receiver connections. For use in the Cessna 170 60E G2, only a serial receiver connection or a Spektrum Remote Receiver can be used. Below are a few examples of serial receivers that can be used with the Aura 8. This is not a complete list of compatible receivers, rather a short list to assist in your receiver selection. -
Page 14: Servo Connections
Aura. The cable is included with the receiver when it is purchased directly from Flex Innovations. You can also purchase the cable itself at flexinnovations.com (FPZA1039). Note: If you are using Futaba S.Bus, be sure to use the... -
Page 15: Connecting Your Receiver To Aura (Continued)
1. Power on your transmitter, DISABLE any throttle hold or throttle kill switches, completely lower the throttle trim and set the stick to full throttle. 2. Connect the flight pack to your Cessna 170 60E G2. 3. Listen for the tones coming from the ESC through the motor, after about 2 seconds you should hear two tones. -
Page 16: Control Direction Test
CONTROL DIRECTION TEST Refer to the chart below to determine the proper control surface responses to transmitter control inputs. If controls are reversed, DO NOT REVERSE CONTROLS IN YOUR TRANSMITTER OR IN THE AURA CONFIG TOOL. Email us at support@flexinnovations.com for corrective action. Note that BOTH the Transmitter Control Direction Test AND the Flight Controller Sensor Direction Test MUST BE PASSED! IF EITHER ONE DOES NOT PASS, DO NOT FLY! NOTE: There is pre-configured rudder to aileron and rudder to elevator mixing programmed into the Aura. -
Page 17: Aura Sensor Direction Test
AURA SENSOR DIRECTION TEST Perform a test of the gyro system to verify the corrections made for a given movement are correct. If any of the tests do not result in the correct reaction from the airplane's gyro system, DO NOT FLY THE AIRPLANE, and contact us via email at support@flexinnovations.com The flight control system activates with RF broadcast. -
Page 18: Prop Adapter, Propeller And Spinner Installation
PROP ADAPTER, PROPELLER AND SPINNER INSTALLATION Required Tools and Fasteners: 2.5mm Hex Driver (3) M3x9 Hex Head Machine Screws #1 Phillips Screwdriver (1) M3x30 Phillips Head Machine Screw Adjustable Wrench (1) Prop Washer Blue Thread Lock (1) Propeller Nut Note: Do not complete transmitter, receiver and/or Aura setup with the propeller installed. 1. -
Page 19: Battery Installation
CG location noted. The acceptable CG range for the Cessna 170 60E G2 is 83mm to 97mm (3 1/4 inches to 3 3/4 inches). Designer and multi-time world... -
Page 20: Pre-Flight Checklist
PRE-FLIGHT CHECKLIST To help ensure a successful first flight, as well as many flights after, perform a few simple pre-flight checks to be sure the aircraft is ready to fly: Verify the elevators and rudder are properly hinged and in good working order. Pinch a control surface between your thumb and forefinger and grasp the stabilizers with your other hand. -
Page 21: Optional Advanced Cessna 170 60E G2 Aura Configuration
The Advanced Aura Profile for the Cessna 170 60E G2 offers different Flight Modes that are more suited for intermediate to advanced pilots. In order to use the Advanced Cessna 170 60E G2 Profile, you will need a minimum 7 channel transmitter. If you wish to use crow, you will need a minimum 8 channel transmitter. -
Page 22: Flying Your Cessna 170 60E G2
CHANGE FLIGHT MODES. throttle to full while maintaining directional control with the rudder Power off the Cessna 170 60E G2. Insert a bind plug into Aura and slight back pressure on the elevator. The airplane should lift off Port S3 (you will need to remove the servo lead that is currently smoothly before the throttle is fully open. -
Page 23: Airframe Repairs
AIRFRAME REPAIRS The Cessna 170 60E G2 is molded from durable EPO foam and is repairable with most adhesives. Similar to building and repairing wood or composite airplanes, the correct glue for a given application is critical to the repair holding and not breaking again. For major repairs, such as a broken fuselage, epoxy is preferred because it allows time to correct any misalignment. -
Page 24: Aircraft Troubleshooting Guide
AIRCRAFT TROUBLESHOOTING GUIDE Should you encounter any abnormal situations with your Cessna 170 60E G2, refer to the table below to determine the probable cause and a recommended solution for the issue. If the required solution does not rectify the problem, please contact product support at support@flexinnovations.com for further assistance. -
Page 25: Limited Warranty
LIMITED WARRANTY Warranty Coverage Questions & Assistance Flex Innovations LLC and its authorized resellers (“Flex”) warrant to Contact Us By: the original purchaser that this product (the “Product”) will be free E-Mail – support@flexinnovations.com from defects in materials and workmanship at the date of purchase. - Page 26 Building and Flying Notes...
- Page 27 Building and Flying Notes...
- Page 28 Potenza™ is a trademarks of Flex Innovations LLC Cessna and Cessna 170 are trademarks or registered trademarks of Textron Aviation, Inc. and are used under license by Flex Innovations, Inc DSM®, DSM2™, and DSMX™ are trademarks of Horizon Hobby, Inc.
Need help?
Do you have a question about the Cessna 170 60E G2 and is the answer not in the manual?
Questions and answers