Table of Contents
Advertisement
Advertisement
Table of Contents

Related Manuals for Flex innovations Pirana


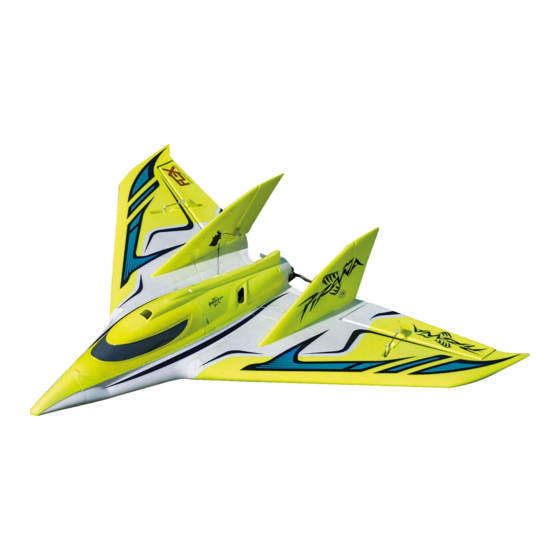
Summary of Contents for Flex innovations Pirana
- Page 1 DESIGNED BY: w w w.f lexin n ovat i ons. com...
- Page 2 BEFORE CONTINUING WITH THIS INSTRUCTION MANUAL OR ASSEMBLY OF YOUR AIRCRAFT, PLEASE VISIT OUR WIKI PAGE SUPPORT SITE FOR THE LASTEST PRODUCT UPDATES, FEATURE CHANGES, MANUAL ADDENDUMS, AND FIRMWARE CHANGES FOR BOTH YOUR AIRCRAFT AND THE INSTALLED FT AURA 5 LITE ADVANCED FLIGHT CONTROL SYSTEM. wiki.flexinnovations.com/wiki/Pirana wiki.flexinnovations.com/wiki/Aura...
-
Page 3: Table Of Contents
TABLE OF CONTENTS Speci cations..................3 FPV Video Gear Installation (Optional)......14, 15 Replacement Parts Listing............3 Battery Installation..............16 Optional Completion Items............3 Connecting a Battery to the LED Controller......17 Completion Items ................3 Propeller Installation..............18 Battery Charging Guidelines ............3 Center of Gravity Veri cation .............18 Special Language De nitions............4 Control Direction Test..............19... -
Page 4: Speci Cations
BATTERY AND CHARGER MANUFACTURER. FAILURE TO FPZM1020L1 Potenza 1020L Prop Nut and Washer COMPLY CAN RESULT IN FIRE. FPMZ1020L2 Potenza 1020L Aluminum Motor Mount ZTW50A Pirana ZTW 50A Piraña LPO6565 APC 6.5x6.5 Prop The assembly of the Piraña can be accomplished in less than FPZA1016 Potenza Advanced R/C LED Controller (6s) one hour. -
Page 5: Special Language De Nitions
All instructions, warranties and other collateral documents are subject to change at the sole This product is not intended for use by discretion of Flex Innovations LLC, Inc. For up-to-date product literature, please visit our website children under 14 years without direct Piraña and LT Aura 5 Lite product pages. -
Page 6: Ft Aura 5 Lite
FT AURA 5 LITE AFCS The FT Aura 5 Lite AFCS (Advanced Flight Control System) Description of Pre-Loaded Aura Light Modes comes programmed and installed in your Piraña, making setup a breeze. This highly-refined 3-axis gyro makes the Mode 1 (Sport, Gyro O ) - Gyro gain is set to o . aircraft fly like it is a larger aircraft and in less wind. -
Page 7: Transmitter Setup
TRANSMITTER SETUP WARNING DO NOT ATTEMPT RADIO SETUP WITH PROPELLER INSTALLED. INAVERTENT POWER UP COULD CAUSE DEATH OR SERIOUS INJURY The included FT Aura 5 Lite is designed to work seamlessly with all popular transmitter and receiver brands, however, transmitter setup is significantly different than when setting up a model without Aura. When programming your transmitter, start with a freshly reset, new model memory in your transmitter. -
Page 8: Receiver Installation/Servo Connections
RECEIVER INSTALLATION/SERVO CONNECTIONS Choosing a Receiver Aura will auto-detect modern serial receiver connections. For use in the Piraña, only a serial receiver connection or a Spektrum Mini Port B Remote Receiver can be used. Below are a few examples of receivers that can be used with the FT Aura 5 Lite. -
Page 9: Connecting/Binding Your Receiver To Aura
Aura. The cable is included with the receiver when it is purchased directly from Flex Innovations. You can also purchase the cable itself at flexinnovations.com (FPZA1039) Note: If you are using Futaba S.Bus, be sure to... -
Page 10: Connecting Your Receiver To Aura
CONNECTING YOUR RECEIVER TO AURA (Auto-Detect) FT Aura 5 Lite Auto-Detect ESC THROTTLE CALIBRATION In order to map the full range of the ESC output to your throttle stick motion you will have to perform an ESC throttle calibration. NOTE: Execute ESC throttle calibration with the propeller removed. 1. -
Page 11: Receiver Installation (Mounting Locations)
RECEIVER INSTALLATION (MOUNTING LOCATIONS) Required Tools and Fasteners #1 Phillips Screwdriver #2 Phillips Screwdriver Lift the forward hatch off of the fuselage by lifting at the front and pulling the hatch forward away from the fuselage. Remove the (4) rear hatch screws using a #2 Phillips screwdriver, and lift the rear hatch off the fuselage. Both forward and rear plywood trays can be removed with a #1 Phillips screwdriver, offering plenty of space for mounting your receiver. -
Page 12: Wing Installation
WING INSTALLATION Required Tools and Fasteners #2 Phillips Screwdriver Front: (2) M3x15 Phillips head self-tapping screws (QTY 2) Rear: (2) M3.5x10 Phillips head self-tapping screws (QTY 2) 1. Locate both wings and wing tubes. Insert both wing tubes into the fuselage, noting that the short tube is installed at the front, and the long tube is installed at the rear. -
Page 13: Vertical Fin Installation
VERTICAL FIN INSTALLATION Required Tools and Fasteners #2 Phillips Screwdriver (4) M3x15 Phillips head self-tapping screws (QTY 4) Locate the left and right vertical fins. Insert the vertical fin into the pocket in the main wing noting that the decals face the wing tips, and the servos orient toward the middle of the aircraft. - Page 14 VERTICAL FIN INSTALLATION (CONTINUED) Push the servo wire and Remote Receiver wire (if applicable) into the slot in the wing and fuselage. Connect each wire to their corresponding ports on Aura. Remote Receiver Left Rudder - S4 Right Rudder - S5 Remote Receiver - Mini Port B Left Rudder Right Rudder...
-
Page 15: Fpv Video Gear Installation (Optional)
NOTE: The video transmitter mount is an optional accessory (FPM417010), and can be purchased at flexinnovations.com or through your local Flex Innovations dealer. Mount your video transmitter and antenna as desired. A hole is provided in the top of the fuselage for your FPV antenna. An optional video transmitter mount is available separately, and is secured to the main plywood tray using a #1 Phillips screwdriver and (2) M2 x 10 self-tapping screws that are provided with the mount. - Page 16 FPV Video Gear (continued) Due to the wide variety of video cameras available, we've provided a nose that may need to be modified slightly to fit your particular camera. An easy way to mount your video camera is to simply use a couple small dots of hot glue on the front and rear of the camera to secure it in place.
-
Page 17: Battery Installation
BATTERY INSTALLATION Install the hook side of adhesive-backed hook and loop tape to the plywood battery tray in the fuselage, and the loop side to your battery. Place the battery on the tray, and secure it in place with the provided hook and loop strap. -
Page 18: Connecting A Battery To The Led Controller
CONNECTING A BATTERY TO THE LED CONTROLLER The LEDs on your aircraft are switchable via the transmitter and are designed to be powered by 12 volts (3S Li-Po) through the 6S JST-XH balance tab on the LED controller. By default, the LED controller is left unplugged from the receiver or Aura. If the servo lead of the LED controller is not plugged into the Aura or a receiver (where it is not receiving a signal), the LEDs will default in the ON position, allowing the aircraft to be flown with the LEDs on using a basic 5-channel transmitter or serial receiver with no servo port or Satellite. -
Page 19: Propeller Installation
The CG range is from 170mm to 185mm (6-11/16-inches to 7-9/32 inches) when measured as depicted in the image above. 174mm (6-27/32-inches) is the optimum location for all types of flying. Do not fly the Pirana with a CG further aft than 170mm (6-11/16-inches), as the aircraft can become unstable. -
Page 20: Control Direction Test
CONTROL DIRECTION TEST Refer to the chart below to determine the proper control surface directions. If controls are reversed, DO NOT REVERSE CONTROLS IN TRANSMITTER OR IN THE AURA CONFIG TOOL. Email us at support@flexinnovations.com for corrective action. Note that BOTH the Transmitter Control Direction Test AND the Flight Controller Sensor Direction Test MUST BOTH BE PASSED! IF ONE DOES NOT PASS, DO NOT FLY! Transmitter Proper Control... -
Page 21: Flight Control Sensing Direction Test
FLIGHT CONTROL SENSING DIRECTION TEST Perform a test of the gyro system to verify the corrections made for a given movement are correct. If any of the tests do not result in the correct reaction from the airplane’s gyro system, DO NOT FLY THE AIRPLANE, and contact us via email at support@flexinnovations.com. -
Page 22: Pre- Ight Checklist
PRE-FLIGHT CHECKLIST and stabilize the wing with your other hand. Give the control surface a good pull away from the wing. The control surface should not come unhinged from the wing. Be sure to avoid over-stressing the part as an aggressive pull may cause the control surface to come un- hinged even though it was hinged properly. -
Page 23: Trimming
TRIMMING The first several flights of your new Piraña should be dedicated to setup and trimming. Trimming your aircraft with the Aura is different than you would typically trim the aircraft without Aura. Transmitter trim or sub-trim will cause trim shifts when different flight modes are selected. To eliminate this trim shift, the model should be mechanically trimmed, or Aura “Quick Trim”... -
Page 24: Aura Quick Change Mode
- Press and HOLD both the BIND and the TRIM buttons again to exit Quick Change Mode and Restart the Aura. Your changes have now been stored. Note: Futaba users who wish to use airbrakes must visit our Wiki site for information on how to configure airbrake setup. wiki.flexinnovations.com/wiki/Pirana... -
Page 25: Flying Your Piraña
FLYING YOUR PIRANA Selecting a Flying Site Selecting a flying site is critical to a successful flight. Airplanes require a lot more room than other R/C products, therefore, a neighborhood or parking lot is less than ideal. A large open field with short grass and generous overfly area are the best candidates. -
Page 26: Aircraft Troubleshooting Guide
AIRCRAFT TROUBLESHOOTING GUIDE Should you encounter any abnormal situations with your Piraña, refer to the matrix below to determine the probable cause and a recommended solution for the action. If the required solution does not rectify the problem, please contact product support for further assistance. DISCREPANCY PROBABLE CAUSE RECOMMENDED SOLUTION... -
Page 27: Airframe Repairs
AIRFRAME REPAIRS The Piraña is molded from durable EPO foam and is repairable with most adhesives. Similar to building and repairing wood or composite airplanes, the correct glue for a given application is critical to the repair holding and not breaking again. For major repairs, such as a broken fuselage, epoxy is preferred because it allows time to correct any misalignment. -
Page 28: Servicing The Power System
SERVICING THE POWER SYSTEM Required Tools and Fasteners: #1 Phillips Screwdriver, 13mm box wrench 1. Remove the propeller from the motor. 2. Remove the front and rear hatches 3. Remove the (4) bolts holding the motor to the rewall using a #1 Phillips screwdriver. Disconnect the motor from the ESC. 4. -
Page 29: Ama Safety Code
AMA SAFETY CODE When flying your aircraft, we recommend following the guidelines set by the Academy of Model Aeronautics (AMA). You can find their safety handbooks as well as more information on the AMA at their website, located at the address below: www.modelaircraft.org... -
Page 30: Limited Warranty
Visit for customer support in your region. Flex Innovations, LLC. and its authorized resellers (“Flex”) warrant to the original purchaser that the product purchased (the “Product”) it Inspection or Services will be free from defects in materials and workmanship at the date of purchase. - Page 31 © 2020 Flex Innovations, LLC. Potenza™ is a trademark trademark of Flex Innovations, LLC. DSM®, DSM2™, and DSMX™ are trademarks of Horizon Hobby, Inc. Futaba is a registered trademark of Futaba Denshi Kogyo Kabushiki Kaisha Corporation of Japan.
Need help?
Do you have a question about the Pirana and is the answer not in the manual?
Questions and answers