Table of Contents
Advertisement
Advertisement
Table of Contents

Related Manuals for Flex innovations Super PNP F-100D Super Sabre


Summary of Contents for Flex innovations Super PNP F-100D Super Sabre
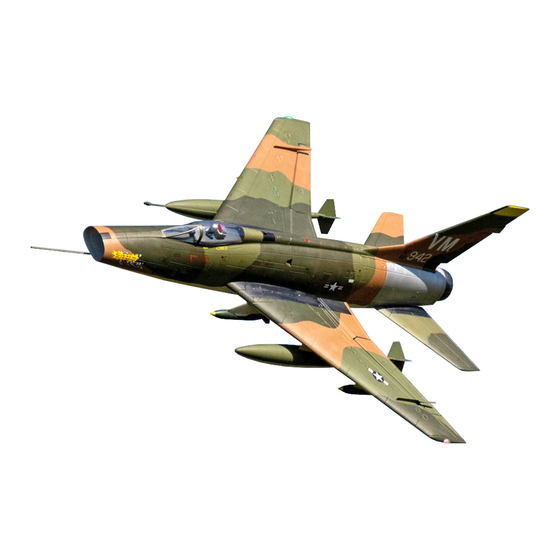
- Page 1 Super Sabre w w w.f lexi nn ovat ions.com...
- Page 2 STOP BEFORE CONTINUING WITH THIS INSTRUCTION MANUAL OR ASSEMBLY OF YOUR AIRCRAFT, PLEASE VISIT OUR WIKI PAGE SUPPORT SITE FOR THE LASTEST PRODUCT UPDATES, FEATURE CHANGES, MANUAL ADDENDUMS, AND FIRMWARE CHANGES FOR BOTH YOUR AIRCRAFT AND THE INSTALLED AURA 8 ADVANCED FLIGHT CONTROL SYSTEM. wiki.flexinnovations.com/wiki/F100D wiki.flexinnovations.com/wiki/Aura...
-
Page 3: Table Of Contents
These features combine to o er a jet that carries energy, ies big, and performs more like a large turbine jet than a typical foam EDF. Want a scale EDF like no other? The Flex Innovations F-100D is the ticket to uncompromised scale EDF performance. -
Page 4: Speci Cations
SPECIFICATIONS COMPLETION ITEMS 11 Blade 90mm Ducted Fan w/ Potenza 65DF 1600 Kv BL Motor (FPMDF90A) (FPZM1065DFC) 7lb 13oz(2930g) RTF with 6S 5200mAh V-Good 100A ESC with 8A SBEC battery installed (FPZESC6S100BEC) Potenza DS15 (7) and DS12 (2) Digital Servos (FPZDS15) (FPZDS12) Aura 8 Advanced Flight Control System 55.5 in. -
Page 5: Important Information Regarding Warranty
All instructions, warranties and other collateral documents are subject to change at the sole This product is not intended for use by discretion of Flex Innovations LLC, Inc. For up-to-date product literature, please visit our website children under 14 years without direct F-100D and Aura 8 product pages adult supervision. -
Page 6: Aura 8 Afcs
AURA 8 AFCS Works conveniently with all major radio systems The Aura 8 Advanced Flight Control System (AFCS) installed in your F-100D is a giant leap forward in aircraft flight control system Accepts signals from Spektrum SRXL, Futaba technology. Compatible with virtually every digital output capable S.Bus, Graupner Hott (Sum D of 8), JR XBus receiver on the market today, the Aura features a serial data (Mode B), Jeti (Ex Bus), Hitec S.Bus, PPM Stream... -
Page 7: Transmitter Setup
TRANSMITTER SETUP Start with a freshly reset, new model memory in your transmitter. Make ONLY the changes shown in the Transmitter Configuration Guide. The Aura 8 in your aircraft defaults to 3 flight modes that are switched via CH7/Aux2 in your transmitter. You may need to reassign CH7/ Aux2 to a 3-position switch. -
Page 8: Receiver Installation/Servo Connections
RECEIVER INSTALLATION/SERVO CONNECTIONS Aura will auto-detect modern digital receiver connection(s). Using DEFAULT AURA CONNECTIONS a modern digital receiver connection gives the Aura access to Left Aileron precise data of each channel for additional gyro-enabled outputs, Right Aileron Left Elevator Right Elevator Rudder Nose Wheel Left Flap... - Page 9 RECEIVER INSTALLATION/SERVO CONNECTIONS (CONTINUED) NOTICE Using Only Spektrum Remote Receivers (1 or 2) is not supported for the the F-100D Super Sabre. A Receiver with Modern Digital Connection AND working servo ports is the preferred receiver connection method for the F-100D Super Sabre NOTICE Due to the servo port requirements, PWM is NOT SUPPORTED for the F-100D Super Sabre.
-
Page 10: Retract And Gear Sequencer Operation
RETRACTS AND GEAR SEQUENCER OPERATION The following steps will be required EACH time the aircraft is powered for ight: 1. Ensure your radio has CH5 (Gear) assigned to a 2-position switch and is set to 125% travel. 2. Hold the F-100D Super Sabre in a manner that the gear doors and retracts are unobstructed and free to close and open. To arm the retracts, cycle your transmitter’s CH5/Gear switch from down to up, then down again waiting about 1 second in each position. -
Page 11: Elevator Installation
ELEVATOR INSTALLATION Required Tools, Parts, and Fasteners 1.5mm Hex Wrench #2 Phillips Screwdriver Blue Thread Lock 1. Locate the fuselage, elevators, 2 included wheel collars, blue thread lock, and a #2 Phillips screwdriver. 2. Secure the fuselage inverted on stand or use and soft blanket/towel to protect the top of the fuselage. 3. - Page 12 ELEVATOR INSTALLATION (continued) 5. Slide the elevator pivot tube through both sets of bearings just until the end of the tube is flush with the outside face of the bearing . While holding the elevator in one hand, carefully slide the wheel collar down into the slot until you feel it catch the end of the elevator pivot shaft.
-
Page 13: Elevator Linkage Installation
ELEVATOR LINKAGE INSTALLATION Required Tools and Fasteners #1 Phillips Screwdriver Power on the transmitter, ensure the servo arms are perpendicular to the case of the servo and pointing away from the center of the fuselage. Install the ball link to the elevator control horn using a #1 Phillips head screwdriver while holding the nut with your finger to prevent it from falling out as you start to tighten the screw. -
Page 14: Fin And Rudder Installation
FIN AND RUDDER INSTALLATION Required Tools and Fasteners #1 Phillips Screwdriver (2) M3x10 Phillips head self-tapping screws (QTY 2) 1. Locate the vertical fin/rudder, short 1/4” dia. carbon tube and (2) M3x10 self-tapping Phillips head screws. 2. To mount the vertical fin/rudder assembly to fuselage, install the carbon tube into the plastic housing located on the top of the fuselage. - Page 15 FIN AND RUDDER INSTALLATION (CONTINUED) Now that the fin/rudder assembly is in place, secure it using the two M3x10 Phillips self-tapping screws in the front and rear of the fin/rudder assembly. Be sure the rudder linkage is disconnected before connecting the battery. Confirm the servo arm is centered after connecting the battery, then re-install the rudder linkage.
-
Page 16: Main Wing Installation
MAIN WING INSTALLATION Required Tools and Fasteners #2 Phillips Screwdriver (4) M3x10 Phillips head self-tapping screws 5 Minute Epoxy (QTY 4) Medium CA 1. Locate wings and wing fences. Using 5 minute epoxy, spread a small amount of glue into the wing fence mounting slot on the top of the wing. - Page 17 MAIN WING INSTALLATION (CONTINUED) 2. Locate the wings, wing tubes, fuselage, and the (4) M3x10 Phillips head self-tapping screws Slide the wing tubes into the wing panel then slide wing into place on the fuselage. Plug in the servo/LED/Gear connector as you install the wing onto the fuselage.
-
Page 18: Drop Tank Assembly And Installation
DROP TANK ASSEMBLY AND INSTALLATION 1. Locate the drop tank bodies and fin sections. Apply medium CA to the joint where the bodies and fin sections come together. Note: Use regular CA, “foam safe” is not necessary NOTICE Make sure to have the orientation of the fin section correct as the tanks are slightly arched and the fin sections only fit one way. -
Page 19: Installation Of Pitot Tube And Refueling Probe
INSTALLING PITOT TUBE AND REFUELING PROBE 1. Locate the supplied pitot tube and refueling probe and secure the airplane upside down on a stand or soft blanket. 2. Insert the tab into the slots located on the bottom of the nose and/or wing and carefully pull the pitot tube/refueling probe towards the rear of the airplane to lock it into place. -
Page 20: And Elevator Trim Settings
BATTERY INSTALLATION 1. Remove the canopy from the fuselage by pulling the canopy latch toward the rear of the plane. While holding back on the latch gently lift the canopy off of the fuselage. 2. Apply a piece of hook-sided adhesive backed hook and loop strip on the battery tray. 3. -
Page 21: Control Surface Recommended Throws
ELEVATOR TRIM SETTINGS The elevators require di erent trim settings depending on whether or not the drop tanks are installed. NO DROP DROP TANKS TANKS INSTALLED 26.5mm 23.5mm Measure from the L.E. at the root of the elevator to the Panel Line just above the the elevator. -
Page 22: Control Direction Test
CONTROL DIRECTION TEST Refer to the chart below to determine the proper control surface directions. If controls are reversed, DO NOT REVERSE CONTROLS IN TRANSMITTER OR IN THE AURA CONFIG TOOL. Email us at Flight Controller Sensor Direction Test MUST BOTH BE PASSED! IF ONE DOES NOT PASS, DO NOT FLY! Note: There is “Taileron”... -
Page 23: Flight Control Sensing Direction Test
FLIGHT CONTROL SENSING DIRECTION TEST Perform a test of the gyro system to verify the corrections made for a given movement are correct. If any of the tests do not result in the correct reaction from the airplane's gyro system, in the drawings below for clarity. -
Page 24: Pre Ight Checklist
PRE-FLIGHT CHECKLIST and stabilize the wing with your other hand. Give the control surface a good pull away from the wing. The control surface should not come unhinged from the wing. Be sure to avoid over-stressing the part as an aggressive pull may cause the control surface to come un- hinged even though it was hinged properly. -
Page 25: Flying Your F-100D Super Sabre
FLYING YOUR F-100D SUPER SABRE Selecting a Flying Site Trimming F-100D Super Sabre require a lot more room than other R/C products, therefore, a dedicated to trimming and setup. Fly the airplane at 2/3 to 3/4 power in Flight Mode 2 and trim for level ight. Land, adjust linkages and return the trim to zero and y again. -
Page 26: Expert Mode
OPTIONAL EXPERT F-100D AURA CONFIGURATION The “Expert” Aura Con guration o ers three ight modes that are activated with your Flaps (CH6): General Flight, Takeo , and Landing. Flight Mode 1- General Flight For all general ight tasks with the landing gear retracted. Flaps are up and the rates are set to low. “Tailerons”... -
Page 27: Troubleshooting Guide
AIRCRAFT TROUBLESHOOTING GUIDE Should you encounter any abnormal situations with your F-100D, refer to the matrix below to determine the probable cause and a recommended solution for the action. If the required solution does not rectify the problem, please contact product support for further assistance. DISCREPANCY PROBABLE CAUSE RECOMMENDED SOLUTION... -
Page 28: Airplane Repairs And Replacing Servos
AIRFRAME REPAIRS The F-100D Super Sabre is molded from durable EPO foam and is repairable with most adhesives. Similar to building and repairing wood or composite airplanes, the correct glue for a given application is critical to the repair holding and not breaking again. For major repairs, such as a broken fuselage, epoxy is preferred because it allows time to correct any misalignment. -
Page 29: Servicing The Power System
SERVICING THE POWER SYSTEM #1 Phillips Screwdriver Required Tools and Fasteners: #2 Phillips Screwdriver M3 Hex Driver Adustable Wrench Remove the access hatch using a #2 Phillips screwdriver. Unplug the 3-motor wires from the ESC. Using #1 Phillips screwdriver, remove the M3x6 Phillps washer head sheet metal screws that secure the EDF fan unit to the EDF mounting rails. -
Page 30: Limited Warranty
Visit for customer support in your region. Flex Innovations, LLC. and its authorized resellers (“Flex”) warrant to the original purchaser that the product purchased (the “Product”) it Inspection or Services will be free from defects in materials and workmanship at the date of purchase. -
Page 31: Ama Safty Code
Academy of Model Aeronautics National Model Aircraft Safety Code GENERAL: A model aircraft is a non-human-carrying aircraft capable 4. RC model aircraft must use the radio-control frequencies currently allowed by the Federal Communications Commission (FCC). Only code and is intended exclusively for sport, recreation, education and/or individuals properly licensed by the FCC are authorized to operate equipment on Amateur Band frequencies. - Page 32 © 2020 Flex Innovations, LLC. Potenza™ is a trademark or registered trademark of Flex Innovations, LLC. DSM®, DSM2™, and DSMX™ are trademarks of Horizon Hobby, Inc. Futaba is a registered trademark of Futaba Denshi Kogyo Kabushiki Kaisha Corporation of Japan.
Need help?
Do you have a question about the Super PNP F-100D Super Sabre and is the answer not in the manual?
Questions and answers