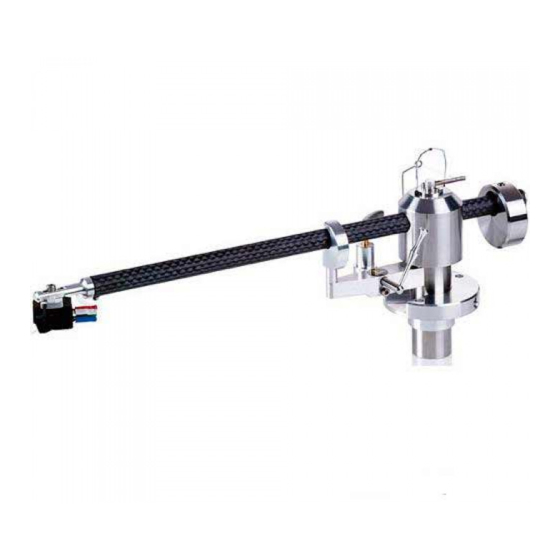
Summary of Contents for Clearaudio Unify
- Page 1 Unify User manual Bedienungsanleitung © clearaudio electronic GmbH, 2017/03 Made in Germany...
- Page 2 Please read this instruction manual carefully, to avoid any damage or loss of warranty. This manual will help you achieve an easy setup and guarantees the highest pleasure for a long time. Unify We wish you a lot of listening pleasure with your new Clearaudio tonearm. Clearaudio electronic GmbH Warning Do not expose the equipment to rain or moisture.
-
Page 3: Table Of Contents
User manual / Bedienungsanleitung Contents Packing contents ............4 Unify tonearm mounting ........... 5 - 7 Special notes .............. 8 Technical data ............9 Warranty ................18 - 19 Made in Germany... -
Page 4: Packing Contents
Clearaudio user manual, warranty and cartridges quality card, return delivery note Recommended Tools: • Clearaudio Cartridge alignment gauge (Art. No. AC005 / IEC) • Clearaudio Weight Watcher (Art. No. AC094) Both items and more accessoires are available at www.analogshop.de. © clearaudio electronic GmbH, 2017/03... -
Page 5: Unify Tonearm Mounting
Unify tonearm mounting Unify tonearm on any Clearaudio Please keep in mind that these directions are for mounting the turntable. Installation on other brand turntables is possible but not covered in this manual. Please refer to the turntable manufacturer´s user manual. - Page 6 When tightening the counterweight, insure that the weight is perfectly vertical otherwise this may affect your cartridges azimuth settings. 7. Align cartridge for overhang and offset angle using the Clearaudio Cartridge alignment gauge (Art. No.AC005 / IEC). Once done, re-check tracking force.
- Page 7 User manual / Bedienungsanleitung Please tighten both screws when finished and re-check tracking force after adjusting VTA. Pic. 8: Screw one for VTA Pic. 9: Screw one for VTA 10. Azimuth adjustments are facilitated through the small allen screw on the bottom side of the armwand where the headshell enters the carbon fibre.
-
Page 8: Special Notes
Otherwise serious damage could occur. 6.3 Service If any servicing or repair of a Clearaudio product is necessary, please first contact your dealer or distributor. Alternatively contact Clearaudio directly and we will advise you of your nearest service location. -
Page 9: Technical Data
3 years* 3 years* * Only if the Manufacturer‘s guarantee card is filled out correctly and sent back within 2 weeks to Clearaudio Clearaudio electronic is not responsible for any typographical errors in descriptions. Technical specifications are subject to change or improvement without prior notice. Product availability will be as long as stock lasts. - Page 10 User manual / Bedienungsanleitung Sehr verehrte clearaudio – Kundin, sehr verehrter clearaudio – Kunde, Höchste Ansprüche und Made in Germany, kombiniert mit Technologie und einem zeitlosem Design lassen bestmöglichen High End Musikgenuss zu einem unschlagbaren Preis wahr werden! Unify Sie haben mit dem Tonarm eines der besten Produkte seiner Art erworben.
- Page 11 User manual / Bedienungsanleitung Inhaltsverzeichnis 1. Lieferumfang ..............12 Unify 2. Montage des Tonarmes ......... 13 - 15 3. Besondere Hinweise ............16 4. Technische Daten ............17 Garantie ................18 - 19 Made in Germany...
-
Page 12: Lieferumfang
Zusatzgewicht (für Tonabnehmer mit geringem Eigengewicht) – und Qualitätskarte, Rücklieferschein Empfohlene Hilfsmittel: • clearaudio Cartridge alignment gauge (Art. Nr. AC005/IEC) • clearaudio Weight Watcher (Art. Nr. AC094) Diese und viele andere Zubehörartikel sind auch über unseren Onlineshop www.analogshop.de erhätlich. © clearaudio electronic GmbH, 2017/03... -
Page 13: Montage Des Unify Tonarmes
Bitte beachten Sie, dass diese Montageanleitung zur Installation des Plattenspieler gilt. Sie können den Unify auch auf anderen Plattenspielern installieren, allerdings gehen wir in dieser Anleitung nicht gesondert darauf ein. Bei Bedarf fordern Sie bitte Hinweise für Fremdlaufwerke an. - Page 14 Je fünf weitere Rillen (nach außen) entsprechen ca. 0,5 Gramm. Exakte Einstellsicherheit bietet allerdings nur die Benutzung einer Testplatte zur Überprüfung. Green arrowhead = slower anti-skating Red arrowhead = stronger anti-skating Bild 6: Antiskating Einstellung Bild 7: Antiskating-Einstellung © clearaudio electronic GmbH, 2017/03...
- Page 15 User manual / Bedienungsanleitung 7. Zum richtigen Einstellen der Höhe Ihres Tonarms lösen Sie bitte beide Justierschrauben am Fuß der Tonarmbasis; diese befinden sich seitlich in einer Vertiefung und können mit dem Innensechs- kantschlüssel (4) gelöst und nach der Höheneinstellung wieder angezogen werden! Bei aufgelegter LP sollte der Arm parallel zur LP-Oberfläche ausgerichtet sein.
-
Page 16: Besondere Hinweise
Andernfalls könnte Ihr Tonarm ernsthafte Schäden davon tragen. 6.3 Pflege Wenn eine Wartung oder Reparatur an einem clearaudio Produkt erforderlich ist, wenden Sie sich bitte zuerst immer an Ihren Händler oder Vertriebspartner. Alternativ können Sie clearaudio direkt kontaktieren und wir werden Sie von Ihrer nächstgelegenen Servicestelle beraten. -
Page 17: Technische Daten
* nur bei korrekt ausgefüllter und innerhalb 14 Tagen eingesandter Garantiekarte. Änderungen bleiben vorbehalten. Lieferbar solange Vorrat reicht. Für Druckfehler keine Haftung. Irrtümer vorbehalten- Kopien und Abdrucke – auch nur auszugsweise – bedürfen der schriftlichen Genehmigung durch die clearaudio electronic GmbH © clearaudio electronic GmbH 2017 Made in Germany... -
Page 18: Garantie
User manual / Bedienungsanleitung To achieve the full Clearaudio warranty, it is necessary that you fill out and send the corresponding part of the warranty registration certificate /card back to Clearaudio, within two weeks after purchase. Only if the product is returned in it’s... - Page 19 ESPAÑOL GARANTIA Para obtener información acerca de la garantia póngase en contacto con su distribuidor Clearaudio. GUARDE SU RECIBO DE COMPRA Su recibo de compra es su prueba permanente de haber adquirido un aparato de valor, Este recibo deberá...
- Page 20 91054 Erlangen Germany Phone/Tel.: +49 9131 40300 100 Fax: +49 9131 40300 119 www.clearaudio.de www.analogshop.de info@clearaudio.de Handmade in Germany (Technische Änderungen vorbehalten - Technical specification are subject to change without pror notification) 2017 © clearaudio electronic GmbH, 2017/03 Made in Germany...


Need help?
Do you have a question about the Unify and is the answer not in the manual?
Questions and answers