Crestron Mercury CCS-UC-1 Do Manual
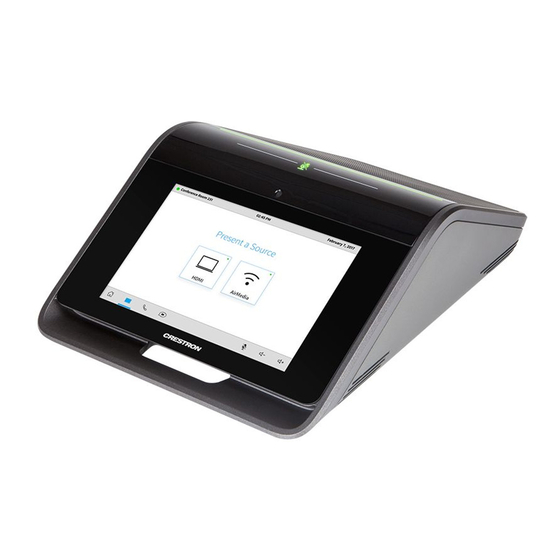
Tabletop conference system
Hide thumbs
Also See for Mercury CCS-UC-1:
- Product manual (108 pages) ,
- Configuration manual (64 pages) ,
- Do manual (2 pages)
Table of Contents
Advertisement
DO
GUIDE
CCS-UC-1
Crestron Mercury™ Tabletop Conference System
DO
Install the Cable Retention Plate
Install the cable retention plate as shown in the following diagram. The cable retention plate is designed to fit at the cable exit location at the rear of the
Crestron Mercury chassis and provides three tie-down points for cables connected to the device.
NOTE:
If the CCS-UCA-SMK swivel mount kit is to be used, use the cable retention bracket included with the CCS-UCA-SMK. For details, refer to the
CCS-UCA-SMK DO Guide (Doc. 7882) at www.crestron.com/manuals.
Install cable
retention
plate here
CAUTION:
When turning over the device, place the device on a soft surface to avoid damage to the unit.
NOTE:
Allow the cable retention plate adhesive to properly cure before attaching any wiring.
DO
Connect the Device
The Crestron Mercury device should be wired for its intended use. Refer to the following table to determine what is necessary for the specific installation.
REQUIRED WIRING
GENERAL
WIRING
Route cables through swivel tube plate
No
Service Loops
Yes
Cable Retention Plate
Yes
Feed Cables Through the Swivel Tube Plate (Installations with CCS-UCA-SMK only)
If the CCS-UCA-SMK swivel mount kit is used in the installation, refer to the CCS-UCA-SMK DO Guide (Doc. 7882) at www.crestron.com/manuals.
NOTE:
If the 6' HDMI input cable and the 6' USB cable are to be routed to the front of the Crestron Mercury device, do not route the cables through the
swivel tube plate.
Hardware Hookup
When wiring the Crestron Mercury device to external devices, it is highly recommended to use the cables that ship with the Crestron Mercury
device. Each kit ships with every cable needed for most rooms. The cables and accessories have been designed so that a service loop can be
implemented prior to the cables leaving the Mercury's chassis body (if necessary). If an extension option is required, Crestron solutions should
always be used and can be found under the MODELS & ACCESSORIES tab at www.crestron.com/products/model/CCS-UC-1.
Cable retention
plate installed
SCENARIO
WIRING WITH SMK
ZOOM ROOM
Yes
Optional
No
Yes
Yes
Yes
DO
Check the Box
QUANTITY
PRODUCT
1
Cable, RJ-45 Male - RJ-45 Male, 12' (3.66 m)
1
Cable, USB 2.0, A - micro B, 6' (1.83 m)
1
Retention Plate, Cable
3
Tie Wrap
CCS-UC-1 W/PS KIT Only
1
Power Pack, PW-2420RU
CCS-UC-1-AV W/PS KIT Only
1
Cable, HDMI, 6' (1.83 m), Thin
1
Cable, HDMI, 20' (6.10 m)
1
Cable, USB 2.0, A Female - A, 15' (4.57 m)
1
Camera, CCS-CAM-USB-F-100
1
IR Emitter Probe, STIRP
1
Power Pack, PW-2420RU
Standard Hookup
Display device
via 20' (6.10 m) HDMI
cable and IR or serial control
®
(CCS-UC-1-AV W/PS KIT only)
Ground
Corporate
network
or PoE+
N
L A
AUX:
10BASE-T/100BASE-TX
Ethernet to SIP or AirMedia
router
®
Zoom Room Hookup
USB B
To USB port on Zoom room
PC via included USB cable
Ground
N
L A
Laptop
via included USB cable and 6' (1.83 m) and HDMI cable
(CCS-UC-1-AV W/PS KIT only)
USB/ACC:
For future use
24 Vdc, 2.5 A
AC power pack
(CCS-UC-1 W/PS KIT and
CCS-UC-1-AV W/PS KIT only)
CCS-UCA-MIC Microphone pods
(sold separately)
CCS-CAM-USB-F-100
Must connect AC power pack to CCS-UC-1
(CCS-UC-1-AV W/PS KIT only)
USB/ACC
Insert included USB stick
here.
24 Vdc, 2.5 A
AC power pack
(CCS-UC-1 W/PS KIT and
CCS-UC-1-AV W/PS KIT only)
CCS-UCA-MIC Microphone pods
(sold separately)
Must connect AC power pack to CCS-UC-1
PART NUMBER
2033988
2047803
2047908
2047935
6500187
6508218
6503567
6508260
6506442
6500940
6500187
100-240 V
50/60 Hz:
From ac power outlet
100-240 V
50/60 Hz:
From ac power outlet
Advertisement
Table of Contents

Subscribe to Our Youtube Channel
Related Manuals for Crestron Mercury CCS-UC-1


Summary of Contents for Crestron Mercury CCS-UC-1
- Page 1 If the CCS-UCA-SMK swivel mount kit is used in the installation, refer to the CCS-UCA-SMK DO Guide (Doc. 7882) at www.crestron.com/manuals. NOTE: If the 6' HDMI input cable and the 6' USB cable are to be routed to the front of the Crestron Mercury device, do not route the cables through the swivel tube plate.
- Page 2 Crestron, the Crestron logo, AirMedia, and Crestron Mercury are either trademarks or registered trademarks of Crestron Electronics, Inc. in the United States and/or other countries.
- Page 3 CCS-UC-1 Crestron Mercury™ Tabletop Conference System Supplemental Guide Crestron Electronics, Inc.
- Page 4 Crestron, the Crestron logo, .AV Framework, AirMedia, Crestron Connected, Crestron Fusion, Crestron Mercury, and PinPoint are either trademarks or registered trademarks of Crestron Electronics, Inc. in the United States and/or other countries. App Store, iTunes, and Mac are either trademarks or registered trademarks of Apple, Inc. in the United States and/or other countries. Bluetooth and the Bluetooth logos are either trademarks of registered trademarks of Bluetooth SIG, Inc.
-
Page 5: Table Of Contents
.AV Framework (AVF) .................... 23 AirMedia ........................ 37 Enterprise Deployment Options ................... 38 Crestron Cloud Provisioning Service (CPS) ............38 Crestron Deployment Tool for PowerShell® Software ..........38 Operation Join or Schedule a Meeting ..................40 Reserved (Join a Meeting) ..................40 Reserved (Join a Skype for Business Meeting) ............ - Page 6 Reserve from Microsoft Outlook ................65 Troubleshooting Appendix: Configure Exchange for Use with CCS-UC-1 Enable Resource Account Body for One Touch Join ........... 67 ii • Contents Operations & Installation Guide – DOC. 7844E...
-
Page 7: Introduction
Crestron Mercury Tabletop Conference System Introduction The CCS-UC-1 Crestron Mercury™ Conference Room System provides a single tabletop device that allows for room scheduling, presenting, conference calling, and video calling. For more information on features, capabilities, and specifications on the CCS-UC-1 and its accessories, visit www.crestron.com/mercury. -
Page 8: Operating Environment
To connect to the device, follow this procedure: 1. On the device, tap 2. Press and hold Help for approximately 10 seconds to display the System Info screen. 2 • CCS-UC-1: Crestron Mercury Tabletop Conference System Supplemental Guide – DOC. 7844E... - Page 9 System Info screen. The welcome screen is displayed. Welcome Screen 5. Click Sign In to continue. A prompt for the user name and password is displayed. CCS-UC-1: Crestron Mercury Tabletop Conference System • 3 Supplemental Guide – DOC. 7844E...
- Page 10 DEVICE is used to upload firmware, reboot the device, view the system log, configure SIP calling parameters, and set the date and time. • AVF configures the settings for Crestron Fusion integration, dialing features, meeting functionality, and room scheduling. 4 • CCS-UC-1: Crestron Mercury Tabletop Conference System...
-
Page 11: Log Out From The Device
HDCP compliance are not allowed to pass through to the connected display. NOTE: When HDCP is enabled, the connected display must be HDCP compliant as well. CCS-UC-1: Crestron Mercury Tabletop Conference System • 5 Supplemental Guide – DOC. 7844E... -
Page 12: Hdmi Output
Click Input Signal to view details about the input signal connected to the HDMI input port. HDMI OUTPUT Click HDMI OUTPUT to display information about the HDMI output and the output signal. HDMI OUTPUT Screen 6 • CCS-UC-1: Crestron Mercury Tabletop Conference System Supplemental Guide – DOC. 7844E... -
Page 13: Network
Choose one of the following options for each network adapter. • Set DHCP Enabled to On to use a DHCP server to provide the IP address, subnet mask, default gateway, and DNS server. CCS-UC-1: Crestron Mercury Tabletop Conference System • 7 Supplemental Guide – DOC. 7844E... - Page 14 2. Enter the domain name of the authentication server. 3. Upload a machine certificate. a. Click Manage Certificates to manage certificates for 802.1x authentication. A list of certificates is displayed. 8 • CCS-UC-1: Crestron Mercury Tabletop Conference System Supplemental Guide – DOC. 7844E...
- Page 15 5. Click Manage Certificates to manage certificates for 802.1x authentication. A list of certificates is displayed. CCS-UC-1: Crestron Mercury Tabletop Conference System • 9 Supplemental Guide – DOC. 7844E...
- Page 16 To search for a specific authority, start typing the name of the authority in the search box and check the boxes next to the desired authorities. 4. To load a custom certificate, click Manage Certificates and follow this procedure: 10 • CCS-UC-1: Crestron Mercury Tabletop Conference System Supplemental Guide – DOC. 7844E...
- Page 17 Click OK to close the Add Certificate screen. 5. Click Save Changes when done or Revert to return to the previous setting. CCS-UC-1: Crestron Mercury Tabletop Conference System • 11 Supplemental Guide – DOC. 7844E...
-
Page 18: Device
Click Restore to restore the factory settings. Click Reboot to reboot the device. Device Logs Click Download Logs to download the device’s system logs to the PC. 12 • CCS-UC-1: Crestron Mercury Tabletop Conference System Supplemental Guide – DOC. 7844E... - Page 19 Cloud Settings The device can connect with the Crestron Cloud provisioning service. To allow a connection to the Crestron Cloud provisioning service, set Cloud Configuration Service Connection to Enabled. To deny the connection, set Cloud Configuration Service Connection to Disabled. For more information, refer to “Enterprise Deployment Options” on page 38.
- Page 20 4. Enter the port number to be used within the SIP network in Port. NOTE: Port 5060 is the default port used by most SIP servers. Check with the VoIP network administrator for port availability. 14 • CCS-UC-1: Crestron Mercury Tabletop Conference System Supplemental Guide – DOC. 7844E...
- Page 21 11. Click Save Changes to apply any changes. Click Revert to revert back to the previously used settings. 12. Verify the status of the connection to the SIP server in the Status field. CCS-UC-1: Crestron Mercury Tabletop Conference System • 15 Supplemental Guide – DOC. 7844E...
- Page 22 DEVICE Screen - Configure Date/Time The device’s internal clock can be synchronized with a time server or set manually. NOTE: When connected to Crestron Fusion, the time is automatically set from Crestron Fusion. Any settings made here do not apply. •...
- Page 23 For information on supported versions of Skype for Business, refer to Answer ID 5829 in the Online Help on the Crestron website (www.crestron.com/onlinehelp). Use the following table and procedure to configure the device for Skype for Business. CCS-UC-1: Crestron Mercury Tabletop Conference System • 17 Supplemental Guide – DOC. 7844E...
- Page 24 Select the type of entry to be assigned from the Type drop-down list. • Number: Select Number to have the speed dial button dial a phone number. 18 • CCS-UC-1: Crestron Mercury Tabletop Conference System Supplemental Guide – DOC. 7844E...
- Page 25 Click OK to close the Add Certificate screen. 6. Click Save Changes when done or Revert to return to the previous setting. CCS-UC-1: Crestron Mercury Tabletop Conference System • 19 Supplemental Guide – DOC. 7844E...
- Page 26 DEVICE Screen - Authentication Management: Users Tab Click to view details about a user. Click to update a user’s information. Click to delete the user from the list of authorized users. 20 • CCS-UC-1: Crestron Mercury Tabletop Conference System Supplemental Guide – DOC. 7844E...
- Page 27 Click the Groups tab to configure user groups. A list of user groups is displayed. DEVICE Screen - Authentication Management: Groups Tab Click to view details about a group. Click to delete the group from the list of groups. CCS-UC-1: Crestron Mercury Tabletop Conference System • 21 Supplemental Guide – DOC. 7844E...
- Page 28 3. Click OK to save the group or click Cancel to cancel. Zoom Room DEVICE Screen - Zoom Room This section is used to set the device to operate as either a Crestron Mercury device or a Zoom room controller. •...
-
Page 29: Av Framework (Avf)
.AV Framework (AVF) Click AVF to configure the device’s .AV Framework™ platform functionality. Click H to display links for configuring system settings, controlling Crestron Fusion operation, ® configuring the dialer, configuring the connected video display, configuring front panel operation, managing the system’s configuration, and viewing activity logs. - Page 30 1. In the Fusion Room Name field, enter the name to be used by the Crestron Fusion server. 2. In the IPID field, enter the IP ID number to be used by the Crestron Fusion server. 3. In the Fusion Cloud URL field, click Enable to allow autodiscovery by the Crestron Fusion server.
- Page 31 Bluetooth or SIP, one-touch keys for initiating phone calls for a meeting, and configures the device to use Lightweight Directory Access Protocol (LDAP) to look up names in an LDAP directory. CCS-UC-1: Crestron Mercury Tabletop Conference System • 25 Supplemental Guide – DOC. 7844E...
- Page 32 AVF Screen - Dialer 26 • CCS-UC-1: Crestron Mercury Tabletop Conference System Supplemental Guide – DOC. 7844E...
- Page 33 NOTE: If none of the Regex fields are filled, the JOIN button does not appear on the CCS-UC-1 home screen. Click Save to save the changes. CCS-UC-1: Crestron Mercury Tabletop Conference System • 27 Supplemental Guide – DOC. 7844E...
- Page 34 Phone Attribute: Enter the name of the LDAP field associated with the attribute used for listing a phone number. 28 • CCS-UC-1: Crestron Mercury Tabletop Conference System Supplemental Guide – DOC. 7844E...
- Page 35 Port: Enter the port number used by the LDAP server to listen for LDAP queries. DN: Enter the path in the Directory Information Tree to start the search. i.e. dc=Mycompany,dc=MyCompany,dc=com. CCS-UC-1: Crestron Mercury Tabletop Conference System • 29 Supplemental Guide – DOC. 7844E...
- Page 36 Click General Search. Search results are displayed in the lower half of the screen. c. Click x to close the Search LDAP screen. For more information, refer to Answer ID 5852 in the Online Help on the Crestron website (www.crestron.com/onlinehelp). 30 • CCS-UC-1: Crestron Mercury Tabletop Conference System...
- Page 37 3. Depending on the model selected, different controls are displayed. Complete the required fields to use the selected display device. 4. Click Save to save the settings. CCS-UC-1: Crestron Mercury Tabletop Conference System • 31 Supplemental Guide – DOC. 7844E...
- Page 38 NOTE: Emergency broadcasts are sent from Crestron Fusion. For more information on emergency broadcasts, refer to the Crestron Fusion help file. When all changes are made, click Save to save the settings. 32 • CCS-UC-1: Crestron Mercury Tabletop Conference System...
- Page 39 Enter the amount of time the meeting’s time remaining message is displayed in the Time Remaining Message Duration field. When all changes are made, click Save to save the settings. CCS-UC-1: Crestron Mercury Tabletop Conference System • 33 Supplemental Guide – DOC. 7844E...
- Page 40 When all changes are made, click Save to save the settings. 34 • CCS-UC-1: Crestron Mercury Tabletop Conference System Supplemental Guide – DOC. 7844E...
- Page 41 Click Activate Configuration to carry out the changes that were made, or click Revert Configuration to revert back to the previously saved settings. The screen below is shown. CCS-UC-1: Crestron Mercury Tabletop Conference System • 35 Supplemental Guide – DOC. 7844E...
- Page 42 Click the up or down arrows to scroll through the message log. • Click Stop Scrolling to pause the message log. Click Scrolling to resume. • Click Download to download the message log. 36 • CCS-UC-1: Crestron Mercury Tabletop Conference System Supplemental Guide – DOC. 7844E...
-
Page 43: Airmedia
Select which of the CCS-UC-1’s Ethernet port connections (Adapter 1 for the LAN port or Adapter 2 for the AUX port) is to be used for presenting by AirMedia. CCS-UC-1: Crestron Mercury Tabletop Conference System • 37 Supplemental Guide – DOC. 7844E... -
Page 44: Enterprise Deployment Options
These tools can assist in deploying any number of CCS-UC-1 devices that an organization may need to deploy. For more information, refer to Answer ID 5719 in the Online Help on the Crestron website (www.crestron.com/onlinehelp). Crestron Cloud Provisioning Service (CPS) Crestron CPS provides a platform to manage CCS-UC-1 devices at scale, significantly reducing the time and effort needed to deploy and configure devices from a single location. -
Page 45: Operation
For details on answering and making phone calls, refer to “Answer a Phone Call” on page 51 and “Make a Phone Call” on page 52. CCS-UC-1: Crestron Mercury Tabletop Conference System • 39 Supplemental Guide – DOC. 7844E... -
Page 46: Join Or Schedule A Meeting
Home screen. The Home screen displays the current status of the room. Reserved (Join a Meeting) If the room is reserved for use, the display on the device indicates as such. Home Screen - Reserved Room 40 • CCS-UC-1: Crestron Mercury Tabletop Conference System Supplemental Guide – DOC. 7844E... -
Page 47: Reserved (Join A Skype For Business Meeting)
The user can join the meeting that is currently in session. 1. Tap JOIN SKYPE MEETING to join the Skype for Business meeting. The device ® joins the Skype for Business meeting. CCS-UC-1: Crestron Mercury Tabletop Conference System • 41 Supplemental Guide – DOC. 7844E... - Page 48 Tap In Lobby to view waiting invitees. Tap X to exit the Participants screen. • End the call to end the call. 42 • CCS-UC-1: Crestron Mercury Tabletop Conference System Supplemental Guide – DOC. 7844E...
- Page 49 2. Enter the name or telephone number of the participant to be added. 3. Tap the name or phone number that is displayed. The participant is dialed and added to the call when they answer. CCS-UC-1: Crestron Mercury Tabletop Conference System • 43 Supplemental Guide – DOC. 7844E...
-
Page 50: Available (Create A New Meeting)
The user can either use the room for the remaining time available or create a new meeting for another time. To create a new meeting, follow this procedure: 1. Tap RESERVE NOW > to reserve the room. The New Meeting screen is displayed. 44 • CCS-UC-1: Crestron Mercury Tabletop Conference System Supplemental Guide – DOC. 7844E... -
Page 51: Present To A Room
Depending on the configuration, the CCS-UC-1 can present to a room over HDMI or via AirMedia. To view the different presentation options, tap . The Present a Source screen is displayed. CCS-UC-1: Crestron Mercury Tabletop Conference System • 45 Supplemental Guide – DOC. 7844E... -
Page 52: Present Via Hdmi
2. Connect the presentation source to the HDMI cable that is connected to the CCS- UC-1. 3. When done presenting, tap Stop Presenting. To return to the previous screen, tap < Back. 46 • CCS-UC-1: Crestron Mercury Tabletop Conference System Supplemental Guide – DOC. 7844E... -
Page 53: Present Via Airmedia
® “computer”) desktop. The computer should be able to access the CCS-UC-1 over the network. Mobile devices can also share their content using the Crestron Pinpoint™ mobile app or the AirMedia app, which are available for iOS ® and Android™ devices. Crestron PinPoint may be used for full screen sharing on devices running Android 5.0 Lollipop and above. - Page 54 Do not drag the application out of the disk image file. • From a Wireless Device a. Start the Crestron Pinpoint app or the AirMedia app. b. Follow the onscreen instructions for connecting to a CCS-UC-1. 4. Share content. •...
- Page 55 OK to save the changes or click Cancel to cancel. AirMedia Settings Screen • Auto Update should be set to Off. • Auto Discovery should be set to On. CCS-UC-1: Crestron Mercury Tabletop Conference System • 49 Supplemental Guide – DOC. 7844E...
- Page 56 • From a wireless device, follow the instructions for sharing content. 5. When done presenting, tap Stop Presenting. To return to the previous screen, tap < Back. 50 • CCS-UC-1: Crestron Mercury Tabletop Conference System Supplemental Guide – DOC. 7844E...
-
Page 57: Answer A Phone Call
ID information (if available) showing is displayed. Incoming Screen 2. Tap to ignore the call or tap to end the current call and answer the new call. CCS-UC-1: Crestron Mercury Tabletop Conference System • 51 Supplemental Guide – DOC. 7844E... -
Page 58: Make A Phone Call
Return to Active Call Control 52 • CCS-UC-1: Crestron Mercury Tabletop Conference System Supplemental Guide – DOC. 7844E... -
Page 59: Make A Call With An Office Session Initiation Protocol (Sip) System
Address Book: Tap Address Book to search the local address book for a specific contact. The Find Contact to Call screen is displayed. Find Contact to Call Screen CCS-UC-1: Crestron Mercury Tabletop Conference System • 53 Supplemental Guide – DOC. 7844E... -
Page 60: Make A Call With A Bluetooth Phone
Make a Call with a Bluetooth Phone When configured, the CCS-UC-1 can make phone calls using a Bluetooth-enabled phone to carry the call while using the CCS-UC-1 as a speakerphone. 54 • CCS-UC-1: Crestron Mercury Tabletop Conference System Supplemental Guide – DOC. 7844E... - Page 61 2. On the Bluetooth phone, connect to the Bluetooth device matching the Bluetooth name of the CCS-UC-1. The CCS-UC-1 indicates that it is connecting with a Bluetooth device and then displays the dialing screen. Dialing Screen CCS-UC-1: Crestron Mercury Tabletop Conference System • 55 Supplemental Guide – DOC. 7844E...
-
Page 62: Make A Call With A Connected Computer
CCS-UC-1 as a speakerphone. NOTE: The CCS-UC-1 does not provide an Internet connection to the computer to make a call. The computer must have its own Internet connection. 56 • CCS-UC-1: Crestron Mercury Tabletop Conference System Supplemental Guide – DOC. 7844E... - Page 63 The USB Connected screen is displayed. USB Connected Screen 3. On the computer, use the audio call software to make and end the phone call. 4. When done, disconnect the computer. CCS-UC-1: Crestron Mercury Tabletop Conference System • 57 Supplemental Guide – DOC. 7844E...
-
Page 64: Skype For Business
CCS-UC-1 shows the search results on the display. 3. Tap the name of the contact to be called. When the call is answered, the In Skype Call screen is displayed. In Skype Call Screen 58 • CCS-UC-1: Crestron Mercury Tabletop Conference System Supplemental Guide – DOC. 7844E... - Page 65 3. Tap a speed dial button to call. The device calls the number stored for the speed dial button. Call a Phone Number Use the numeric keypad to dial a phone number. 1. Tap Skype. The Find Contact to Call screen is displayed. CCS-UC-1: Crestron Mercury Tabletop Conference System • 59 Supplemental Guide – DOC. 7844E...
- Page 66 . The keypad screen is displayed. Tap to return to the Find Contact to Call screen. Keypad Screen 3. Tap the number to call with the numeric keypad, and then tap 60 • CCS-UC-1: Crestron Mercury Tabletop Conference System Supplemental Guide – DOC. 7844E...
- Page 67 Tap In Lobby to view waiting invitees. Tap X to exit the Participants screen. • End the call to end the call. CCS-UC-1: Crestron Mercury Tabletop Conference System • 61 Supplemental Guide – DOC. 7844E...
- Page 68 2. Enter the name or telephone number of the participant to be added. 3. Tap the name or phone number that is displayed. The participant is dialed and added to the call when they answer. 62 • CCS-UC-1: Crestron Mercury Tabletop Conference System Supplemental Guide – DOC. 7844E...
-
Page 69: Run A Web Conference
The USB Connected screen is displayed. USB Connected Screen 4. On the computer, set the web conference software to use the room camera attached to the CCS-UC-1. CCS-UC-1: Crestron Mercury Tabletop Conference System • 63 Supplemental Guide – DOC. 7844E... - Page 70 5. Start the web conference. 6. When the conference is over, end the conference. 7. Disconnect the USB and HDMI cables from the computer. 64 • CCS-UC-1: Crestron Mercury Tabletop Conference System Supplemental Guide – DOC. 7844E...
-
Page 71: Invite The Ccs-Uc-1 To A Meeting (Schedule The Room)
2. Add the CCS-UC-1 in the To: field, and send the update. If the meeting is accepted, it will appear on the room calendar shortly. 3. Join the meeting from the CCS-UC-1. CCS-UC-1: Crestron Mercury Tabletop Conference System • 65 Supplemental Guide – DOC. 7844E... -
Page 72: Troubleshooting
LLDP. For example, to enable LLDP ® (LLDP) is disabled. on some Cisco switches, use the following console commands: Switch# configure terminal Switch(config)# lldp run Switch(config)# end 66 • CCS-UC-1: Crestron Mercury Tabletop Conference System Supplemental Guide – DOC. 7844E... -
Page 73: Appendix: Configure Exchange For Use With Ccs-Uc-1
MEETING causes the CCS-UC-1 to join the Skype for Business call. For information on supported versions of Skype for Business and Exchange, refer to Answer ID 5829 in the Online Help on the Crestron website (www.crestron.com/onlinehelp). Home Screen - Reserved Room... - Page 74 $cred=Get-Credential <useraccount>@$org $sess=New-PSSession -ConfigurationName microsoft.exchange - Credential $cred -AllowRedirection -Authentication basic - ConnectionUri https://ps.outlook.com/powershell Import-PSSession $sess //Send Whatever commands you want. Refer to https://technet.microsoft.com/en-us/library/dn975125.aspx for more information. 68 • CCS-UC-1: Crestron Mercury Tabletop Conference System Supplemental Guide – DOC. 7844E...
- Page 75 This page is intentionally left blank. CCS-UC-1: Mercury Tabletop Conference System • 69 Supplemental Guide – DOC. 7844E...
- Page 76 Crestron Electronics, Inc. Supplemental Guide – DOC. 7844E 15 Volvo Drive, Rockleigh, NJ 07647 (2048655) Tel: 888.CRESTRON 11.17 Fax: 201.767.7576 Specifications subject to www.crestron.com change without notice.
Need help?
Do you have a question about the Mercury CCS-UC-1 and is the answer not in the manual?
Questions and answers