Crestron CCS-UC-1 Configuration Manual
Mercury seies secure sip endpoint with cisco unified communications manager 11.0
Hide thumbs
Also See for CCS-UC-1:
- Product manual (108 pages) ,
- Do manual (76 pages) ,
- Configuration manual (53 pages)

Related Manuals for Crestron CCS-UC-1


Summary of Contents for Crestron CCS-UC-1
- Page 1 CCS-UC-1 Secure SIP Endpoint with Cisco Unified ® Communications Manager 11.0 Configuration Guide Crestron Electronics, Inc.
- Page 2 Other trademarks, registered trademarks, and trade names may be used in this document to refer to either the entities claiming the marks and names or their products. Crestron disclaims any proprietary interest in the marks and names of others. Crestron is not responsible for errors in typography or photography.
-
Page 3: Table Of Contents
Configure a Secure SIP Profile for Phones ............23 Configure Phone Security Profile ................27 Configure the Crestron device as a Third-party SIP Device ........31 Configure Media Resource Group and Media Resource Group List ...... 37 Cisco UBE configuration for MRG resources ..........37 Cisco UCM Media Termination Point Configuration ........ - Page 4 ii • Contents Configuration Guide – DOC. 7991A...
-
Page 5: Introduction
SIP endpoints registering to the Cisco Unified Communications Manager (Cisco UCM). Topology The network topology for the Crestron Mercury endpoint to interop with the Cisco UCM is shown below. Secure SIP Endpoint Integration with Cisco UCM - Reference Network CCS-UC-1: Secure SIP Endpoint with Cisco UCM 11.0 •... -
Page 6: Software Requirements
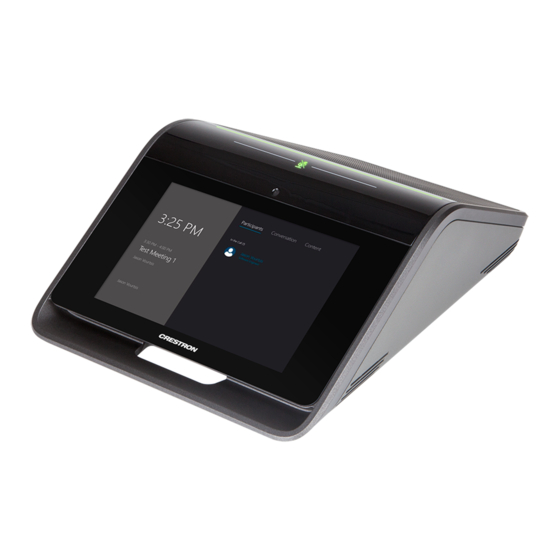
Cisco phone models: 8961 (SIP) and 8945 (SIP) • Crestron Mercury devices (2) Product Description The Crestron Mercury device is a complete solution for conference rooms. It acts as an all-in-one touch screen, speakerphone and AirMedia product for conference rooms ®... -
Page 7: Features Not Supported
Crestron’s Bugzilla software Defect: 125193. • On the Crestron Mercury web user interface, a configuration of DHCP OFF on the Network configuration page mandates configuration of both the adapters. The user is unable to save changes unless both the adapters are configured and is notified of an invalid IP against the default of 0.0.0.0 for an unused adapter. -
Page 8: Crestron Mercury Configuration
Crestron Mercury Configuration Setup The LAN port of the Crestron Mercury device needs to be connected to one PoE+ port to power it up and network connectivity with the Cisco UCM. The PoE+ switch that is used should have the LLDP functionality enabled for the device to power up and be completely functional. - Page 9 The Status screen that appears displays basic information on the device. Crestron Mercury: Status The device can be configured from the Network page. 3. On the web GUI, navigate to Network. CCS-UC-1: Secure SIP Endpoint with Cisco UCM 11.0 • 5 Configuration Guide – DOC. 7991A...
- Page 10 Crestron Mercury: Network Setting: DHCP Off: Static IP Configured 4. Enter the following parameters in the Adapter 1 section to configure the Crestron Mercury device. • Domain Name: skypelabsj.local was used in this test • DHCP: Choose either of the following:...
-
Page 11: Configuring The Tls Sip Parameters
Online. Add Certificates For a successful TLS handshake between the Crestron Mercury device and the Cisco UCM, the following certificates need to be added to the Crestron Mercury: CCS-UC-1: Secure SIP Endpoint with Cisco UCM 11.0 • 7... -
Page 12: Add Root Certificate
RootCA certificate (root_cer). This is the certificate that is downloaded from the certificate authority that serves the Cisco UCM (the DNS IP configured on the CUCM and Crestron Mercury device). This certificate is required by the Crestron Mercury device to allow it to validate the Cisco UCM when Enable Server Validation is enabled in the SIP Calling configuration screen. - Page 13 The certificate authority from where this root-cer certificate was downloaded appears in the list of trusted certificate authorities. 8. On the main SIP Calling screen, navigate to Select Trusted Certificate Authorities. CCS-UC-1: Secure SIP Endpoint with Cisco UCM 11.0 • 9 Configuration Guide – DOC. 7991A...
-
Page 14: Generate Device Certificate Request And Download Device Certificate From Ca
On the CA, open a browser and access the Certificate Services. For this example, a Microsoft Active Directory was used to generate a specific device certificate request. ® Certificate Authority: Request a Certificate 10 • CCS-UC-1: Secure SIP Endpoint with Cisco UCM 11.0 Configuration Guide – DOC. 7991A... - Page 15 Certificate Authority: advanced certificate request 2. Click advanced certificate request. 3. On the screen that follows, click Create and Submit a request to this CA. CCS-UC-1: Secure SIP Endpoint with Cisco UCM 11.0 • 11 Configuration Guide – DOC. 7991A...
- Page 16 5. Configure Identifying Information for Offline Template: Name: Assign the device IP to be the common name. The IP address used in this example is 10.80.25.50. 12 • CCS-UC-1: Secure SIP Endpoint with Cisco UCM 11.0 Configuration Guide – DOC. 7991A...
- Page 17 • The certificate should have a .PFX extension. • A password. Enter this same password when importing this SIP certificate on the Crestron Mercury device. CCS-UC-1: Secure SIP Endpoint with Cisco UCM 11.0 • 13 Configuration Guide – DOC. 7991A...
-
Page 18: Add Sip Certificate
6. Select the sip_cert file that needs to be uploaded, and click OK. 7. Enter the password that was used when exporting this certificate on the CA. 14 • CCS-UC-1: Secure SIP Endpoint with Cisco UCM 11.0 Configuration Guide – DOC. 7991A... -
Page 19: Cisco Ucm Configuration
CA. A typical TLS handshake consists of the following steps: 1. The Crestron Mercury device sends a Client Hello to the Cisco UCM server. 2. The Cisco UCM server sends a Server Hello. 3. The Cisco UCM server sends its certificate and a certificate request from the Crestron Mercury device. -
Page 20: Configure The End User
3. Configure User ID: Enter a unique end user identification name. Two users were configured for this example for the Crestron Mercury devices: Crestron Mercury_2600 and Crestron Mercury_2602. 16 • CCS-UC-1: Secure SIP Endpoint with Cisco UCM 11.0 Configuration Guide – DOC. 7991A... - Page 21 4. Configure Password: Enter any password. This same password will be entered on the Crestron Mercury device against the SIP Server Password. The password in this example was 123456. 5. Confirm Password: Re-enter the same password configured above. 6. Configure the Last Name: Enter the end user last name.
-
Page 22: Configure A Secure Sip Trunk Security Profile
Configure a Secure SIP Trunk Security Profile For the example, a new SIP Trunk Security Profile, Secure SIP Trunk Profile-Crestron was configured. To add a new SIP Trunk Security Profile, follow this procedure: 1. Navigate to System > Security > SIP Trunk Security Profile. -
Page 23: Configure A Secure Sip Profile For Trunk
3. Configure a Name: Secure SIP Trunk Profile-Crestron was used in this example. 4. Configure Device Security Mode: Encrypted. 5. Configure Incoming Transport Type: TLS. 6. Configure Outgoing Transport Type: TLS. 7. Configure X.509 Subject Name: as the FQDN of the Cisco UBE. - Page 24 Cisco UCM: Trunk Secure SIP Profile Configuration (2/4) 20 • CCS-UC-1: Secure SIP Endpoint with Cisco UCM 11.0 Configuration Guide – DOC. 7991A...
- Page 25 Cisco UCM: Trunk Secure SIP Profile Configuration (3/4) CCS-UC-1: Secure SIP Endpoint with Cisco UCM 11.0 • 21 Configuration Guide – DOC. 7991A...
- Page 26 Configure Early offer support for voice and video calls * as Disabled 3. Retain all other default configurations. 4. Click Save, and then click Apply Config. 22 • CCS-UC-1: Secure SIP Endpoint with Cisco UCM 11.0 Configuration Guide – DOC. 7991A...
-
Page 27: Configure A Secure Sip Profile For Phones
Configure a Secure SIP Profile for Phones For the test, a new SIP Profile Standard SIP Profile Phones_Crestron was configured and assigned to the Crestron Mercury devices and phones registered to the Cisco UCM. To add a new SIP Profile, follow this procedure: 1. - Page 28 Cisco UCM: Secure SIP Profile Configuration (2/4) 24 • CCS-UC-1: Secure SIP Endpoint with Cisco UCM 11.0 Configuration Guide – DOC. 7991A...
- Page 29 Cisco UCM: Secure SIP Profile Configuration (3/4) CCS-UC-1: Secure SIP Endpoint with Cisco UCM 11.0 • 25 Configuration Guide – DOC. 7991A...
- Page 30 Configure Early Offer support for voice and video calls* as Disabled 3. Retain all other default configurations. 4. Click Save, and then click Apply Config. 26 • CCS-UC-1: Secure SIP Endpoint with Cisco UCM 11.0 Configuration Guide – DOC. 7991A...
-
Page 31: Configure Phone Security Profile
Phone Security Profile. For the example, separate phone security profiles were configured for the Crestron Mercury device, and the 8945 and 8961 phone-types used. To configure the Phone Security Profile for the Crestron Mercury device, follow this procedure: 1. Navigate to System > Security > Phone Security Profile. - Page 32 8. Configure SIP Phone Port: 5060. The Crestron Mercury device used this port. 9. Click Save. The 8945 and 8961 phone security profiles were configured by selecting the specific phone type as follows: 1. Navigate to System > Security > Phone Security Profile.
- Page 33 Cisco UCM: Phone Security Profile for 8945 Phone Type CCS-UC-1: Secure SIP Endpoint with Cisco UCM 11.0 • 29 Configuration Guide – DOC. 7991A...
- Page 34 Cisco UCM: Phone Security Profile for 8961 Phone Type 30 • CCS-UC-1: Secure SIP Endpoint with Cisco UCM 11.0 Configuration Guide – DOC. 7991A...
-
Page 35: Configure The Crestron Device As A Third-Party Sip Device
Configure the Crestron device as a Third-party SIP Device 1. Navigate to Device > Phone. 2. Click Add New. Cisco UCM: Add Crestron Device as Third-party SIP Device (1/3) CCS-UC-1: Secure SIP Endpoint with Cisco UCM 11.0 • 31 Configuration Guide – DOC. 7991A... - Page 36 Cisco UCM: Add Crestron Device as Third-party SIP Device (2/3) 32 • CCS-UC-1: Secure SIP Endpoint with Cisco UCM 11.0 Configuration Guide – DOC. 7991A...
- Page 37 Crestron Mercury_2602 was selected for the second Crestron Mercury device. 13. Click Save. 14. Add a DN to this phone. DN 2600 was configured for one of the Crestron Mercury devices in this example. Similarly, DN 2602 was added to the other Crestron Mercury device.
- Page 38 Cisco UCM: Add DN to Crestron Device: Third-party SIP Device (1/5) 34 • CCS-UC-1: Secure SIP Endpoint with Cisco UCM 11.0 Configuration Guide – DOC. 7991A...
- Page 39 Cisco UCM: Add DN to Crestron Device: Third-party SIP Device (2/5) CCS-UC-1: Secure SIP Endpoint with Cisco UCM 11.0 • 35 Configuration Guide – DOC. 7991A...
- Page 40 Cisco UCM: Add DN to Crestron Device: Third-party SIP Device (3/5) Cisco UCM: Add DN to Crestron Device: Third-party SIP Device (4/5) 36 • CCS-UC-1: Secure SIP Endpoint with Cisco UCM 11.0 Configuration Guide – DOC. 7991A...
-
Page 41: Configure Media Resource Group And Media Resource Group List
Cisco UCM: Add DN to Crestron Device: Third-party SIP Device (5/5) Configure Media Resource Group and Media Resource Group List A Media Resource Group (MRG) is required to include Music on Hold servers, Conference Bridges, and Media Termination Points that may be necessary to test the Cisco UCM or Service Provider features. - Page 42 82DBCD03 02016402 010A301D 0603551D 25041630 1406082B 06010505 07030106 082B0601 05050703 02302706 092B0601 04018237 150A041A 3018300A 06082B06 01050507 0301300A 06082B06 01050507 0302300D 06092A86 4886F70D 01010505 00038201 010000DE 2572CE59 4DA3B950 CB7678B7 2F9E1688 6F0CFF6F E2082BD2 38 • CCS-UC-1: Secure SIP Endpoint with Cisco UCM 11.0 Configuration Guide – DOC. 7991A...
- Page 43 90 session refresh header-passing registrar server expires max 120 min 60 early-offer forced midcall-signaling passthru CCS-UC-1: Secure SIP Endpoint with Cisco UCM 11.0 • 39 Configuration Guide – DOC. 7991A...
- Page 44 972265727[7-9] voice-class codec 1 voice-class sip bind control source-interface GigabitEthernet0/0 voice-class sip bind media source-interface GigabitEthernet0/0 40 • CCS-UC-1: Secure SIP Endpoint with Cisco UCM 11.0 Configuration Guide – DOC. 7991A...
- Page 45 1 voice-class sip bind control source-interface GigabitEthernet0/0 voice-class sip bind media source-interface GigabitEthernet0/0 dtmf-relay rtp-nte no srtp CCS-UC-1: Secure SIP Endpoint with Cisco UCM 11.0 • 41 Configuration Guide – DOC. 7991A...
-
Page 46: Cisco Ucm Media Termination Point Configuration
This is the same name as that configured on the Cisco UBE. 5. Configure Device Pool: Default. 6. Check the Trusted Relay Point check box. 42 • CCS-UC-1: Secure SIP Endpoint with Cisco UCM 11.0 Configuration Guide – DOC. 7991A... -
Page 47: Cisco Ucm Conference Bridge Configuration
Cisco UBE. 5. Configure Device Pool: Default. 6. Select Device Security Mode: Encrypted Conference Bridge. 7. Select Use Trusted Relay Point: On. CCS-UC-1: Secure SIP Endpoint with Cisco UCM 11.0 • 43 Configuration Guide – DOC. 7991A... -
Page 48: Cisco Ucm Mrg Configuration
3. Provide a Name: MRG_Secure_phones was used in this example. 4. Select Media Resources from the Available Media Resources. For this example, the resources MOH_2 (MOH) , ANN_2(ANN), Crestronrtr, and SRTP-MTP were added. 44 • CCS-UC-1: Secure SIP Endpoint with Cisco UCM 11.0 Configuration Guide – DOC. 7991A... - Page 49 3. Provide a Name: MRG_Secure_trk was used in this example. 4. Select Media Resources from the Available Media Resources. For this example, the resources MOH_2 (MOH), Crestronrtr, and SRTP-MTP were added. CCS-UC-1: Secure SIP Endpoint with Cisco UCM 11.0 • 45 Configuration Guide – DOC. 7991A...
- Page 50 3. Provide a Name: MRGL_Secure_phones was used in this example. 4. Select the desired media resource groups from the Available Media Resource Groups. MRG_Secure_phones resource group was added to the list. 46 • CCS-UC-1: Secure SIP Endpoint with Cisco UCM 11.0 Configuration Guide – DOC. 7991A...
- Page 51 3. Provide a Name: MRGL_Secure_trk was used in this example. 4. Select the desired media resource groups from the Available Media Resource Groups: MRG_Secure_trk resource group was added to the list. CCS-UC-1: Secure SIP Endpoint with Cisco UCM 11.0 • 47 Configuration Guide – DOC. 7991A...
-
Page 52: Configure Region For G729
5. On the screen that follows, select the newly added region in the lower pane and Maximum Audio Bit Rate select the from the drop-down menu as 8kbps (G729). 6. Click Save. 48 • CCS-UC-1: Secure SIP Endpoint with Cisco UCM 11.0 Configuration Guide – DOC. 7991A... -
Page 53: Modify Device Pool Configuration
1. Navigate to System > Device Pool. Cisco UCM: Find and List Device Pools 2. Click Default. 3. Media Resource Group List: Select the MRGL_Secure from the drop-down menu. CCS-UC-1: Secure SIP Endpoint with Cisco UCM 11.0 • 49 Configuration Guide – DOC. 7991A... -
Page 54: Configure Trunk
1. From the Device menu drop-down menu, select Trunk. 2. Click Add New. Cisco UCM: Trunk Configuration 50 • CCS-UC-1: Secure SIP Endpoint with Cisco UCM 11.0 Configuration Guide – DOC. 7991A... - Page 55 7. From the Media Resource Group List, select MRGL_Secure_trk from the drop- down menu. 8. Ensure that the Media Termination Point Required check box is unchecked. CCS-UC-1: Secure SIP Endpoint with Cisco UCM 11.0 • 51 Configuration Guide – DOC. 7991A...
- Page 56 10. Configure Consider Traffic on This Trunk Secure: When using both sRTP and TLS. 11. Configure Use Trusted Relay Point: On. Cisco UCM: Trunk Configuration Parameters (3/5) 52 • CCS-UC-1: Secure SIP Endpoint with Cisco UCM 11.0 Configuration Guide – DOC. 7991A...
- Page 57 12. Select the Redirecting Diversion Header Delivery – Inbound check box. Cisco UCM: Trunk Configuration Parameters (4/5) 13. Select the Redirecting Diversion Header Delivery – Outbound check box. Cisco UCM: Trunk Configuration Parameters (5/5) CCS-UC-1: Secure SIP Endpoint with Cisco UCM 11.0 • 53 Configuration Guide – DOC. 7991A...
-
Page 58: Configure Route Patterns
UCM to Cisco UBE using the access code “9” and using the “+”. Cisco UCM: Route Pattern Configuration: Outbound Dialing Using Access Code 9 (1/2) 54 • CCS-UC-1: Secure SIP Endpoint with Cisco UCM 11.0 Configuration Guide – DOC. 7991A... - Page 59 Cisco UCM: Route Pattern Configuration: Outbound Dialing Using Access Code 9 (2/2) CCS-UC-1: Secure SIP Endpoint with Cisco UCM 11.0 • 55 Configuration Guide – DOC. 7991A...
- Page 60 Cisco UCM: Route Pattern Configuration: Outbound Dialing Using a + (1/2) 56 • CCS-UC-1: Secure SIP Endpoint with Cisco UCM 11.0 Configuration Guide – DOC. 7991A...
- Page 61 Cisco UCM: Route Pattern Configuration: Outbound Dialing Using a + (2/2) CCS-UC-1: Secure SIP Endpoint with Cisco UCM 11.0 • 57 Configuration Guide – DOC. 7991A...
- Page 62 67.@ Similarly, the route pattern of * was configured to restrict caller ID on outbound calls. Cisco UCM: Route Pattern Configuration: Restrict Caller ID (1/2) 58 • CCS-UC-1: Secure SIP Endpoint with Cisco UCM 11.0 Configuration Guide – DOC. 7991A...
- Page 63 Cisco UCM: Route Pattern Configuration: Restrict Caller ID (2/2) CCS-UC-1: Secure SIP Endpoint with Cisco UCM 11.0 • 59 Configuration Guide – DOC. 7991A...
- Page 64 Crestron Electronics, Inc. Supplemental Guide – DOC. 7991A 15 Volvo Drive Rockleigh, NJ 07647 (2048877) Tel: 888.CRESTRON 05.17 Fax: 201.767.7576 Specifications subject to www.crestron.com change without notice.
Need help?
Do you have a question about the CCS-UC-1 and is the answer not in the manual?
Questions and answers