Advertisement
Available languages
Available languages
Quick Links
Download this manual
See also:
Owner's Manual
Advertisement

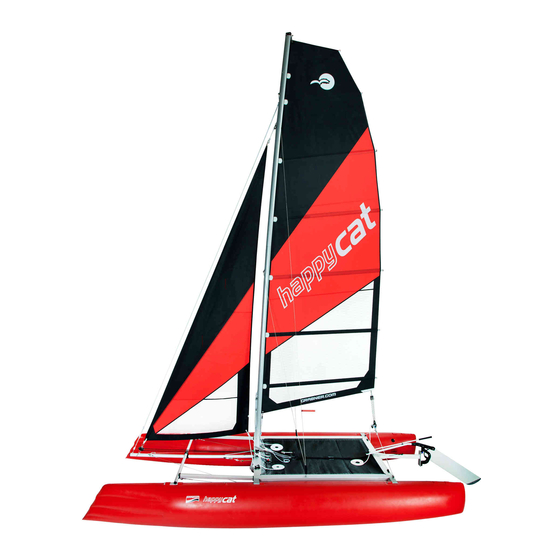
Summary of Contents for grabner HAPPY CAT EVOLUTION
- Page 1 Gennaker HaPPY CaT evoluTion / HurriCane GeBrauCHSanWeiSunG inSTruCTion-Manual...
- Page 2 MonTaGe MaSTHalTer STüCkliSTe 1 Gennaker 11 m² inkl. Packsack ► Schrauben Sie die Masthalterung am 1 Fall Mast-Unterteil fest. 1 Schot 1 Halsleine 1 Rollenblock für Fall 2 Rollenblöcke für Schot 2 Ratschenblöcke für Schot 1 Masthalterung mit Klemmen für Fall und Halsleine 2 Schrauben anWendunGSBereiCH...
- Page 3 ► Ziehen Sie nun den Draht vorsichtig MonTaGe uMlenkrollen durch den Bugspriet bis die Halsleine ► Befestigen Sie den Rollenblock ohne bei der Öffnung heraus kommt. Leine an der freien, oberen Öse am ► Trennen Sie die Verbindung von Mast-Oberteil. Draht und Halsleine.
- Page 4 aCHTunG: der Pfeil auf den rat- schenblöcken muss von außen nach innen zeigen. Gennaker SeTzen ► Knoten Sie die Halsleine am Segel- hals (TACK) an. ► Ziehen Sie das Gennakerfall durch ► Ziehen Sie an der Halsleine , bis die den oberen Rollenblock am Mast.
- Page 5 SCHoTfüHrunG ► Führen Sie die Schot weiter zum Ratschenblock auf der gegenüber- ► Knoten Sie ein Ende von der Genna- liegenden Bootsseite. kerschot am Schothorn (CLEW) an. ► Ziehen Sie die Schot, von innen nach außen, durch den Ratschenblock. ► Gehen Sie weiter zurück durch den zweiten Rollenblock am Rahmen- Hinterteil.
-
Page 6: Pflege Und Lagerung
Gennaker BerGen Gennaker erneuT SeTzen ► Lösen Sie die Halsleine von der ► Mit dem Fall den Gennaker ganz Klemme am Mast. nach oben ziehen und das Fall in der ► Lösen Sie das Gennakerfall und las- Klemme belegen. sen Sie den Gennaker herunter. ►... - Page 7 fiTTinG of ParT liST MaST Holder 1 Gennaker 11 m² 1 Halyard ► Screw the mast-holder to the lower 1 Sheet part of the mast. 1 Guy-line 1 Pulley for halyard 2 Pulley for sheet 2 Ratchet-cleat for sheet 1 Mast holder with block+cleat for haly- ard and guy-line 2 Screws aPPliCaTion of uSe...
- Page 8 ► Separate the guy-line from the wire. fiTTinG of THe ► Feed the guy-line through the fair- Guide-PulleY lead eye and cleat on the port side of the mast-holder, and secure the line ► Attach the pulley block without line to by figure eight knot.
- Page 9 ► Knot the guy-line to the tack (TACK). ► Pull the guy-line until the ball-knob touches the forward end of the aTTenTion: The arrow on the ratchet- bowsprit. cleats must point inward. HoiSTinG THe Gennaker ► Pull the gennaker halyard through the upper pulley-block of the mast.
- Page 10 SCHeeT aPPoinTMenT ► Take the sheet farther to the ratchet- cleat on the opposite side of the boat. ► Knot the end of the gennaker sheet ► Feed the sheet outward from the in- to the clew (CLEW). side of the ratchet-cleat. ►...
-
Page 11: Care And Storage
TakinG THe re-HoiSTinG THe Gennaker doWn Gennaker ► Detach the guy-line from the cleat at ► Pull the gennaker up by means of the the mast. halyard, and belay it in the cleat. ► Loosen the gennaker-halyard and lo- ► Pull the guy-line till the ball-knob tou- wer the gennaker. - Page 12 GRABNER GMBH Weistracherstraße 11 3350 HAAG, Österreich Tel: +43(0)7434/42251 Fax: +43(0)7434/42251-66 Mail: grabner@grabner.com www.grabner.com Technische Änderungen, Irrtum und Druck- ubject to change, technical changes errors fehler vorbehalten 11/18 and missprints 11/18...


Need help?
Do you have a question about the HAPPY CAT EVOLUTION and is the answer not in the manual?
Questions and answers