Table of Contents
Advertisement
Quick Links
I N S T A L L A T I O N I N S T R U C T I O N S
Instrucciones de instalación
Installationsanleitung
Instruções de Instalação
Istruzioni di installazione
Installatie-instructies
Instructions d´installation
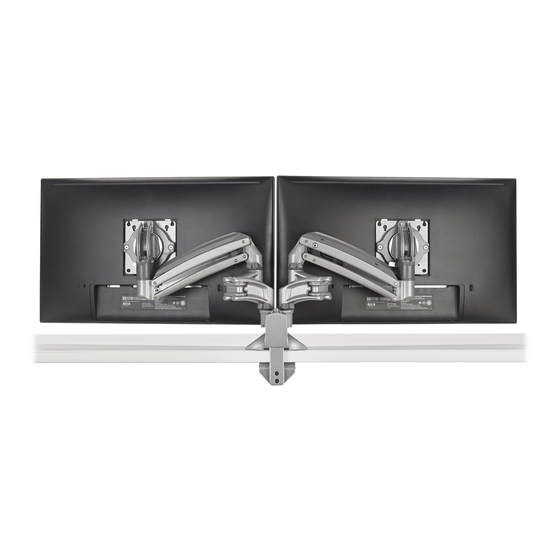
KXD Flexlink™ Desk Mounts
Portuguese Product Description
Spanish Product Description
German Product Description
Italian Product Description
Dutch Product Description
French Product Description
KXD220
Advertisement
Table of Contents

Related Manuals for CHIEF Flexlink KXD220


Summary of Contents for CHIEF Flexlink KXD220
- Page 1 I N S T A L L A T I O N I N S T R U C T I O N S Instrucciones de instalación Istruzioni di installazione Installationsanleitung Installatie-instructies Instruções de Instalação Instructions d´installation KXD Flexlink™ Desk Mounts Spanish Product Description German Product Description Portuguese Product Description...
-
Page 2: Important Safety Instructions
--SAVE THESE INSTRUCTIONS!-- ACCESSORY: AN ACCESSORY is the secondary Chief product which is attached to a primary Chief product, and may have a component attached or setting on it. COMPONENT: A COMPONENT is an audiovisual item designed to be attached or resting on an accessory or mounting system such as a video camera, CPU, screen, display, projector, etc. - Page 3 Installation Instructions KXD220 DIMENSIONS INTERFACE MOUNTING PATTERN ROTATION COMPATIBILITY RANGE 100 X 100 75 X 75 10 DOWN DYNAMIC HEIGHT ADJUST RANGE 18.81 5.81 477.8 147.6 DESKTOP THICKNESS RANGE 2.43 61.8 11.0...
- Page 4 KXD220 Installation Instructions LEGEND Tighten Fastener Pencil Mark Apretar elemento de fijación Marcar con lápiz Befestigungsteil festziehen Stiftmarkierung Apertar fixador Marcar com lápis Serrare il fissaggio Segno a matita Bevestiging vastdraaien Potloodmerkteken Serrez les fixations Marquage au crayon Loosen Fastener Drill Hole Aflojar elemento de fijación Perforar...
-
Page 5: Tools Required For Installation
Installation Instructions KXD220 TOOLS REQUIRED FOR INSTALLATION 3/16” (included) 1/8” (included) PARTS A (1) [Desk clamp arm] K (1) H (2) B (8) D (8) C (8) M4x4mm 3/16” M4x10mm M10x5.3x10 M4x20mm L (1) J (2) 1/8” #10-32-3/8” E (1) F (1) G (1) [Clamp bracket]... -
Page 6: Assembly And Installation
KXD220 Installation Instructions Assembly And Installation Grommet Hole Option NOTE: KXD clamp mounts may be installed directly to Connecting Desk Clamp Arms to Desk grommet holes between 1 1/4” and 2 1/2” in diameter. Standard Installation If grommet hardware (E-G) is used, they can be installed to grommet holes between 3/8”... - Page 7 Installation Instructions KXD220 Display Installation - Standard Faceplate Using Grommet Hardware Remove desk clamp from mount by loosening button head Remove quick release faceplate from mount by pulling cap screw until clamp is completely disengaged from the quick release lever and sliding faceplate off mount. (See bolt.
- Page 8 KXD220 Installation Instructions Adjustments For recessed mounting hole installation: • Place four spacers (D) on top of mounting holes Low Profile Adjustment on back of display. (See Figure 9) Adjust inside arm to achieve desired low profile depth. (See • Using Phillips screwdriver, carefully install four Figure 11) and (See Figure 12) M4x20mm screws (C) through corresponding...
-
Page 9: Pitch Adjustment
Installation Instructions KXD220 Pitch Adjustment Lift Arm Tension Adjustment Tension may be adjusted with tension adjustment screw Adjust pitch to desired tilt position. (See Figure 13) inside cable management cover and 1/8” hex key (L). (See Adjust pitch tension screw to change the adjustment Figure 15) tension. -
Page 10: Cable Management
KXD220 Installation Instructions Cable Management Display Removal Security Screw Press insides of cable management covers at both ends to NOTE: In order to prevent display from being easily removed unhinge tabs on either end of cable management cover on from mount using the quick release lever, install upper arm. - Page 11 Installation Instructions KXD220...
-
Page 12: Installation Instructions
KXD220 Installation Instructions USA/International A 6436 City West Parkway, Eden Prairie, MN 55344 P 800.582.6480 / 952.225.6000 F 877.894.6918 / 952.894.6918 Europe A Franklinstraat 14, 6003 DK Weert, Netherlands P +31 (0) 495 580 852 F +31 (0) 495 580 845 8800-003094 Rev00 2018 Legrand Asia Pacific...
Need help?
Do you have a question about the Flexlink KXD220 and is the answer not in the manual?
Questions and answers