Subscribe to Our Youtube Channel
Summary of Contents for Viega 8139
- Page 1 Viega WC element Instructions for Use for flush plates Visign Model Year built: 8139 from 05/2006 en_INT...
- Page 2 Viega WC element 2 from 20...
-
Page 3: Table Of Contents
Assembly information 3.1.1 Mounting conditions 3.1.2 Installation dimensions 3.1.3 Required tools Assembly 3.2.1 Mounting WC element 3.2.2 Connecting concealed cistern 3.2.3 Preparing optional actuation versions 3.2.4 Setting the flush volume Cleaning and maintenance Disposal Viega WC element 3 from 20... -
Page 4: About These Instructions For Use
This restriction does not extend to possible operating instructions. The installation of Viega products must take place in accordance with the general rules of engineering and the Viega instructions for use. -
Page 5: About This Translated Version
German/European directives specified in this manual: The information herein is not binding for other countries and regions; as said above, they should be understood as a recommendation. Viega WC element 5 from 20... -
Page 6: Product Information
DIN 4109 (additional sheet 2) ments Fulfilled noise protection require‐ VDI 4100 SSt I-SSt II ments Intended use 2.2.1 Areas of use The Viega Eco Plus WC element is suitable for mounting on load- bearing concrete floors. Viega WC element 6 from 20... -
Page 7: Product Description
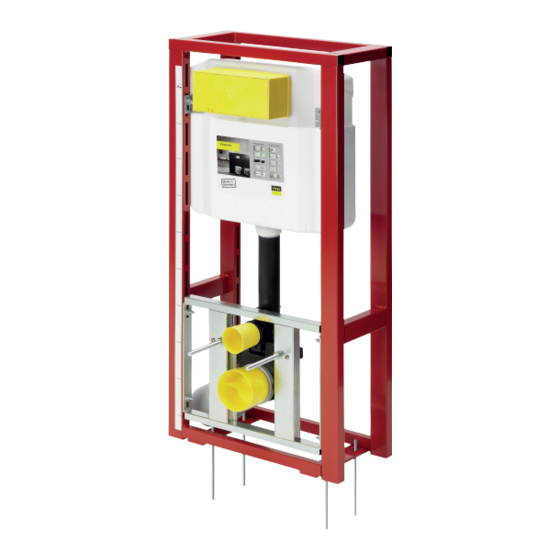
Product information Product description 2.3.1 Overview Fig. 1: Scope of delivery flush actuation site protection Viega concealed cistern 2H Viega WC element flushing pipe fixing for the WC ceramic drain elbow protective plug for flushing pipe protective plug for drain elbow... - Page 8 Visign for Style 14 Functional unit 8332.3 Visign for More Flush plate Visign for More 8352.1 Flush plate Visign for More 8351.1 Flush plate Visign for More 8354.1 Flush plate Visign for More 8357.1 Viega WC element 8 from 20...
-
Page 9: Sound Protection
6. 2.3.4 Technical data Flush volume Small flush volume Factory setting approx. 3 l Setting range approx. 3–4 l Large flush volume Factory setting approx. ca. 6 l Setting range approx. 6–9 l Viega WC element 9 from 20... -
Page 10: Handling
Assembly information 3.1.1 Mounting conditions Suitable walls The Viega WC element is suitable for mounting on masonry wall con‐ structions pursuant to the regulations in section Ä „Regulations from section: Fields of application / Mounting conditions“ on page 6. The WC element may only be mounted on even wall surfaces. -
Page 11: Installation Dimensions
Handling 3.1.2 Installation dimensions Fig. 2: WC element 8139 dimensions 3.1.3 Required tools The following tools are required for mounting the WC element: drill with 10 mm drill bit fork or ring spanner: 13 mm / 19 mm / 27 mm... -
Page 12: Assembly
Mounting WC element Mark the holes for the floor supports. Drill the holes for the floor supports. Ø10 Align the WC element in accordance with the cutting check and secure onto the floor (size 13). Viega WC element 12 from 20... - Page 13 If necessary, mount the reducer. Screw in the threaded rods for the WC ceramic. Pull the plastic protective sleeves over the threaded rods. Double clad the WC element with IFGP cladding panels (model 8055.10) (2 x 12.5 mm). Viega WC element 13 from 20...
-
Page 14: Connecting Concealed Cistern
Screw the ½ inch connector into the wall lead-in. Counter with a fork spanner (size 27). Loosen the plastic union nut. Pull the wall lead-in out. Press the connection. Viega WC element 14 from 20... - Page 15 Tighten the union nut. Loosen (size 19) the flexible hose at the filling valve. Open the corner valve. Flush the pipeline. Close the corner valve. Mount (size 19) the flexible hose onto the filling valve. Viega WC element 15 from 20...
- Page 16 Loosen (size 19) the flexible hose at the corner valve. Unscrew the plastic union nut. Pull the corner valve inwards out of the wall lead-in. Remove the plastic union nut. Remove the wall lead-in inwards. Viega WC element 16 from 20...
- Page 17 Loosen the closing cap on the left-hand upper side of the concealed cistern. Close the opening on the side with the closing cap. Push the wall lead-in from inside into the upper opening. Insert the corner valve into the wall lead-in. Viega WC element 17 from 20...
-
Page 18: Preparing Optional Actuation Versions
Visign for Public1 (model 8326.21). Lead the empty pipe from the hollow wall socket into the concealed cistern. Distance from the remote actuation to the cistern (x) min. 1.0 m max. 1.7 m Viega WC element 18 from 20... -
Page 19: Setting The Flush Volume
The WC element is factory-set at a large flush volume of approx. 6 l. The large flush volume can be set continuously from approx. 6 l up to approx. 9 l. Remove the drain valve from the concealed cistern. Viega WC element 19 from 20... -
Page 20: Cleaning And Maintenance
The valves may have to be replaced, depending on the extent of the deposits. Disposal Separate the product and packaging materials (e. g. paper, metal, plastic or non-ferrous metals) and dispose of in accordance with valid national legal requirements. Viega WC element 20 from 20...


Need help?
Do you have a question about the 8139 and is the answer not in the manual?
Questions and answers