Viega Eco Plus Instructions For Use Manual
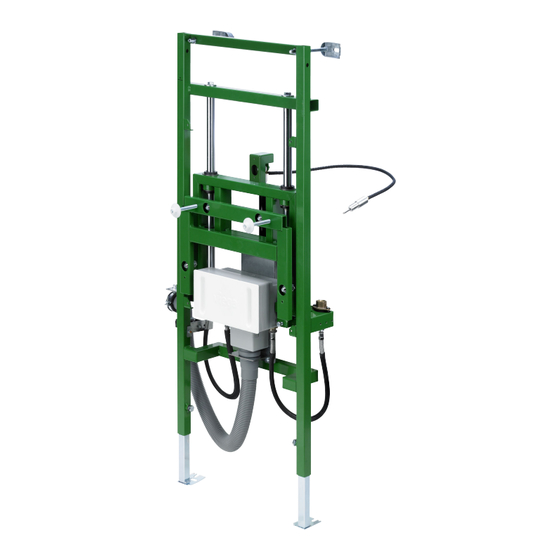
Washbasin element,
individually height-adjustable
Hide thumbs
Also See for Eco Plus:
- Instructions for use manual (28 pages) ,
- Instructions for use manual (14 pages) ,
- Instructions for use manual (20 pages)

Related Manuals for Viega Eco Plus


Summary of Contents for Viega Eco Plus
- Page 1 Viega Eco Plus washbasin element, individually height-adjustable Instructions for Use for washbasins with single-hole fitting, also barrier-free Model Year built: 8164.21 from 10/2015 en_INT...
- Page 2 Viega Eco Plus washbasin element, individually height-adjustable 2 from 37...
-
Page 3: Table Of Contents
3.2.3 Final assembly of the concealed connection box 3.2.4 Changing the sides of the hydraulic hose 3.2.5 Replacing the corner valves Lifting and lowering the washbasin Cleaning and maintenance Disposal Viega Eco Plus washbasin element, individually height-adjustable 3 from 37... -
Page 4: About This Instruction For Use
This restriction does not extend to possible operating instructions. The installation of Viega products must take place in accordance with the general rules of engineering and the Viega instructions for use. -
Page 5: About This Translated Version
German/European directives specified in this manual: The information herein is not binding for other countries and regions; as said above, they should be understood as a recommendation. Viega Eco Plus washbasin element, individually height-adjustable 5 from 37... -
Page 6: Product Information
Intended use 2.1.1 Areas of use The Viega Eco Plus washbasin element is suitable for mounting on wall constructions in acc. with DIN EN 1996-1-1, DIN 1045 and support pro- files in acc. with DIN 18183. The Viega Eco Plus washbasin element is suitable for washbasin ceramics with single-hole fitting (also barrier-free). -
Page 7: Product Description
14 - wall lead-in water connection mounting template 15 - cover plate contact surface cover frame 16 - threaded bolts for fixing sanitary objects seal (gauges for bore hole 280 mm) Viega Eco Plus washbasin element, individually height-adjustable 7 from 37... - Page 8 Actuation unit – connection to hydraulic cylinder, position 4 in the overall view Fig. 2: for 4 – actuation unit for 8164.21, overview 1 - concealed socket 2 - actuation unit 3 - sleeve 4 - actuating button 5 - rosette Viega Eco Plus washbasin element, individually height-adjustable 8 from 37...
-
Page 9: Operating Mode
The gas pressure spring enables continuous adjustment of the seat height within a 20 cm range. Further information can be found in the instruction for use of the gas pressure spring. Viega Eco Plus washbasin element, individually height-adjustable 9 from 37... -
Page 10: Compatible Components
200 mm washbasin height Fixing interval of the washbasin 280 mm ceramic max. washbasin width 700 mm Wall construction max. 45 mm (incl. wall tile) Viega Eco Plus washbasin element, individually height-adjustable 10 from 37... -
Page 11: Accessories
8064.22 for mounting. Spare parts If necessary, you can order the following spare parts: The cover plate model 8064.22, suitable for the Viega Eco Plus wash- basin element model 8164.21, glass Push button with rosette for individual height adjustments of WB... - Page 12 Drainpipe model 9945.143 chrome-plated with flanged rim 75 mm, article 121 587 chrome-plated with flanged rim 120 mm, article 670 856 Gas pressure spring model 8172.1, only in connection with Viega Eco Plus washbasin element model 8164.21 Steel hydraulic actuation Push button 8064.10 with rosette, only in connection with Viega Eco...
-
Page 13: Handling
160 mm; outermost fixing points for support profiles with a depth of 75 mm right 135 mm; (when holding plate 2 is shortened) outermost fixing points for support profiles with a depth of 50 mm. Viega Eco Plus washbasin element, individually height-adjustable 13 from 37... -
Page 14: Installation Dimensions
Fig. 5: Washbasin element 8164.21 dimensions 3.1.3 Required tools The following tools are required for mounting the washbasin element: drill with 10 mm drill bit ratchet with sockets: 13 mm / 17 mm Viega Eco Plus washbasin element, individually height-adjustable 14 from 37... - Page 15 10 mm / 13 mm / 17 mm / 19 mm / 22 mm / 27 mm Allen key: 5 mm Phillips-tip screwdriver flat-blade screwdriver silicone press cutting knife hacksaw file for deburring Viega Eco Plus washbasin element, individually height-adjustable 15 from 37...
-
Page 16: Assembly
Mounting the element Preparing the concealed connection box Remove mounting template from the element. Remove the site protection from the concealed connection box. Seal the corner valve (e.g. using hemp). Viega Eco Plus washbasin element, individually height-adjustable 16 from 37... - Page 17 (see marking on the top holder). Install the complete holders in the concealed connection box. In addition, audibly clip each of the three catches into the concealed connection box. 150% Viega Eco Plus washbasin element, individually height-adjustable 17 from 37...
- Page 18 Mount the flexible hose on the left-hand side of the wall lead-in of the element using a compression fitting (size 19). Repeat mounting on the right-hand side. Only for mounting support pro- files Viega Eco Plus washbasin element, individually height-adjustable 18 from 37...
- Page 19 50 mm. 75 mm 50 mm Mount the pipe clamp for the drain elbow to retaining plate 2. Mount the drain elbow in the pipe clamp. Viega Eco Plus washbasin element, individually height-adjustable 19 from 37...
- Page 20 Handling Make a wastewater connection (DN 40) on site. Mount pipe clamp to retaining plate 1 (size 13) and on the sleeve of the wastewater hose connection. Viega Eco Plus washbasin element, individually height-adjustable 20 from 37...
- Page 21 Mount the fixing set supplied with the fork spanner (size 13). Align the washbasin element and set the distance to the wall 135–200 mm (size 17). 1 3 5 - 2 0 0 m m Viega Eco Plus washbasin element, individually height-adjustable 21 from 37...
- Page 22 Attach washbasin element to the floor (size 13). Provide connections to the water and wastewater pipe system on site. Encase the element with support profiles in order to clad it. Viega Eco Plus washbasin element, individually height-adjustable 22 from 37...
- Page 23 Ä Chapter 3.2.4 ‘Changing the sides of the hydraulic hose’ min. 43 Ø68 on page 33 . not be screwed together with the height-adjust- Plaster board must able internal frame! Viega Eco Plus washbasin element, individually height-adjustable 23 from 37...
- Page 24 Handling Install the concealed socket and mounting template. Tile up to the mounting template and concealed socket. Viega Eco Plus washbasin element, individually height-adjustable 24 from 37...
- Page 25 Ä ‘Construction height’ made during this assembly step, see on page 14 . 1 , 0 0 0 m 0 - 2 Secure element onto the floor and in the support profiles. Viega Eco Plus washbasin element, individually height-adjustable 25 from 37...
-
Page 26: Mounting The Cover Plate
Tile up to the mounting template and concealed socket. 3.2.2 Mounting the cover plate Mount the bearing surface (H support) for the cover plate flush with the finished wall surface (size 17 / 19). Viega Eco Plus washbasin element, individually height-adjustable 26 from 37... - Page 27 Tighten the rear threaded nuts at all four points (size 17). When doing so, hold the threaded bolts with a flat-blade screw- driver. Tighten the front threaded nuts at all four points (size 17). Check to ensure they are flush. Viega Eco Plus washbasin element, individually height-adjustable 27 from 37...
- Page 28 R 50 Observe the minimum radius of 50 mm for hydraulic actuation. This prevents the hydraulic actuation from buckling. Fit the supplied seal in the cover frame on the front. Viega Eco Plus washbasin element, individually height-adjustable 28 from 37...
- Page 29 5 mm, in order to ensure the washbasin height adjustment functions smoothly. Cut the concealed connection box flush with the cover plate INFO! Take care when cutting! Do not damage the cover plate. Viega Eco Plus washbasin element, individually height-adjustable 29 from 37...
-
Page 30: Final Assembly Of The Concealed Connection Box
Seal the gap between the cover plate and the ceramic washbasin with silicone. Connect the first washbasin fitting connection via the supplied copper pipe (SW 19). If necessary, cut supplied chrome-plated pipe elbows to length. Viega Eco Plus washbasin element, individually height-adjustable 30 from 37... - Page 31 Example illustration: Connection of a washbasin fitting to the con- cealed connection box with flexible hoses. Align corner valves: align the chrome-plated pipe elbow with the marking aid (line in the concealed connection box). α Viega Eco Plus washbasin element, individually height-adjustable 31 from 37...
- Page 32 INFO! The adjustment range of the odour trap is 20 mm up and down. +20 mm Attach the cover plate to the concealed connection box. The lateral bars serve as anti-twist protection. Viega Eco Plus washbasin element, individually height-adjustable 32 from 37...
-
Page 33: Changing The Sides Of The Hydraulic Hose
Changing the sides of the hydraulic hose Loosen Allen screw (SW 5) on the head of the gas pressure spring. Swing out the gas pressure spring to the left and right-hand side. Viega Eco Plus washbasin element, individually height-adjustable 33 from 37... - Page 34 Mount hydraulic hose and actuation unit as described Ä Chapter 3.2.3 ‘Final assembly of the concealed connection box’ on page 30 . Re-mount hydraulic hose in the prescribed guide on the rear side of the washbasin element. Viega Eco Plus washbasin element, individually height-adjustable 34 from 37...
-
Page 35: Replacing The Corner Valves
Keep hands away from the dangerous areas. Push the washbasin down by hand or by leaning on it. If the washbasin does not lower: Push the actuation button to unlock. Viega Eco Plus washbasin element, individually height-adjustable 35 from 37... -
Page 36: Cleaning And Maintenance
ð Washbasin is secured in the chosen position. Stop Cleaning and maintenance The mechanism of the height adjustment is maintenance-free. Maintenance and cleaning work may only be carried out by specialist trade professionals or qualified experts. Viega Eco Plus washbasin element, individually height-adjustable 36 from 37... -
Page 37: Disposal
Consult a specialist company in the event of blockages. Disposal Separate the product and packaging materials (e. g. paper, metal, plastic or non-ferrous metals) and dispose of in accordance with valid national legal requirements. Viega Eco Plus washbasin element, individually height-adjustable 37 from 37...
Need help?
Do you have a question about the Eco Plus and is the answer not in the manual?
Questions and answers