Viega Eco Plus Instructions For Use Manual
Hide thumbs
Also See for Eco Plus:
- Instructions for use manual (37 pages) ,
- Instructions for use manual (23 pages) ,
- Instructions for use manual (14 pages)

Related Manuals for Viega Eco Plus


Summary of Contents for Viega Eco Plus
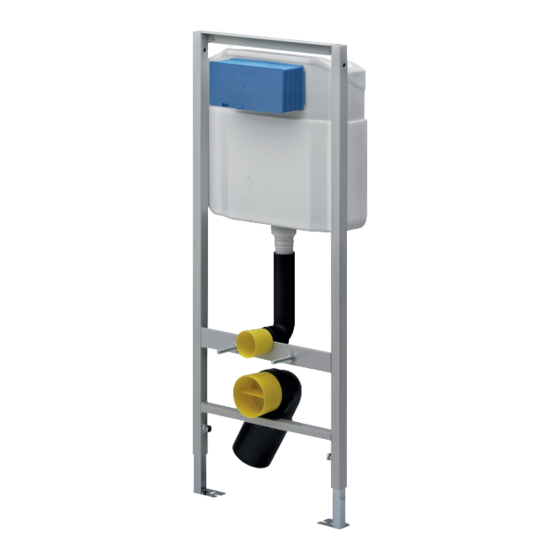
- Page 1 Viega Eco WC element Instructions for Use Viega Eco Plus Model Year built: 8180.26 from 08/2007 en_INT...
- Page 2 Viega Eco WC element 2 from 26...
-
Page 3: Table Of Contents
Assembly information 3.1.1 Mounting conditions 3.1.2 Installation dimensions 3.1.3 Required tools Assembly 3.2.1 Mounting WC element 3.2.2 Connecting concealed cistern 3.2.3 Preparing optional actuation versions 3.2.4 Setting the flush volume Cleaning and maintenance Disposal Viega Eco WC element 3 from 26... -
Page 4: About This Instruction For Use
This restriction does not extend to possible operating instructions. The installation of Viega products must take place in accordance with the general rules of engineering and the Viega instructions for use. -
Page 5: About This Translated Version
German/European guidelines in this manual: The information is not binding for other countries and territories and should, as mentioned, be considered as support. Viega Eco WC element 5 from 26... -
Page 6: Product Information
2 Product information Intended use 2.1.1 Areas of use The Viega Eco Plus WC element is suitable for mounting on wall con- structions in acc. with DIN EN 1996-1-1, DIN 1045 and support profiles in acc. with DIN 18183. Product description 2.2.1... -
Page 7: Compatible Components
Name Model number Standard Flush plate Standard 1 8180.1 Visign for Style Flush plate 8315.1 Visign for Style 10 Flush plate 8333.1 Visign for Style 13 Flush plate 8334.1 Visign for Style 14 Viega Eco WC element 7 from 26... -
Page 8: Sound Protection
VDI 4100 SSt I-SSt III. 2.2.4 Technical data Flush volume Small flush volume Factory setting approx. 3 l Setting range approx. 3–4 l Large flush volume Factory setting approx. ca. 6 l adjustable to approx. 9 l Viega Eco WC element 8 from 26... -
Page 9: Accessories
Product information Accessories Required accessories The fixing set model 8173 is required to secure. Viega Eco WC element 9 from 26... -
Page 10: Handling
WC element is clad and tiled. The corresponding empty pipe (included in the scope of delivery of the remote actuation) is required when preparing the remote actuation Visign for Public1. Viega Eco WC element 10 from 26... -
Page 11: Installation Dimensions
10 mm drill bit ratchet with sockets: 13 mm / 17 mm fork or ring spanner: 10 mm / 13 mm / 17 mm / 19 mm fork or ring spanner: 27 mm Viega Eco WC element 11 from 26... -
Page 12: Assembly
Mounting WC element Masonry wall Determine and mark fixing points. x1: 390 mm x2: 1110 mm. Ø10 Drill holes. 1000 0-200 0 - 2 0 Attach fixing set with the fork spanner (size 13). Viega Eco WC element 12 from 26... - Page 13 Attach WC element to the floor using the fork spanner (size 13) and the screws and dowels supplied. Set the installation depth of the WC element (130–200 mm) with the fork spanner (size 17). Viega Eco WC element 13 from 26...
- Page 14 Install site protection of the flush actuation. Pull the plastic protective sleeves for the threaded rods over the WC ceramic. Mount protective plug. If necessary mount a reducer. Carry out water connection. Viega Eco WC element 14 from 26...
- Page 15 Handling Double clad WC element with IFGP cladding panels (model 8055.10) (2 x 12.5 mm). Viega Eco WC element 15 from 26...
- Page 16 Determine construction height in accordance with the on-site marking of the upper edge of the finished floor. Pull WC element up (cutting check) and align. Tighten feet with the fork spanner (size 17). 1000 0-200 Mark holes for floor supports. Viega Eco WC element 16 from 26...
- Page 17 Handling Drill holes. Ø10 Secure WC element to floor (size 13). Attach WC element to the support profiles using the screws sup- plied. Connect the WC element flush with the support profiles. Viega Eco WC element 17 from 26...
- Page 18 Install site protection of the flush actuation. Pull the plastic protective sleeves for the threaded rods over the WC ceramic. Mount protective plug. If necessary mount a reducer. Carry out water connection. Viega Eco WC element 18 from 26...
-
Page 19: Connecting Concealed Cistern
If there is not enough space when pressing the water connection, the water connection can be pulled out to the side. Screw the ½ inch connector into the wall lead-in. Counter with a fork spanner (SW 27). Viega Eco WC element 19 from 26... - Page 20 The position of the key surface (SW 25) must be up or down. The clicking into the groove signals the correct position. Re-tighten the union nut. Loosen (SW 19) flexible hose onto the filling valve. Open corner valve. Flush pipeline. Viega Eco WC element 20 from 26...
- Page 21 Handling Close corner valve. Re-mount (SW 19) the flexible hose onto the filling valve. Viega Eco WC element 21 from 26...
- Page 22 Conversion water connection upwards (optional) Loosen (SW 19) flexible hose onto the corner valve. Unscrew plastic union nut. Pull the corner valve inwards out of the wall lead-in. Remove plastic union nut. Remove the wall lead-in inwards. Viega Eco WC element 22 from 26...
- Page 23 Loosen the closing cap on the left-hand upper side of the concealed cistern. Close opening on the side with the closing cap. Push wall lead-in from inside into the upper opening. Insert the corner valve back into the wall lead-in. Viega Eco WC element 23 from 26...
-
Page 24: Preparing Optional Actuation Versions
1.7 m Prepare electrical actuation A corresponding empty pipe (not included in the scope of delivery of the electrical actuation) is required for the preparation of the electrical actuation (model 8350.31 or model 8350.32). Viega Eco WC element 24 from 26... -
Page 25: Setting The Flush Volume
The WC element is factory-set at a large flush volume of approx. 6 l. The large flush volume can be set continuously from approx. 6 l up to approx. 9 l. Remove the drain valve from the concealed cistern. Viega Eco WC element 25 from 26... -
Page 26: Cleaning And Maintenance
The valves may have to be replaced, depending on the extent of deposits. Disposal Separate the product and packaging materials (e. g. paper, metal, plastic or non-ferrous metals) and dispose of in accordance with valid national legal requirements. Viega Eco WC element 26 from 26...
Need help?
Do you have a question about the Eco Plus and is the answer not in the manual?
Questions and answers