Table of Contents
Advertisement
Quick Links
Advertisement
Chapters
Table of Contents

Related Manuals for ProLights MOSAICO


Summary of Contents for ProLights MOSAICO
- Page 1 MOSAICO OUTDOOR LED PROJECTOR USER MANUAL MANUALE UTENTE EN - IT...
- Page 2 All rights reserved by Music & Lights S.r.l. No part of this instruction manual may be reproduced in any form or by any means for any commercial use. In order to improve the quality of products, Music&Lights S.r.l. reserves the right to modify the characteristics stated in this instruction manual at any time and without prior notice.
-
Page 3: Table Of Contents
3. 18 Construction of the DMX termination 4 Maintenance 4. 1 Maintenance and cleaning the unit 4. 2 Trouble shooting 4. 3 Animation wheel replacement 4. 4 Gobos replacement Packing content • MOSAICO • Power adapter cable • Signal adapter cable (2 pcs) • User manual... -
Page 4: General Instructions
MOSAICO WARNING! Before carrying out any operations with the unit, carefully read this instruction manual and keep it with cure for future reference. It contains important information about the installation, usage and maintenance of the unit. SAFETY General instruction • The products referred to in this manual conform to the European Community Directives and are there- fore marked with . -
Page 5: Introduction
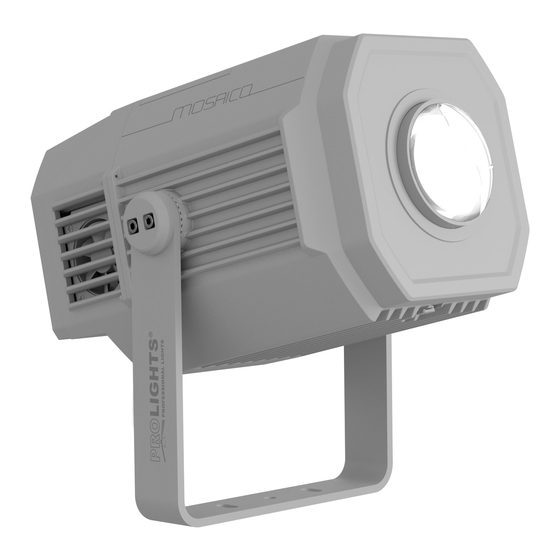
- 1 - INTRODUCTION 1.1 DESCRIPTION MOSAICO is a powerful outdoor LED fixture for the projection of textures, images and logos onto build- ings and landscapes. The outstanding 11’388 lumens output allows for replacement of the 1.200 HID fix- ture with this far more durable and advanced tool. The complete set of onboard effects allow for extreme creative integration in any context and the zoomable optics makes it a truly versatile fixture for both near- field and long-throw installations. - Page 6 MOSAICO • Firmware upgrade: yes, via USB - DMX interface (UPBOX1) not included ELECTRONICS • Dimmer: linear 0 ~ 100% electronic dimmer • Dimmer curves: 4 different dimming curves available • Strobe / shutter: 1~30 Hz, electronic • Operating temperature: -20° ~ +45°...
-
Page 7: Operating Elements And Connections
MOSAICO 1.3 OPERATING ELEMENTS AND CONNECTIONS Fig.2 Rear panel 1. MOUNTING BRACKET 2. 2x HEXAGONAL HEAD SCREW SYSTEMS for side, to tighten the bracket. 3. DMX IN (5-pole XLR): 1 = ground, 2 = DMX-, 3 = DMX+, 4 N/C, 5 N/C. -
Page 8: Installation
2.1 MOUNTING MOSAICO may be set up on a solid and even surface. The unit can also be mounted upside down to a cross arm. For fixing, stable mounting clips are required. The mounting place must be of sufficient stability and be able to support a weight of 10 times of the unit’s weight. -
Page 9: Mounting With Optional Bracket
50x50 mm to 150x150mm or circular cross-section with diameter from 50 mm to 150 mm. N.B.: Only the connection kit MOSAICO - bracket (3 pcs M12 screws, 3 pcs nuts) is included in the package. • Check that all accessories have been supplied with the product before installation. -
Page 10: Functions And Settings
MOSAICO - 3 - FUNCTIONS AND SETTINGS 3.1 OPERATION Connect the supplied main cable to a socket (100-240V~/50-60Hz). Then the unit is ready for operation and can be operated via a DMX controller or it independently performs its show program in succession. -
Page 11: Menu Structure
MOSAICO 3.3 MENU STRUCTURE MENU ð ð Default: 1 CONNECT DMX Address Value (1-512) ð DMX Mode 12 CH Default: 12CH 14 CH 16 CH ð Default: Off Wireless Receive On/Off On/Off ð Default: No Receive Reset Yes/No ð Default: No... - Page 12 MOSAICO ð ð 4 INFORMATION Default: 0 Fixture Time 0-9999 ð Temperature ** °C ð Fans Speed ð Software DISP: V1.0 Version CTR1:V1.0 CTR2:V1.0 ð 15D0****** View ð ð 5 STAND ALONE Play Default:Off ð Show Show 1 Default: Show 1...
- Page 13 MOSAICO ð ð Scenes Record Scenes 01 Scenes 02 DMX - Scenes Record Scenes 03 ..Scenes 30 Scenes 31 Scenes 32 ð ð Slave setup Edit Scenes 01 RGobo/ Focus/Zoom/RShutter Default: Edit Scenes 02 RGobo/ Focus/Zoom/RShutter RGobo: 0 ..
-
Page 14: Connect
• Press the MENU button repeatedly to exit the menu and save changes. To able to operate the MOSAICO with a light controller, adjust the DMX start address for the first a DMX channel. If the address 33 on the controller is provided for controlling the function of the first DMX chan- nel, adjust the start address 33 on the MOSAICO. - Page 15 MOSAICO until the display shows Connect, then select Receive Reset using the UP/DOWN buttons, then press the ENTER button. • To activate the mode use the UP / DOWN keys and select the Yes option. • Press the ENTER button to confirm the selection.
-
Page 16: Fixture Settings
MOSAICO specified time that you can set using the arrow buttons. To have the display always on select On or choose another value to turn off the display after the amount of time you choose. - Flip Display: Orientation of the display. This function allows you to rotate the display 180° to get a better view of the display when the unit is hanging upside down. -
Page 17: Information On The Device
MOSAICO • Press the MENU button to access the main menu. • Press the UP/DOWN button to scroll through the menu, select Advanced, then press the ENTER button to enter the next menu. • Press the UP/DOWN button to select one off the following parametres: - Reset - To start a preset program to restore the selected function (All, Color 1, Color 2, Gobo, Prism , Frost, Focus, Zoom, Animation). - Page 18 MOSAICO • Press the UP/DOWN button to scroll through the menu, select Play and press the ENTER button to enter the next menu. • Press the UP/DOWN button to scroll through the menu, select Chase and press the ENTER button to enter the next menu.
- Page 19 After pushing ENTER button, MOSAICO will wait for the confirm. • From the DMX console, change the parameters of the MOSAICO based on the scene to be created. • After creating the scene, press ENTER on the MOSAICO (the message STORED will appear).
- Page 20 MOSAICO • Press the UP/DOWN button to change the value of the function, then press the ENTER button to confirm. • Press the MENU button repeatedly to exit the menu and save changes. NOTE: if the Slave units have to do the same operation as the MASTER, during a recording, the values of Focus, Zoom and RGobo will not be stored.
-
Page 21: Dmx Control
MOSAICO 3.15 DMX CONTROL SCENES 12 CH 14 CH 16 CH FUNCTION RECORD Value SHUTTER Shutter closed 000 - 031 No function (shutter open) 032 - 063 Strobe effect slow to fast 064 - 095 No function (shutter open) 096 - 127... - Page 22 MOSAICO SCENES 12 CH 14 CH 16 CH FUNCTION Value RECORD PINK + LIGHT GREEN 036 - 039 LIGHT GREEN 040 - 043 LIGHT GREEN + DARK ORANGE 044 - 047 DARK ORANGE 048 - 051 DARK ORANGE + CYAN...
- Page 23 MOSAICO SCENES 12 CH 14 CH 16 CH FUNCTION RECORD Value FROST 0% to 100% 000 - 255 000 - 255 FOCUS 000 - 255 ZOOM ANIMATION WHEEL Open/No Function 000 - 003 Forward stop to fastest 004 - 127...
- Page 24 MOSAICO SCENES 12 CH 14 CH 16 CH FUNCTION RECORD Value SCENE No Function 000 - 007 Scene 1 008 - 015 Scene 2 016 - 023 Scene 3 024 - 030 Scene 4 031 - 038 Scene 5 039 - 046...
-
Page 25: Color And Rotating Gobos
MOSAICO 3.16 COLOR Dark Blue Yellow Green Light Orange Magenta Open Dark Red Pink Light green Dark Orange Cyan Open Jade ROTATING GOBOS ANIMATION WHEEL Glass Metal... -
Page 26: Connection Of The Dmx Line
MOSAICO 3.17 CONNECTION OF THE DMX LINE DMX connection employs standard XLR connectors. Use shielded pair-twisted cables with 120Ω imped- ance and low capacity. The following diagram shows the connection mode: DMX - INPUT DMX - OUTPUT XLR plug XLR socket... -
Page 27: Maintenance
MOSAICO - 4 - MAINTENANCE 4.1 MAINTENANCE AND CLEANING THE UNIT • Make sure the area below the installation place is free from unwanted persons during setup. • Switch off the unit, unplug the main cable and wait until the unit has cooled down. -
Page 28: Animation Wheel Replacement
MOSAICO 4.3 ANIMATION WHEEL REPLACEMENT This procedure will explain how to replace the animation wheel. 1. To change the animation wheel, disconnect the fixture from power and allow components to cool. 2. Remove the upper cover by removing the 6 screws, to access the internal mechanics. -
Page 29: Gobos Replacement
MOSAICO 4.4 GOBOS REPLACEMENT Questa procedura spiegherà come sostituire i gobos. 1. Lift and extract the gobo holder you want to replace from the gobo wheel. 2. Remove the spring that secures the gobo to the support. 3. Insert the new gobo respecting the direction of the painted part. - Page 30 Music & Lights S.r.l. si riserva ogni diritto di elaborazione in qualsiasi forma delle presenti istruzioni per l’uso. La riproduzione - anche parziale - per propri scopi commerciali è vietata. Al fine di migliorare la qualità dei prodotti, la Music&Lights S.r.l. si riserva la facoltà di modificare, in qualunque momento e senza preavviso, le specifiche menzionate nel presente manuale di istruzioni.
- Page 31 4. 1 Manutenzione e pulizia del sistema ottico 4. 2 Risoluzione dei problemi 4. 3 Sostituzione animation wheel 4. 4 Sostituzione gobos Contenuto dell'imballo: • MOSAICO • Adattatore cavo di alimentazione • Adattatore cavo di segnale (2 pz) • Manuale utente...
-
Page 32: Avvertenze Generali
MOSAICO ATTENZIONE! Prima di effettuare qualsiasi operazione con l’unità, leggere con attenzione questo manuale e conservarlo accuratamente per riferimenti futuri. Contiene informazioni importanti riguardo l’installazione, l’uso e la manutenzione dell’unità. SICUREZZA Avvertenze generali • I prodotti a cui questo manuale si riferisce sono conformi alle Direttive della Comunità Europea e per- tanto recano la sigla . -
Page 33: Introduzione
MOSAICO - 1 - INTRODUZIONE 1.1 DESCRIZIONE MOSAICO è potente proiettore gobos, immagini animazio- eccezionale fonte luminosa 11’388 lumens premette rimpiazza- re la classe di illuminatori 1.200 HID con un apparrecchio durevole, più avanzato ed IP66. Grazie alle molteplici funzionalità come ruota colori, frost, prisma e ruota animazioni diventa un proiettore versatile sia per eventi quotidiani che installazioni semi permanenti. - Page 34 MOSAICO • Display: display touch black OLED • Aggiornamento firmware: si, con interfaccia USB - DMX (UPBOX1) non inclusa ELETTRONICA • Dimmer: 0 ~ 100% lineare, elettronico • Curve dimmer: 4 curve dimmer regolabili • Strobo / shutter: 1~30 Hz, elettronico •...
-
Page 35: Elementi Di Comando E Di Collegamento
MOSAICO 1.3 ELEMENTI DI COMANDO E COLLEGAMENTI Fig.2 Pannello Posteriore 1. STAFFA DI MONTAGGIO 2. 2x SISTEMI A VITE A TESTA ESAGONALE per lato, per stringere la staffa 3. DMX IN (XLR a 5 poli): 1 = massa, 2 = DMX -, 3 = DMX +, 4 N/C, 5 N/C. -
Page 36: Installazione
- 2 - INSTALLAZIONE 2.1 MONTAGGIO Il MOSAICO può essere collocato su un piano solido. Inoltre, grazie alle possibilità di fissaggio sulla doppia staffa (fig.3), l’unità può essere montata anche a testa in giù, su una traversa. Per il fissaggio occorrono dei supporti robusti per il montaggio. -
Page 37: Montaggio Con Staffa Opzionale
50x50 mm a 150x150 mm o sezione circolare con diametro da 50 mm a 150 mm. N.B.: E’ incluso nella confezione solo il kit di connessione MOSAICO - staffa (3 pcs viti M12, 3 pcs dadi). • Verificare che siano stati forniti con il prodotto tutti gli accessori prima dell’installazione. -
Page 38: Funzioni E Impostazioni
Per spegnere il MOSAICO, staccare la spina dalla presa di rete. Per maggiore comodità è consigliabile collegare l’unità con una presa comandata da un interruttore. 3.2 IMPOSTAZIONE BASE Il MOSAICO dispone di un LED display e 4 pulsanti per accesso alle funzioni del pannello di controllo (fig.4). Mode Enter... -
Page 39: Struttura Menu
MOSAICO 3.3 STRUTTURA MENU MENU ð ð Default: 1 CONNECT DMX Address Value (1-512) ð DMX Mode 12 CH Default: 12CH 14 CH 16 CH ð Default: Off Wireless Receive On/Off On/Off ð Default: No Receive Reset Yes/No ð Default: No... - Page 40 MOSAICO ð ð 4 INFORMATION Default: 0 Fixture Time 0-9999 ð Temperature ** °C ð Fans Speed ð Software DISP: V1.0 Version CTR1:V1.0 CTR2:V1.0 ð 15D0****** View ð ð 5 STAND ALONE Play Default:Off ð Show Show 1 Default: Show 1...
- Page 41 MOSAICO ð ð Scenes Record Scenes 01 Scenes 02 DMX - Scenes Record Scenes 03 ..Scenes 30 Scenes 31 Scenes 32 ð ð Slave setup Edit Scenes 01 RGobo/ Focus/Zoom/RShutter Default: Edit Scenes 02 RGobo/ Focus/Zoom/RShutter RGobo: 0 ..
-
Page 42: Collegamento
DMX. Se, per esempio, sull’unità di comando è previsto l’indirizzo 33 per comandare la funzione del primo canale DMX, si deve impostare sul MOSAICO l’indirizzo di start 33. Le altre funzioni del pannello saranno assegnate automaticamente agli indirizzi successivi. Un esempio con indirizzo 33 di start in fig.5. -
Page 43: Screen
MOSAICO do i pulsanti UP/DOWN, quindi premere il pulsante ENTER. • Per attivare la modalità utilizzare i tasti UP/DOWN e selezionare l’opzione Yes. • Premere il pulsante ENTER per confermare la selezione. • Premere il pulsante MENU per tornare indietro o attendere alcuni secondi per uscire dal menu di confi- gurazione. -
Page 44: Impostazioni Del Dispositivo
MOSAICO Yes per attivare la funzione oppure No per disattivarla. - Warm Cue - Avviso di errore. Utilizzare i tasti UP/DOWN per selezionare Off o On a seconda che il di- splay mostri o meno avvisi di errore. - Key lock - Blocco tasti. Con questa funzione è possibile bloccare i tasti del pannello di controllo, per evitare, ad esempio, manomissioni delle impostazioni. -
Page 45: Informazioni Sul Dispositivo
MOSAICO • Premere il pulsante UP/DOWN per scorrere il menu, selezionare Advanced, quindi premere il pulsante ENTER per accedere al menu successivo. • Premere il pulsante UP/DOWN per selezionare uno dei seguenti parametri: - Reset - Per avviare un programma preimpostato per ripristinare la funzione selezionata (All, Color 1, Color 2, Gobo, Prism , Frost, Focus, Zoom, Animation). - Page 46 MOSAICO per accedere al menu successivo. • Premere il tasto UP/DOWN per selezionare Play e premere il tasto ENTER per accedere al menu succes- sivo. • Premere il tasto UP/DOWN per selezionare Chase e premere il tasto ENTER per accedere al menu suc- cessivo.
- Page 47 • Premere il tasto MENU più volte per uscire dal menu e per salvare le modifiche apportate. Scenes Record La funzione Scenes Record permette la registrazione delle scene del MOSAICO tramite la console su cui è stata memorizzata la fixture in Scene Record, in grado di pilotare le funzioni del faro espresse in DMX.
- Page 48 MOSAICO NOTA: se le unità Slave devono fare la stessa operazione del MASTER, durante una registrazione, non ver- ranno memorizzati i valori di Focus, Zoom e RGobo. Questi valori devono essere regolati manualmente sulle unità Slave, tramite questa sezione. Scenes Time La funzione Scenes Time permette di impostare i tempi di ingresso, durata e uscita di ogni singola scena.
-
Page 49: Canali Dmx
MOSAICO 3.15 CANALI DMX SCENES 12 CH 14 CH 16 CH FUNCTION RECORD Value SHUTTER Shutter closed 000 - 031 No function (shutter open) 032 - 063 Strobe effect slow to fast 064 - 095 No function (shutter open) 096 - 127... - Page 50 MOSAICO SCENES 12 CH 14 CH 16 CH FUNCTION Value RECORD PINK + LIGHT GREEN 036 - 039 LIGHT GREEN 040 - 043 LIGHT GREEN + DARK ORANGE 044 - 047 DARK ORANGE 048 - 051 DARK ORANGE + CYAN...
- Page 51 MOSAICO SCENES 12 CH 14 CH 16 CH FUNCTION RECORD Value FROST 0% to 100% 000 - 255 000 - 255 FOCUS 000 - 255 ZOOM ANIMATION WHEEL Open/No Function 000 - 003 Forward stop to fastest 004 - 127...
- Page 52 MOSAICO SCENES 12 CH 14 CH 16 CH FUNCTION RECORD Value SCENE No Function 000 - 007 Scene 1 008 - 015 Scene 2 016 - 023 Scene 3 024 - 030 Scene 4 031 - 038 Scene 5 039 - 046...
-
Page 53: Ruota Colori E Gobos
MOSAICO 3.16 COLOR Dark Blue Yellow Green Light Orange Magenta Open Dark Red Pink Light green Dark Orange Cyan Open Jade ROTATING GOBOS ANIMATION WHEEL Glass Metal... -
Page 54: Collegamenti Della Linea Dmx
MOSAICO 3.17 COLLEGAMENTI DELLA LINEA DMX La connessione DMX è realizzata con connettori standard XLR. Utilizzare cavi schermati, 2 poli ritorti, con impedenza 120Ω e bassa capacità. Per il collegamento fare riferimento allo schema di connessione riportato di seguito: DMX - INPUT... -
Page 55: Manutenzione
MOSAICO - 4 - MANUTENZIONE 4.1 MANUTENZIONE E PULIZIA DEL SISTEMA OTTICO • Durante gli interventi, assicurarsi che l’area sotto il luogo di installazione sia libera da personale non qualificato. • Spegnere l’unità, scollegare il cavo di alimentazione ed aspettare finché l’unità non si sia raffreddata. -
Page 56: Sostituzione Animation Wheel
MOSAICO 4.3 SOSTITUZIONE ANIMATION WHEEL Questa procedura spiegherà come sostituire l’animation wheel. 1. Per cambiare l’animation wheel, scollegare l’apparecchiatura dall’alimentazione e lasciare raffreddare i componenti. 2. Rimuovere la copertura superiore tramite la rimozione delle 6 viti, per accedere alle meccaniche inter- 3. -
Page 57: Sostituzione Gobos
MOSAICO 4.4 SOSTITUZIONE GOBOS Questa procedura spiegherà come sostituire i gobos. 1. Sollevare ed estrarre delicatamente dalla ruota gobo il supporto del gobo che desiderate sostituire. 2. Rimuovere la molla che assicura il gobo al supporto. 3. Inserire il nuovo gobo rispettando il verso della parte verniciata. - Page 58 Note...
- Page 60 MUSIC & LIGHTS S.r.l. - Phone +39 0771 72190 - www.musiclights.it...
Need help?
Do you have a question about the MOSAICO and is the answer not in the manual?
Questions and answers