
Subscribe to Our Youtube Channel
Related Manuals for Chiayo SDR-1900


Summary of Contents for Chiayo SDR-1900
-
Page 1: Operation Manual
SDR-1900 Operation manual UHF Dual-Channel 2-Way Sync Receiver SDR-1900 CHIAYO ELECTRONICS CO.,LTD. - Page 2 Thank you for choosing this wireless microphone system! For more details, please take a few moments to read this operating manual to have a thorough understanding of the function and operation of both transmitter and receiver. In the box SDR-1900 SDR-1900 receiver two transmitters a pair of antennas (handheld/beltpack) audio cable...
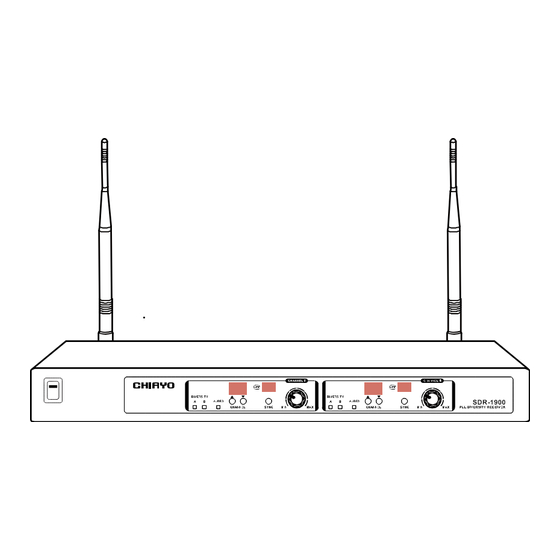
- Page 3 Instructions Parts and functions Front panel DIVERSITY DIVERSITY SDR-1900 AUDIO AUDIO CHANNEL SYNC CHANNEL SYNC PLL DIVERSITY RECEIVER 10 12 Rear panel 1. Power switch 13. IrDA synchronizing area 2. RF diversity indicator 14. IrDA synchronizing button 3. AF indicator 15.
- Page 4 SDR-1900 UHF Dual-Channel 2-Way Sync Receiver Channel synchronizing between receiver and transmitter Align infrared areas of the receiver and transmitter within 10~30cm. 10~30cm Changing the receiver’s channel Press the synchronizing button of the transmitter. The transmitter's LED will grow to denote synchronizing signal transmitted.
- Page 5 Instructions Audio output connection Balanced output XLR connector provides balanced audio output signal from this jack to the mixer/amplifier. Use an audio output cable with “XLR” or “Cannon” connector, connect one end to the balanced output jack of the receiver, and the other end to the “MIC IN” jack of the mixer/ amplifier.
- Page 6 SDR-1900 UHF Dual-Channel 2-Way Sync Receiver Receiver installation For best operation, the receiver should be at least 1m above the ground and 1m away from a wall or metal surface to minimize reflections. The transmitter should also be at least 1m away from a wall or metal surface to minimize reflections.
- Page 7 Instructions...
- Page 8 CHIAYO ELECTRONICS CO.,LTD. Http://www.chiayo.com.tw | Email: sales@chiayo.com.tw Office: 30, Lane 27, Section 4, Jen-Ai Road, Taipei 10685, Taiwan Tel: 886-2-27415741 | Fax: 886-2-27525242 Factory: 88, Chung-Hsiao Street 2, Chiayi 60080, Taiwan Tel: 886-5-2711000 | Fax: 886-5-5767611...
Need help?
Do you have a question about the SDR-1900 and is the answer not in the manual?
Questions and answers