
Related Manuals for Stevens AeroModel ToonSCALE FREDe


Summary of Contents for Stevens AeroModel ToonSCALE FREDe
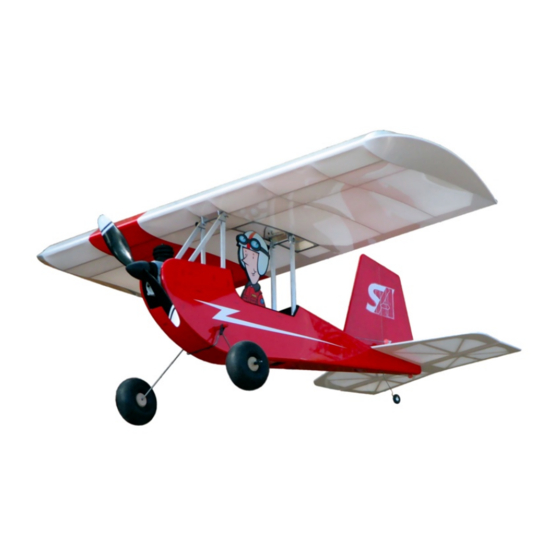
- Page 1 FREDe (S300) ToonSCALE™ By Stevens AeroModel Length 23 inches | Span 27 inches | Wing Area 260 inches | Flying Weight 12-14 oz. Version 10/02/2009 FREDe © 2009 Stevens AeroModel all rights reserved. Page 1 of 32...
-
Page 2: Product Support
Product Support WARRANTY Stevens AeroModel guarantees this kit to be free from defects in both material and workmanship at the date of purchase. This warranty does not cover any component parts damaged by use or modification. In no case shall Stevens AeroModel’s liability exceed the original cost of the purchased kit. Further, Stevens AeroModel reserves the right to change or modify this warranty without notice. - Page 3 ☐ 3M 77 or Glue Stick for Profile Pilot ☐ Small Round “Rat-Tail” file. ☐ 1 in. x 12 in. length sticky back velcro ☐ 3/4 in. wide clear tape FREDe © 2009 Stevens AeroModel all rights reserved. Page 3 of 32...
- Page 4 ☐ GWS ESC350C-CS 5.33:1, GWS 9x4.7 - 10x4.7 SF Propeller ☐ Castle Creations Pixie 20P Brushed ESC. (GWS ESC300A and Electrifly C-12 also suitable) ☐ 7.4V 2S1P ThunderPower Pro-Lite V2 910mAh or equivalent. FREDe © 2009 Stevens AeroModel all rights reserved. Page 4 of 32...
- Page 5 General Assembly Instructions Thank you, for purchasing this Stevens AeroModel FREDe™. A design inspired by the joy of flying. This ToonSCALE™ model has been developed and manufactured using state of the art CAD/CAM systems and features a unique interlocking construction process that, when compared to traditional methods found in other model aircraft kits, save countless hours of measuring, cutting, sanding, and fitting.
-
Page 6: Fuselage Construction
Ensure that the etching on F1 faces forward. ☐ Fit balsa former F4 to end of center crutch. ☐ Fit instrument panel F2 to assembly. holes in former extend below F00 crutch. FREDe © 2009 Stevens AeroModel all rights reserved. Page 8 of 32... - Page 7 F1. ALTERNATE NOSE - N2 properly installed. ☐ ☐ ALTERNATE NOSE - Install N1 forward of former F1 and against fuselage side FS matching top/forward edges F0. FREDe © 2009 Stevens AeroModel all rights reserved. Page 9 of 32...
- Page 8 Strut slot opens to the top and forward of F4 former. angles aft. ☐ ☐ Install F4a balsa doubler as illustrated. ☐ ☐ Install balsa doubler F3a aft of instrument panel. FREDe © 2009 Stevens AeroModel all rights reserved. Page 10 of 32...
- Page 9 ☐ Assemble hatch catch assembly from H4 and ☐ Install F9 spanning fuselage sides and former H5. Install 3/16 in. magnet to pocket in catch. F1. Note that F9 ends short of touching F2. FREDe © 2009 Stevens AeroModel all rights reserved. Page 11 of 32...
- Page 10 ☐ Install former F6 spanning fuselage sides and ☐ Pull fuselage sides together capturing former keyed to formers F1, F2, and F3. F5 and F8. Square to table and tack glue. FREDe © 2009 Stevens AeroModel all rights reserved. Page 12 of 32...
- Page 11 ☐ Open up the push-rod exit OPPOSITE to your ☐ Cut ONLY ONE of the servo pocket plugs “open” servo pocket. free. (right or left will not matter) FREDe © 2009 Stevens AeroModel all rights reserved. Page 13 of 32...
- Page 12 1/8 in., trim excess housing flush with F7. ☐ Bond H2 over vent hole centered to etch ☐ Cut 10.5mm paper tube to 3-1/2 in. length. marks along H1. Use thick CA glue. FREDe © 2009 Stevens AeroModel all rights reserved. Page 14 of 32...
- Page 13 Bond to dowel with thin CA. ☐ Use a sharpie or black paint to color “head”, ☐ Test fit of hatch to fuselage assembly then cut dowel flush with bottom of “head”. FREDe © 2009 Stevens AeroModel all rights reserved. Page 15 of 32...
-
Page 14: Wing Construction
☐ Install R1 ribs to slots at center of W2 lower spar assembly. ☐ Install W1 top spar to assembly. ☐ Key ribs R2 and R3 to notches in W2 spar assembly. Tack glue to retain. FREDe © 2009 Stevens AeroModel all rights reserved. Page 16 of 32... - Page 15 R1. contour of rib centerline aligning with notches in R4. INSTALL LEFT WING TIP ONLY FREDe © 2009 Stevens AeroModel all rights reserved. Page 17 of 32...
- Page 16 ☐ Install 1/4 in. square balsa leading edge stock ☐ Install RIGHT side wing tip using techniques to wing assembly. described in previous wing tip step. FREDe © 2009 Stevens AeroModel all rights reserved. Page 18 of 32...
- Page 17 ☐ Use a sanding block and or razor plane to round leading edge to match profile on plan. ☐ Lightly sand remainder of wing with 400 grit paper in preparation for covering. FREDe © 2009 Stevens AeroModel all rights reserved. Page 19 of 32...
- Page 18 ☐ Follow instructions on plan set to sand leading edge of control surface (Elevator and Rudder) at 45 degree angle in preparation for tape hinging. ☐ Cover parts with Stevens AeroModel AeroLITE or similar light weight, high quality, model airplane film. Remove covering from hole in center of horizontal stabilizer to receive the mounting post for the vertical fin.
- Page 19 FREDe © 2009 Stevens AeroModel all rights reserved. Page 21 of 32...
-
Page 20: Final Assembly
3/4 in. wide clear tape and trim excess to complete tape hinge. Rudder servo mounts within fuselage centered on servo rails. Repeat process above for Vertical Stabilizer and Rudder assembly. FREDe © 2009 Stevens AeroModel all rights reserved. Page 22 of 32... - Page 21 From excess 1/32 in. inside dia. push-rod tubing cut a length to 1-1/8 in. creating tail Gear Bearing Tube. FREDe © 2009 Stevens AeroModel all rights reserved. Page 23 of 32...
- Page 22 Pass gear wire through bearing tube, and 1 in. from where 45 degree bend started rudder post through notch in horizontal Create final series of bends as illustrated. stabilizer. Fit assembly square to fuselage. FREDe © 2009 Stevens AeroModel all rights reserved. Page 24 of 32...
- Page 23 ☐ ☐ Retain pushrod at control horn using ☐ ☐ Reduce length of trimmed servo horn by provided Du-Bro RC Micro EZ link cutting off one position as illustrated. (DUB849). FREDe © 2009 Stevens AeroModel all rights reserved. Page 25 of 32...
- Page 24 ☐ Install color artwork for instrument panel using 3M 77 adhesive or glue stick. Use a black paint marker to color the balsa profile edges black to match the pilot outline. FREDe © 2009 Stevens AeroModel all rights reserved. Page 26 of 32...
- Page 25 Install foam cockpit combing in same manner area of strut that will be bonded to the as foam interior bottom. fuselage or plywood gussets. FREDe © 2009 Stevens AeroModel all rights reserved. Page 27 of 32...
- Page 26 Use a small round file open up holes if necessary. ☐ Fit tabs to underside of wing assembly at pockets opened in previous step. Bond using thick CA glue. FREDe © 2009 Stevens AeroModel all rights reserved. Page 28 of 32...
- Page 27 ☐ Once inflated, twist valve stem then wrap around loop of gear and back to dowel. stem around spool/hub tucking stem in under Increase number of wraps to reduce spring of tire. landing gear. FREDe © 2009 Stevens AeroModel all rights reserved. Page 29 of 32...
- Page 28 Low Rate +/- 15 degrees 30% expo High Rate +/- 30 degrees 70% expo Elevator Travel Low Rate +/- 20 degrees 30% expo High Rate +/-40 degrees 70% expo FREDe © 2009 Stevens AeroModel all rights reserved. Page 30 of 32...
- Page 29 With rudder/elevator control and no mounting hardware. ailerons setting up landings in cross-winds should be avoided until you are comfortable with the model’s in-flight behavior. FREDe © 2009 Stevens AeroModel all rights reserved. Page 31 of 32...
- Page 30 Stevens AeroModel staff using any of the following methods: E-Mail - support@stevensaero.com RCGroups.com - Forum Build Threads Facebook.com - Search for Stevens AeroModel Phone - 719-387-4187 M-F 10A-5P MST FREDe © 2009 Stevens AeroModel all rights reserved. Page 32 of 32...
Need help?
Do you have a question about the ToonSCALE FREDe and is the answer not in the manual?
Questions and answers