Advertisement
Quick Links
1 Characteristics
●Battery Ah setting
●Operating and setting easily
EPIP-20 LT SERIES
●Automatic selection of voltage 12/24V
Charging Control
SOLAR CHARGE CONTROLLER
●PWM charging
●Temperature compensation. Boost, equalizing, float charging
●Four work mode: ON/OFF, lighting control, Lighting + hours on,
─for solar PV system
ON/OFF+exact time
Protecting Function
INSTRUCTION MANUAL
●TVS lighting protecting
●Over-load, short circuit, polarity reverse protection, electronic fuse.
Display
●LCD display specially designing for solar system
●LCD display: all system parameters in digital value, system status as
symbols
●Accurate clock show
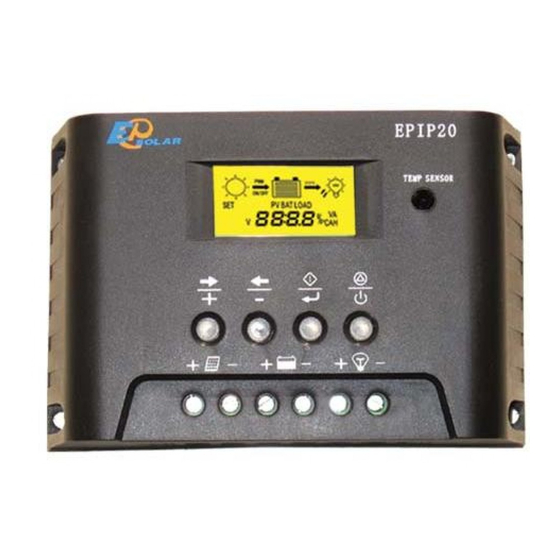
2 Controller panel instructions
LCD monitor
4 key setting
Terminal
3 Installations:
1
2
Advertisement

Related Manuals for Epsolar EPIP20-LT Series


Summary of Contents for Epsolar EPIP20-LT Series
- Page 1 1 Characteristics ●Battery Ah setting ●Operating and setting easily EPIP-20 LT SERIES ●Automatic selection of voltage 12/24V Charging Control SOLAR CHARGE CONTROLLER ●PWM charging ●Temperature compensation. Boost, equalizing, float charging ●Four work mode: ON/OFF, lighting control, Lighting + hours on, ─for solar PV system ON/OFF+exact time Protecting Function...
-
Page 2: Operation & Instructions
Connect the individual components to the symbols provided, they are 6.The negative battery is grounded or ground connected as the above. solar panel, battery and loads in order. Only install the regulator near the battery on a suitable surface. This surface should be solid, stable, even, 4. - Page 3 If charging, the strips will increase. Without charging or discharging, the strips inside will remain the XXXX status. XX.X ℃ XX.X XXXX XX XX Every strips equals 10% of battery capacity. XXXX XX:XX H:M shows status of battery. flashes when over discharging.
- Page 4 4.5.1 Real time adjustment Press K3 for one time and turn to the reading status for the first When LCD displays time to be adjusted:: Press K3 for two times season. and display “SET” Press K1,K2, and will display the months of first season, ON 1 ...
-
Page 5: Mechanical Specifications
Each season has two working period. And will show as ON1、 OFF1, ON2、 8 Problems & Troubleshooting: OFF2. ON1, OFF1 is for the first period, ON2, OFF2 is for the second Problems Troubleshooting period. The whole period is 24 hours. ON1 to OFF 2 is 24 hours. Sun symbol Battery over voltage.
Need help?
Do you have a question about the EPIP20-LT Series and is the answer not in the manual?
Questions and answers