
Related Manuals for Right Weigh 201-RTS-01(B)


Summary of Contents for Right Weigh 201-RTS-01(B)
- Page 1 Wireless Technology Enabled Exterior Digital Load Scale with Remote Trailer Sensor 201-RTS-01(B) 201-RTS-02(B) Installation and Operation Manual Please read carefully before installation...
- Page 2 The Bluetooth word mark and logos are registered trademarks owned by ® Bluetooth SIG, Inc. and any use of such marks by Right Weigh, Inc. is under license. Other trademarks and trade names are those of their respective owners.
-
Page 3: Table Of Contents
Estimated Steer + Average (S-AVG) Remote Trailer Connection Calibration Operating and Weighing Instructions Security PIN Code Overweight Warning Right Weigh Bluetooth™ App Overview Unique Scale Identifier Syncing your Device Set the Load Scale Name Settings & Sharing Troubleshooting Appendix A - Additional Parts... -
Page 4: Specifications & Overview
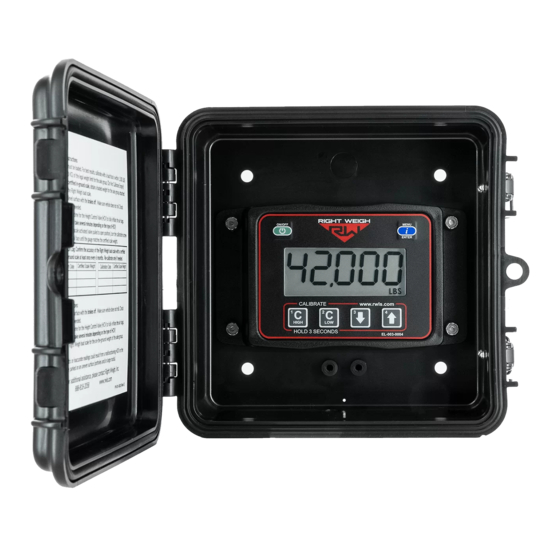
Specifications & Overview The Right Weigh 201-RTS series digital load scale is designed to monitor a tractor’s drive axle group, estimate the steer axle weight, and has the option of being connected to any Right Weigh remote trailer sensor. The 201-RTS-01(B) has one internal air pressure sensor and is designed to monitor a drive axle group containing one height Control Valve(HCV). - Page 5 Specifications & Overview Estimated Steer Axle: The weight of the steers can be estimated if this scale is used to monitor the drive axle group. Refer to the Estimated Steer + Average section for more information. Technical Specifications Operating Temperature: -22° F to +185° F (-30° C to +85° C) Storage Temperature: -40°...
-
Page 6: Installation And Electrical Connections
Installation and Electrical Connections The 201-RTS series is designed to be mounted on the inside or outside of the truck, however the 201-RTS-01/201-RTS-02 must still be mounted in a protective enclosure if mounted outside. A protective box and mounting bracket are included with the 201-RTS-01B/201-RTS-02B. Choose a location on the vehicle to mount the scale that is easily accessible and safe from potential damage (forklift posts, tire caps, etc.). - Page 7 Appendix 4: Install a new 1/4” air line and fitting to be used with the Right Weigh load scale into the street tee. Run the new air line from the street tee fitting to the mounting location of the scale.
- Page 8 Installation and Electrical Connections 6: Mount the remote trailer connection socket on the back of the truck where it will be accessible to the driver. A 2—1/8”(54mm) hole must be drilled to accept the socket, or a mounting bracket must be added. 7: Route the wiring through the truck and connect the threaded 12-pin data connector to the back of the load scale.
-
Page 9: Operating Modes
Operating Modes The next few pages cover the operating modes that are built into the 201-RTS Series load scale. The load scale can only be setup in one operating mode at a time. If the mode is changed, the calibration data will be reset to factory defaults, requiring re-calibration. -
Page 10: Estimated Steer + Average (S-Avg)
Operating Modes In the lower left of the display, a small number will be visible. This number corresponds to the axle group being displayed. Average Mode (AVG): 1=Drive 2=Remote Trailer 1 2= Drive + Remote Trailer Estimated Steer Mode Average (S-AVG): 1=Estimated Steer 2=Drive 3=Remote Trailer... -
Page 11: Remote Trailer Connection
When connected to a remote trailer sensor, trailer axle group empty and loaded weight values can be calibrated on the 201-RTS series load scale. The weight values entered by the user will be saved to the Right Weigh remote trailer sensor for ease of use in drop and hook situations. -
Page 12: Calibration
HCV to refill the system. (This may take several minutes depending on the type of HCV.) 4: Press the ON/OFF button to turn on the Right Weigh load scale. - Page 13 1: While the vehicle is fully loaded, obtain a weight from a certified in-ground scale for the axle group(s) attached to the Right Weigh load scale. 2: Park on a level surface. Shift the transmission to neutral and set the parking brakes.
-
Page 14: Operating And Weighing Instructions
HCV to refill the system. (This may take several minutes depending on the type of HCV.) 4: Press the ON/OFF button to turn on the Right Weigh load scale. 5: If monitoring multiple axle groups, press the MENU button to cycle the display through each axle group. -
Page 15: Security Pin Code
Security PIN Code A security PIN code can be added to the 201-RTS series to prevent tampering with the scale. It will need to be entered to change the calibration values, or to change the PIN code. Keep a copy of the PIN code for future use. Once a PIN has been set, it can be changed, but it cannot be removed. -
Page 16: Overweight Warning
Overweight Warning As an added visual warning, the display can be set to flash when above a set weight. For example, you may choose to have the display flash any time the weight on the axle group goes above 33,500 pounds. Setting an Overweight Warning 1: With the scale turned on, press and hold the C HIGH and C LOW buttons. - Page 17 Notes...
-
Page 18: Right Weigh Bluetooth™ App Overview
Right Weigh Right Weigh Load load scales, axle group weight readings are displayed on the Scale App The basic steps to connect your Right Weigh load scale to your smart device are: • Discover the unique name of your load scale(s) •... - Page 19 Right Weigh Load Scales App Overview App Home Screen 5. Share 4. Print 1. View Data 6. Settings Settings 7. Total Weight Support 2. Scale Name 8. Signal Status (Truck) and Weight Warning 3. Axle Group Indicators Name 9. Add a Scale...
-
Page 20: Unique Scale Identifier
Unique Scale Identifier Unique Scale Identifier: If this is the first time you have used the Right Weigh load scale, you will need to enter a special mode to view the scale’s unique identifier. This will help identify the scale when syncing more than one scale with your smart device. -
Page 21: Syncing Your Device
Syncing your Device Step 1: Press (+) Step 2: Press the Step 3: Select the load scale from truck icon. matching the unique identi- the home screen. fier of the scale you wish to sync with. Tap (+) If your gauge is setup in the If your gauge is setup in the Estimated default Average (AVG) mode, Steer - Average (S-AVG) mode, you... -
Page 22: Set The Load Scale Name
Set the Load Scale Name To re-name a scale, first go to the Scale Details page. You can get to the Scale Details page by tapping on the scale name from the home screen of the app. From there tap the pencil icon to begin editing the current scale name. Enter the new name then press return in the keypad to save. -
Page 23: Settings & Sharing
Settings and Sharing Settings In the settings screen, you have the option to change the unit of measure (LBS or KG), set warning and overload weights, toggle the net weight feature, toggle warning notifications, and to toggle/ change weight data log settings. -
Page 24: Troubleshooting
(refer to scale operating instructions for proper procedure). Drive the vehicle around the block and return to the same location. Acquire a second reading from the Right Weigh load scale. If the two readings are significantly different, then the HCV might be malfunctioning. - Page 25 Troubleshooting Scale does not power on: Scale is not If there is a bad connection in the circuit which causes voltage to drop below 9 volts, the scale will not power connected to a on. Test the power source with a voltmeter. switched power source of between 9 and 32 volts...
- Page 26 Troubleshooting App does not detect a Bluetooth scale: The scale has been If a scale has been connected to power for an extended powered on too or is period of time the Bluetooth transmitter can time-out. connected to power Reset the scale by momentarily disconnecting and constantly reconnecting the power source.
-
Page 27: Appendix A - Additional Parts
The following is a list of additional parts needed for air line installation. This list is just a suggestion and may not be all of the parts needed for your specific vehicle. Check with your Right Weigh dealer for optional installation kits. •... -
Page 28: Appendix B - Wiring Insulation
Appendix B - Wiring Insulation It is very important that all wiring connections be made watertight. Connections which are not watertight will allow moisture to travel through the individual strands of the wires and make it’s way into the scale, causing permanent damage to the electronics. -
Page 29: Warranty Statement
Our industry-leading warranty is our best effort to express this commitment. Products manufactured or sold by Right Weigh, Inc. are warrantied to be free from significant defects in material and workmanship 3 years from date of purchase. During this time, and within the boundaries set forth in this warranty statement, Right Weigh, Inc. -
Page 30: Return Policy & Repairs
Right Weigh, Inc. will return the repaired product at customer expense via a shipping method (carrier to be at sole discretion of Right Weigh, Inc.) equal to or faster than the method used by the customer. - Page 31 Notes...
- Page 32 United States, Canada and All Other Countries: Right Weigh, Inc. Tel: (888) 818-2058 www.rwls.com rwls@rwls.com Australia and New Zealand: Smart Truck Solutions Tel: 0418 622840 PP-003-0029 Rev A August 2018 Right Weigh, Inc. Hillsboro, Oregon, USA www.rwls.com ©2015-2018 Right Weigh, Inc. All rights reserved.
Need help?
Do you have a question about the 201-RTS-01(B) and is the answer not in the manual?
Questions and answers