Table of Contents
Advertisement
Quick Links
Advertisement
Table of Contents

Subscribe to Our Youtube Channel
Summary of Contents for SUNSTONE Orion M Series
- Page 1 Orion m Series Welding System User Manual...
-
Page 3: Table Of Contents
Table of Contents Chapter 1: Setup and Assembly . . . . . . . . . . . . . . . . . . p . - Page 4 m Series User Manual...
-
Page 5: What Is In The Box
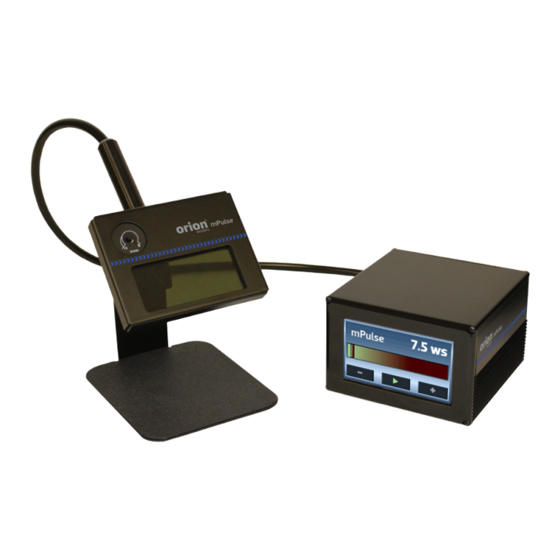
Chapter 1: Welder Setup & Assembly What is in the Box ALL ORION M SERIES SYSTEMS COME WITH: (1) Orion mPulse Welder/Power Supply and Stylus Hand Piece (1) Orion mPulse Welder Power Cord (2 pieces) (2) Alligator Clips (1) Shielding Gas Hose (1) Electrode Vile (5 –... -
Page 6: Microscope Arm Setup
m Series User Manual Insert the Orion stylus (from the back of the welder) into the Stylus Holder on the Darkening Lens stand . Adjust the darkening lens shade by turning the shade dial above the darkening lens screen . Turn clockwise for a lighter shade and counter- clockwise for darker shade . - Page 7 Mounting Option 3 - Bolt to table • Remove the clamp and position the base against the table . • Trace drill holes with a pen or marker . • Drill 1/4’ holes in the tabletop . • Run screws through the base into the drilled holes . MICROSCOPE SETUP •...
-
Page 8: Microscope Lcd Filter Shutter
m Series User Manual • Loosen/tighten the allen on the microscope arm to adjust the spring pressure . Turn the allen clockwise if the arm does not hold the microscope up . Turn the allen counter clockwise if the arm does not allow the microscope to come down . -
Page 9: Become Familiar With The Microscope
Become Familiar with the Microscope The Orion Microscope has been designed to provide maximum visual clarity, eye protection and ease of use . One challenge using the microscope is getting used to bringing the work piece to the welding electrode while looking through the microscope . - Page 10 m Series User Manual INSTALL THE TUNGSTEN ELECTRODE ONTO THE WELDING STYLUS Follow these steps to properly install the tungsten electrode . • Remove the stylus hull by pulling it away from the stylus shaft . • Loosen the collet cap by twisting it counter-clockwise . •...
-
Page 11: Shielding Gas Setup
electrode is to push down on the electrode with your index finger while twisting the electrode with the thumb and middle finger . • Once the electrode is sharp and clean, turn the Dremel off and insert the electrode back into the stylus as explained above . - Page 12 m Series User Manual SHIELDING GAS TANK AND REGULATOR SETUP • Ensure that your shielding gas tank is securely fastened to a stationary point near the welding area . • Turn the regulator dial COUNTER CLOCKWISE (closed) until it is fully backed out . meaning the dial become loose, to prevent over-pressurization of the line .
- Page 13 OrionWelders.com...
- Page 14 m Series User Manual...
-
Page 15: Mpulse Interface
Chapter 2: The Touch Screen Interface The Orion touch screen interface is very user friendly . Users have access to every welding parameter with one touch . Below is an explanation of the various buttons and options found on the Orion mPulse interface . *Orion touch screens are resistive touch screens . - Page 16 m Series User Manual...
-
Page 17: Chapter 3: Make A Weld
Chapter 3: Make a Weld Make An Arc Weld (using the provided weld plate) 1 . On the touch screen select 7 .5 Ws on the Energy bar and then hit Play . *Remember to verify the gas pressure and microscope connection . 2 . - Page 18 m Series User Manual Chapter 4: Recommended Welder Settings General Settings • These settings are to help users get started . Remember to adjust the power up and down as needed . Electrode Shaping: Stylus Cone Stylus Cone Sharp Electrode Tip Flat Electrode Tip Electrode placement examples: Add Metal Weld...
- Page 19 Add Material (24 AWG wire) Retip Prong (26 AWG wire) Metal Tip Shape Energy Notes Metal Tip Shape Energy Notes 14k Gold Sharp 17.5 ws Wire at 45 degree 14k Gold Sharp 10 ws Butt weld with 90 angle. degree electrode 24k Gold Sharp 15 ws...


Need help?
Do you have a question about the Orion M Series and is the answer not in the manual?
Questions and answers
I bought my sandstone Orion impulse second hand. I keep getting "welder is currently in a idle state" message on the screen. I'm beginning to think I bought a welder that doesnt work.Please give me some advice. Thank you, Joan Shumaker
The message "welder is currently in an idle state" for the SUNSTONE M Series Orion impulse welder means that the welder is powered on, but the welding functions are disabled. This occurs when the play/pause button is set to pause mode, showing the pause symbol.
This answer is automatically generated