
Subscribe to Our Youtube Channel
Related Manuals for STOVES Slide In SN600SIDLM


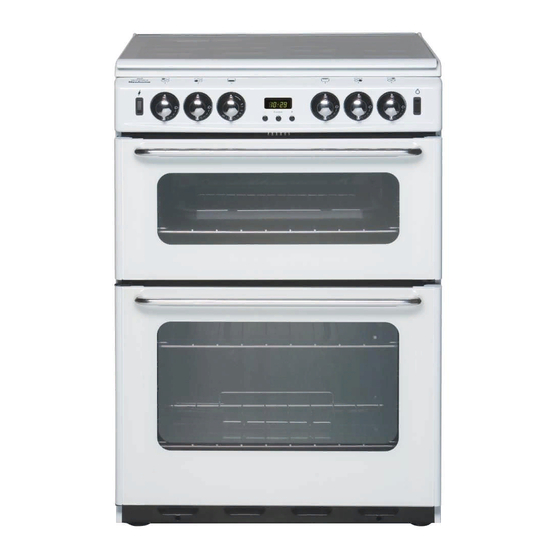
Summary of Contents for STOVES Slide In SN600SIDLM
- Page 1 Slide In 550mm & 600mm wide Freestanding Double Oven Gas Cookers (including models with minute minder and models with automatic programmer) Natural Gas Models & LP Gas Models User, Installation & Servicing Instructions RS2/2...
- Page 2 If you smell gas: - Do not try to light any appliance. - Do not touch any electrical switch. - Call the Gas Emergency Helpline at TRANSCO on: 0800 111999 The Gas Consumer Council (GCC) is an independent organisation which protects the interests of gas users.
-
Page 3: Table Of Contents
Technical Data ........31 Stoves Customer Care ....... . 32 Please keep this handbook for future reference, or for anyone else who may use the appliance. -
Page 4: User's Section
Introduction Thank you for choosing a British Gas & Electrical connection built appliance by Stoves Please refer to installation instructions We hope that the following information for the Gas & Electrical Safety Regulations will help you to familiarise yourself and the Ventilation Requirements. - Page 5 Introduction Glass door panels holes open or install a mechanical ventilation device (mechanical extractor To meet the relevant Standards of hood). Prolonged intensive use of the Domestic cooking appliances, all the appliance may call for additional glass panels on this appliance are ventilation, for example, opening of a toughened to meet the fragmentation window, or more effective ventilation,...
- Page 6 Introduction Environmental Protection To replace a light bulb (if fitted) Stoves Limited is committed to protecting Caution: Switch off the electricity the environment and operates an supply to the cooker at the socket, to Environmental Management System avoid the risk of electric shock. Wait...
-
Page 7: Be Safe - Not Sorry
Be Safe - Not Sorry ■ Do not use aluminium foil to cover When you are cooking, keep children away from the vicinity the grill pan, or put items wrapped of the appliance. in foil under the grill as this creates a fire hazard. -
Page 8: Using The Hob
Using the Hob Ignition Pans Push in and turn the selected control For optimum safety and performance, we knob anticlockwise to the ‘full on’ position recommend the use of flat bottomed pans and press the ignition switch (if fitted), with a base diameter of minimum 100mm or hold a lighted match or taper to the (4”) and maximum 250mm (10”). - Page 9 Using the Hob To save gas The fold down lid ■ Use the size of pan most suited to Caution: Glass lids may shatter when heated. Turn off all the burners before the size of the burner - ie; larger shutting the lid.
-
Page 10: Using The Grill
Using the Grill Caution: Accessible parts may Detachable grill pan handle be hot when the grill is used - Place the handle over the edge of the young children should be kept grill pan. The handle should be away. removed from the pan during grilling, to prevent overheating. - Page 11 Using the Grill The grill pan trivet Using aluminium foil The grill pan trivet - inside the grill pan Using aluminium foil to cover the grill - can be inverted to give a high or low pan, or putting items wrapped in foil position, or it may be removed under the grill creates a fire hazard.
-
Page 12: Using The Ovens
Using the Ovens Caution: When you are cooking Using the top oven keep children away from the Ignition vicinity of the oven. Push in and turn the top oven control knob anticlockwise to the ‘ ’ FULL ON If it is found, over a period of time, that position (gas mark 9). - Page 13 Using the Ovens Notes: Oven light (if fitted) As part of the cooking process, hot air Press the light button on the facia panel. is expelled through a vent at the top of the oven(s). When opening the oven Zones of heat door, care should be taken to avoid The temperature at the centre of the any possible contact with potentially...
-
Page 14: Oven Furniture
Using the Ovens Oven furniture Slow cooking Make sure that frozen foods are thoroughly before cooking. THAWED Baking tray and roasting tins Do not slow cook joints of meat or For best cooked results and even poultry weighing more than 2 kg / ⁄... -
Page 15: Top Oven Baking Guide
Using the Ovens Top oven baking guide Dish Recommended Suggested Approximate gas mark shelf cooking time position (preheated oven) Scones top - middle 10 - 15 mins Meringues “S” slow setting bottom 2 - 3 hours Cakes Small cakes middle 15 - 25 mins Whisked sponge middle... -
Page 16: Main Oven Baking Guide
Using the Ovens Main oven baking guide Dish Recommended Suggested Approximate gas mark shelf cooking time position (preheated oven) Scones middle - top 8 - 15 mins Meringues “S” slow set bottom 2 - 3 hours Cakes Small cakes middle - top 15 - 25 mins Whisked sponge middle - top... -
Page 17: Traditional Fruit Cakes
Using the Ovens Traditional fruit cakes Roast turkey It should be remembered that ovens Roasting turkey involves cooking two can vary over time, therefore cooking different types of meat - the delicate times can vary, making it difficult to be light breast meat, which must not be precise when baking fruit cakes. -
Page 18: Roasting Guide
Using the Ovens Roasting guide Notes: ■ When cooking stuffed meat or The times given in the roasting guide are only approximate, because the poultry calculate the cooking time size and age of the bird will influence from the total weight of the meat cooking times as will the shape of a plus the stuffing. -
Page 19: Automatic Cooking
Using the Oven Automatic cooking (models with Do not automatic programmer only) ■ Warm food should never be The automatic cooking facility is placed in the oven if there is a controlled by the programmer (see delay period. ‘Programmer / Clock’ section) and allows ■... - Page 20 Using the Oven Automatic cooking (models with Hints for automatic cooking automatic programmer only)..■ Food is placed in a cold oven so you will need to add about 10 - 15 minutes onto the cooking Important: Food is more susceptible time to allow for the oven to reach to the growth of food poisoning the selected temperature.
-
Page 21: Programmer / Clock (If Fitted)
Programmer / Clock (if fitted) The Programmer Buttons Manual operation minute minder cook time ready time minus plus To set the programmer to manual To set the “Time of Day” operation at any time (cancelling any automatic setting), press the cook time and ready time buttons simultaneously. - Page 22 Programmer / Clock (if fitted) Semi-automatic cooking (example) 1. A (Auto) symbol appears. You have started cooking a meal or dish in the oven, and want to set the time for the oven to switch off. Press the cook time button, then use the plus and minus buttons to set the display to show the length of cooking time required, eg;...
- Page 23 Programmer / Clock (if fitted) Fully automatic cooking (example) 5. A (Auto) symbol appears. For use when a delayed start time is required. You want to set the length of cooking time, and the time for the oven to switch off.
- Page 24 Programmer / Clock (if fitted) The oven will automatically switch off 9. A (Auto) symbol will flash. at 18.00 hours (6.00 pm) and the alarm will sound (9). To switch off the alarm press the minute minder button (10). When the oven has switched off, return the oven control knob to the “off”...
-
Page 25: Minute Minder (If Fitted)
Minute Minder (if fitted) Initial display Setting the minute minder 1. Press and release the plus button to change the display from clock to minute minder - the bell symbol will light. 2. Use the plus and minus buttons to set the length of time before the alarm tone will sound. -
Page 26: Cleaning
Cleaning Caution: Any cleaning agent Burner caps and heads used incorrectly may damage Important: Allow burners to cool the appliance. before cleaning. Always let the cooker cool Caution: Hotplate burners can be before cleaning. damaged by soaking, automatic Some cooking operations generate dishwashers (or dishwasher powders considerable amount of grease, this / liquids), caustic pastes, hard... - Page 27 Cleaning Easy care surfaces Glass parts MAIN OVEN SIDES AND BACK GLASS DOOR PANELS LID GLASS We recommend that the appliance is Do not use abrasives or polishes as cleaned after open roasting, and also they will scratch and damage the glass. after roasting at temperatures higher Use a mild cream cleaner - eg;...
-
Page 28: Installation Instructions
Installation Instructions Please read For installation in countries other than the Before start: instructions. Planning your installation will UK, the appliance must be connected in save you time and effort. accordance with all local gas and electri- cal regulations. Prior to installation, ensure that the local distribution conditions (nature of the gas and gas pressure) and the adjustment of the Ventilation Requirements... - Page 29 Installation Instructions Whilst every care is taken to eliminate Clearances burrs and raw edges from this product, No shelf or overhang or cooker hood please take care when handling - we should be closer than a minimum of recommend the use of protective 650mm, but check with cooker hood gloves during installation.
- Page 30 Installation Instructions Stability bracket 4. Fix the bracket to the floor. If the cooker is fitted with a flexible Measure from FLOOR LEVEL connection, a stability bracket should in the back of ENGAGEMENT EDGE be fitted to engage in the back of the the cooker and add 3mm.
- Page 31 Installation Instructions Connect to the electricity supply As the colours of the wires in the mains lead for the appliance may Warning: This appliance must be not correspond with the coloured earthed. markings identifying the terminals in The flexible mains lead is supplied your plug, proceed as follows: connected to a BS 1363 fused plug, 1.
- Page 32 Installation Instructions Connect to the gas supply Commissioning The inlet to the cooker is ⁄ ” BSP Burner aeration internal situated at the rear right corner. All burners have fixed aeration and no Fit the bayonet connection. This should adjustment is possible. be located so as to ensure that the flexible connector hose does not kink.
-
Page 33: Technical Data
Technical Data Data badge - Lower part of front frame Grill - Grill burner is surface combustion type. Spark gaps 3 - 4mm. Type of gas - This cooker must only be used with either Natural Gas only or LP Hob - Burners have burner heads and Gas only, as specified on the appliance caps which are removable for cleaning. -
Page 34: Stoves Customer Care
Serial No Please ensure you have the above details (Model No and Serial No) to hand when calling Stoves Customer Care. They are essential to booking your call. Outside the UK and Northern Ireland, refer to your local supplier. STOVES LIMITED... - Page 36 STOVES LIMITED STONEY LANE, PRESCOT, MERSEYSIDE, L35 2XW 08 25241 00 © 2002...
Need help?
Do you have a question about the Slide In SN600SIDLM and is the answer not in the manual?
Questions and answers