
Related Manuals for STOVES Richmond 600 Ei


Summary of Contents for STOVES Richmond 600 Ei
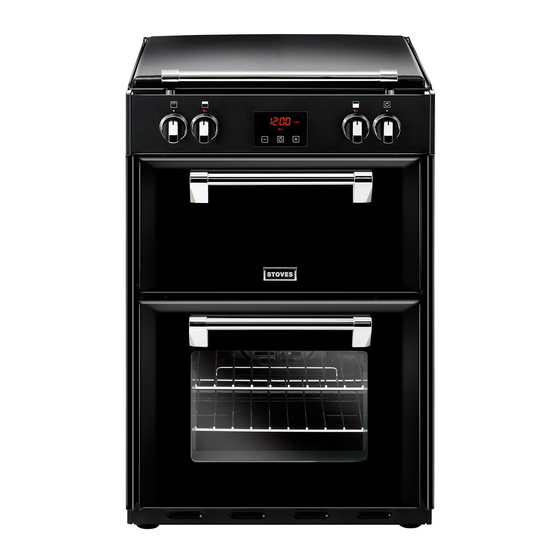
- Page 1 U S E R G U I D E A commitment to: Stoves Richmond 600 Ei Part Number: 083690400 Date: 02/02/18...
- Page 2 PL - Poland NZ - New Zealand NL - Netherlands AU - Australia ES - Spain To contact Stoves about your appliance, please call: Warranty Registration Customer Care Helpline 0800 952 1065 0344 815 3740 *Please call our Customer Care team for extended...
- Page 3 Hereby, Glen Dimplex Home Appliances Ltd. declares that the radio equipment types ST RICH 600Ei is in compliance with Directive 2014/53/EU. The full text of the EU declaration of conformity is available at the following internet address: www.stoves.co.uk in the online user manual for this appliance. Disposal of Packaging Material The packaging materials used with this appliance can be recycled.
- Page 4 SAFETY WARNING • If the hob surface is cracked, broken or shattered, switch off the appliance to avoid the possibility of electric shock and call for a service engineer’s visit. • During use the appliance becomes hot. Care should be taken to avoid touching heating elements.
- Page 5 • Only use hob guards designed by the manufacturer of the cooking appliance or indicated by the manufacturer of the appliance in the instructions for use as suitable or hob guards incorporated in the appliance. The use of inappropriate hob guards can cause accidents.
-
Page 6: Using Your Appliance
USING YOUR APPLIANCE Getting to know your product Note: Your appliance layout may differ depending on the model. Large Large Left hand rear Right hand rear Medium Medium Left hand front Right hand front Hob Controls Control Panel Top Oven/Grill Grill Main Oven Main Oven Selector... - Page 7 COOK ZONE KEYS INDIVIDUAL COOK ZONE DISPLAYS POWER DOWN KEY POWER UP KEY ON/OFF KEY TIMER DISPLAYS...
-
Page 8: Appliance Functions
Appliance functions Note: Your oven may not have all of the functions shown here. We recommend for best cooking results, please preheat your oven for 15 minutes and 3-5 minutes for grilling. Do not try to slow cook using any of the other oven functions. Intense Baking Defrost Base Heat with fan... -
Page 9: Ovens And Grill
Main Oven Oven Selector Note: The bread proving function can also be used as a defrost setting Ovens and Grill Top Oven/Grill & Main Oven Selector & Grill Selector Main Oven When using the top oven or main oven, the red thermostat indicator light will come on until the selected temperature is reached. -
Page 10: Main Oven - Grill
Top Oven - Grill THE DOOR MUST BE OPEN WHEN THE GRILL IS USED FOR CONVENTIONAL GRILLING. Main Oven - Grill THE DOOR MUST BE CLOSED WHEN THE GRILL IS USED FOR FANNED CONVENTIONAL GRILLING. Grill pan and trivet The grill trivet (inside the grill pan) can be inverted to give a high or low position, or it may be removed. The speed of grilling can be controlled by selecting a higher or lower shelf position, or adjusting the grill setting. - Page 11 Hob Overview Function Description Symbol Once a cook zone is selected, a power level can be set to a Power Level low or high temperature. Once a cook zone is selected, the cook zone timer can be activated Cook zone timer to sound after a pre-determined amount of time.
- Page 12 To switch the hob on Touch and hold the on/off key for 1 second Note: If a zone is not selected in 10 seconds, the hob will turn off automatically. Switching on an individual hob cook zone Use the up or down keys to select a Select desired cook zone power level Pressing the minus key first selects power level 9.
- Page 13 Switching off an individual hob cook zone Touch the down key until 0 appears on Select desired cook zone the cook zone display The selected cook zone will be switched off when the display shows “0”. Power boost (rear cook zones only) Touch the down key until power level 9 Select desired rear cook zone appears...
-
Page 14: Child Lock
The cook zones can be boosted for a period of up to 5 minutes. When the Power Boost has finished, the zone will display power level 9. Child Lock Touch the right hand cook zone key Touch and hold the on/off key for 1 and the down key together second Touch the right hand cook zone key... -
Page 15: Setting The Minute Minder
De-activate child lock Touch the Right hand front key and the Select the on/off key and L will appear down key together on all displays Switch on the hob and 0 will appear in Press the minus key and the hob all cook zone displays should switch off Note: When you now switch on the hob “0”... - Page 16 Pressing the down key first sets the Adjust the time by using the up and timer to 30 minutes down keys Once set, the minute minder will begin The timer display will flash and bleep when the to count down time is up.
- Page 17 Timer auto switch off Select desired cook zone and ensure the Touch and hold to down and up keys together, power level is already set until 00 and a dot flashes in the timer display Once set, the operation of the timer is shown Use the up and down keys to set a time by a dot appearing in chosen cook zone display The timer display will flash and bleep when the...
- Page 18 To check the time for a cook zone Press the up and down keys together to Select the timed cook zone display the time remaining To check the time on multiple cook zones If multiple timers have been set: Select the timer by pressing the up and down Ensure that a cook zone has not been keys together selected...
-
Page 19: Using The Touch Controls
Please be aware that only the main oven is controlled by the programmer. Clock / Programmer Note: Your clock / programmer may not have all these functions Minus Menu Plus Minute minder Manual mode Volume level Cooking time / Duration 7-segment display End of cooking time Max. -
Page 20: Setting The Time Of Day
Setting the time of day By pressing menu, scroll through the functions until you reach ‘time of day’. Press the function button until the ‘time of day’ Press the plus or minus buttons to set a time symbol appears Setting the minute minder The maximum cooking time that can be set is 99 minutes. - Page 21 To modify or cancel the minute minder Return to the minute minder function and use either the plus or minus buttons to adjust the time. By setting the time to ‘0.00’, this will cancel the countdown. Setting the cooking time (the duration of time the oven will operate for) Semi Auto- matic cooking The maximum cooking time that can be set is 23 hours and 59 minutes.
- Page 22 Setting the end of cooking time (to set a time for the oven to turn off) Fully Auto- matic Enter cooking duration as described in ‘Setting the cooking time’ section. The display shows the current ‘time of day’ plus the ‘end of cooking time’ symbol. The latest ‘end of cooking time’...
-
Page 23: Setting The Volume
Setting the volume Press the menu button until “LX” (X = 1, 2 or 3) flashes on the display. Use the plus or minus buttons to select a tone. Note: Default tone is L3 Activating / deactivating Key lock Press and hold the plus button for 3-5 seconds Once the Key lock is active, the buttons will be inactive. -
Page 24: Bluetooth Connectivity
Bluetooth Connectivity State of Connectivity Symbol • When the connectivity symbol is not present, the appliance cannot be connected to. • When the connectivity symbol is blinking, the appliance is ready to be paired with a smart device using the Zeus App. •... -
Page 25: Clear Memory
Clear Memory Press the menu and plus button at the same time until a beep is heard. Once the beep is heard, any paired data will be cleared. Delete pairing information in the Bluetooth Settings of your smartphone or tablet. How to read the 6-digit pairing code 1. - Page 26 Removing Shelf Runners Telescopic positions Telescopic positions (if fitted) (if fitted) Standard shelves Slightly raise the shelf and insert in the chosen shelf position Ensure the shelf is fully pushed back towards the back of the oven, until the shelf stopper is reached.
-
Page 27: Changing The Light Bulb
Removing Telescopic shelves (if fitted) Grasp and lift shelf Lift shelf from the retaining tabs. Front of appliance Before removing the shelves completely, please make sure that the shelf is unclipped from the retaining tabs. Changing the light bulb Not all appliances have the same number and type of bulbs. Before you replace your bulb, check to see what type you have. -
Page 28: Cleaning Your Appliance
CLEANING YOUR APPLIANCE Do’s Note: Always switch off your appliance and allow it to cool down before you clean any part of it. Note: Please take extra care when cleaning over the symbols on the control panel, as this can lead to them fading. - Page 29 Please keep this handbook for future reference, or for anyone else who may use the appliance.
- Page 30 Please keep this handbook for future reference, or for anyone else who may use the appliance.
- Page 31 Please keep this handbook for future reference, or for anyone else who may use the appliance.
-
Page 32: Technical Data
TECHNICAL DATA Electric Induction Mini Range Electrical supply / Load Appliance Size (cm) Electrical supply Hotplate Load (W) 55 / 60 220 - 240V ~ 50Hz Induction 11430 - 12370 The data badge is located at the lower part of front frame, behind the door. WARNING: This appliance must be earthed.
Need help?
Do you have a question about the Richmond 600 Ei and is the answer not in the manual?
Questions and answers