Table of Contents
Advertisement
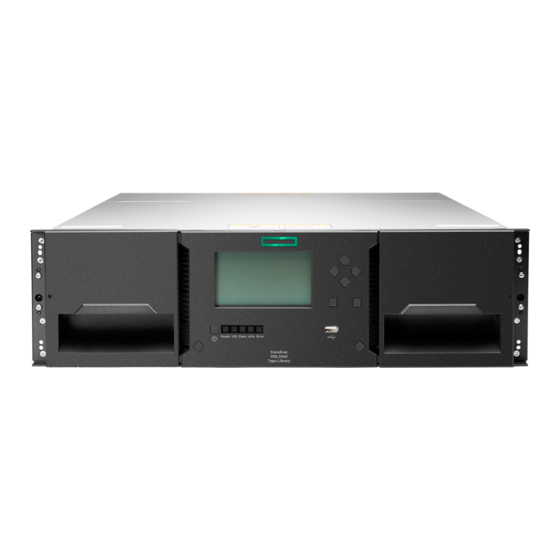
HPE StoreEver MSL3040 Tape Library
Getting Started Guide
Abstract
This guide provides information on installing the HPE StoreEver MSL3040 Tape Library. This
guide is intended for system administrators and other users who need physical knowledge of the
tape library.
Part Number: Q6Q62-00052
Published: November 2018
Edition: 3
Advertisement
Table of Contents

Related Manuals for HPE StoreEver MSL3040


Summary of Contents for HPE StoreEver MSL3040
- Page 1 HPE StoreEver MSL3040 Tape Library Getting Started Guide Abstract This guide provides information on installing the HPE StoreEver MSL3040 Tape Library. This guide is intended for system administrators and other users who need physical knowledge of the tape library. Part Number: Q6Q62-00052...
- Page 2 Copyright 2017, 2018 Hewlett Packard Enterprise Development LP Acknowledgments ® ® Microsoft and Windows are trademarks of the Microsoft group of companies. Warranty WARRANTY STATEMENT: To obtain a copy of the warranty for this product, see the Storage warranty information website: http://www.hpe.com/support/Storage-Warranties...
-
Page 3: Table Of Contents
Contents Overview.......................5 Front panel............................5 Rear panel............................6 USB ports............................7 Tape drive back panels........................7 MSL3040 power supply LEDs......................8 Module and tape drive numbering....................... 8 MSL3040 storage slots........................9 Library user interfaces........................10 Planning the installation................12 Location requirements........................12 Module and rack layout guidelines.................... - Page 4 Warning event code 4126: Cartridge found in inaccessible slot of lowermost unit..............................37 Warning event Drive disabled - no power supply available in module....37 Related information................... 39 Product documentation........................39 Websites............................39...
-
Page 5: Overview
Overview WARNING: Only personnel with technical and product safety training (referred to as users in this document) may have access to or operate the HPE StoreEver MSL3040 Tape Library. • Read all documentation and procedures before installing or operating the library. -
Page 6: Rear Panel
Enter button Base module only Right magazine release button Navigation button – Down Base module only USB port Base module only Back/Return button Base module only OCP LEDs, left to right Base module only • Ready, green • Unit identification (UID), blue •... -
Page 7: Usb Ports
Module controller LEDs, from top to bottom: • Health status, green • Error, amber • Unit identifier (UID), blue Product serial number tag location USB ports The library has two USB ports — one on the OCP and one on the back panel. You can update firmware, save or restore configuration settings, or download support tickets with a USB thumb drive in either USB port. -
Page 8: Msl3040 Power Supply Leds
Table 3: LTO-6 SAS tape drive 1. Tape drive Ethernet port 2. SAS port A 3. SAS port B 4. Tape drive power LED, green Table 4: LTO-7 and LTO-8 SAS tape drive back panels 1. Tape drive Ethernet port 2. -
Page 9: Msl3040 Storage Slots
Example module numbering Example tape drive numbering Module 3 Drive 5 (empty) Drive 4 Module 2 (empty) Drive 3 (empty) Module 1 (empty) Drive 2 Drive 1 MSL3040 storage slots Each MSL3040 module has two magazines of storage slots that can be removed from the front of the library. Each magazine has 20 storage slots for tape cartridges. -
Page 10: Library User Interfaces
Figure 2: The lowest row of storage slots in the library are inaccessible to the robot if the library has a Q6Q62A base module. If an expansion module is installed below the Q6Q62A base module, the inaccessible storage slots will be in the lowest expansion module and all of the storage slots in the base module will be accessible. - Page 11 the RMI administrator password can be reset from the OCP. After resetting the RMI administrator password from the OCP, share the new INITIAL RMI administrator password with the library administrator. The security user password can be set once by the administrator from the Configuration > User Accounts screen.
-
Page 12: Planning The Installation
Definition Rack requirements HPE G2 Enterprise Series, Enterprise Series, G2 Advanced Series, Advanced Series, Standard Series, and other HPE square hole or round hole racks Rack space requirements 3U for the base module and 3U for each expansion module Room temperature 10-35º... -
Page 13: Module And Rack Layout Guidelines
To verify that an HBA is supported on your server and qualified for the library, see the StoreEver Support Matrix at: https://www.hpe.com/storage/StoreEverSupportMatrix A server that has FC-attached hard drives performs best with at least two FC ports. Using the same FC port for disk and tape drive access can cause performance degradation. -
Page 14: Sas Connection Information
To verify the specifications of your HBA or find a list of compatible HBAs, see the StoreEver Support Matrix: https://www.hpe.com/storage/StoreEverSupportMatrix CAUTION: Do not connect the library to a SAS RAID controller unless the compatibility matrix shows that the controller is qualified with the library. -
Page 15: Library Partition Guidelines
The tape drive has a mini-SAS connector. The connector is keyed in location 4, which is the standard location for end devices. If you use a cable other than the one recommended for use with the product, verify that it is keyed in location 4. -
Page 16: Installing The Library
Installing the library WARNING: Each library module weighs 20 kg (44 lb) without media or tape drives and at least 35 kg (77 lb) with media (40 cartridges) and three tape drives. When moving the library, to reduce the risk of personal injury or damage to the device: •... -
Page 17: Unpacking The Shipping Containers
Unpacking the shipping containers Prerequisites Before unpacking any modules, clear a level work surface near where you will install the modules. CAUTION: If the temperature in the room where the module will be installed varies by 15º C (30º F) from the room where it was stored, allow the module to acclimate to the surrounding environment for at least 12 hours before unpacking it from the shipping container. -
Page 18: Installing The Shelves In The Rack
5. If you are installing a library with an expansion module above the base module, keep the top cover with the base module until the cover is installed on the top expansion module. 6. Save the packaging materials for future use. Installing the shelves in the rack Each module is supported by a pair of shelves and is secured to the rack with captive fasteners. - Page 19 Orientation for a square-hole rack. The face with square inserts is installed into the square rack holes. Orientation for a round-hole rack. The face with the round inserts is placed against the rack posts. b. Align the adapter block in the bottom 2U of the 3U volume that the module will occupy, as shown in the illustration.
-
Page 20: Installing The Base Module In The Rack
5. From the front of the rack, starting at the rear adapter, mount the RHS rack shelf for each module into the adapter blocks on the right side of the rack. 6. Ensure that each rack shelf tab is properly engaged with the front and rear adapters. Verify that the rack shelf cannot move in the front-to-back axis of the rack. -
Page 21: Preparing The Top And Bottom Modules
4. Use a #2 Phillips screwdriver to tighten the captive fasteners on each side of the base module until they are finger tight. Do not over tighten. 5. Verify that the module is contained within the 3U rack volume. Preparing the top and bottom modules Skip this step if you are installing a base module only, without any expansion modules. - Page 22 a. Unlock the top cover using two small screwdrivers. b. Lift the cover front end by about 12 cm. c. Gently pull the cover forward to disengage from the pivot point at the module center. 2. Install the cover plate on the other module. a.
- Page 23 Moving the bottom cover plate Prerequisites • The base module is installed in a rack with at least 3U open below. • The base module has either not been powered on or the robot is locked. Procedure 1. Remove the bottom cover plate from a module. a.
-
Page 24: Installing The Expansion Modules In A Rack
a. Place the module upside-down on a work table. b. Insert the back of the cover at the module center. c. Lower the cover front edge until you feel a hard stop and the cover locks in at the front of the module. Installing the expansion modules in a rack Skip this step if the library does not have expansion modules. -
Page 25: Aligning And Connecting Modules
Aligning and connecting modules Skip this step if the library does not have expansion modules. Procedure 1. From the front of the library, loosen the screws on each of the modules two full turns. 2. From the back of the library, starting with the bottom pair of modules, align each module with the module below. -
Page 26: Installing Optional Power Supplies
Installing optional power supplies Each module supports up to two power supplies. The base module is shipped with one power supply installed. Expansion modules are shipped without a power supply. If an expansion module will have one or more tape drives, it must have a power supply. When present and connected to a different AC power source, the second power supply in the module provides redundancy. -
Page 27: Installing Tape Drives
4. Tighten the blue captive thumbscrews with your fingers or a #2 Phillips screwdriver until it is finger tight. Do not over tighten. More information Rear panel on page 6 Installing tape drives When possible, install all tape drives during the initial library installation process before the library is powered on. -
Page 28: Connecting The Fibre Channel Cables
4. To secure the tape drive to the chassis, use a torque driver to tighten the blue captive thumbscrews on the drive sled to 6 inch pounds or 0.68 N m. If a torque driver is not available, use a #2 Phillips screwdriver to tighten the thumbscrews until a low initial threshold torque achieves a snug tight condition. -
Page 29: Powering On The Library
• When using a cable with a single connector on each end, attach the other end into the connector on the tape drive. • When using a SAS fanout cable, attach one mini-SAS connector into the connector on each tape drive. The unused ends of the SAS fanout cable are single channel and not suitable for use with disk arrays. -
Page 30: Verifying The Host Connections
Backup software packages might require additional software or licensing to communicate with the robotics. For compatibility information, see the StoreEver Support Matrix at: https://www.hpe.com/storage/StoreEverSupportMatrix 2. Verify the connection between the library and the host using the host server operating system utilities or Library and Tape Tools (L&TT). -
Page 31: Loading Tape Cartridges
Procedure Apply a high-quality preprinted bar code label to each tape cartridge. LTO tape cartridges have a recessed area on the face of the cartridge next to the write-protect switch. Use this area for attaching the adhesive-backed bar code label. Figure 4: Apply the label within the recessed area IMPORTANT: Only apply the bar code label as shown, with the alphanumeric portion facing the hub side of the tape cartridge. -
Page 32: Verifying The Installation
1. Navigate to the HPE Support website: http://www.hpe.com/support/storage IMPORTANT: Access to some updates might require product entitlement when accessed through the Hewlett Packard Enterprise Support Center. You must have an HPE Passport set up with relevant entitlements. To view and update your entitlements, and to link your contracts and warranties with your profile, navigate to: http://www.hpe.com/support/AccessToSupportMaterials... -
Page 33: Configuring Additional Features
Configuring additional features The library has many features to customize it for your organization. For configuration procedures and troubleshooting information, see the user guide. Procedure • Enabling the mailslot. • Configuring partitioning and additional library parameters using one of the partitioning wizards. ◦... -
Page 34: Msl3040 Ocp Menu
MSL3040 OCP menu • Initial Setup • Operation ◦ Move Media ◦ Move Cartridge from Drive to Home Slot ◦ Inventory Scan ◦ UID LED Control • Configuration ◦ Date & Time ◦ Network Settings ◦ Drive Power On/Off ◦ User Accounts –... - Page 35 ◦ Library Firmware Upgrade ◦ Move Robotic to Base Module ◦ System Reboot ◦ LCD Adjustment ◦ SSH (Secure Shell) • Open Magazines/Mailslots • Status ◦ Network Settings ◦ Library ◦ Drive • About • Logout MSL3040 OCP menu...
-
Page 36: Supported Media
C7976A HPE LTO-6 Ultrium 6.25 TB BaFe RW Data Tape, purple C7976B HPE LTO-6 Ultrium 6.25 TB MP WORM Data Tape, two-tone (purple and gray) C7976W HPE LTO-6 Ultrium 6.25 TB BaFe WORM Data Tape, two-tone (purple and gray) C7976BW... -
Page 37: Troubleshooting The Installation
Troubleshooting the installation This chapter contains a general troubleshooting procedure, with specific procedures for identifying and addressing common installation problems. For additional troubleshooting information, see the user and service guide. Procedure 1. Check the event log from the RMI or OCP. Surrounding events can often provide additional information for locating a problem. - Page 38 For redundant power, install two power supplies in the module. • Move the tape drive to a module with a power supply. Solution 2 Cause The power supply in the module was not installed correctly or is faulty. Action 1. From the back of the library, check the LEDs on the power supply in the expansion module. •...
-
Page 39: Related Information
4. In the StoreEver Tape pane, select your library. The library user and service guide provides related information: HPE StoreEver MSL3040 and MSL6480 Tape Libraries User and Service Guide Documentation feedback Hewlett Packard Enterprise is committed to providing documentation that meets your needs. To help us improve the documentation, send any errors, suggestions, or comments to Documentation Feedback (docsfeedback@hpe.com).
Need help?
Do you have a question about the StoreEver MSL3040 and is the answer not in the manual?
Questions and answers