REMKO SKT Series Assembly And Operating Instructions Manual
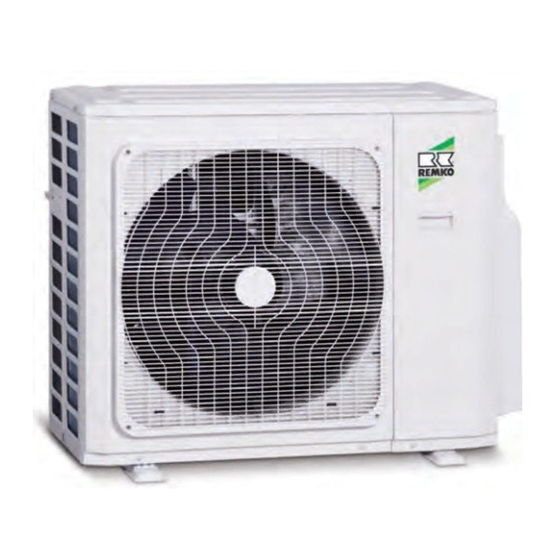
Multisplit outdoor unit
Hide thumbs
Also See for SKT Series:
- Operating and installation instructions (56 pages) ,
- Operating and installation instructions (64 pages)

Subscribe to Our Youtube Channel
Related Manuals for REMKO SKT Series


Summary of Contents for REMKO SKT Series
- Page 1 Assembly and operating instructions REMKO series SKT Multisplit outdoor unit SKT 520, SKT 790, SKT 1060 Read the instructions prior to performing any task! 0175-2018-09 Edition 1, en_GB...
- Page 2 Read these operating instructions carefully before commis- sioning / using this device! These instructions are an integral part of the system and must always be kept near or on the device. Subject to modifications; No liability accepted for errors or mis- prints! Installation and operating instructions (translation of the orig- inal)
-
Page 3: Table Of Contents
Table of contents Safety and usage instructions......................5 1.1 General safety notes........................5 1.2 Identification of notes........................5 1.3 Personnel qualifications........................5 1.4 Dangers of failure to observe the safety notes................5 1.5 Safety-conscious working....................... 5 1.6 Safety notes for the operator......................6 1.7 Safety notes for installation, maintenance and inspection.............. - Page 4 REMKO series SKT Shutdown............................. 53 Exploded view and spare parts lists....................54 14.1 Exploded view of the unit SKT 520 AT..................54 14.2 Spare parts list for SKT 520 AT....................55 14.3 Exploded view of the unit SKT 790 AT..................56 14.4 Spare parts list for SKT 790 AT....................
-
Page 5: Safety And Usage Instructions
Safety and usage instructions CAUTION! This combination of symbol and signal word 1.1 General safety notes warns of a potentially hazardous situation, which if not avoided may cause injury or mate- Carefully read the operating manual before com- rial and environmental damage. missioning the units for the first time. -
Page 6: Safety Notes For The Operator
"certificate of warranty" to conditions stipulated in this manual and comply REMKO GmbH & Co. KG at the time when the with all applicable regional regulations. units are purchased and commissioned. -
Page 7: Transport And Packaging
1.11 Transport and packaging The devices are supplied in a sturdy shipping con- tainer. Please check the equipment immediately upon delivery and note any damage or missing parts on the delivery and inform the shipper and your contractual partner. For later complaints can not be guaranteed. -
Page 8: Technical Data
REMKO series SKT Technical data 2.1 Unit data Series SKT 520 AT SKT 790 AT SKT 1060 AT Inverter multisplit outdoor units for cooling and Operating mode heating 10.6 Nominal cooling output (2.1-5.3) (2.1-7.9) (21.1-10.6) Energy efficiency ratio SEER Power consumption, annual, Q... - Page 9 Series SKT 520 AT SKT 790 AT SKT 1060 AT Refrigerant, basic quantity equivalent 3.55 4.34 6.26 Refrigerant, additional quantity >5 m Max. number of indoor units Refrigerant piping, max. length per IU Refrigerant piping, max. total length Refrigerant piping, max. height, upper OU Refrigerant piping, max.
-
Page 10: Unit Dimensions
REMKO series SKT 2.2 Unit dimensions Fig. 1: Dimensions We reserve the right to modify the dimensions and design as part of the ongoing technical development process. SKT 520 SKT 790 SKT 1060 (All measurements in mm) -
Page 11: Performance Curves For Heating And Cooling
2.3 Performance curves for heating and cooling Heating capacity SKT 520 6,50 6,00 5,50 5,00 4,50 4,00 3,50 3,00 2,50 2,00 1,50 1,00 0,50 0,00 [°C] Fig. 2: Performance curves, heating SKT 520 (data for room temperature 20 °C) A: Outside temperature 1: COP 2: Heating capacity in kW 3: Power consumption in kW... - Page 12 REMKO series SKT Heating capacity SKT 790 10,00 9,50 9,00 8,50 8,00 7,50 7,00 6,50 6,00 5,50 5,00 4,50 4,00 3,50 3,00 2,50 2,00 1,50 1,00 0,50 0,00 [°C] Fig. 4: Performance curves, heating SKT 790 (data for room temperature 20 °C)
- Page 13 Heating capacity SKT 1060 13,50 13,00 12,50 12,00 11,50 11,00 10,50 10,00 9,50 9,00 8,50 8,00 7,50 7,00 6,50 6,00 5,50 5,00 4,50 4,00 3,50 3,00 2,50 2,00 1,50 1,00 0,50 0,00 [°C] Fig. 6: Performance curves, heating SKT 1060 (data for room temperature 20 °C) A: Outside temperature 1: COP 2: Heating capacity in kW...
-
Page 14: Design And Function
Condenser fan electronic expansion valves and a condenser fan. Reversing valve The outdoor unit can be combined with REMKO Compressor indoor units from the series SKT 260 IT that pro- Capillary tube throttle element vide sufficient cooling capacity. - Page 15 Fig. 9: System layout SKT 1060 AT Outdoor area Power supply Ba-d: Indoor area Shut-off valves 1a-d: Indoor units Suction pipes Outdoor unit Injection pipes Condensate drainage line Control lines Condenser fan The connection between the indoor unit (indoor areas Ba, Bb, Bc, Bd, Be) and the outdoor unit (connection circuits A, B, C, D, E) of the outdoor unit is established using refrigerant piping and a control line.
-
Page 16: Combinations
REMKO series SKT 3.2 Combinations Operation Indoor unit The compressor in the outdoor unit is operated by means of regulating the control board in the out- The IT SKT 260 indoor unit can be combined with door unit. The chapter on "Regulation" in the the AT SKT 520-1060 outdoor units. -
Page 17: Installation Instructions For Qualified Personnel
Installation instructions Only use the union nuts supplied with the refrigerant piping. These should only be for qualified personnel removed shortly before connecting the refrig- erant piping. 5.1 Important notes prior to instal- Carry out all electrical wiring in accordance lation with applicable DIN and VDE standards. -
Page 18: Wall Openings
REMKO series SKT 5.2 Wall openings 5.4 Selection of installation location A wall opening of at least 70mm diameter and 10mm incline from the inside to the outside Indoor unit must be created. The indoor unit is designed for horizontal wall To prevent damage to the lines, the interior of installation above doors. - Page 19 Wind If the unit is being installed in windy areas, ensure that the warm outlet air is discharged in the pre- vailing wind direction. If this is not the possible, it may be necessary to install a windbreak (to be pro- vided by the customer).
-
Page 20: Minimum Clearances
REMKO series SKT 5.5 Minimum clearances 5.6 Oil return measures Observe the minimum clearances to allow access If the outdoor unit is installed at a higher level than for maintenance and repair work and facilitate the indoor unit, suitable oil return measures must optimum air distribution. -
Page 21: Installation
Installation The following instructions describe the installation of the cooling cycle and the assembly of the indoor 6.1 Connection of unit and the outdoor unit. refrigerant piping The required pipe diameters are given in the table "Technical data". The refrigerant piping is connected on the back side of the units. - Page 22 REMKO series SKT Label the refrigerant piping (injection and suc- tion pipes) as well as the associated electrical control lines of each interior unit with a letter. Only connect the lines to their associated con- nections. NOTICE! Always pay attention to the affiliation of the...
-
Page 23: Leak Testing
NOTICE! A vacuum of at least 20 mbar must be pro- duced! The time required to generate the vacuum is dependent on the final pressure pipe volume of the indoor units and the length of the refrigerant piping. However, the process will take at least 60 minutes. -
Page 24: Adding Refrigerant
REMKO series SKT 6.4 Adding refrigerant Condensate drainage connection and safe The unit contains a basic quantity of refrigerant. In addition, an additional amount of refrigerant must drainage be added for refrigerant piping lengths exceeding 5 metres per circuit. Refer to the following chart:... -
Page 25: Electrical Wiring
Electrical wiring 8.1 General connection and safety Proceed as follows to connect the line: instructions Remove the side panel at the connection. For the MVT devices, an electrical supply must be Choose the cable cross-section in accord- laid as a mains supply to the outdoor unit as well ance with the relevant specifications. - Page 26 REMKO series SKT 1: Power supply 2: Strain relief 3: Control line for indoor unit A 4: Control line for indoor unit C 5: Control line for indoor unit B Fig. 22: Electrical wiring of the cable shown on the...
-
Page 27: Electrical Wiring Diagram
8.3 Electrical wiring diagram SKT AT in combination with the IT SKT 260 indoor units SKT 520 AT SKT 790 AT SKT 1060 AT L(A) N(A) S(A) L(B) N(B) S(B) L(C) N(C) S(C) L(D) N(D) S(D) L (1) 2 (N) L (1) 2 (N) L (1) -
Page 28: Electrical Drawings
REMKO series SKT 8.4 Electrical drawings Overview diagram of SKT 520 AT L(B) N(B) S(B) Fig. 24: Overview diagram of SKT 520 AT A: Control board Crankcase heating B: Inverter board Condensate tray heating AT: Mains cable for outdoor unit 230 V / 1~ / 50 Hz... - Page 29 Overview diagram of SKT 790 ATR Fig. 25: Overview diagram of SKT 790 AT A: Control board Condensate tray heating B: Inverter board Temperature probe for condenser outlet T3 AT: Mains cable for outdoor unit 230 V / 1~ / 50 Hz Temperature probe for condenser inlet T4 IT: Connection for indoor units 1-3 High-pressure probe...
- Page 30 REMKO series SKT Overview diagram of SKT 1060 AT Fig. 26: Overview diagram of SKT 1060 AT A: Control board Crankcase heating B: Inverter board Condensate tray heating C: Com circuit board Temperature probe for condenser outlet T3 AT: Mains cable for outdoor unit 230 V / 1~ / 50 Hz...
-
Page 31: Before Commissioning
Before commissioning Commissioning After leak testing has been successfully com- pleted, connect the vacuum pump via the pressure NOTICE! gauge station to the valve connections on the out- door unit (see chapter "Leak testing") and create a Commissioning should only be performed by vacuum. - Page 32 REMKO series SKT Function test of cooling operating mode NOTICE! Remove the protective caps from the valves. Start the commissioning procedure by briefly Check that the shut-off valves and valve caps opening the shut-off valves on the outdoor are tight after carrying out any work on the unit until the pressure gauge indicates a cooling cycle.
- Page 33 If the compressor moves to an incorrect fre- quency range within 15 minutes, a safety shut- down occurs and the unit shows "E6" If there is a malfunction, the malfunction is dis- played coded. See the "Outdoor unit malfunc- tion display" table Fig.
- Page 34 REMKO series SKT Continued Item Display Description Temp. of suction pipe for indoor unit A (T Current value. If the temperature is lower than Temp. of suction pipe for indoor unit B (T -9°C, the display shows "-9". If the temperature Temp.
- Page 35 (3) Cooling capacity - Heating capacity OU / IU Display Temperature (°C) Cooling Heating 20.0 Display capacity capacity 22.5 (kW) (kW) 25.0 2.0-2.5 2.0-2.5 27.5 2.0-2.5 2.0-2.5 30.0 3.0-3.8 3.0-3.8 32.5 4.5-5.0 4.5-5.0 34.5 5.5-6.1 5.5-6.1 6.1-7.0 (7) Outdoor unit current consumption 6.1-7.0 6.1-7.0 Display...
-
Page 36: Troubleshooting, Fault Analysis And Customer Service
REMKO series SKT Troubleshooting, fault analysis and customer service 11.1 Troubleshooting and customer service The unit and components are manufactured using state-of-the-art production methods and tested several times to verify their correct function. However, if alarms should occur, please check the functions as detailed in the list below. - Page 37 Operational malfunctions (continued) Malfunction Possible causes Checks Remedial measures Thermal load has Is the outdoor unit in per- Reduce the thermal load. The compressor's increased manent operating mode? If necessary, install an suction pipe and / or additional unit / insulate liquid separator components that have iced have iced up...
-
Page 38: Outdoor Unit Error Analysis
REMKO series SKT 11.2 Outdoor unit error analysis Error E0: EEPROM error on outdoor unit Switch off, wait 2 minutes and then switch on again. Is the error still present? Replace the control board. Error E3: Communication error between inverter board and control board... - Page 39 Error E5: Overvoltage or undervoltage error Overvoltage/undervoltage protection has tripped. Check the power supply voltage on the outdoor unit's L and N terminals. Is Correct the power supply this between 220 and 240 Is voltage present between terminals P and N on the inverter board? If the meas- ured value is between 277-356 VDC (SKT 520...
- Page 40 REMKO series SKT Error E8: Condenser fan speed control not working Switch off, wait 2 minutes and then switch on again. Is The unit operates normally. the error still present? Switch off; rotate the con- Determine the cause and denser fan manually. Does rectify the error.
- Page 41 Error P1: High pressure fault (for larger versions) High pressure fault P1 is present. Is the electrical connection between the high pressure probe and the control board established correctly? Check whether the high pressure probe is faulty. Remove the high pressure probe's plug and measure Replace the high pressure the resistance.
- Page 42 REMKO series SKT Error P2: Low pressure alarm Low pressure probe has tripped. Error P2 is present. Is the electrical connection between the low pressure Correct the connection. probe and the control board established correctly? Check whether the low pressure probe is faulty.
- Page 43 Error P3: Compressor current consumption too high Safety shut-down due to increased current consump- tion on the compressor. Switch the unit off, switch it back on and measure the total current consumption. Is this within the specified range? Check the cooling cycle. Is this OK? Is the outside temperature Switch the unit off.
- Page 44 REMKO series SKT Error P4: Temperature probe for heat gas line faulty Heat gas temperature on the compressor too high Is the heat gas temperature higher than 115 °C? Check the cooling cycle for leaks. Did you find a leak?
- Page 45 Error P5: Excessive temperature on condenser The unit stops if the refrigerant temperature on the condenser outlet exceeds 65 °C. It re-starts once the temperature is 52 °C. Excessive tempera- Check the electrical ture safety shut- connection between Establish the connection correctly. down.
- Page 46 REMKO series SKT Error P6: Inverter board safety shut-down (part 1) Inverter board safety shut- down Check the voltage between the inverter board's P and N See the second part of terminals. Is this between this table on the next...
- Page 47 Error P6: Inverter board safety shut-down (part 2) Inverter board safety shut-down Check the voltage between the inverter board's P and N termi- See the first part of this table on nals. Is this between the previous page! 277-366 VDC (SKT 520 AT) or 277-410 VDC (larger versions)? Check the power supply...
- Page 48 REMKO series SKT Check the individual components Check the temperature probes Disconnect the temperature probe from the control board and measure the resistance on the plug's contacts. Ä ‘Resistance values for probes T1, T2, T3, T4 and T2B’ on page 50 and Ä on page 51) (See tables Fig.
- Page 49 Check the IPM board Switch the unit off and wait until the condensers are completely discharged. Disconnect the cables from the IPM board and measure the resistances between P and UVWN, UVW and N. Voltmeter Normal resistance Voltmeter Normal resistance (+) Red (-) Black (+) Red...
- Page 50 REMKO series SKT Resistance values for probes T1, T2, T3, T4 and T2B K Ohm K Ohm K Ohm K Ohm...
- Page 51 Resistance values for probe T5 K Ohm K Ohm K Ohm K Ohm...
-
Page 52: Care And Maintenance
REMKO series SKT Care and maintenance Maintenance It is recommended that you take out a mainte- Regular care and observation of some basic points nance contract with an annual service from an will ensure trouble-free operation and a long appropriate specialist firm. -
Page 53: Shutdown
Ensure that units and components are disposed of in accordance with local regulations, e.g. through authorised disposal and recycling specialists or at collection points. REMKO GmbH & Co. KG or your contractual partner will be pleased to provide a list of certified firms in your area. -
Page 54: Exploded View And Spare Parts Lists
REMKO series SKT Exploded view and spare parts lists 14.1 Exploded view of the unit SKT 520 AT Fig. 32: Exploded view of the unit SKT 520 AT We reserve the right to modify the dimensions and design as part of the ongoing technical development... -
Page 55: Spare Parts List For Skt 520 At
14.2 Spare parts list for SKT 520 AT IMPORTANT! To ensure the correct delivery of spare parts, please always the device type with the corresponding serial number (see type plate) No. Designation Condenser protection grille Condenser front panel Fan blade Fan motor 4-way valve Electronic injection valve... -
Page 56: Exploded View Of The Unit Skt 790 At
REMKO series SKT 14.3 Exploded view of the unit SKT 790 AT Fig. 33: Exploded view of the unit SKT 790 AT We reserve the right to modify the dimensions and design as part of the ongoing technical development process. -
Page 57: Spare Parts List For Skt 790 At
14.4 Spare parts list for SKT 790 AT IMPORTANT! To ensure the correct delivery of spare parts, please always the device type with the corresponding serial number (see type plate) No. Designation Condenser protection grille Condenser front panel Fan blade Fan motor 4-way valve Electronic injection valve... -
Page 58: Exploded View Of The Unit Skt 1060 At
REMKO series SKT 14.5 Exploded view of the unit SKT 1060 AT Fig. 34: Exploded view of the unit SKT 1060 AT We reserve the right to modify the dimensions and design as part of the ongoing technical development process. -
Page 59: Spare Parts List For Skt 1060 At
14.6 Spare parts list for SKT 1060 AT IMPORTANT! To ensure the correct delivery of spare parts, please always the device type with the corresponding serial number (see type plate) No. Designation Condenser protection grille Condenser front panel Fan blade Fan motor 4-way valve Low-pressure probe... -
Page 60: Index
REMKO series SKT Index Ordering spare parts ....55, 57, 59 Outdoor unit board malfunction display ..37 Alarms Checks ......36 Possible causes . - Page 62 REMKO series SKT...
- Page 64 SFlb Customer Service Our equipment operates precisely and reliably. However, in the event of a fault, REMKO customer service is quickly at the scene. Our comprehensive network of experienced dealers always guarantees quick and REMKO GmbH & Co. KG reliable service.
Need help?
Do you have a question about the SKT Series and is the answer not in the manual?
Questions and answers