Table of Contents
Advertisement
Advertisement
Table of Contents

Subscribe to Our Youtube Channel
Related Manuals for R-Biopharm RIDA QUICK SCAN


Summary of Contents for R-Biopharm RIDA QUICK SCAN
- Page 2 Brochure Manual for ® RIDA QUICK SCAN Version 1.0.0 © Copyright 2009 by R-Biopharm AG Printed in Germany R-Biopharm AG An der neuen Bergstraße 17 D-64297 Darmstadt, Germany Phone+ 49 (0) 6151 8102 0 Fax:+ 49 (0) 6151 8102 40...
-
Page 3: Table Of Contents
Contents Introduction........................4 Step one..........................5 Overview ........................5 Starting up ....................... 7 Making the necessary connections ................. 7 Basics of operation ....................8 ® Using the RIDA QUICK SCAN reader................9 Switching the device on ..................9 Evaluate test strip (SCAN MODE) ................9 Changing device settings (SETUP MODE) ............. -
Page 4: Introduction
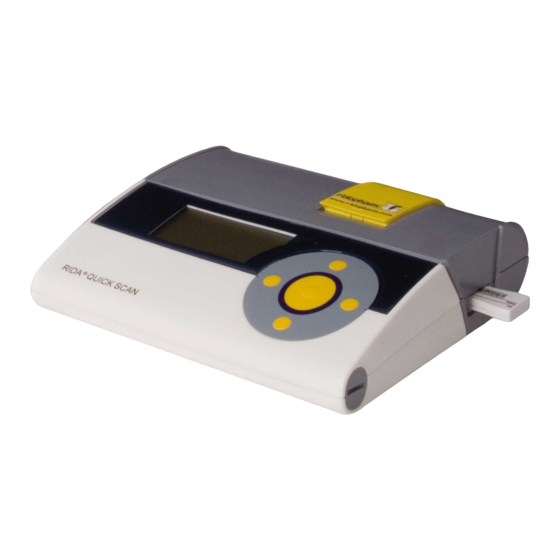
QUICK SCAN is a lateral flow test reader designed to evaluate the RIDA QUICK tests from R-Biopharm AG. Depending on the quick test and/or the device setting, quantitative or qualitative results are achieved with a fast and precise scanning process. -
Page 5: Step One
2 Step one 2.1 Overview... -
Page 7: Starting Up
2.2 Starting up ® The RIDA QUICK SCAN reader is ready to operate as soon as you unpack it. Although the batteries are charged in the factory, they may have discharged if the device has been stored for some time. This is not a defect in the device but is due to the physics of batteries in general. -
Page 8: Basics Of Operation
Slide protective cap back. Figure 3 Never insert one of the adapters into the power socket without first attaching the power unit. This could give you an electric shock if you touch the Caution contacts. Press the adapter on to the power unit until it clicks into place. Make sure that the adapter is properly attached by trying to push it out again. -
Page 9: Using The Rida ® Quick Scan Reader
"N" means that the device is connected to a mains power supply (the batteries are being recharged). The batteries are recharged only when the device is switched Self Test Scan mode ◄ ► ° C UserID User01 R-Biopharm Method DON CutOff Cut off0.50 ® RIDA QUICK SCAN 18.01.09 09:00 pm Start scan ▼▲... - Page 10 Then, use the ▼ key to select "Start Scan" and press ENTER. The display will now show the entry fields for the test batch. Compare the 8-digit "Batch nr checksum" with the corresponding number on the test packaging to ensure that you are using the right test batch.
- Page 11 Enter coefficients Batch No. Batch Nr 0 3 0 5 9 Prm A 00.09 Prm F 0.356 Prn G Next Back Figure 10 Within a wrap around function the digits can be changed in order of ▲ , then , then (blank).
- Page 12 Please note that the batch will be actualized only within the actual method (e.g. DON quant). It is recommended to actualize all methods, as soon as a new lot is used. It is essential to actualize always the batch number before using a new batch.
- Page 13 Test invalid, must be repeated: ◄ ► Result ° C DON Cut off INVALID 18.01.09 09:00 pm Next ◄► Print Figure 13 Use "Print" to print the result and "Next" to go directly to the next measurement. After you select "Print" the device automatically goes to the start of the next measurement. If you do not want to print the result at that time (e.g.
-
Page 14: Changing Device Settings (Setup Mode)
3.3 Changing device settings (SETUP MODE) Various basic settings can be adjusted in SETUP MODE. These settings remain stored even after the device is switched off. To do this, select the individual entry fields with the cursor keys ▲▼ and then change the parameters using the ◄►... -
Page 15: Displaying Stored Test Results (Memory Mode)
3.4 Displaying stored test results (MEMORY MODE) In MEMORY MODE you can view and print stored measurements. Delete data records via the "Setup Mode" menu. The device can store up to 100 measurements. For each measurement 11 data record entries are stored. -
Page 16: Calibrating The Reader (Calibration Mode)
Date The date of the measurement is shown. Either the date value and the date format may be change in advance in the menu Set up mode. Time The time of the measurement is shown. Either the time value and the date format may be change in advance in the menu Set up mode. -
Page 17: External Components (Optional)
When the defined time for calibration test is reached the reader will also ask you to calibrate it. A check is made to ensure that the calibration is still valid before every measurement. If you still wish to carry out the measurement, you can test the calibration of the reader later on. To do this, you must choose the respective option on the display. - Page 18 If you choose to enter parameters via barcode in the user interface of the measuring device and if the barcode reader is connected, the activation signal of the barcode reader (triple tone) sounds. The barcode reader is ready to use and can read barcodes. Enter the barcode by pressing the yellow key on the barcode reader.
-
Page 19: Printer
3.6.2 Printer Figure 12 The printer is connected to one of the two round ports on the side of the reader. Make sure that the plug is fully inserted. The plugs have an orientation direction (see the mark on the black plug). The mark on the plug must face upward so that it fits into the port. -
Page 20: Troubleshooting And Fixing Faults
4 Troubleshooting and fixing faults This section is aimed at experienced users who carry out installation and maintenance work. The explanations should help users fix problems and faults they encounter during normal ® operation of the RIDA QUICK SCAN. Only problems that can be detected and fixed directly ®... - Page 21 Fault: When I switch on the device the date and time are not correct Cause: Date/time were not saved. Help: - Re-enter the date and time in SETUP MODE. Cause: The internal buffer battery is empty. Help: - If this is the case, contact your supplier. The buffer battery may have to be replaced.
-
Page 22: Safety And Maintenance
5 Safety and maintenance 5.1 Safety information Use only approved NiMH batteries (see Section 5.4). Do not use any other battery. Other batteries may cause a short circuit. The battery casing could be Note! destroyed (dangerous). When you are replacing batteries insert them into the device with the minus pole first (Figure 13). -
Page 23: Important Information For Using The Device
5.2 Important information for using the device ® When you use the RIDA QUICK SCAN pay attention to the following: - Do not place the device in direct sunlight. - Do not subject the device to intense heat. - Protect the device from high humidity, moisture and excessive contact with liquids. -
Page 24: Replacing The Batteries
If you operate the device on vibrating objects, this may lead to vibration in the detector unit, which reduces the accuracy of the measured value. If possible, always Note! ® place the RIDA QUICK SCAN on a flat surface or at least hold it still while it is measuring. - Page 25 To replace the batteries open the screwed lid of the battery compartment (5). Use a flat object, such as a coin. Pay attention to the poles +/- of the buffer battery (see Figure below). If the batteries are inserted wrongly, the device cannot function.
-
Page 26: Technical Specifications
6 Technical specifications Power supply 3 x AA batteries internal +12V to +24V / 1.25A external Storage Temperature -20 to +70° C Relative humidity (non-condensing) ≤ 70 % Air pressure 300 to1060 hPa Operating conditions Temperature +15° C to +40°C Relative humidity (non-condensing) ≤... - Page 27 Products from ESE GmbH are subject to quality standards according to DIN ISO 9001. R-Biopharm AG An der neuen Bergstraße 17 D-64297 Darmstadt, Germany Internet : www.r-biopharm.de...
- Page 28 On / Off setup mode ► ◄ memory mode ► ◄ ► ◄ calibration scan mode backlight Record No. User ID start calibration language user ID method start self test start scan date method time date checksum time-format time start MANUAL input power off time cut off start BARCODE input...
Need help?
Do you have a question about the RIDA QUICK SCAN and is the answer not in the manual?
Questions and answers