Table of Contents
Advertisement
Advertisement
Table of Contents

Related Manuals for R-Biopharm Rida Cycler


Summary of Contents for R-Biopharm Rida Cycler
- Page 1 R-Biopharm AG ® RIDA CYCLER User Manual BILD...
- Page 2 ® RIDA CYCLER Version 1.0 User manual...
- Page 3 ® RIDA CYCLER Version 1.0 User manual...
- Page 4 User manual ® RIDA CYCLER ZRCYCLER Version 1.0 (2017-12-14) © Copyright 2018 by R-Biopharm AG Distributed by R-Biopharm AG An der neuen Bergstraße 17 64297 Darmstadt, Germany Phone: +49 (0) 61 51 - 8102-0 Fax: +49 (0) 61 51 - 8102-40 E-mail: info@r-biopharm.de...
- Page 5 ® RIDA CYCLER Version 1.0 User manual User manual...
-
Page 6: Table Of Contents
® RIDA CYCLER Version 1.0 User manual Contents Inhaltsverzeichnis General information ......................9 Important information ......................9 Explanation of symbols used ..................... 9 Intended use ........................13 1 Unpacking and installation .....................14 1.1 Hardware installation ........................14 1.2 Software installation ........................14 1.3 Updating software .......................... - Page 7 ® RIDA CYCLER Version 1.0 User manual 9 Starting the Run .......................40 9.1 Samples Editor ..........................42 9.1.1 Well layout ............................ 42 9.1.2 Filling cells ........................... 42 9.1.3 Colors ............................43 9.1.4 Name ............................. 43 9.1.5 Type .............................. 44 9.1.6 Sample Concentrations ......................46 9.1.7 Multiplex Standards ........................
- Page 8 ® RIDA CYCLER Version 1.0 User manual 14 Excel workbook ......................70 Notes and Annex ........................72 Technical data, ambient conditions ....................72 Biological Safety information ......................73 Decontamination of Instrument ......................73 EC Declaration of conformity/CE Mark ....................73 Type Plate Symbols ..........................74 Disposal Information ..........................
-
Page 9: General Information
® RIDA CYCLER Version 1.0 User manual General information Please carefully compare the contents of this delivery with the enclosed delivery note, the package leaflet or the invoice. We recommend that you keep a copy of this document together with the instructions, so that you can quickly access information about the date and scope of delivery in case of future queries, re-orders or service work. - Page 10 ® RIDA CYCLER Version 1.0 User manual ATTENTION Follow the instructions to ensure optimal instrument performance...
- Page 11 ® RIDA CYCLER Version 1.0 User manual Proper Use Warnings Warning Damaged Lid ® Do not use the RIDA CYCLER instrument if the lid is broken or if the lid lock is damaged. There is a high risk of personal injury to the user through parts that are moving, electrically live, or are hot.
- Page 12 ® RIDA CYCLER Version 1.0 User manual Keep the side vents free from obstruction to prevent interference with the cooling of the instrument.
-
Page 13: Intended Use
® RIDA CYCLER Version 1.0 User manual Caution! Avoid spilling liquid into the chamber. Any solution that spills onto electronic boards could cause a short circuit, damaging the instrument. Caution! Do not obstruct the side vents. Keep the side vents free from obstruction to prevent interference with the cooling of the instrument. -
Page 14: Unpacking And Installation
® RIDA CYCLER Version 1.0 User manual 1 Unpacking and installation ® The following items are packaged within the RIDA CYCLER shipping container: • ® RIDA CYCLER instrument (with tube clamp inside) • Power adaptor • Power cable • 2 m USB cable •... - Page 15 ® RIDA CYCLER Version 1.0 User manual • Ensure that the PC has Bluetooth® enabled if this is the preferred connection.
-
Page 16: Updating Software
USB. Fig. 1: All connected instruments are now ready to be used 1.3 Updating software Please check the website (www.r-biopharm.com) periodically to see if new software and firmware updates are available or contact your R-Biopharm sales representative. ® Download the RIDA CYCLER software update setup file. -
Page 17: Rida ® Cycler: Overview
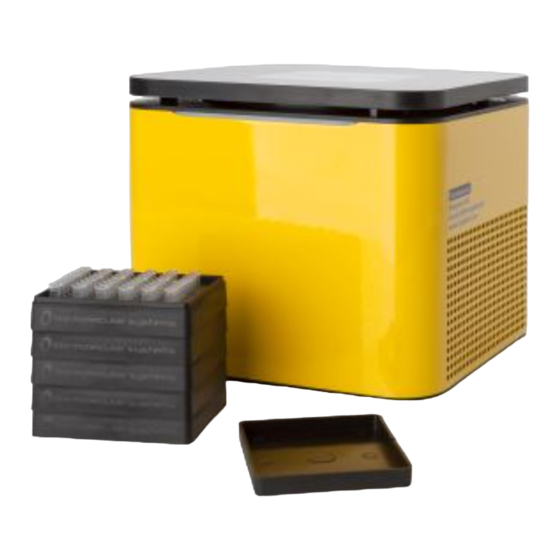
® RIDA CYCLER Version 1.0 User manual ® 2 RIDA CYCLER: Overview 1 Rotor - Aluminum rotor with 48 sample positions and a tube location label to ensure correct loading of tubes. 2 Tube clamp - Safeguards against the tubes and caps from coming out of the rotor during a run. -
Page 18: Consumables And Accessories
® RIDA CYCLER Version 1.0 User manual 3 Consumables and Accessories Power adaptor External power supply for the instrument. (Art.No. ZRC-MIC-PA) Provided with instrument. Tubes and caps Strip of four reaction vessels with a volume range of 5 - 30 µL. (Art.No. -
Page 19: Getting Started
® RIDA CYCLER Version 1.0 User manual 5 Getting started 5.1 Loading tubes Each tube is part of a strip of four, with the first tube having a small tab to ensure the strip is loaded into the instrument correctly. Each tube is preloaded with silicone oil, which acts as a barrier to prevent evaporation and condensation, thereby improving reaction performance and removing the need for a heated lid. - Page 20 ® RIDA CYCLER Version 1.0 User manual Fig. 6: Loading rack set-up...
- Page 21 ® RIDA CYCLER Version 1.0 User manual Once the tubes are loaded, properly fit the caps to ensure the tubes are sealed. Use the provided capping tool to help with fitting caps properly and avoid cross contamination. The tool is designed to clamp down on a strip of four caps.
-
Page 22: Removing Tubes
® RIDA CYCLER Version 1.0 User manual 5.2 Removing tubes Once the run has completed and the instrument has cooled down, the lid lock will disengage allowing you to open the lid. The LED at the front of the instrument will flash green. Hot Surface! If the lid lock has disengaged due to a power failure or fault prior to the run stopping, please do not open the lid for at least 5 minutes until the chamber has... -
Page 23: Tool Bar
The support package contains a compressed log file of the run. Select a folder to save the support package to. Email the zipped support package file to PCR@r-biopharm.de. Install Template Download templates provided by R-Biopharm. Templates contain the ® ® thermoprofile settings for all CONGEN SureFood... -
Page 24: Open Run Files
® RIDA CYCLER Version 1.0 User manual About Information about the version of RIDA®CYCLER software. RIDA®CYCLER Before starting a run, the necessary templates and assays need to be installed. 6.1.2 Open run files There is one file type: Fig. 11: Run files Run File: contains the assays used, run profile, sample annotation, raw data and analyzed data (green running man). - Page 25 ® RIDA CYCLER Version 1.0 User manual...
-
Page 26: Instrument Communication Icon
® RIDA CYCLER Version 1.0 User manual Start Run Runs begin by selecting the Start Run option. The Start Run option will only appear when a New Run has been initiated. Hide Select Hide Instrument if you do not wish to display a particular instrument Instruments in the software. -
Page 27: File Tab
® RIDA CYCLER Version 1.0 User manual Fig. 13: Instrument communication icon 6.2 File tab Fig. 14: File tabs Every open file will be displayed with its name on a tab. Multiple files can be open at the one time. The file being displayed in the main window will be highlighted in blue. Files that need to be saved will have an asterisk just before the file name. -
Page 28: File Active Windows
® RIDA CYCLER Version 1.0 User manual Fig. 16: Navigator bar 6.4 File active windows In the central area of the user interface are segmented windows that are active for a specific section of the navigator bar. Fig. 17: Cycling analysis window... - Page 29 ® RIDA CYCLER Version 1.0 User manual...
-
Page 30: Csv Export Or Copy To Clip Board
® RIDA CYCLER Version 1.0 User manual Raw Data The data is updated in real-time during the run and is available after the run has completed. The graphs are scaled automatically during a run and can be scaled manually by expanding or contracting each axis. Analysis graph Analyzed data displayed in a specific graph type depending on the analysis chosen. -
Page 31: Result Table Organization
® RIDA CYCLER Version 1.0 User manual Paste the image into the third-party document processing software as a bitmap. The image should be of sufficient quality for publication purposes. For larger posters (e.g. A0) the images may appear slightly grainy. Fig. -
Page 32: Sizing Bars
® RIDA CYCLER Version 1.0 User manual 6.4.5 Sizing Bars The width or height of these windows, relative to each other, can be adjusted using the sizing bars. Fig. 20: Sizing bars 6.4.6 Graph Display Functions There are four graph display functions available: Fig. -
Page 33: Samples Selector
® RIDA CYCLER Version 1.0 User manual 7 Samples Selector Deselect and select specific samples using the Samples selector located to the right-hand side of the user interface. Select/deselect individual samples by clicking on the sample bar. Alternatively, select just the named samples using the Select Name, or select all samples by using the Select All, or deselect all of the samples by using the Select None options. - Page 34 ® RIDA CYCLER Version 1.0 User manual View icon located on the sample selector. There is also an option to Show All or Hide All.
-
Page 35: Samples Selector Grouping
® RIDA CYCLER Version 1.0 User manual Fig. 24: Show / hide function 7.1 Samples Selector Grouping Select the Samples Selector Grouping icon to view the sample selector based on Assay, Sample Name or None (well order). Fig. 25: Sample grouping This option makes it easier to view or hide samples based on grouped types. -
Page 36: Creating A New Run
® RIDA CYCLER Version 1.0 User manual Fig. 26: Sample overview 8 Creating a New Run Select New from the tool bar menu and then template for the new run from the drop-down list. Fig. 27: Template window 8.1 Adding assays Select the Assays required for the run by selecting the Add button. - Page 37 ® RIDA CYCLER Version 1.0 User manual Select an assay from any directory using the file icon. Use the file explorer to locate the assay you require from any location including network drives or external hard drives such as a USB Flash drive. Fig.
-
Page 38: Assay Profile Compatibility
® RIDA CYCLER Version 1.0 User manual You can Edit or Delete assay libraries from the list. Fig. 32: Personal assay library The Information, Assay Profile and Analysis Settings can be viewed once the assay is selected. Remove assays by using the delete button next to the assay name. The Run Profile is based on the first assay that is selected. -
Page 39: Updating Changes To An Assay
® RIDA CYCLER Version 1.0 User manual 8.3 Updating Changes to an Assay Further changes in the Information fields can be made to the assay. These changes can be saved to a new or existing Assay file, by clicking on the Save icon located next to the name of the assay. -
Page 40: Starting The Run
® RIDA CYCLER Version 1.0 User manual 9 Starting the Run Select the Instrument you wish to use for the run in the tool bar. Only Idle instruments can be selected to start a run. Fig. 33: Available instruments are displayed in the tool bar Once the instrument is chosen, begin the run by selecting the Start option from the drop-down list. - Page 41 ® RIDA CYCLER Version 1.0 User manual The instrument will automatically lock the lid, centrifuge the samples down, and then the run profile will begin. The LED indicator will turn green to notify a user the instrument is running.
-
Page 42: Samples Editor
® RIDA CYCLER Version 1.0 User manual 9.1 Samples Editor The Samples editor is displayed in a table format and allows you to annotate your samples. Samples can be annotated before, during or after a run. Failure to properly annotate samples can affect analysis. -
Page 43: Colors
® RIDA CYCLER Version 1.0 User manual 9.1.3 Colors Select the Color you want for each sample (optional). Chose any color from the color pallet or generate your own colors using the color chart. To create a gradient, select the first color and highlight all the way down to the last color required, and then click the Auto fill icon. -
Page 44: Type
® RIDA CYCLER Version 1.0 User manual Now highlight all the cells required to complete the filling of the names and replicates. Click on the Auto fill icon. The names will be sequential based on the first two inputs and the replicates for each will be automatically filled in too. - Page 45 ® RIDA CYCLER Version 1.0 User manual To change multiple cells at once, highlight the cells, use the F2 key on your keyboard, and then select from the following options:...
-
Page 46: Sample Concentrations
® RIDA CYCLER Version 1.0 User manual Unknown: Any sample that is under investigation. Standard: A sample of known quantity, used to generate a standard curve from which an unknown sample quantity can be calculated, or used to determine amplification efficiency. A sample that contains no template. - Page 47 ® RIDA CYCLER Version 1.0 User manual Now highlight all the cells required to complete the dilution series and replicates. Click on the Auto fill icon. The concentrations will be filled based on the first two inputs and the replicates for each will be automatically filled in too.
-
Page 48: Multiplex Standards
® RIDA CYCLER Version 1.0 User manual 9.1.7 Multiplex Standards You can enter standard concentrations for each channel individually. Select the Toggle between single and multiplex standards icon to use the option of entering multiplexed standards. You must ensure that the assay has been setup as a multiplex. Switching between single and multiplex is possible;... -
Page 49: Optional Columns
® RIDA CYCLER Version 1.0 User manual 9.1.9 Optional columns Additional columns can be added to the Samples editor using the Select visible sample data columns icon. The following columns can be added or removed from the table: Standard Concentration: concentrations are used for Standard curve analysis. RIN: provide a RNA integrity number for each input RNA. -
Page 50: Sample Editor Warnings
® RIDA CYCLER Version 1.0 User manual Select the fields to import and into which column of the Sample Editor. Once the run file is selected a table will display all the fields in the file. You have the option to select the type of delimitation (e.g. - Page 51 ® RIDA CYCLER Version 1.0 User manual Fig. 44: Information window...
-
Page 52: Creating Templates
® RIDA CYCLER Version 1.0 User manual 10 Creating templates Templates allow the user to set-up runs that will be used repetitively. For example, you may want to run a group of assays using a particular set of controls and standards in specifically allocated wells all the time. -
Page 53: Modifying A Profile During A Run (Optional)
® RIDA CYCLER Version 1.0 User manual Fig. 46: Run Summary banner In the Run Summary banner, the hold temperature or cycle number is displayed to the left side of the banner next to the name of the instrument performing the run. A graphic of the Profile Summary is also displayed. -
Page 54: Messages
® RIDA CYCLER Version 1.0 User manual 11.3 Messages Any warnings about the run will be displayed in Messages along with the time it occurred. Common messages will include the start time and instrument name and firmware version. Some messages may be warnings such as incompatibility of a selected assay or any loss in communication with the instrument and when communication was restored. -
Page 55: Cycling Analysis
® RIDA CYCLER Version 1.0 User manual Multiple analyses are possible for each run, with the analysis being viewed highlighted blue on the navigator bar. Delete any analysis by selecting the Delete button next to the target name 12.1 Cycling analysis Cycling Analysis allows you to determine the quantification cycle (Cq) and reaction efficiency of each sample in your data set. - Page 56 ® RIDA CYCLER Version 1.0 User manual Fig. 50: Cycling analysis options Linear y-axis: display the baseline corrected cycling data with the y-axis in linear scale by selecting the Linear y-axis icon.
-
Page 57: Cycling Analysis Parameters
® RIDA CYCLER Version 1.0 User manual Fig. 51: Linear y-axis Log y-axis: displaying the data in the logarithmic view allows you to better visualize the exponential region of the amplification curve and is therefore the default option. You can revert to the logarithmic scale by selecting the Log y-axis icon. - Page 58 ® RIDA CYCLER Version 1.0 User manual Threshold start: you can avoid interfering parts at the start of the baseline-corrected real time curve by moving the threshold start position. This can be achieved by either entering the value in the Threshold start text box or moving your mouse left or right clicked on the green box at the start of the threshold line.
-
Page 59: Cycling Analysis Results Table
® RIDA CYCLER Version 1.0 User manual Normalization failure: The cause of the normalization failure depends on the type of normalization being performed: • Dynamic – an initial linear region is unable to be found; The exclusion is set to: Extensive: samples will be excluded if they display no amplification, if normalization fails or they fail the fluorescence cut off. -
Page 60: Floating Windows
® RIDA CYCLER Version 1.0 User manual Well: the order of the well numbers will depend on the grouping of the samples as the name of the sample order can be alphanumeric (grouped) or numeric (ungrouped). Cq: the quantification cycle value for each sample, which is dependent on the cycle threshold set. -
Page 61: Standard Curve Using Absolute Quantification Analysis
® RIDA CYCLER Version 1.0 User manual Located in the top right hand corner of either the cycling analysis graph or parameters windows. You can move the floating window into any position of the screen. Once the window is floating you can select the parent analysis (e.g. Absolute Quantification). Any change made to the floating window will be represented in the associated parent analysis. -
Page 62: Efficiency Calculation
® RIDA CYCLER Version 1.0 User manual 12.3.1 Efficiency calculation The method utilizes the Cycling Analysis feature to determine Cq values and plots them (y-axis) against the log of the given concentration (x-axis) for each standard annotated in the Samples editor. -
Page 63: Standard Curve Results Table
® RIDA CYCLER Version 1.0 User manual R-squared Value: The R value is a measure of the percentage of data that matches the hypothesis that the given standards form a standard curve. In other words, if the R2 value is low then the given standards do not aggregate to the line of best fit very well, and therefore, the calculated efficiency may not be reliable. -
Page 64: Cycling Analysis For Standard Curves
® RIDA CYCLER Version 1.0 User manual Percentage Variation: is the percentage difference between the given and calculated concentrations. Fig. 57: Standard curve results table 12.3.3 Cycling analysis for standard curves Cycling Analysis is used to determine the Cq values for the standard curve. Therefore, Cycling Analysis is automatically paired with, and will appear beneath, the Standard Curve Analysis in the navigator bar. -
Page 65: Absolute Quantification
® RIDA CYCLER Version 1.0 User manual 12.4 Absolute quantification Absolute Quantification allows you to quantify the unknown concentration of a sample using a standard curve generated with samples of a known quantity. The method has been applied to applications such as the determination of viral load in patients. The Absolute Quantification analysis method shares all of the features found in Standard Curve Analysis but with the addition of determining unknown concentrations. -
Page 66: Reports
® RIDA CYCLER Version 1.0 User manual 13 Reports Generate a report for each Run using the Reports + button in the Run Navigator. A standard report will be displayed containing information about Run Properties, Samples, and Analysis. A preview of the report will be displayed to the right and can be configured to show only certain parts of the run. -
Page 67: Report Preview
® RIDA CYCLER Version 1.0 User manual 13.2 Report preview Each selected section will be displayed in the report Preview. A new page will begin following each section. Each page will have a number in page footer along with the version of software used. -
Page 68: Samples
® RIDA CYCLER Version 1.0 User manual Event Log A report of important messages generated during the run including any issues such as loss of communication 13.2.2 Samples The Samples editor is replicated in the report preview including sample Name, Type, standard concentrations, and Assay. -
Page 69: Report Options
® RIDA CYCLER Version 1.0 User manual 13.3 Report options Search Find a word or string of characters in the report preview. Enter the search word(s) to find them in the report. The located words will be highlighted in the preview. Print Print the report using user defined settings. -
Page 70: Excel Workbook
® RIDA CYCLER Version 1.0 User manual 14 Excel workbook Convert a run file into an Excel workbook with worksheets for each section. Do the following to create an excel workbook from your run file: Click on Save As then select Excel Workbook (*.xlsx) from the Save As Type options. Once the Excel Workbook is created open it to view the run file. - Page 71 ® RIDA CYCLER Version 1.0 User manual Fig. 63: Excel workbook...
-
Page 72: Notes And Annex
® RIDA CYCLER Version 1.0 User manual Notes and Annex Technical data, ambient conditions Physical Dimensions W: 150 mm, L: 150 mm, H: 130 mm (265 mm lid open) Weight 2.1 kg Electrical AC Input 100 - 240 VAC, 50/60 Hz 4.0 A Thermal Performance Temperature Accuracy ±... -
Page 73: Biological Safety Information
(5 gL ) are recommended when dealing with high risk situations. In case of doubt, please contact your local distributor or R-Biopharm AG, Darmstadt directly EC Declaration of conformity/CE Mark ®... -
Page 74: Type Plate Symbols
® RIDA CYCLER Version 1.0 User manual Type Plate Symbols Regulatory Compliance Mark This device is compliant with applicable ACMA technical standards for EMC. FCC Declaration of Conformity This device complies with Part 15 of the FCC Rules. Operation is subject to the following two conditions: (1) this device may not cause harmful interference, and (2) this device must accept any interference received, including interference that may cause undesired operation. -
Page 75: Annex 1: Temperature Verification System (Tvs)
® RIDA CYCLER Version 1.0 User manual Annex 1: Temperature verification system (TVS) The TVS can be used to ensure that the RIDA®CYCLER is operating to specification in regard to temperature control Fig. 64: Temperature verification system TVS sensor is fragile and connected via a very thin cable. Please handle with care to avoid breakage. -
Page 76: Annex 2: Error Messages And Warnings
® RIDA CYCLER Version 1.0 User manual Carefully remove the sensor from the instrument and place it back into the foam slot. Unplug the TVS from the computer and place it back into the protective case. Annex 2: Error messages and warnings The following error messages and warnings are possible: The selected assay is not compatible with the run. -
Page 77: Annex 3: Toshiba Bluetooth Work Around
® RIDA CYCLER Version 1.0 User manual ® Annex 3: Toshiba Bluetooth work around If you are using a Toshiba computer and you are not able to communicate with the ® RIDA CYCLER instrument using Bluetooth the following work around should rectify the issue. 1. -
Page 78: Annex 4: Cfr 21, Part 11
® RIDA CYCLER Version 1.0 User manual Annex 4: CFR 21, Part 11 The Code of Federal Regulations Tile 21 part 11 (21CFR11) of the U.S Food and Drug Administration, covers the regulations on electronic records and electronic signatures to ensure trustworthy, reliable and equivalent to paper records. - Page 79 ® RIDA CYCLER Version 1.0 User manual The remaining procedures we have no control over, especially as some of them relate to the whole standard operating procedure for a test and/or quality management process, not just to the software. These include: “(c) Protection of records to enable their accurate and ready retrieval throughout the records retention period”.
- Page 80 ® RIDA CYCLER Version 1.0 User manual...
-
Page 81: Annex 5: Dye Colour Chart
® RIDA CYCLER Version 1.0 User manual File management is up to the end user. They must configure appropriate permissions and file storage such that it meets these requirements. Windows allows you to have separate permissions to create files or write data and delete. However, it does not distinguish between writing a file and overwriting a file so there is nothing to prevent you from saving one file over the top of another. - Page 82 ® RIDA CYCLER Version 1.0 User manual Quasar® 705 Conjugated label...
-
Page 83: Acknowledgement Of Registered Trademarks
® RIDA CYCLER Version 1.0 User manual Acknowledgement of Registered Trademarks ® ® Adobe and Reader are both registered trademarks of Adobe Systems Incorporated, San Jose CA USA ® Bluetooth is a registered trademark of the Bluetooth SIG, Kirkland WA USA ®... -
Page 84: References
® RIDA CYCLER Version 1.0 User manual References 1. Bustin, S.A., Benes, V., Garson, J.A., Hellemans, J., Huggett, J., Kubista, M., Mueller, R., Nolan, T., Pfaffl, M.W., Shipley, G.L., Vandesompele, J., and Wittwer, C.T. (2009) The MIQE Guidelines: Minimum Information for Publication of Quantitative Real-Time PCR Experiments. Clin. -
Page 85: Abbreviations
® RIDA CYCLER Version 1.0 User manual Abbreviations Confidence interval Quantification cycle Coefficient of variation Internal amplification control Limit of detection No template control PCR: Polymerase chain reaction qPCR Real time PCR RNA integrity number RT-qPCR Reverse transcription real time PCR Standard deviation W-o-L Window of linearity... -
Page 86: Glossary
® RIDA CYCLER Version 1.0 User manual Glossary Analytical Accuracy the difference between the experimentally measured and actual concentrations. Analytical Repeatability: precision of the assay within the same samples repeatedly measured in the same assay. Also, referred to intra-assay variance it is expressed as the SD for the Cq variance or CV of the copy number/ concentration variance. - Page 87 ® RIDA CYCLER Version 1.0 User manual Bio Molecular Systems Pty Ltd Unit 5 - 3 Northward Street, Upper Coomera QLD 4209 Australia Phone: +61 (02) 9332 1694 E-mail: support@biomolecularsystems.com www.biomolecularsystems.com...
Need help?
Do you have a question about the Rida Cycler and is the answer not in the manual?
Questions and answers