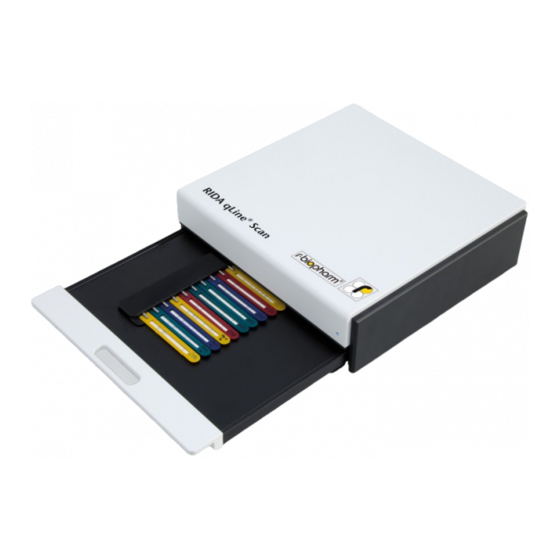
Summary of Contents for R-Biopharm RIDA qLine Scan
- Page 1 R-Biopharm AG RIDA QUICK SCAN II ® (V2.5) Deckblatt von Marketing / Foto fehlt Bedienungsanleitung...
- Page 2 RIDA qLine Scan User manual ® 2017-11-04...
- Page 3 2018 R-Biopharm AG, Darmstadt © User manual RIDA qLine Scan 2017-11-04 ® Copyright 2016 by R-Biopharm AG © R-Biopharm AG An der neuen Bergstraße 17 64297 Darmstadt, Germany Phone: +49 (0) 61 51 - 8102-0 Fax: +49 (0) 61 51 - 8102-40 E-mail: info@r-biopharm.de...
-
Page 4: Warnings, Cautions And Notes
Copyright Information The contents of this report are property of R-Biopharm AG. The contents are not to be copied, reproduced or transferred to a third person, without a prior written permission. -
Page 5: Table Of Contents
RIDA qLine Scan User manual ® Contents: General information and explanations Contents Warnings, Cautions and Notes ..................4 1 Safety instructions ......................6 2 General information ...................... 6 2.1 Intended use ..........................6 2.2 Functions ............................6 2.3 Validation ............................7 2.4 Device and specification ........................ -
Page 6: Safety Instructions
RIDA qLine Scan User manual ® 1 Safety instructions • Please be careful with this equipment at all times. • Follow basic safety precautions to reduce the risk of injuries, fire and electrical shock. • Read and understand all the information in this document. Failures in understanding and following the instructions may result in damage to the product, injury to operating personnel and poor instrument performance. -
Page 7: Validation
RIDA qLine Scan User manual ® 2.3 Validation Every RIDA qLine Scan passes a test phase of 100 scans. The reader is calibrated using a calibration card and the corresponding software. ® Warning: If you alter the equipment in any way, you put the warranty in danger and this will no longer be valid. -
Page 8: Start-Up
RIDA qLine Scan User manual ® 3 Start-up 3.1 Introduction In this chapter is described how to install and start this device. This includes unpacking, accessories, the software installation and PC connections. Note: Make sure you do not drop the scanner, this could injure someone or damage the device. -
Page 9: Environmental Conditions
RIDA qLine Scan User manual ® 3.4 Environmental conditions Place the instrument on a flat, horizontal surface with sufficient amount of space around it. Avoid a positioning at places where it can fall down. Warning: Please, pay attention that the pulled out drawer doesn’t reach out over the working place. -
Page 10: Installation And Connection Of Rida Qline Scan
RIDA qLine Scan User manual ® 4 Installation and connection of RIDA qLine Scan ® 4.1 Transportation lock The device is locked for transportation. Please read the note attached to the device attentively. Turn the device upside down and proceed upon instruction. Caution: Before turning the instrument on, please remove transportation lock. -
Page 11: Preparation
RIDA qLine Scan User manual ® 4.2 Preparation Please plug the supplied cables into the respective sockets at the rear of the scanner. 4.2.1 Connection The RIDA qLine Scan features two sockets at the rear. 1. Power Plug ® 2. USB Port First connect the black power plug with socket at the rear of the scanner. -
Page 12: First Evaluation Of Pictures
RIDA qLine Scan User manual ® Note: Perform a minimum of 10 test scans before starting the first analysis. The warmer the lamp of the device, the better the scan results. After a longer break between scans, perform a few empty scans as well. Never quit the warm-up phase. -
Page 13: Erroneous Image Acquisition
RIDA qLine Scan User manual ® Pay attention that the Tests are positioned facing up. Close the drawer as far as it will go. You can start the scan-process now. Open the drawer after scanning and remove the strips 6 Erroneous image acquisition If any image does not reflect the visual perception, please check the correct proceeding upon the instructions and restart the image acquisition. -
Page 14: Inside
RIDA qLine Scan User manual ® 8.2 Inside The cleaning of the interior is limited to the drawer area. Warning: Wear rubber gloves when cleaning the scanner. Slight contaminations Pull out the drawer completely and then wipe the drawer with a damp cloth carefully. Fig. -
Page 15: Maintenance
RIDA qLine Scan User manual ® To clean the RIDA qLine Scan intensively, please unplug the device and pull the drawer out. Position the device upside-down and wipe the glass plate with a lint-free cloth carefully. If it is ® necessary repeat this procedure until the glass sheet is clean (see picture). - Page 16 RIDA qLine Scan User manual ® R-Biopharm AG An der neuen Bergstraße 17 64297 Darmstadt, Germany Phone: +49 (0) 61 51 - 8102-0 Fax: +49 (0) 61 51 - 8102-40 E-mail: info@r-biopharm.de www.r-biopharm.com 2017-11-04...


Need help?
Do you have a question about the RIDA qLine Scan and is the answer not in the manual?
Questions and answers