
Related Manuals for Farm King 1460


Summary of Contents for Farm King 1460
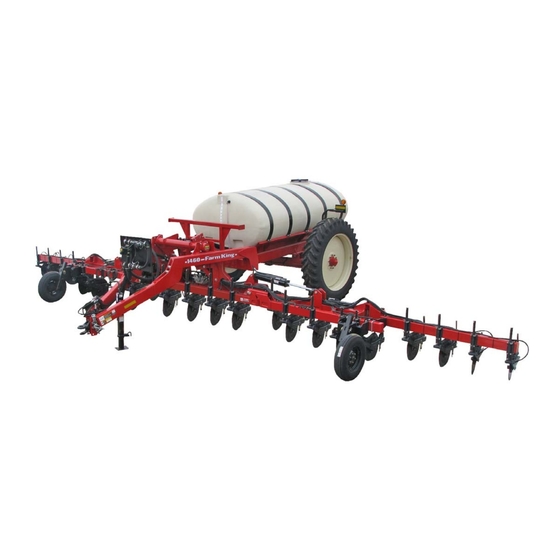
- Page 1 OPERATOR AND PARTS MANUAL Fertilizer Applicator Model 1460 032016 88663040 6990633 (1-13) Printed in U.S.A. © Bobcat Company 2013 062013 | Rev 1 | 88664296...
-
Page 3: Table Of Contents
Table of Contents - Fertilizer Applicator 1460 TABLE OF CONTENTS Manufacturer’s Statement: For technical reasons, Buhler Industries Inc. reserves the right to modify machinery design and specifications provided herein without any preliminary notice. Information provided herein is of descriptive nature. -
Page 4: Table Of Contents - Fertilizer Applicator
Table of Contents - Fertilizer Applicator 1460... -
Page 5: Safety
Customer / Owner’s Signature: Remove this Warranty Registration Form from the Operator And Parts Manual. Make two copies of the form. Send original Warranty Registration Form to Farm King. Give one copy to the customer and the dealer will keep one copy. - Page 6 Warranty Registration - Fertilizer Applicator 1460...
-
Page 7: Introduction
Farm King equipment. READ AND UNDERSTAND THIS OPERATOR AND PARTS MANUAL BEFORE OPERATING YOUR FARM KING EQUIPMENT. If you have any questions, see your Farm King dealer. This manual may illustrate options and accessories not installed on your Farm King equipment. - Page 8 Introduction - Fertilizer Applicator 1460...
-
Page 9: Owner's Information
Introduction - Fertilizer Applicator 1460 OWNER’S INFORMATION Serial Number Location Thank you for your decision to purchase a Farm King Please enter the model and serial number in the space 1460 Fertilizer Applicator. ensure maximum provided for easy reference. performance of your equipment, it is mandatory that you... -
Page 10: Equipment Identification
Introduction - Fertilizer Applicator 1460 EQUIPMENT IDENTIFICATION Component Location ROCKER ARM FRONT PRODUCT SIGHT TANK LIGHT BAR GAUGE GAUGE WHEEL INNER WING COULTER OUTER WING HITCH / SAFETY CHAIN HYDRAULIC VALVE BLOCK... - Page 11 Introduction - Fertilizer Applicator 1460 Component Location REAR AMBER LIGHT SIGHT AMBER LIGHT GAUGE RED LIGHT RED LIGHT FILL VALVE PRODUCT PUMP FRESH WATER TANK B-11030...
- Page 12 Introduction - Fertilizer Applicator 1460...
- Page 13 Safety - Fertilizer Applicator 1460 SAFETY SAFETY INSTRUCTIONS ............15 Safe Operation Is The Operator’s Responsibility .
-
Page 14: Safety - Fertilizer Applicator
Safety - Fertilizer Applicator 1460... -
Page 15: Safety Instructions
Rules moderate injury. It may also be used to alert against Regulations unsafe practices. • The written instructions from Farm King include the Warranty Registration, Dealer Inspection Report, Operator And Parts Manual and machine signs (decals). • Check the rules and regulations at your location. The rules may include an employer’s work safety... -
Page 16: Use Safety Rules
Safety - Fertilizer Applicator 1460 Use Safety Rules • The equipment must be used ONLY on approved tractors / transport vehicles. • Read and follow instructions in this manual and the tractor’s Operators Manual before operating. • DO NOT modify the equipment in any way. -
Page 17: Transport Safety
Safety - Fertilizer Applicator 1460 Transport Safety Machine Requirements And Capabilities • Do not exceed 20 mph (32 kph). Reduce speed on • Fasten seat belt securely. If equipped with a foldable rough roads and surfaces. Roll-Over Protective Structure (ROPS), only fasten seat belt when ROPS is up and locked. -
Page 18: Fire Prevention
Fueling Operation The Farm King machine must be in good operating condition before use. Check all of the items listed on the service schedule under the 8 hour column. (See “SERVICE SCHEDULE”... -
Page 19: Welding And Grinding
Safety - Fertilizer Applicator 1460 Welding And Grinding Always clean the machine and equipment, disconnect the battery, and disconnect the wiring from the machine controls before welding. Cover rubber hoses, battery and all other flammable parts. Keep a fire extinguisher near the machine when welding. -
Page 20: Rules For Safe Use Of Chemicals
Safety - Fertilizer Applicator 1460 Rules For Safe Use Of Chemicals • Do not spill chemicals on skin or clothing. If chemicals spilled, remove contaminated clothing immediately and wash skin (and clothing) thoroughly with soap and water. Wash hands and face with soap and water and change clothing after spraying. -
Page 21: Safety Signs (Decals)
Follow the instructions on all the signs (decals) that are on the equipment. Replace any damaged signs (decals) and be sure they are in the correct locations. Equipment signs are available from your Farm King equipment dealer. Front Left Side Of Hitch... - Page 22 Safety - Fertilizer Applicator 1460 Rear Of Chassis Frame (Rear Of Machine) B-11008 p/n SX004772 p/n SX004775 p/n SX002438...
- Page 23 Safety - Fertilizer Applicator 1460 Pivot Points On Wings (Front and Back) Rocker Shaft End Cap B-11006 B-11001 p/n 002439 p/n SX004302...
-
Page 24: Equipment Decals And Signs
Safety - Fertilizer Applicator 1460 EQUIPMENT DECALS AND SIGNS Part Number SX017672 NOTE: All safety related decals are shown in the Safety Signs Section. (See “SAFETY SIGNS (DECALS)” on page 21.) Check and replace any worn, torn, hard to read or missing decals on your equipment. -
Page 25: Safety Sign-Off Form
Farm King follows the general Safety Standards specified by the American Society of Agricultural and Biological Engineers (ASABE) and the Occupational Safety and Health Administration (OSHA). Anyone who will be operating and / or maintaining the 1460 fertilizer applicator must read and clearly understand ALL Safety, Operating and Maintenance information presented in this manual. - Page 26 Safety - Fertilizer Applicator 1460...
-
Page 27: Assembly
Assembly - Fertilizer Applicator 1460 ASSEMBLY COMPONENT INSTALLATION ........... . 29 Preparing For Assembly . - Page 28 Assembly - Fertilizer Applicator 1460...
-
Page 29: Component Installation
Preparing For Assembly AVOID INJURY OR DEATH Before you leave the operator’s position: • Always park on a flat level surface. 1460 fertilizer applicators are shipped without some • Place all controls in NEUTRAL. components installed due to transporting height •... - Page 30 Assembly - Fertilizer Applicator 1460 Figure 2 HIGH PRESSURE FLUID HAZARD To prevent serious injury or death from high pressure fluid: B-0035 • Relieve pressure on system before repairing or adjusting. Connect the Blue (Work Circuit) and Red (Transport •...
-
Page 31: Coulter Installation
Assembly - Fertilizer Applicator 1460 Coulter Installation Figure 4 Figure 3 CENTER OF TOOLBAR B-11031 B-11000 Align two clamp plates (Item 1) [Figure 4] on either side Locate the center of the toolbar. Measure out from the of the toolbar at a marked location (30”, 22”, 20”). -
Page 32: Supply Hose Installation
Assembly - Fertilizer Applicator 1460 Supply Hose Installation Coulter Injector Alignment Figure 7 CORRECT WRONG Review the supply line routing on the installed coulters or main toolbar before attaching lines to inner wing coulters. Figure 6 B-0155 B-0154 Injector is not aligned (WRONG) with coulter [Figure 7]. -
Page 33: Coulter Knife Alignment
Assembly - Fertilizer Applicator 1460 Coulter Knife Alignment Orifice Installation (Coulters / Knives) NOTE: The following images may not show your Figure 10 exact coulter assembly as it appears but the procedure is correct. Figure 8 CORRECT B-0179 B-0174 Loosen hose fitting by 1/4 turn (Item 1) [Figure 10] and WRONG disconnect. -
Page 34: Slow Moving Vehicle Sign Installation
Assembly - Fertilizer Applicator 1460 Slow Moving Vehicle Sign Installation Spray Controller Console Installation (Option) Figure 12 Install the spray controller console in the cab of the tractor according to the manufacturers specifications. (See the spray controller Installation and Operator’s manual for the correct procedure.) -
Page 35: Adjusting Axle Width
Assembly - Fertilizer Applicator 1460 Adjusting Axle Width Move the tractor and fertilizer applicator to a flat level surface. Stop the engine, engage the park brake and leave the operator’s position. (See “Leaving The Operator’s Position” on page 45.) Place chock blocks in front and behind the tractor tires to... - Page 36 Assembly - Fertilizer Applicator 1460 Figure 14 B-11010 Loosen and remove the two bolts (Item 1) [Figure 14] that hold the spindle / hub assembly to the axle sub- frame. Slide the assembly in or out to the desired row spacing.
-
Page 37: John Blue Ground Driven Pump Installation
Assembly - Fertilizer Applicator 1460 John Blue Ground Driven Pump Installation Move the fertilizer applicator and John Blue Ground Driven Pump to a flat level area with access to compressed air and a hoist or forklift access. Stop the tractor and engage the park brake. - Page 38 Assembly - Fertilizer Applicator 1460 Figure 16 Figure 18 B-11046 B-11052 Place the two backing bolt plates (Item 1) [Figure 16] on Move the pump back (Item 1) [Figure 18] until it is up the backside of the toolbar and insert four 5/8” bolts against the front of the toolbar (Item 2) [Figure 18].
-
Page 39: Twin Piston Pump
Assembly - Fertilizer Applicator 1460 Twin Piston Pump Installing Monitor Hose Figure 20 Figure 22 B-11047 B-11048 Cut the zip tie (Item 1) [Figure 20] holding the suction Cut the zip tie holding the hose to the monitor and route... - Page 40 Assembly - Fertilizer Applicator 1460...
-
Page 41: Operation
Operation - Fertilizer Applicator 1460 OPERATION GENERAL INFORMATION ............43 Pre - Operation Checklist . - Page 42 Operation - Fertilizer Applicator 1460...
-
Page 43: General Information
Operation - Fertilizer Applicator 1460 GENERAL INFORMATION Pre - Operation Checklist Before operating the fertilizer applicator for the first time and each time thereafter, check the following items: AVOID INJURY OR DEATH Leaking fluids under pressure can enter the skin Wear safety glasses to prevent eye injury when any and cause serious injury or death. -
Page 44: Break - In Checklist
Break - In Checklist Tractor Requirements Check and tighten all wheel bolts to their specified torque The 1460 fertilizer applicators will require two auxiliary after transporting for five (5) miles (11km). hydraulic functions, Category IV rated drawbar and a 7- Pin electrical connection. -
Page 45: Entering And Leaving The Operator's Position
Operation - Fertilizer Applicator 1460 Entering And Leaving The Operator’s Position Follow the instructions in your tractor’s operation manual for the correct procedure. Entering The Operator’s Position Move to the operator’s position, start the engine and release the parking brake. -
Page 46: Initial Set-Up
Operation - Fertilizer Applicator 1460 INITIAL SET-UP Figure 24 Connecting The Fertilizer Applicator To The Tractor Always inspect the tractor’s drawbar and fertilizer applicator hitch before connecting. See the tractor’s owner’s manual. Enter the operator’s position. (See “Entering The Operator’s Position” on page 45.) Move the tractor into position in front of the fertilizer applicator. - Page 47 Operation - Fertilizer Applicator 1460 Figure 25 B-11033 Install the hitch pin (Item 1) [Figure 25] and retaining pin to securely fasten the fertilizer applicator hitch to the tractor drawbar. Attach the safety chain (Item 2) [Figure 25] around the...
-
Page 48: Connecting Hydraulic Hoses
Operation - Fertilizer Applicator 1460 Connecting Hydraulic Hoses To Connect: Figure 26 HIGH PRESSURE FLUID HAZARD To prevent serious injury or death from high pressure fluid: B-0145 • Relieve pressure on system before repairing or Push coupler into female coupler on the tractor until they adjusting. -
Page 49: John Blue Pump Setting
Operation - Fertilizer Applicator 1460 JOHN BLUE PUMP SETTING The NGP pump output is determined by the drive sprocket ratio and the stroke setting. There are two ways to find the proper setting for your pump. On-line Flow Chart Calculator... -
Page 50: Fertilizer Applicator Operation
Operation - Fertilizer Applicator 1460 FERTILIZER APPLICATOR OPERATION Figure 29 Leveling The Fertilizer Applicator The fertilizer applicator frame must be adjusted down or up until the fertilizer applicator is parallel with the ground prior to operation. Lower the toolbar. (See “Raising And Lowering The Toolbar”... - Page 51 Operation - Fertilizer Applicator 1460 Figure 30 B-11045 Measure the distance (Items 1 & 2) [Figure 30] from the ground to the bottom of the fertilizer applicator frame in the two locations shown. NOTE: The two measurements should be approximately the same when the frame is level.
-
Page 52: Unfold Wings
Operation - Fertilizer Applicator 1460 Unfold Wings Adjust the tractor's hydraulic flow to the “Transport” and “Work” circuits to 4 - 6 gpm flow. Engage the tractor hydraulics. (See the tractor’s operator’s manual for the correct procedure.) Unfold the wings with the “Transport Circuit” (hydraulic hoses with the “Red”... -
Page 53: Raising And Lowering The Toolbar
Operation - Fertilizer Applicator 1460 Raising And Lowering The Toolbar Setting The Toolbar / Coulter Depth Check depth while operating in the field. Adjust toolbar height by adding or removing stroke control segments to the lift cylinders and adjusting the height of the gauge wheels. -
Page 54: Hydraulic Cylinder Functions
Operation - Fertilizer Applicator 1460 Hydraulic Cylinder Functions Use the following table to check the tractor valve function against the cylinder behavior. The hydraulic flow to the Transport and Work Circuits should not exceed 6 gpm. The system pressure will need to be 2000 psi minimum. -
Page 55: Centrifugal Pump (Option)
Operation - Fertilizer Applicator 1460 Centrifugal Pump (Option) The pump must always run in a “flooded” condition. Operating the pump in a “non-flooded” condition will cause severe seal damage and possible pump damage. A “flooded” condition is when the centrifugal pump is DO NOT allow an air trap point to occur. -
Page 56: Spray Monitor
Operation - Fertilizer Applicator 1460 Spray Monitor FLOW TABLE FOR WATER GREEN BLACK STEEL LEVEL PLASTIC PLASTIC PLASTIC GLASS BALLS BALLS BALLS BALLS BALLS Cover the monitor daily to prevent damage to the 0.34 0.47 0.51 0.91 3.33 equipment. 0.24 0.35... -
Page 57: Filling The Product Tank
Operation - Fertilizer Applicator 1460 Filling The Product Tank Do not spill chemicals on skin or clothing. If chemicals spilled, remove contaminated clothing immediately and wash skin (and clothing) thoroughly with soap and water. Wash hands and face with soap and water and change clothing after spraying. - Page 58 Operation - Fertilizer Applicator 1460 Figure 36 Figure 38 B-11019 B-11017 Open fill valve (Item 1) [Figure 38]. Remove fill cap (Item 1) [Figure 36]. Figure 39 Figure 37 B-11018 B-11015 Install the fill hose (Item 1) [Figure 37]. Open tank valve (Item 1) [Figure 39].
-
Page 59: Filling Fresh Water Tank
Operation - Fertilizer Applicator 1460 Filling Fresh Water Tank FIELD OPERATION Pre-Operation Move the tractor and fertilizer applicator to a level area in the field. (See “TRANSPORTING” on page 64.) Always use clean, fresh water when filling the fresh Engage the tractor hydraulics. (See the tractor’s water tank. -
Page 60: Spray System Test - Ace Centrifugal Pump (Option)
Operation - Fertilizer Applicator 1460 Spray System Test - Ace Centrifugal Pump (Option) Wet Test Add approximately 300 gallons of clean water to the product tank. (See “Filling The Product Tank” on page 57.) Inspect the system for leaks. Repair as needed before operating fertilizer applicator. -
Page 61: John Blue Twin Piston Pump Test (Option)
Operation - Fertilizer Applicator 1460 John Blue Twin Piston Pump Test (Option) Swath Width Figure 43 The measurement for the loaded radius must be from the Manufacturer of the tire or be measured under loaded conditions. The loaded radius tire is always the tire that has the first drive sprocket attached to its hub. - Page 62 Operation - Fertilizer Applicator 1460 Setting The Pump Read the desired pump setting from the bottom scale on the pump setting chart. Loosen the setting pointer nut and rotate the setting hub until the setting pointer is over the desired setting.
-
Page 63: Operating The Fertilizer Applicator In The Field
Operation - Fertilizer Applicator 1460 Operating The Fertilizer Applicator In The Field As the tractor approaches the end of the field / rows, turn the sectional control valves “Off” and fully raise the Enter the operator’s position, start the engine and toolbar. -
Page 64: Transporting
Operation - Fertilizer Applicator 1460 TRANSPORTING Fully raise the toolbar into the transport position. (See “Raising And Lowering The Toolbar” on page 53.) Requirements Always comply with federal, state, local and provincial laws regarding the transport of farm equipment on pubic roadways. -
Page 65: Maintenance
Maintenance - Fertilizer Applicator 1460 MAINTENANCE TROUBLESHOOTING ............67 Chart . - Page 66 Maintenance - Fertilizer Applicator 1460...
-
Page 67: Troubleshooting
NOTE: If a problem is encountered that is difficult to solve, even after having read through this troubleshooting section, please call your local Farm King dealer. Before you call, please have this Operator And Parts Manual and the serial number of your machine at hand. - Page 68 Maintenance - Fertilizer Applicator 1460 PROBLEM CAUSE CORRECTION During field operation, lifting the No power to microswitch, solenoid Check to make sure all electrical toolbar for end row turns, the wings do valve (1) is not enabled. connections are good.
-
Page 69: Service Schedule
Maintenance - Fertilizer Applicator 1460 SERVICE SCHEDULE Maintenance Intervals Maintenance work must be done at regular intervals. Failure to do so will result in excessive wear and early failures. The service schedule is a guide for correct maintenance of the fertilizer applicator. -
Page 70: Lubrication
Maintenance - Fertilizer Applicator 1460 LUBRICATION Locations Recommendations Always use a good quality multi-purpose / lithium base grease when lubricating the equipment. Fluid such as engine oil, hydraulic fluid, coolants, grease, etc. must disposed environmentally safe manner. Some regulations require that certain spills and leaks on the ground must be cleaned in a specific manner. - Page 71 Maintenance - Fertilizer Applicator 1460 Lubricate the following grease locations EVERY 50 Figure 49 HOURS: Figure 47 B-11007 Apply two - three pumps of grease to the rockshaft caps B-11028 (Item 1) [Figure 49]. Apply two - three pumps of grease to the inner wing fold Figure 50 bushings (Item 1) [Figure 47].
-
Page 72: Adjusting Hydraulic Pressure
Maintenance - Fertilizer Applicator 1460 Lubricate the following grease locations EVERY 250 ADJUSTING HYDRAULIC PRESSURE HOURS: Procedure Figure 51 NOTE: The pressure reducing valve (PR1) controls the amount of downward pressure applied to the outer coulters. The adjustment range is from 800 to 1,500 PSI. - Page 73 Maintenance - Fertilizer Applicator 1460 Figure 53 88668043 Install a 3000 PSI gauge (Item 1) in gauge port 15 (Item 2) [Figure 53] of the hydraulic block. NOTE: This plug is ORB, use the correct fitting when installing the 3000 PSI gauge.
-
Page 74: Dealer / Grower Supplied Coulters Procedure
Maintenance - Fertilizer Applicator 1460 Dealer / Grower Supplied Coulters Procedure Delivery of the fertilizer applicator without factory supplied coulters may require additional adjustment of the hydraulic system to accommodate the weight of the coulters used. This unknown weight directly affects the hydraulic pressures in the folding / unfolding and raising / lowering of the toolbar. -
Page 75: Axles
Maintenance - Fertilizer Applicator 1460 AXLES Wheel Nut Torque AVOID INJURY OR DEATH • Always chock tires before performing any CHECK WHEEL NUTS AFTER: maintenance or service. 1. First 3 (three) hours of field operation. 2. First 10 (ten) hours of field operation. -
Page 76: Tire Pressure
Maintenance - Fertilizer Applicator 1460 Tire Pressure When inflating tires, use a clip-on chuck and extension hose long enough to allow you to stand to one side and NOT in front of or over the tire assembly. Check tire pressure daily. Fill tires per tire manufacturer's recommendation. -
Page 77: Cleaning
Maintenance - Fertilizer Applicator 1460 CLEANING The tank and system must be emptied of chemical mixture and flushed with clean water before servicing spray system spraying components. CHEMICAL HAZARD To prevent serious injury or death: Do not spill chemicals on skin or clothing. If... -
Page 78: Cleaning The Line Strainer Screen
Maintenance - Fertilizer Applicator 1460 Cleaning The Line Strainer Screen SAFETY SIGN (DECAL) INSTALLATION Procedure Clean the line strainer screen every 50 hours of operation. When replacing safety signs (decals), The tank and system must be emptied of chemical temperature must be above 10° C (50° F). -
Page 79: Storage And Return To Service
Storage • Place the equipment in a dry protected shelter. Sometimes it may be necessary to store your Farm King NOTE: If a dry protected shelter is not available, fertilizer applicator for an extended period of time. Below cover with a waterproof tarp and tie down is a list of items to perform before storage. - Page 80 Maintenance - Fertilizer Applicator 1460...
-
Page 81: Parts Identification
Parts Identification - Fertilizer Applicator 1460 PARTS IDENTIFICATION GENERAL PARTS INFORMATION ..........83 ADJUSTABLE AXLE . - Page 82 Parts Identification - Fertilizer Applicator 1460 COULTER W / INJECTOR GROUP ..........120 12 Row - 30”...
-
Page 83: General Parts Information
Parts Identification - Fertilizer Applicator 1460 GENERAL PARTS INFORMATION The parts identification section list descriptions, part numbers and quantities for all North America Base Model 1460 fertilizer applicators. Contact your Farm King dealer for additional fertilizer applicator parts information. ADJUSTABLE AXLE... -
Page 84: Pintle Hitch Assembly
Parts Identification - Fertilizer Applicator 1460 PINTLE HITCH ASSEMBLY 88668000... - Page 85 Parts Identification - Fertilizer Applicator 1460 ITEM PART NUMBER DESCRIPTION 88666482 5 TON JACK WELDMENT, TW 88668004 BOLT, 1.00” x 7.00” HEX GR 8 YZ SX014072 TUBE RD, 2.00” OD x 1.020” ID x 0.88 SX014119 SAFETY CHAIN, 21000# SX014120 PLATE, 0.50”...
-
Page 86: Frame Assembly
Parts Identification - Fertilizer Applicator 1460 FRAME ASSEMBLY 88668001-D... - Page 87 Parts Identification - Fertilizer Applicator 1460 ITEM PART NUMBER DESCRIPTION 00012012 BOLT, 0.38” x 0.75” CSHH G5 P 00080680 LOCKWASHER, 0.375” PL 88666347 ROCKSHAFT CAP, GREEN 88666346 ROCKSHAFT CAP, RED 88666434 PIN WELDMENT, 1.25” W / FLAG 88667986 CENTER DB WELDMENT, GREEN...
-
Page 88: Toolbar Assembly (431.31 In.)
Parts Identification - Fertilizer Applicator 1460 TOOLBAR ASSEMBLY (431.31 IN.) 88668012-D... - Page 89 Parts Identification - Fertilizer Applicator 1460 ITEM PART NUMBER DESCRIPTION SXLN-062-NI-YZ LOCKNUT, 5/8” NYLON INSERT YZ SXLN-031-NIYZ LOCKNUT, 5/16” NYLON INSERT YZ SXG1641 GREASE ZERK, 1/4”-28 STRAIGHT SX014126 WING PIN WELDMENT SX014049 WING STOP PLATE, 0.50” SX014000G LEFT WING DB WELDMENT, GREEN...
-
Page 90: Toolbar Assembly (491.31 In.)
Parts Identification - Fertilizer Applicator 1460 TOOLBAR ASSEMBLY (491.31 IN.) 88668022... - Page 91 Parts Identification - Fertilizer Applicator 1460 ITEM PART NUMBER DESCRIPTION 09707515 BOLT, CSHH G5 P 0.31” x 1.75” 86505344 88668019 U-BOLT, 5/8” x 6” x 5.50” G5 SQ YZ SX014049 WING STOP PLATE, 0.50” SX014126 WING PIN WELDMENT SX014503R 8 FT. RIGHT WING WELDMENT, RED SX014503G 8 FT.
-
Page 92: Hydraulic Plumbing Assembly (W/O Outer Wings)
Parts Identification - Fertilizer Applicator 1460 HYDRAULIC PLUMBING ASSEMBLY (W/O OUTER WINGS) 88668024-D... - Page 93 Parts Identification - Fertilizer Applicator 1460 ITEM PART NUMBER DESCRIPTION SXNTFTL038168YZ LOCKNUT, 3/8”-16 UNC TOP, FLG GR 8 YZ 00088275 BOLT, 0.31” x 1.50” CSHH GR5 P 86505344 09602223 BOLT, 1” x 7” CSHH GR5 P SXLN-100-NI-YZ LOCKNUT,1” NYLON INSERT SXLN-038-NIYZ LOCKNUT, 3/8”...
-
Page 94: Hydraulic Plumbing Assembly (W / Outer Wings)
Parts Identification - Fertilizer Applicator 1460 HYDRAULIC PLUMBING ASSEMBLY (W / OUTER WINGS) 88668025-D... - Page 95 Parts Identification - Fertilizer Applicator 1460 ITEM PART NUMBER DESCRIPTION SXNTFTL038168YZ LOCKNUT, 3/8”-16 UNC TOP, FLG GR 8 YZ 00088275 BOLT, 0.31” x 1.50” CSHH GR5 P 86505344 09602223 BOLT, 1” x 7” CSHH GR5 P SXLN-100-NI-YZ LOCKNUT,1” NYLON INSERT SXLN-038-NIYZ LOCKNUT, 3/8”...
-
Page 96: Hydraulic Manifold Block (W/O Outer Wings)
Parts Identification - Fertilizer Applicator 1460 HYDRAULIC MANIFOLD BLOCK (W/O OUTER WINGS) 10 9 SX014093_B... - Page 97 Parts Identification - Fertilizer Applicator 1460 ITEM PART NUMBER DESCRIPTION 88661438 COMBINATION VALVE BODY 88661439 VALVE, C-BALANCE 2.5:1 RATIO 88661440 VALVE, C-BALANCE 10.0:1 RATIO 88661441 CHECK VALVE, #10 88661442 FLOW DIVIDER, #10 COMBINER 88661443 CHECK VALVE, #10 PILOT-OPEN 88661444 PRESSURE REDUCING VALVE, #10...
-
Page 98: Hydraulic Manifold Block (W / Outer Wings)
Parts Identification - Fertilizer Applicator 1460 HYDRAULIC MANIFOLD BLOCK (W / OUTER WINGS) 88668044_B... - Page 99 Parts Identification - Fertilizer Applicator 1460 ITEM PART NUMBER DESCRIPTION 00080681 LOCK WASHER, 0.31 PL 00087872 BOLT, 0.31” x 0.75” HEX GR 5 PL 88662270 RELIEF VALVE, SAE 08 1200 PSI SX014093 HYDRAULIC MANIFOLD BLOCK W / REDUCING SX6400-8 ADAPTER, STRAIGHT, 08 MJIC - 08 ORB...
-
Page 100: Tank And Plumbing Assembly
Parts Identification - Fertilizer Applicator 1460 TANK AND PLUMBING ASSEMBLY 88667997-B... - Page 101 Parts Identification - Fertilizer Applicator 1460 ITEM PART NUMBER DESCRIPTION 00087936 BOLT, CSHHP 0.38x 2.5” LG 88667999 TANK; 1600 ELLIP, 1460 DRILL, CREAM 88668127 1600 GAL SADDLE / TANK WELDMENT, GREEN 88668128 1600 GAL SADDLE / TANK WELDMENT, RED SX008882...
-
Page 102: Hand Rinse Tank Assembly
Parts Identification - Fertilizer Applicator 1460 HAND RINSE TANK ASSEMBLY 88667996-B ITEM PART NUMBER DESCRIPTION 00080681 LOCK WASHER, 5/16” PL 00087872 BOLT, 5/16” x 0.75” HEX GR 5 PL 88665010 HAND EYE RINSE TANK ASSEMBLY, - CRM SX014666 TANK BRACKET WELDMENT, 9 GAL. -
Page 103: Hand / Eye Rinse Tank Assembly
Parts Identification - Fertilizer Applicator 1460 HAND / EYE RINSE TANK ASSEMBLY 88665010_B ITEM PART NUMBER DESCRIPTION 88664993 RIVET WASHER, 3/8” OD x 3/16” ID 88664994 TANK COVER, 9 GAL SCREW CAP 88664995 TANK LID, 9 GAL MOLDED 88665008 TANK, 9 GAL BUHLER CREAM 88665019 SIGHT HOSE, 1/2”... -
Page 104: Ace Centrifugal Pump & Plumbing Assembly (Option)
Parts Identification - Fertilizer Applicator 1460 ACE CENTRIFUGAL PUMP & PLUMBING ASSEMBLY (OPTION) TO CONTROL PANEL 88668011-D... - Page 105 Parts Identification - Fertilizer Applicator 1460 ITEM PART NUMBER DESCRIPTION 88661393 1” PRESSURE SPIKE VALVE, 100 PSI 88663901 BOLT, 3/8” x 1.50” CSHH GR 5 P SX011612 BLACK RUBBER HOSE, 1” 150# 2’ SX015747 PRODUCT PUMP MOUNT STRAP SX015748 PRODUCT PUMP MOUNT WELDMENT SX016538 HYDRAULIC HOSE, 1/2”...
-
Page 106: Tank Quick Fill Plumbing Ace Centrifugal Plumbing Assembly
Parts Identification - Fertilizer Applicator 1460 TANK QUICK FILL PLUMBING ACE CENTRIFUGAL PLUMBING ASSEMBLY 17 13 88668123_B... - Page 107 Parts Identification - Fertilizer Applicator 1460 ITEM PART NUMBER DESCRIPTION SXTBC350 T-BOLT CLAMP, 3-1/2” x 3-13/16” SXTBC256 T-BOLT CLAMP, 2-11/32” x 2-5/8” SXMV300 VALVE, 3” STANDARD PORT MANIFOLD VALVE SXMV220CF VALVE, 2” FP FLG BANJO SXMBF300BD BULKHEAD, 3” BOLT FLANGED BD SXM300TEE TEE, 3”...
-
Page 108: John Blue Ground Drive Mount Assembly
Parts Identification - Fertilizer Applicator 1460 JOHN BLUE GROUND DRIVE MOUNT ASSEMBLY 5, 7 CHAIN ROUTING (Right Side) 25, 21 3, 16 2, 14 SX014114-D... - Page 109 Parts Identification - Fertilizer Applicator 1460 ITEM PART NUMBER DESCRIPTION SXNUT-075-J NUT, 3/4” SXLW-050 LOCK WASHER, 1/2” SXLW-038 LOCK WASHER, 3/8” SXLN-075-CL LOCKNUT, 3/4” CENTER LOCKNUT SXLN-062-CL LOCKNUT, 5/8” CENTER LOCKNUT SXLN-038-NI LOCKNUT, 3/8” NYLON INSERT SXFW-062 FLAT WASHER, 5/8”...
-
Page 110: John Blue Twin Pump Assembly
Parts Identification - Fertilizer Applicator 1460 JOHN BLUE TWIN PUMP ASSEMBLY 17 (FROM TANK) 12 (TO MONITOR KIT) CHAIN ROUTING (Right Side) 88668015-B TWIN... - Page 111 Parts Identification - Fertilizer Applicator 1460 ITEM PART NUMBER DESCRIPTION 00080680 LOCK WASHER, 0.375” PL 00087936 BOLT, CSHHP 0.38” x 2.5” LG 88660940 DUAL PISTON PUMP 88660945 90° ELBOW, 1.50” MPT x 1.50” FPT- POLY 88660946 PUMP MOUNT SPACER 88660948...
-
Page 112: Raven Control Plumbing Assembly
Parts Identification - Fertilizer Applicator 1460 RAVEN CONTROL PLUMBING ASSEMBLY 10 23 15 22 7 23 88668014_D... - Page 113 Parts Identification - Fertilizer Applicator 1460 ITEM PART NUMBER DESCRIPTION 00280260 BOLT, 3/8” x 3” CSHH GR 8 PL 88668020 U-BOLT, 3/8” x 2-1/2” x 4” RND YZ 88668021 U-BOLT, 3/8” x 3-3/4” x 5” RND YZ 88668032 U-BOLT, 5/16” x 1” x 1-3/4” YZ...
-
Page 114: Spray Monitors
Parts Identification - Fertilizer Applicator 1460 SPRAY MONITORS 88668329_B... - Page 115 Parts Identification - Fertilizer Applicator 1460 ITEM PART NUMBER DESCRIPTION 00087845 BOLT, 1/4” x 2-1/2” HEX GR 5 AS REQ. 88668003 ASSY; MONITOR, SINGLE COLUMN AS REQ. 88668887 ASSY, MONITOR, 3 COLUMN AS REQ. 88664836 ASSY, MONITOR, 4 COLUMN AS REQ.
-
Page 116: Single Column Monitor Assembly
Parts Identification - Fertilizer Applicator 1460 SINGLE COLUMN MONITOR ASSEMBLY 88668003-B ITEM PART NUMBER DESCRIPTION SX002037 SINGLE MONITOR U-PIN SX002135 1/2” HOSE BARB SX002137 SINGLE MONITOR FLOAT STOP SX002139 SINGLE COLUMN MONITOR SX002140 MONITOR O-RING, BUNA SX8165105 RED GLASS MONITOR BALL... -
Page 117: Microswitch
Parts Identification - Fertilizer Applicator 1460 MICROSWITCH SXSB010510 MICROSWITCH ITEM PART NUMBER DESCRIPTION 88666365 SWITCH MOUNTING PLATE, 12 GA 88668038 LOCKNUT, 10-24 NYLON INSERT YZ 88668039 BOLT, 1/4” x 1.25” TAP GR 5 YZ 88666366 SWITCH ACTIVATION PLATE, 12 GA SXFW-038YZ FLATWASHER, 3/8”... -
Page 118: Coulter W / Knife Group
Parts Identification - Fertilizer Applicator 1460 COULTER W / KNIFE GROUP 88661376 SX014138_CL 12 Row - 30” Spacing / 11 Coulters ITEM PART NUMBER DESCRIPTION 88660890 RH STRAIGHT SHANK COULTER ASSEMBLY, W/ KNIFE 88660892 RH OFFSET SHANK COULTER ASSEMBLY, W/ KNIFE... -
Page 119: 16 Row - 22" Spacing / 15 Coulters
Parts Identification - Fertilizer Applicator 1460 16 Row - 22” Spacing / 15 Coulters ITEM PART NUMBER DESCRIPTION 88660890 RH STRAIGHT SHANK COULTER ASSEMBLY, W/ KNIFE 88660892 RH OFFSET SHANK COULTER ASSEMBLY, W/ KNIFE 88661376 4 x 6 CLAMP KIT 16 Row - 30”... -
Page 120: Coulter W / Injector Group
Parts Identification - Fertilizer Applicator 1460 COULTER W / INJECTOR GROUP 88661376 SX014141 12 Row - 30” Spacing / 11 Coulters ITEM PART NUMBER DESCRIPTION 88660894 STRAIGHT SHANK COULTER ASSEMBLY, W/ INJECTOR 88660895 OFFSET SHANK COULTER ASSEMBLY, W/ INJECTOR 88661376 4 x 6 CLAMP KIT 12 Row - 36”... -
Page 121: 16 Row - 22" Spacing / 15 Coulters
Parts Identification - Fertilizer Applicator 1460 16 Row - 22” Spacing / 15 Coulters ITEM PART NUMBER DESCRIPTION 88660894 STRAIGHT SHANK COULTER ASSEMBLY, W/ INJECTOR 88660895 OFFSET SHANK COULTER ASSEMBLY, W/ INJECTOR 88661376 4 x 6 CLAMP KIT 16 Row - 30” Spacing / 15 Coulters... -
Page 122: Coulter Assembly (Straight)
Parts Identification - Fertilizer Applicator 1460 COULTER ASSEMBLY (STRAIGHT) RH W / Knife 8 10 88661366 R B ITEM PART NUMBER DESCRIPTION SX2570-375 HUB CAP 88664879 1/8” x 1 1/4” COTTER PIN, BLACK 88664880 5/8”-18 SLOTTED HEX NUT BLK 88664881 1/2”... - Page 123 Parts Identification - Fertilizer Applicator 1460 ITEM PART NUMBER DESCRIPTION 88664888 1/2” ID x 1 1/2” OD x 10 GA MA BU ZP 88664889 PIVOT SLEEVE 88664890 3/4”-10 LOCK HEX NUT ZP SXFW-075-SAE-YZ 3/4” STANDARD FLATWASHER ZP 88664891 PIVOT SLEEVE 88664892 5/8”-11 x 1”...
-
Page 124: Rh W / Injector
Parts Identification - Fertilizer Applicator 1460 COULTER ASSEMBLY (STRAIGHT) (CONT’D) RH W / Injector 88661368 R B-1... - Page 125 Parts Identification - Fertilizer Applicator 1460 ITEM PART NUMBER DESCRIPTION 00012008 1/2”-13 x 1 1/2” HHCS GR5 ZP 00012071 1/2”-13 x 1” HHCS GR5 ZP 88664913 KNIFE SHIM, 16 GA. ZP 88664914 KNIFE SHIM, 1/8” ZP 88664922 ADJUSTMENT PLATE, INJECTOR...
-
Page 126: Coulter Arm Assembly
Parts Identification - Fertilizer Applicator 1460 COULTER ARM ASSEMBLY RH W / Injector 88661368 R B-2... - Page 127 Parts Identification - Fertilizer Applicator 1460 ITEM PART NUMBER DESCRIPTION 88664927 1/2”-13 JAM HEX NUT ZP 88664904 2975 SPRING BUSHING PAINTED SX2550-795 SPRING, 0.562” WIRE x 11” LONG 88667464 10” POLY HELPER SPRING 88664929 COULTER PIVOT, RH (SHOWN) 88664895 COULTER PIVOT, LH 812435 1/4”...
-
Page 128: Coulter Clamp Kit (4X6 Bar)
Parts Identification - Fertilizer Applicator 1460 COULTER CLAMP KIT (4X6 BAR) 88661376-B ITEM PART NUMBER DESCRIPTION 88664921 BOLT, 1/2”-13 x 7” HHCS GR 5 ZP 88664928 UNIVERSAL CLAMP PLATE SX2990-360 DRILLED CLAMP CASTING 88664892 SET SCREW, 5/8”-11 x 1” SQ. HCPSS GR 5 ZP 88664887 LOCKNUT, 1/2”-13 HEX ZP... -
Page 129: Coulter Hose Assembly
Parts Identification - Fertilizer Applicator 1460 COULTER HOSE ASSEMBLY 88668034_B ITEM PART NUMBER DESCRIPTION 88661128 HOSE BARB, 11/16” MPST x 1/2” HB SX000812 HOSE, 1/2” 150# EPDM 0.6’ SX3A1412G HOSE BARB, 1/4” MPT x 1/2” HB SX402910 CAP & GASKET 1/4” THRD QT BLK SX8J STAINLESS CLAMP, 1/2”... -
Page 130: Gauge Wheel Group Lh / Rh
Parts Identification - Fertilizer Applicator 1460 GAUGE WHEEL GROUP LH / RH ASSEMBLY ASSEMBLY SX014122-B ITEM PART NUMBER DESCRIPTION 00280223 BOLT, 3/4” x 6.50” CSHH GR 5 P NA2024 88668005 PIN CLIP, 0.177” x 3-3/4” ZINC SX011506 TIRE & WHEEL ASSEMBLY, 7.6-15SL SX014057 FLAT, 0.75”... -
Page 131: Gauge Wheel Hub Assembly (256 - 6 - 6 - 4.62)
Parts Identification - Fertilizer Applicator 1460 GAUGE WHEEL HUB ASSEMBLY (256 - 6 - 6 - 4.62) NOTE: Tighten LUG NUTS to 150 Foot Pounds of torque, Do Not Lubricate. SX011503-B ITEM PART NUMBER DESCRIPTION 88665707 HUB W / CUPS... -
Page 132: Lighting Marking Group
Parts Identification - Fertilizer Applicator 1460 LIGHTING MARKING GROUP 88668008-D... - Page 133 Parts Identification - Fertilizer Applicator 1460 ITEM PART NUMBER DESCRIPTION 86511926 MACHINE BOLT, 10-24 x 1.75” YZ2 88668009 U-BOLT, 1/2” x 7.38” x 7.25” GR 5 YZ 88668038 LOCKNUT, 10-24 NYLON INSERT YZ SX004499 LIGHT / DECAL SHEET, BLACK SX004560...
-
Page 134: Electrical Harnesses / Routing
Parts Identification - Fertilizer Applicator 1460 ELECTRICAL HARNESSES / ROUTING ELECTRICAL ITEM PART NUMBER DESCRIPTION SX014611 HYDRAULIC SOLENOID TEE HARNESS SX005813 MICRO SWITCH 5’ EXTENSION HARNESS, SPECIAL SX014610 MICRO SWITCH 15’ EXTENSION HARNESS, SPECIAL... -
Page 135: Running Gear Hub Assembly (11.25Bc, 15000#)
Parts Identification - Fertilizer Applicator 1460 RUNNING GEAR HUB ASSEMBLY (11.25BC, 15000#) NOTE: Tighten LUG NUTS to 420 Foot Pounds of torque, Do Not Lubricate. SX289126-B ITEM PART NUMBER DESCRIPTION 88665668 BEARING CONE 88665669 GREASE SEAL 88665670 OUTER CONE BEARING... -
Page 136: Outer Wing Fold Cylinders
Parts Identification - Fertilizer Applicator 1460 OUTER WING FOLD CYLINDERS SX645216... - Page 137 Parts Identification - Fertilizer Applicator 1460 ITEM PART NUMBER DESCRIPTION SX492675 CLEVIS CAP SX492728 ROD CAP SX494719 PISTON SX493597 CYLINDER ROD SX491746 CYLINDER TUBE SX492286 TIE ROD SX134953 CYLINDER PIN SX135995 SX498006 THREAD LOCK-NYLON SX492652 ROD CLEVIS SX148390 SOCKET SET SCREW, 3/8” UNC...
-
Page 138: Toolbar Lift Cylinders
Parts Identification - Fertilizer Applicator 1460 TOOLBAR LIFT CYLINDERS SX645216... - Page 139 Parts Identification - Fertilizer Applicator 1460 ITEM PART NUMBER DESCRIPTION SX492675 CLEVIS CAP SX492728 ROD CAP SX494719 PISTON SX493597 CYLINDER ROD SX491746 CYLINDER TUBE SX492286 TIE ROD SX134953 CYLINDER PIN SX135995 SX498006 THREAD LOCK-NYLON SX492652 ROD CLEVIS SX148390 SOCKET SET SCREW, 3/8” UNC...
-
Page 140: Inner Wing Fold Cylinders
Parts Identification - Fertilizer Applicator 1460 INNER WING FOLD CYLINDERS 88667540 R AA ITEM PART NUMBER DESCRIPTION 88667541 PISTON ROD 88667542 TUBE 88667543 TIEROD ASSY 88667544 BUTT 88667545 GLAND 88667546 PISTON 88667547 CLEVIS ASSEMBLY 88667548 LOCKNUT, 1.25-12 SX6408-8 HYD FIT; 08 O-RING PLUG, SCKT SXBHF0381508YZ BOLT, 3/8”... -
Page 141: Raven 450
Parts Identification - Fertilizer Applicator 1460 RAVEN 450 SCS-450-2 ITEM PART NUMBER DESCRIPTION SX063-0171-220 CONSOLE ASSY, 450 W/SERIAL PORT SX115-0171-085 CABLE, RAVEN 450 CONTROL CABLE 88664958 CABLE, FLOW CONTROL 43 FT 6 SECT... -
Page 142: Wheel Proximity Sensor Assembly
Parts Identification - Fertilizer Applicator 1460 WHEEL PROXIMITY SENSOR ASSEMBLY 88668055_B ITEM PART NUMBER DESCRIPTION 88663223 TAPPING SCREW, 10-24 x 0.75” FH SS SX010439 SPEED SENSOR MOUNT SX010442 ADJUSTMENT ROD 88668905 GEAR TOOTH / PROXIMITY SPEED SENSOR SX019563 SPEED SENSOR MOUNT WELDMENT SX115-0159-018 24’... -
Page 143: Gps Speed Sensor Assembly
Parts Identification - Fertilizer Applicator 1460 GPS SPEED SENSOR ASSEMBLY WHITE 88666442_C ITEM PART NUMBER DESCRIPTION 88666443 PHOENIX 10 RECEIVER, 063-0172-988 88666444 RECEIVER CABLE, 115-0171-817... - Page 144 Parts Identification - Fertilizer Applicator 1460...
-
Page 145: Specifications
Specifications - Fertilizer Applicator 1460 SPECIFICATIONS SPECIFICATIONS ............. 147 Dimensions . - Page 146 Specifications - Fertilizer Applicator 1460...
-
Page 147: Specifications
Specifications - Fertilizer Applicator 1460 SPECIFICATIONS Dimensions Overall Field Dimensions 1460 DIM DESCRIPTION 1460 Overall Field Height (A) 8 ft. 6 in. Overall Field Width (B) 40 ft. 11 in. Transport Width 16 ft. 5 in. Transport Height 12 ft. 10 in. -
Page 148: Hydraulic Schematic
Specifications - Fertilizer Applicator 1460 HYDRAULIC SCHEMATIC R.H. ROCK SHAFT CYL. SCV 1 RETRACT L.H. ROCK SHAFT CYL. SCV 1 EXTEND SCV 2 RETRACT SCV 2 EXTEND R.H. INNER WING FOLD CYL. L.H. INNER WING FOLD CYL. R.H. OUTER WING FOLD CYL. - Page 149 Specifications - Fertilizer Applicator 1460 ITEM PART NUMBER DESCRIPTION 88661439 VALVE, C-BALANCE 2.5:1 RATIO CB1 / CB2 88661440 VALVE, C-BALANCE 10.0:1 RATIO 88661441 CHECK VALVE, #10 88661442 FLOW DIVIDER, #10 COMBINER 88661443 CHECK VALVE, #10 PILOT-OPEN 88661444 PRESSURE REDUCING VALVE, #10...
-
Page 150: Electrical Schematic
Specifications - Fertilizer Applicator 1460 ELECTRICAL SCHEMATIC ELECTRICAL SCHEMATIC... -
Page 151: 11R30 Coulter Spacing
Specifications - Fertilizer Applicator 1460 11R30 COULTER SPACING 11R30 11R38 COULTER SPACING 11R38... -
Page 152: 11R36 Coulter Spacing
Specifications - Fertilizer Applicator 1460 11R36 COULTER SPACING 11R36 15R30 COULTER SPACING 11R30... -
Page 153: 17R30 Coulter Spacing
Specifications - Fertilizer Applicator 1460 17R30 COULTER SPACING 17R30 11R40 COULTER SPACING 11R40... -
Page 154: 23R22 Coulter Spacing
Specifications - Fertilizer Applicator 1460 23R22 COULTER SPACING 23R22 15R22 COULTER SPACING 15R22... -
Page 155: Hardware Torque Values
Specifications - Fertilizer Applicator 1460 HARDWARE TORQUE VALUES Metric Chart NOTE: Do not use the values listed in the charts if a different torque value or tightening procedure is specified in this manual for a specific application. Torque values listed are for general use only. -
Page 156: Imperial Chart
Specifications - Fertilizer Applicator 1460 HARDWARE TORQUE VALUES (CONT’D) Imperial Chart NOTE: Do not use the values listed in the charts if a different torque value or tightening procedure is specified in this manual for a specific application. Torque values listed are for general use only. -
Page 157: Hydraulic Connection Specifications
Specifications - Fertilizer Applicator 1460 HYDRAULIC CONNECTION SPECIFICATIONS Port Seal (O-ring Boss) Fitting O-Ring Fitting (Straight Thread) Figure 59 Lubricate the O-ring before installing the fitting. Loosen Port Seal And O-ring Boss Tightening Torque the jam nut and install the fitting. Tighten the jam nut until the washer is tight against the surface. -
Page 158: Nozzle Selection
Specifications - Fertilizer Applicator 1460 NOZZLE SELECTION Use the following formula to covert pounds per acre to gallons per minute (gpm): Total lb. per acre = Target lb. per acre Total lb. per acre = GPA of nitrogen Percent of nitrogen Pound per gallon EXAMPLE - The desired output is 100 lbs of nitrogen per acre. -
Page 159: Nozzle Specifications
Specifications - Fertilizer Applicator 1460 NOZZLE SPECIFICATIONS GPA AT 30” NOZZLE SPACING** NOZZLE* (Per Nozzle) 4 MPH 6 MPH 8 MPH 10 MPH H1/4U - SS0004 0.20 0.28 13.9 0.35 17.3 11.6 0.40 19.8 13.2 H1/4U - SS0006 0.30 14.9 0.42... - Page 160 Specifications - Fertilizer Applicator 1460...
-
Page 161: Warranty
Warranty - Fertilizer Applicator 1460 WARRANTY WARRANTY ..............163... - Page 162 Warranty - Fertilizer Applicator 1460...
- Page 163 If Farm King determines that it will pay labor costs for warranty work, it will do so by issuing a credit to the dealer’s or distributor’s account.
- Page 164 Limited Warranty WARRANTY REQUIREMENTS To be covered by warranty, each new product must be registered with Farm King within thirty (30) days of delivery to original retail purchaser. If the customer decides to purchase replacement components before the warranty disposition of such components is determined, Farm King will bill the customer for such components and then credit the replacement invoice for those components later determined to be covered by this limited warranty.
-
Page 165: Alphabetical Index
Alphabetical Index - Fertilizer Applicator 1460 ALPHABETICAL INDEX 11R30 COULTER SPACING ... 151 HYDRAULIC CONNECTION SPECIFICATIONS ....157 11R36 COULTER SPACING . - Page 166 Alphabetical Index - Fertilizer Applicator 1460 TANK QUICK FILL PLUMBING ACE CENTRIFUGAL PLUMBING ASSEMBLY . 106 TOOLBAR ASSEMBLY (431.31 IN.) ..88 TOOLBAR ASSEMBLY (491.31 IN.) ..90 TOOLBAR LIFT CYLINDERS ..138 TRANSPORTING .
- Page 168 www.farm-king.com 2500 Airport Drive SW Willmar, MN USA 56201 Toll Free: 1-888-FK-80001 E-mail: info@buhler.com www.farm-king.com Equipment shown is subject to change without notice. ©2016 Buhler Trading Inc. Printed in Canada TSX:BUI...
Need help?
Do you have a question about the 1460 and is the answer not in the manual?
Questions and answers