
Related Manuals for Digisol DG-GS1510HPEV2


Summary of Contents for Digisol DG-GS1510HPEV2
-
Page 1: User Manual
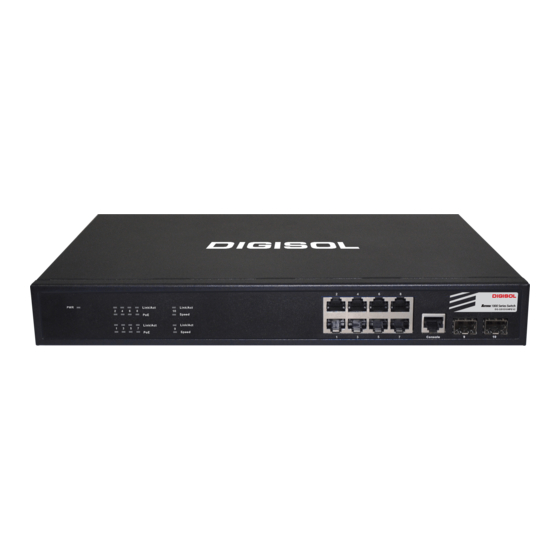
DG-GS1510HPEV2 User Manual DG-GS1510HPEV2 8 PORTS GIGA POE L2 SWITCH WITH 2 SFP PORTS User Manual V1.0 2016-08-18... - Page 2 DG-GS1510HPEV2 User Manual As our products undergo continuous development the specifications are subject to change without prior notice...
- Page 3 Trademarks: DIGISOL™ is a trademark of Smartlink Network Systems Ltd. All other trademarks are the property of the respective manufacturers. Safety This equipment is designed with the utmost care for the safety of those who install and use it.
-
Page 4: Table Of Contents
Web Management User Guide Table of Contents Contents Chapter 1、WEB page introduction....................2 1、Login dialog Box......................2 2、Main Page.........................3 3、System Configuration.......................3 4、Port Configuration......................10 5、MAC binding........................18 6、MAC filtering......................... 20 7、VLAN Configuration..................... 21 8、SNMP Configuration......................24 9、ACL Configuraion......................25 10、QoS Configuration....................... 31 11、IP Basic Configuration....................32 12、Certification. -
Page 5: Chapter 1、Web Page Introduction
DG-GS1510HPEV2 User Manual WEB Configuration operating manual This manual focuses on describing the WEB page of the switch. The user can manage the switch through WEB page. This manual only introduces the simple operations of the various WEB pages of the various switches. -
Page 6: 2、Main Page
Web Management User Guide password, then clicks the Enter button, can log on to the switch Web server. Passwords are case-sensitive, the anonymous user password can be a maximum of up to 16 characters, while the multi-user name and password can be set up to 11 characters. - Page 7 Web Management User Guide Figure 3 is the basic configuration page, users can configure the basic information for the switch. System Description displays the description of the relevant parameters of system. System descriptor ID displays system in the network identity management. The system version number displays the current software version number of switches.
- Page 8 Web Management User Guide Figure 4 Serial port information page (3) User management page Figure 5 is a user management page, the user can modify this switch anonymous user’s (admin) password. Both Telnet, console use the same anonymous user's password. Passwords are case-sensitive, and can be up to 16 characters.
- Page 9 Web Management User Guide Figure 5 user’s management page (4) Security Management Page Figure 6 is Security management configuration page. Using this configuration, , the administrator can control network management services like TELNET, WEB and SNMP. You can switch on (enable) or off (disable) this service.
- Page 10 Web Management User Guide Figure 6 Security management page (5) Configure the current page Figure 7 is the current configuration page. the user can view the current configuration of the switch on this page. Save button is to store the current system configuration in the configuration file. Because the storage operation requires erasing &...
- Page 11 Web Management User Guide Figure 7 the current configuration page (6) Configuration page Figure 8 is profile configuration page. This page allows users to view the system’s initial configuration. The initial configuration is actually the configuration file in the FLASH. When the configuration file does not exist in FLASH, the system starts using the default configuration.
- Page 12 PC. Click Upload button to upload a configuration file or image file, configuration file extension must be *. cfg, image file must be provided by DIGISOL and the file name extension must be *. img. Before the system automatically returns to the results page, please do not click on other pages, or restart the switch; otherwise, the file transfer will lead to failure causing system crash.
-
Page 13: 4、Port Configuration
Web Management User Guide Figure10. System reset page 4、Port Configuration (1) Port configuration page Figure 11 is the port configuration page. Users can enable or disable the port, set the port speed, or View basic information of all ports. To set a specific port, users need to select the appropriate port name from port drop-down menu,. The default port status is up. - Page 14 Web Management User Guide Figure 11 port configuration and port - display page (2) Port Statistics Page Figure 12 is the port statistics information page. To view a particular port, users need to select the appropriate port name in the port drop-down menu. Users can view the statistics regarding the number of packets sent and received on this page.
- Page 15 Web Management User Guide Figure 12 Port Statistics Page (3) Flow control page Figure 13 is the flow control page. Users can enable and disable each port’s send and receive flow control through this page.
- Page 16 Web Management User Guide Figure 13 Flow control page (4) Broadcast storm control page Figure 14 is the Broadcast Storm Control page. This page is used to do the suppression for configure port broadcast packets, multicast packets and DLF packet.
- Page 17 Web Management User Guide Figure 14 Broadcast Storm control Page (5) Port speed limits page Figure 15 is the port speed- limit page. This page is used to configure the port’s transmit and receive rate. From the Port drop-down bar select the relevant ports. Bandwidth control of the send datapackets is used to configure and display the bandwidth control it.
- Page 18 Web Management User Guide Figure 15 Port speed limit page (6) Port protection page Figure 16 is the Port protection page. This page is used to configure the port for the protection port. If the port is configured as a protected port, the ports cannot exchange data with other Protected port. Figure 16 protected port page...
- Page 19 Web Management User Guide (7) Port Learning restrict page Figure 17 is the port learning restrict page. This page is used to restrict the number of MAC addresses a port can learn. The range is 0-8191. The default value is 8191, also is the maximum that the port is not configured the restrict learning.
- Page 20 Web Management User Guide In page configuring process, if at least one Trunk has been established then polymerization settings can take effect; configured Trunking method is also applied to all on the Trunk groups; in that already exist on the Trunk can add or remove Port members ;...
-
Page 21: 5、Mac Binding
Web Management User Guide press the application key to entry into force, the results is displayed in the mirrored configuration information. When you choose the RECEIVE direction of monitoring, received data packets will be monitored, TRANSMIT, sent data packets will be monitored.You can use BOTH to monitor all sent and received packets, NOT_RECEIVE to cancel monitoring received data packets, NOT_TRANSMIT to cancel monitoring send data packets, while NEITHER cancels monitor data packets received and sent, that is canceling port monitoring. - Page 22 Web Management User Guide Figure 20 the MAC binding configuration page (2) MAC binding automatic conversion page Figure 21 is the MAC binding automatic conversion page. This page is used to achieve the port MAC address auto-binding.
-
Page 23: 6、Mac Filtering
Web Management User Guide Figure 21 the MAC binding automatic conversion page 6、MAC filtering (1) MAC filtering configuration page Figure 22 is the MAC filtering configuration page. This page is used to configure MAC address filtering on the ports. MAC entries on the page is used to enter the MAC address filtering, VLAN ID entry is used to enter the MAC address affiliated VLAN. -
Page 24: 7、Vlan Configuration
Web Management User Guide Figure 23 the MAC filtering automatic conversion page 7、VLAN Configuration (1) VLAN information page Figure 24 shows the current VLAN information page. This page is read-only page displays the current VLAN configuration information, including the VID, state and port members. Select VLAN from the drop-down VID, shows the port information of the Port VLAN members. - Page 25 Web Management User Guide Figure 24 VLAN information page (2) Static VLAN configuration page Figure 25 is the static VLAN configuration page that allows users to create VLAN. If you want to create a new VLAN, enter VID on activity line, ranging from 2 to 4094. VLAN name is generated depend on VLAN ID and can not be modified.
- Page 26 Web Management User Guide Figure 25 the static VLAN configuration page (3) VLAN port configuration page Figure 26 is a VLAN port configuration page, which is used to configure the VLAN port configuration and display results. This page mainly consists of eight parts: port, mode, all current VLAN, port-owned VLAN, key "default VLAN =>","...
-
Page 27: 8、Snmp Configuration
Web Management User Guide VLAN from the current all VLAN can be selected. Button "non-members ・ is to delete the port from the specified one or more of the VLAN. Figure 26 The VLAN port configuration page 8、SNMP Configuration SNMP Key configuration Figure 27 show SNMP community configuration... -
Page 28: 9、Acl Configuraion
Web Management User Guide Figure 27 SNMP community configuration page 9、ACL Configuraion (1) IP Standard ACL configuration page Figure 28 is the IP standard ACL configuration page. Users build ACL standard IP access list using this page. . User can select a ACL group number, in the group to create one or more rules. A rule can match only the source IP address field (with mask). - Page 29 Web Management User Guide Figure 28, Standard IP ACL configuration page The addressing method used wildmask. If the rule were to match the IP address range 192.168.0.0 to 192.168.0.255, then the IP address can be 192.168.0.1, and its mask of 0.0.0.255. Users to configure the rules, each rule must have a filter mode: allow or deny.
- Page 30 Web Management User Guide Figure 29 Extended IP ACL configuration page (3) MAC IP ACL configuration page Figure 30 is the MAC IP ACL configuration page. IP MAC group can be the IP packet source and destination MAC address and source and destination IP address control.
- Page 31 Web Management User Guide Figure 30 IP Extended ACL configuration page (4) MAC ARP ACL configuration page Figure 31 is the MAC ARP ACL configuration page. ARP group can be the type of the operation of the ARP packet, the sender MAC and the sender IP control.
- Page 32 Web Management User Guide Figure 31 MAC ARP ACL configuration page (5) ACL information page Figure 32 is the ACL information page, which displays the current ACL rules configured in all the information.
- Page 33 Web Management User Guide Figure 32 ACL resource library information page (6) ACL reference page Figure 33 is the ACL reference page.It tells us which ACL group is assigned to the ports.
-
Page 34: 10、Qos Configuration
Web Management User Guide Figure 33 ACL resource reference page 10、QoS Configuration (1) QoS Apply Configuration Page Figure 34 is a QoS Apply configuration page. Figure 34 QoS configuration page (2) QoS Schedule Configuration Page Figure 35 is a QoS Schedule configuration page. -
Page 35: 11、Ip Basic Configuration
Web Management User Guide Figure 35 QoS Schedule configuration page 11、IP Basic Configuration (1) VLAN Interface Configuration Page Figure 36 is a VLAN interface configuration page. Users can configure the VLAN interface through this page, delete VLAN interfaces, configure the interface IP address, remove the interface IP address, and view interface information. - Page 36 Web Management User Guide Figure 36 VLAN interface configuration page Switch,by default, has a VLAN1 interface, the interface can not be deleted. One can only configure a VLAN interface in this switch. (2) ARP configuration and display page Figure 37 is the ARP configuration and displays all of the information of the ARP table. Users can configure a static ARP entries on this page, delete ARP entries, and revise the dynamic ARP table entry to a static ARP table entry.
- Page 37 Web Management User Guide Figure 37 ARP configuration and display page (3) Static Routing configuration page Figure 38 is the static route configuration page, the user can use this page to add, delete static routes. Figure 38 the host static route configuration page...
-
Page 38: 12、Certification. Authorization. Accounting (Aaa) Configuration
Web Management User Guide 12、Certification. Authorization. Accounting (AAA) configuration (1) Radius Configuration Page Figure 39 is the Radius configuration page, users can configure the Radius-related information, you can set following information: 1. Be sure to set the Radius server's IP address before do the authentication and accounting in this field, 2. - Page 39 Web Management User Guide Figure 39 the Radius configuration page (2)802.1x Configuration Page Figure 40 is the 802.1x configuration page, users can configure 802.1x related information on this page, including: 1. Whether to activate the 802.1x protocol, when doing authentication and accounting must be to start 802.1x protocol.
- Page 40 Web Management User Guide Figure 40 802.1x configuration page (3)802.1x port configuration page Figure 41 is the 802.1x port configuration page. The user through this page can configure the 802.1x port mode. 802.1x port model includes four types: N / A State, Auto state, Force-authorized state and Force-unauthorized state.
- Page 41 Web Management User Guide Figure 41 the 802.1x port configuration page Doing 802.1x authentication, port access, the default maximum host number is 100, the user can modify this field, the biggest support up to 100. (4) 802.1x user authentication information page Figure 42 is a 802.1x user authentication information page, the user can see through this page, all users state information.
-
Page 42: 13、Poe Port Configuration
Web Management User Guide Figure 42 802.1x user authentication information page 13、PoE port configuration PoE port (1) Configuration Page Figure 43 is the PoE port configuration / PoE-display page. Users can enable or disable the port's PoE function to the page, or View all ports of PoE information. Information can be seen in the following tables: 1,... - Page 43 Web Management User Guide Figure 43 PoE port configurationpage This product comes with Limited Life time warranty. For further details about warranty policy andProduct Registration, please visit support section of www.digisol.com...
Need help?
Do you have a question about the DG-GS1510HPEV2 and is the answer not in the manual?
Questions and answers