
Related Manuals for Lindy Presentation Switch Pro


Summary of Contents for Lindy Presentation Switch Pro
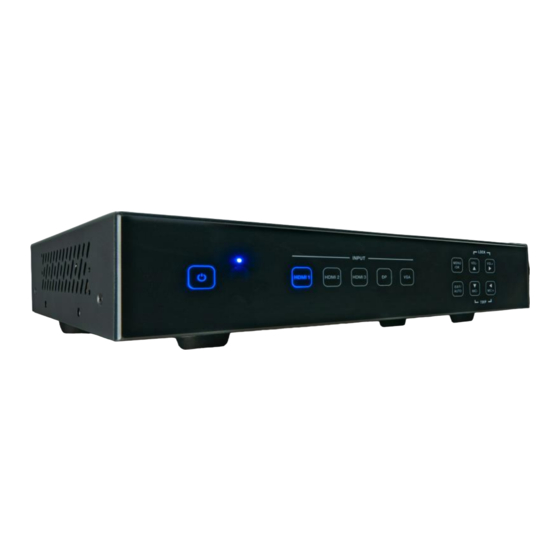
- Page 1 Presentation Switch Pro with HDBaseT Extender User Manual Eng lis h No. 38281 lindy.com Tested to Comply with FCC Standards For Home and Office Use! © LINDY Group - FIRST EDITION (September 2018)
- Page 3 To ensure correct use, please read this manual carefully and retain it for future reference. The Lindy Presentation Switch Pro is designed to allow many different video inputs including audio to be switched and extended at the same time. It is an ideal addition to any meeting or conference room, lecture hall or auditorium.
- Page 4 User Manual English Specification • Input ports: 3x HDMI 2.0, DisplayPort 1.2a and VGA, 5x Stereo Terminal blocks, 1x Mic Terminal Block • Output ports: 1x HDMI, 1x HDBaseT, 1x Stereo Terminal block • Control Ports: 1x IR in, 1x IR out, 1x Contact Terminal block (6pin), 1x RS-232 terminal block, 1x RJ- 45, 1x USB Type A (firmware upgrade) •...
- Page 5 User Manual English Operation buttons: • Pressing “OK/MENU” button enters the OSD. Then navigate using the 4-way arrow buttons. A new OSD setting is confirmed by pressing the “OK/MENU” button. • Pressing "EXIT/AUTO" will exit the OSD. Press "EXIT/AUTO" for 5 seconds to auto switching on/off.
- Page 6 User Manual English Pin number Source Pin 1 HDMI1 Pin 2 HDMI2 Pin 3 HDMI3 Pin 4 DisplayPort Pin 5 VGA/YPbPr/CVBS Audio Ports: • OUT: The audio comes from the input audio corresponding to the selected video source and mixed with MIC audio. •...
- Page 7 User Manual English Operation Main OSD MENU The Main MENU includes Picture, Aspect ratio, Screen, Audio setup, Network, System and Software update options. Picture The picture MENU adjusts the picture quality. Contrast 0-100 (default 50), Brightness 0-100 (default 50), Color 0-60 (default 30), Sharpness 0-20 (default 10), Tint 0-100 (default 50, for CVBS NTSC format only)
- Page 8 User Manual English Aspect Ratio Provides the ability to adjust the picture output aspect ratio to 4:3 or 16:9/10. Screen The screen MENU is only for the VGA input. You can adjust horizontal, vertical position, size and phase. EDID The EDID MENU adjusts HDMI and DisplayPort inputs only. EDID1.4 4K2K30,PCM 2.0 EDID2.0...
- Page 9 User Manual English Audio Setting The Audio Setting MENU switches between Embedded or External analog audio for each HDMI and DP input port. MIC mixer on: The switch will mix the source audio and MIC audio to the audio output (HDMI, HDBT, Audio output port).
- Page 10 User Manual English Remote Control Power: Press this button to power on the switch or turn to standby mode. INPUT: Press these buttons to select the input source. ADJ: Press this button to operate the VGA input auto adjustment function RES: Press this button to select the HDMI output resolution.
- Page 11 User Manual English 3) IR (20KHz---60KHz) cable pinout Auto-Switching function The switch has auto-switching and manual-switching modes. When in auto-switching mode, it will follow the following principles: New input: Once a new input signal is detected, the switch will switch to this new signal automatically. Power reboot: The switch offers the function to remember the signal last used before power off.
- Page 12 User Manual English Connection of Microphone The switch provides one 2-level microphone input to accommodate different microphone input modes, including 48V phantom power mode and MIC mode. When switched to “ON” (It has a good frequency characteristics, high input impedance and high sensitivity in this mode), the MIC input will provide 48V phantom power.
- Page 13 User Manual English 2) Balanced connection: “+” connects to positive, “-” connects to negative and “ ”connects to ground. Operations of RS-232 Control As RS-232 can be transmitted bi-directionally between the switch and the HDBaseT receiver, it is able to control a third-party RS-232 device locally or control the switch bi-directionally.
- Page 14 User Manual English 3) RS-232 Control Please connect the switch with a computer that has been installed with the RS-232 control software. The interface of the control software is shown as below:...
- Page 15 User Manual English Custom serial commands are also available below: Command Description help! Display all communication commands s factory reset! Return to factory reset setting r version! Read current FW version xyz! Upgrade the switch FW r power! Read the switch power on/off status s power on! Power on the switch s power off!
- Page 16 User Manual English Setup current input source output picture aspect ratio at 16:9 s aspect ratio 1! (1: 16:9 , 2: 4:3, 3:16:10 ) r h size! Read current input source output horizontal overscan value Set output horizontal over scan to (100+X)%(the default X value s h size X! is 0 and the range is -10~10,the value is set for current input...
- Page 17 User Manual English s mic vol 0! Setup mic volume 0(0~32) s mic vol up 1! Increase mic input audio volume 1 level s mic vol down 1! Decrease mic input audio volume 1 level s mic mute on! Mute mic input audio s mic mute off! Un-mute mic input audio s audio mute on!
- Page 18 User Manual English Web GUI Control The switch can be controlled via a Web browser, which contains General, Setup and Network Settings. After the active Ethernet link with a RJ45 cable is connected, the IP address is entered in the Web browser.
- Page 19 User Manual English 3) Audio 4) Network...
- Page 20 User Manual English 5) Advanced HDBT Receiver POWER: This LED illuminates when the device is powered DC 24V: Not needed if using PoH remote power from transmitter HDBaseT IN: Connect from the transmitters HDBaseT port with a network cable HDMI OUT: HDMI output port for connection to the display device. IR IN: IR Receiver.
-
Page 21: Ce/Fcc Statement
LINDY Herstellergarantie – Hinweis für Kunden in Deutschland LINDY gewährt für dieses Produkt über die gesetzliche Regelung in Deutschland hinaus eine zweijährige Hersteller- garantie ab Kaufdatum. Die detaillierten Bedingungen dieser Garantie finden Sie auf der LINDY Website aufgelistet bei den AGBs. -
Page 22: Recycling Information
Geräte müssen den Sammel- und Rückgabesystemen zugeführt werden! Dort werden sie kostenlos entgegen genommen. Die Kosten für den weiteren Recyclingprozess übernehmen die Gerätehersteller. LINDY bietet deutschen Endverbrauchern ein kostenloses Rücknahmesystem an, beachten Sie bitte, dass Batterien und Akkus den Produkten vor der Rückgabe an das Rücknahmesystem entnommen werden müssen und über die Sammel- und Rückgabesysteme für Batterien separat entsorgt werden müssen.
Need help?
Do you have a question about the Presentation Switch Pro and is the answer not in the manual?
Questions and answers