Table of Contents
Advertisement
Quick Links
Cover
USER'S GUIDE
Initial Setup
Preparing a Power Supply
Selecting a Tone and Playing
Selecting a Single Tone
Changing the Pitch
Fine Tuning a Pitch (Tuning)
Using Effects
Using the Sound Mode Effects
(Hall Simulator/Reverb and
Surround)
Recording Performances in Real-Time
Using the MIDI Recorder to Record
Performances
• When the Digital Piano is being operated on battery power only, notes may sound distorted when performing or playing back
a song at maximum volume. This is due to the difference between AC adaptor power and battery power, and does not
indicate Digital Piano malfunction. If you notice distortion, switch to AC adaptor power or lower the volume level.
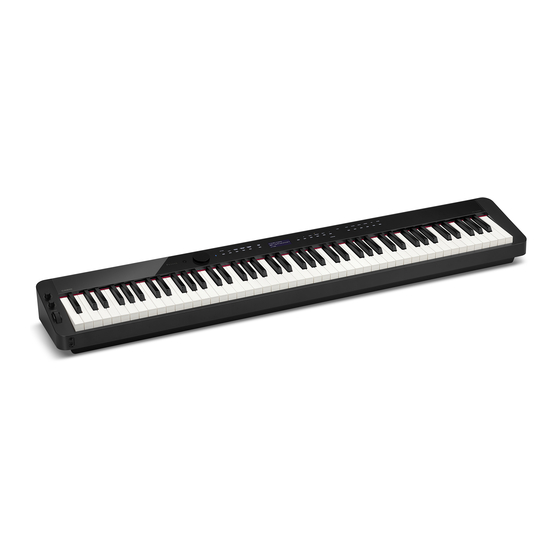
PX - S3000
Turning Power On or Off
Layering Two Tones
Changing the Pitch in Octave Units
(Octave Shift)
Using a DSP
Using the Audio Recorder to
Record Performances
Using a Pedal
Splitting the Keyboard Between
Two Tones
Changing the Scale Tuning
(Temperament) of the Keyboard
Using Chorus
Using Auto Accompaniment and Auto Arpeggio Play
Using Auto Accompaniment
Using Headphones
Registering a Setup
Registering and Restoring a Setup
(Registration)
Connecting with a Smart
Device
Linking with a Smart Device
(APP Function)
Adjusting Acoustic Piano
Sound Characteristics
(Acoustic Simulator)
Using the Arpeggiator
EN
Advertisement
Table of Contents

Related Manuals for Casio Privia PX-S3000


Summary of Contents for Casio Privia PX-S3000
- Page 1 Cover PX - S3000 USER’S GUIDE Initial Setup Preparing a Power Supply Turning Power On or Off Using a Pedal Using Headphones Selecting a Tone and Playing Registering a Setup Selecting a Single Tone Layering Two Tones Splitting the Keyboard Between Registering and Restoring a Setup Two Tones (Registration)
- Page 2 Use of unauthorized accessories creates the risk of fire, electric shock, and personal injury. • You can get information about accessories that are sold separately for this product from the CASIO catalog available from your retailer, and from the CASIO website at the URL or QR code below.
-
Page 3: Table Of Contents
Using Music Preset......EN-38 Contents Registering and Restoring a Setup (Registration) ......EN-40 Overview and Setup EN-3 Registering and Recalling a Setup . -
Page 4: Overview And Setup
Overview and Setup General Guide ■ Front Panel Front Touch Buttons Turning on Digital Piano power causes all of the touch buttons to light, except for the 1P (Power) button. The above illustration shows when all buttons and their text are lit. During actual operation, only the buttons that are currently enabled and the applicable text are lit or flashing. - Page 5 Overview and Setup bp ^, EXIT, $ FUNCTION button 1 P (Power) button 2 Volume knob bq - cl TONE category, RHYTHM category buttons 3 Mode selector button (RHYTHM, ACCOMP, SONG) bq DSP, BANK button 4 INTRO, PART button br TRANSPOSE, Area 1 button 5 NORMAL/FILL-IN, s button bs KNOB, Area 2 button 6 VARIATION/FILL-IN, d button...
-
Page 6: Preparing A Power Supply
Overview and Setup ■ Using Batteries Preparing a Power Supply Your Digital Piano uses an AC adaptor for power. • Be sure to turn off power before loading batteries. • It is up to you to prepare six commercially available •... -
Page 7: Turning Power On Or Off
Overview and Setup ■ Power On Alert Turning Power On or Off After about six minutes of non-operation while the Digital Piano is being powered by its AC adaptor, the Power On Alert Before turning on power, rotate the 2 volume function will cause touch button lights to turn on and off knob as far as it will go in the direction shown sequentially to remind you that power is on. -
Page 8: Using A Pedal
ASSIGNABLE pedal* continue to sound as long as the pedal is depressed. *1 Included pedal (SP-3) or separately available CASIO Sostenuto Sustains only the notes of the keys that sustain pedal. are depressed when the pedal is *2 See “To specify the pedal... -
Page 9: Pedal Unit Jack
Use the dl EXPRESSION/ASSIGNABLE jack to connect a available Pedal Unit (SP-34). You can then use the pedals for commercially available expression pedal or a CASIO sustain expression that is similar to that available on an acoustic pedal (included SP-3 or separately available pedal). - Page 10 A setting value of 1 to 4 is below) is recommended. appropriate for an expression pedal, while a value from 5 to 10 is appropriate for a switch type (CASIO sustain) pedal. Operation Confirmed Pedals (Polarity Type 2) Roland EV-5 (Set minimum volume to 0.)
-
Page 11: Using Headphones
Overview and Setup ■ Expression Pedal Calibration Using Headphones When connecting an expression pedal to the dl EXPRESSION/ASSIGNABLE jack for the first time, Using headphones cuts off output from the built-in speakers, perform the calibration operation below. which means you can practice playing even late at night without disturbing others. -
Page 12: Operations Common To All Modes
Operations Common to All Modes • Unless otherwise specifically noted, all of the procedures in this manual assume that the Digital Piano is in its initial power on state (immediately after you turn on power). If you run into problems with a procedure, turn Digital Piano power off and back on, and then try performing the procedure again. - Page 13 Operations Common to All Modes ■ Mode Selector Button Your Digital Piano has three modes, which are described below. RHYTHM Mode: This is the mode for most basic operations. In addition to normal keyboard play use this mode to perform most other Digital Piano operations.
-
Page 14: Function Mode Menu Operations
Operations Common to All Modes ■ Touch Button Light Auto Off Use the bk U and bl I buttons to select the To save power, you can configure a setting that will turn off all following menu items in sequence: button lights, except for the 3 mode selector button, after a “KEYBOARD”... -
Page 15: Listening To Demo Play
■ To insert a character Digital Piano Operations Use the bk U and bl I buttons to move the cursor to the position where you want to insert Listening to Demo Play a character. You can use the procedure below to play back the six built-in Touch bs Area 2. -
Page 16: Layering Two Tones
Digital Piano Operations ■ To select a tone Layering Two Tones Layering makes it possible to sound with two different tones at Use the bp^ button to cycle through settings the same time. The tone that is layered onto another tone is until the “^TONE”... -
Page 17: Splitting The Keyboard Between Two Tones
Digital Piano Operations ■ To unlayer the keyboard Use the bp^ button to cycle through settings until the “^TONE” indicator to the right of the Use the bp^ button to cycle through settings button is lit. Next, perform the operation under until the “^CTRL”... -
Page 18: Configuring Layer And Split Settings
Digital Piano Operations ■ To unsplit the keyboard ■ To enable or disable pedal operations and pitch bend wheel operations for each part Use the bp^ button to cycle through settings Use FUNCTION parameters (DAMPER PEDAL), (EXP/ until the “^CTRL” indicator to the right of the ASGN PEDAL), (PEDAL UNIT), and (WHEEL) to... -
Page 19: Adjusting The Overall Volume Level Of The Keyboard Performance Parts
Digital Piano Operations Adjusting the Overall Volume Level of the Changing Keyboard Response to Keyboard Performance Parts Touch Pressure (Touch Response) The following types of sounds are output by your Digital Touch Response alters tone volume in accordance with Piano: keyboard performance,* auto accompaniments, song keyboard pressure (speed). -
Page 20: Changing The Pitch
Digital Piano Operations ■ To change touch response sensitivity Changing the Pitch Hold down the bp^ button until “[FUNCTION]” Changing the Pitch in Semitone Steps appears on the display. (Transpose) This enters the FUNCTION Mode. Transpose lets you raise or lower the overall pitch of the Use the bk U and bl I buttons to select the Digital Piano in semitone steps. -
Page 21: Fine Tuning A Pitch (Tuning
Digital Piano Operations Fine Tuning a Pitch (Tuning) Changing the Pitch in Octave Units (Octave Shift) Use the tuning feature when you need to adjust the pitch slightly to play along with another musical instrument. You can use the procedure below to raise or lower pitch in •... -
Page 22: Using The Sound Mode Effects (Hall Simulator/Reverb And Surround
Digital Piano Operations ■ To enable or disable the Hall Simulator/Reverb Using the Sound Mode Effects and Surround effects (Hall Simulator/Reverb and Touch bn SOUND MODE. Surround) • Each touch will cycle between the settings, and the You can use bn SOUND MODE to enable and disable the current setting is indicated by the LED lights as shown effects described below. - Page 23 Digital Piano Operations ● Reverb ■ To specify the Surround type Type (displayed) Description Hold down bn SOUND MODE until “[SOUND 5. Room 1 MODE]” appears on the display, and then 6. Room 2 release the button. Simulates the reverberation of a room. 7.
-
Page 24: Using A Dsp
Digital Piano Operations ■ Configuring DSP Settings Using a DSP The steps below are the general procedure for configuring DSP settings. A DSP (Digital Signal Processor) is a type of effect that is (1) Select the default DSP or preset DSP whose settings you connected between the sound source and output. - Page 25 Digital Piano Operations ■ To configure DSP settings Use the bk U and bl I buttons to display the parameter whose setting you want to change Use the procedure under “To select a DSP” and then touch bm ENTER. (page EN-23) to select the DSP whose settings This enters the parameter editing mode.
-
Page 26: Using Chorus
Digital Piano Operations Using Chorus Adjusting Acoustic Piano Sound Characteristics (Acoustic Chorus is a function that adds depth and breadth to notes. To select a chorus setting, use FUNCTION parameter Simulator) (“Chorus Type”) to select one of the settings below. The tones of your Digital Piano have built-in elements that Setting this give them the reverberation characteristics of an acoustic... -
Page 27: Using The Knobs
Digital Piano Operations ■ List of Acoustic Piano Sound Setting Items Using the Knobs Setting (Display) Available Options The digital piano has two knobs that you can use String Resonance Tone: Specifies the initial to change the tone, effect, and another (String Reso.) setting of each parameter settings in real time. -
Page 28: Using The Pitch Bend Wheel
Digital Piano Operations ■ To initialize all parameter settings that can be Using the Arpeggiator configured with knob operations With the arpeggiator, you can play various arpeggios and other phrases automatically by simply pressing keys on the • The procedure below returns all parameter settings in the keyboard. -
Page 29: Splitting The Keyboard For Duet Play
Digital Piano Operations To disable the arpeggiator, touch bt ARPEG. Splitting the Keyboard for Duet This will cause “AR” to disappear from the Play display. You can split the keyboard in the center for duet play so the left and right sides have the same ranges. The Duet Mode is •... - Page 30 Digital Piano Operations ■ To use the Duet Mode ■ To change the octaves of the duet keyboards Hold down the bp^ button until “[FUNCTION]” Perform steps 1 and 2 under “To use the Duet appears on the display. Mode” (page EN-29). This enters the FUNCTION Mode.
-
Page 31: Changing The Scale Tuning (Temperament) Of The Keyboard
Digital Piano Operations If you want to change the base note of the Changing the Scale Tuning scale, perform the steps below. (Temperament) of the Keyboard • You do not need to perform these steps if you want to use the default base note setting (C). You can change the scale of the keyboard from the standard (1) Touch bp EXIT. -
Page 32: Playing Auto Accompaniment
Digital Piano Operations ■ To select a rhythm Playing Auto Accompaniment The Auto Accompaniments of this Digital Piano consist of a Use the bp^ button to cycle through settings “rhythm part” (drums and percussion) and a “chord part” until the “^RHYTHM” indicator to the right of (various musical instruments). -
Page 33: Auto Accompaniment Pattern Variations
Play other chords with left hand as you play pattern: the melody with your right hand. Touch 5 NORMAL/FILL-IN. Normal • You can use “CASIO Chord” or other simplified chord Touch 6 VARIATION/FILL-IN. Variation input modes to play chords. See “Selecting a Chord Input Mode”... -
Page 34: Triggering Auto Accompaniment Play With Accompaniment Keyboard Input (Synchro Start
Digital Piano Operations ■ Fill-in Triggering Auto Accompaniment Play with These accompaniment patterns are used to insert short one- Accompaniment Keyboard Input (Synchro or two-measure fill-ins into a piece. A fill-in pattern starts to Start) play as soon as you touch one of the fill-in buttons (see below). -
Page 35: Using The Keyboard To Control The Auto Accompaniment Pattern (Keyboard Controller Mode
You can use the six leftmost white keyboard keys to start and This setting Selects this chord input mode: stop accompaniment pattern play, to switch between patterns, (displayed): etc. CASIO Chord CASIO CHORD ■ To enter the keyboard controller mode Fingered 1 FINGERED 1 Fingered 2... - Page 36 Digital Piano Operations ■ CASIO CHORD ■ FINGERED With CASIO CHORD, you can use simplified fingerings to With these input modes, you play chords on the play the four types of chords described below. accompaniment keyboard using their normal chord fingerings.
-
Page 37: Using One-Touch Preset
Digital Piano Operations ● FINGERED ASSIST Using One-Touch Preset Produces an effect that is different from FINGERED 1 when With One-Touch Preset, the Digital Piano automatically two or three keys are pressed. Pressing a root key and any configures optimal tone, tempo, and other settings in key to the left of the root key plays a seventh chord, while a accordance with the rhythm pattern you select. -
Page 38: Using Auto Harmonize
Digital Piano Operations ■ To select the Auto Harmonize type Using Auto Harmonize Auto Harmonize lets you add harmony to melody notes you Perform steps 1 and 2 under “To enable auto play with your right hand for more melodic depth. You can harmonize”... -
Page 39: Changing The Auto Accompaniment And Song Tempo
Digital Piano Operations Changing the Auto Using Music Preset Accompaniment and Song Tempo Selecting a Music Preset instantly changes the Digital Piano to a preset setup (tone, rhythm, chord progression, etc.) for There are two ways to change the tempo (beats per minute) play of songs of various genres/categories. - Page 40 Digital Piano Operations Use the bk – and bl + buttons to select a ■ To change a music preset tempo music preset number. “Changing the Auto Accompaniment and Song Tempo” (page EN-38). This changes the displayed music preset name. At the same time, settings are recalled for the tone, rhythm, ■...
-
Page 41: Registering And Restoring A Setup (Registration
Digital Piano Operations ■ Registration Memory Data Registering and Restoring a Setting Items Freeze* Setup (Registration) Rhythm number, mode selection Accompaniment You can use the registration function to register the setup of (ACCOMP Mode or RHYTHM Mode), the Digital Piano (tone, rhythm, and other settings). You can synchro start standby, Auto recall a registered setup as required to perform a particular Accompaniment settings (chord input... -
Page 42: Registering And Recalling A Setup
Digital Piano Operations Select the area where you want to store the Registering and Recalling a Setup setup. ■ To register a setup While holding down cl STORE, touch an area button from br Area 1 to ck Area 4. This causes “Sure?”... -
Page 43: Using A Pedal To Cycle Through Multiple Setups (Sequential Pedal Recall
Digital Piano Operations Touch one of the buttons from br Area 1 Using a Pedal to Cycle Through Multiple through ck Area 4 to select the area where the Setups (Sequential Pedal Recall) setup you want to recall is located. You can configure Digital Piano settings so each press of a This recalls the setup. -
Page 44: Using The Midi Recorder To Record Performances
Using the MIDI Recorder to Record Performances Connect the included pedal or a separately available CASIO sustain pedal to the jack for The MIDI recorder records Digital Piano keyboard play as which you specified “Inc” or “Dec” in step 4 of MIDI data. - Page 45 Digital Piano Operations ■ Recorded Data for Each Track The symbols below are used in the “System” column to indicate items that can be recorded to the system track, and in the “Solo” column to indicate items that can be recorded to solo tracks 1 and 2. : Recorded ×...
-
Page 46: Recording And Playing Back Keyboard Play
Digital Piano Operations ■ To record to the system track Recording and Playing Back Keyboard Play • Before performing the procedure below, read the section • When the remaining recordable note count is 100 or titled “Getting Ready to Use the MIDI Recorder”... - Page 47 Digital Piano Operations ■ To select a track number before recording After confirming that “Rec Track” is displayed, touch bm ENTER. Use the 3 mode selector button to cycle through settings until the “SONG” (SONG M I D I R E C S E T T I N G Mode) indicator is lit.
- Page 48 Digital Piano Operations ■ To re-record part of a recorded track (punch-in When playback reaches the point from which recording) you want to re-record, start playing on the keyboard. This starts recording and causes the red bo REC0 light • You can use punch-in recording to re-record a particular to change from flashing to lit.
-
Page 49: Configuring Recording Settings (Pre-Count, Metronome, Beat, Punch-In Measure
Digital Piano Operations Configuring Recording Settings (Pre-count, Displayed Description and Options Setting Metronome, Beat, Punch-in Measure) PunchInMeasure Specifies from which measure playback The settings shown below are available for recording. should start when performing punch-in Displayed recording (page EN-47). For example, if Description and Options Setting you want to re-record from measure 28,... -
Page 50: Deleting A Midi Recorder Song
Digital Piano Operations Deleting a MIDI Recorder Song Using the Audio Recorder to Use the procedures in this section to delete a single song in Record Performances its entirety, or a particular track of a song. The audio recorder records Digital Piano keyboard play as ■... - Page 51 Digital Piano Operations ■ To record a keyboard performance onto a USB ■ To select and playback a file recorded with the flash drive audio recorder Perform the procedure under “To prepare to Perform the procedure under “To prepare to use the audio recorder”...
-
Page 52: Listening To Songs (Midi Player
Touch 7 k. USB memory Standard MIDI files (SMF format 0/1) or Change playback “Changing the Auto songs CASIO MIDI files (CMF format) stored on a tempo (speed). Accompaniment and Song Tempo” USB flash drive. For information about how (page EN-38). - Page 53 Digital Piano Operations ■ To play a song with one of hand parts muted (for ■ To import song settings as keyboard practice of the muted part) performance settings • This procedure can be used for a user song or a song on a •...
-
Page 54: Configuring Function Settings (Function Mode
Digital Piano Operations Configuring Function Settings (FUNCTION Mode) The FUNCTION Mode makes it possible to configure function settings using a menu format. There are two types of menu items: directories and parameters. Directory : A directory is a group of multiple parameters. Parameter : A parameter is an actual configurable setting. - Page 55 Digital Piano Operations Display the name of the parameter whose setting you want to change. • For example, to display the “Chorus Type” parameter, you need to navigate through multiple directories in the following sequence: “SOUND” (directory) 3 “EFFECT” (directory) 3 “Chorus Type” (parameter). Perform the procedure below. (1) Use the bk U and bl I buttons to display “SOUND”...
- Page 56 Digital Piano Operations ■ FUNCTION Mode Menu Items • For information about general procedures for changing the settings in the list below, see “To change FUNCTION parameter settings” (page EN-53). • A function whose name has “(DIR)” at the end is a directory, which contains multiple sub-directories and parameters. Parameter Name or Directory Name Display Settings...
- Page 57 Digital Piano Operations Parameter Name or Directory Name Display Settings Pedal/Wheel (DIR) PEDAL/WHEEL – Damper pedal (DIR) DAMPER PEDAL – Pedal Target Pedal Target See page EN-7 Upper1 Part Upper1 Part On, Off Upper2 Part Upper2 Part On, Off Lower Part Lower Part On, Off Expression/assignable pedal (DIR)
- Page 58 Digital Piano Operations Parameter Name or Directory Name Display Settings Auto Accompaniment (DIR) ACCOMPANIMENT – Accomp Volume Accomp Volume 0 - 127 Chord Mode Chord Mode See page EN-34 Music Preset Key Shift MP Key Shift –5 - 0 - +6 Arpeggiator/Auto Harmonize (DIR) ARPEG./A.HARMO.
- Page 59 Digital Piano Operations Parameter Name or Directory Name Display Settings 100 System (DIR) SYSTEM – Tuning Master Tuning 415.5 - 465.9 Panel Light Setting Panel Light Off, 5, 30, 60, 120 (Seconds) Operation Lock Operation Lock On, Off Speaker Out Speaker Out On, Off Auto Resume...
-
Page 60: Using Operation Lock
Digital Piano Operations Using Operation Lock Configuring MIDI Settings Operation Lock disables button operations, except for the Use the FUNCTION parameters below to change the Digital 1P (Power) button and the button operations required to Piano’s MIDI settings. For information about FUNCTION unlock operations. -
Page 61: Deleting All Data In Digital Piano Memory
USB Flash Drive Deleting All Data in Digital Piano Memory Your Digital Piano supports the use of a commercially available USB flash drive to perform the operations below. You can use the procedure below to delete all data, and reset settings and other system contents to return them to their Playing Back Song Data from a USB Flash Drive initial factory defaults. -
Page 62: Usb Flash Drive And Usb Flash Drive Port Handling Precautions
CASIO COMPUTER CO., cq USB flash drive port LTD. shall not be held in any way liable for any use of this Digital Piano that is illegal under copyright laws. -
Page 63: Formatting A Usb Flash Drive
USB Flash Drive Formatting a USB Flash Drive USB Flash Drive Operations The section provides information about the operations below. • Saving Digital Piano Data to a USB Flash Drive • Be sure to format a USB flash drive on the Digital Piano •... - Page 64 USB Flash Drive ■ To save Digital Piano data to a USB flash drive ■ To load data from a USB flash drive to Digital Piano memory Insert the USB flash drive into the Digital Perform steps 1, 2, and 3 under “To save Piano’s USB flash drive port.
- Page 65 USB Flash Drive ■ To delete USB flash drive data ■ To rename USB flash drive data Perform steps 1, 2, and 3 under “To save Perform steps 1, 2, and 3 under “To save Digital Piano data to a USB flash drive”...
-
Page 66: Using A Computer To Copy General Song Data To A Usb Flash Drive
• Control the Digital Piano from a smart device (Piano MUSICDAT folder. Remote Controller) • Standard MIDI files (SMF format 0/1) or CASIO MIDI files • Transfer music data from a smart device (CMF format) Connect the USB flash drive to your computer. -
Page 67: Troubleshooting
Troubleshooting ● Nothing happens when I touch a touch button. ● Nothing happens when I press a pedal. Cause: Cause: a. Wearing glove or touching with a fingernail or stylus. a. The pedal cord is not connected correctly to the cr DAMPER PEDAL jack, cs PEDAL UNIT jack, or b. - Page 68 Troubleshooting ● A tone’s quality and volume sounds slightly different depending where it is played on the keyboard. Cause: This is an unavoidable result of the digital sampling process,* and does not indicate malfunction. * Multiple digital samples are taken for the low range, middle range, and high range of the original musical instrument.
-
Page 69: Error Messages
Troubleshooting Error Messages Display Cause Action Limit • You are attempting to record more than 999 • Keep MIDI recorder recordings up to 999 measures measures with the MIDI recorder. long. • You are attempting to record more than • Keep audio recorder recordings within approximately 25 minutes with the audio recorder. -
Page 70: Reference
Reference Product Specifications Model PX-S3000BK Keyboard 88-key piano keyboard Duet Adjustable tone range (–2 to +2 octaves) Transpose –12 to 0 to +12 semitones Octave shift –2 to 0 to +2 octaves Sound Source Number of Tones 700, Layer, Split Maximum polyphony 192 notes Touch Response... - Page 71 Reference Pedals DAMPER PEDAL jack For connection of the included pedal (SP-3) or a separately available CASIO sustain pedal, selectable function (sustain (off, on), sostenuto (off, on), soft (off, on), arpeggio hold (off, on), play/stop, fill-in) PEDAL UNIT jack For connection of a separately available pedal unit (SP-34), simultaneous use of...
-
Page 72: Fingering Guide
Reference Fingering Guide Cadd9 ■ FINGERED 1, FINGERED 2 Chords Cmadd9 Cm69 Cdim Caug (#9) Csus4 (#11) Csus2 (13) (11) CmM7 Cdim7 CmM7 CdimM7 *1 With FINGERED 2, interpreted as Am7. *2 With FINGERED 2, interpreted as Am7 b *3 Inverted form not supported in some cases. *4 These fingerings are special fingerings for Digital Piano chord input, and so they are not suitable for normal Caug7... - Page 73 Reference ■ FINGERED ON BASS, FULL RANGE CHORD In addition to the chords that can be fingered with FINGERED 1 and FINGERED 2, the chords below also are recognized. A D m B D m C dim Ddim A D dim A D 7 Fdim F dim...
-
Page 74: Chord Example List
Reference Chord Example List C / ( D D ) ( D ) /E D sus4 sus2 m7 D 7sus4 add9 madd9 dim7 • You can use the split point to change the size of the accompaniment keyboard range (page EN-16). *1 Root *2 Chord Type EN-73... - Page 75 Reference F / ( G D ) ( G ) /A D ( A ) /B D sus4 sus2 m7 D 7sus4 add9 madd9 dim7 • You can use the split point to change the size of the accompaniment keyboard range (page EN-16). *1 Root *2 Chord Type EN-74...
-
Page 76: Versatile Tone Map
Reference Versatile Tone Map OTHERS: 056 VERSATILE NYLON GUITAR 1-127 Strings Slap 1 1-127 Fret Noise3 Velocity Sound 1-127 Strings Slap 2 1-127 Fret Noise4 C-1 - B6 1-30 Normal mp 1-127 Strings Slap 3 1-127 Fret Noise5 31-60 Normal mf 1-127 Strings Slap 4 1-127... -
Page 77: Knob Set List
Reference Knob Set List (K1) knob (K2) knob Knob Set Applicable Part (displayed) Parameter Freeze* Parameter Freeze* Filter Cut Off Frequency Knob Resonance Knob Upper1 Brilliance/Rev Brilliance Effect Reverb Send Knob Upper1 Up1 Cho/Rev Chorus Send Effect Reverb Send Sound Mode Upper1 Amp Envelope Attack Time... -
Page 78: Dsp Effect List
Reference DSP Effect List Preset DSP List DSP Name Module 1 Module 2 Module 3 Module 4 (Display) Mono 1BandEQ Mono 1-Band EQ Mono 2BandEQ Mono 2-Band EQ Mono 3BandEQ Mono 3-Band EQ Stereo1BndEQ Stereo 1-Band EQ Stereo2BndEQ Stereo 2-Band EQ Stereo3BndEQ Stereo 3-Band EQ Tone Control... - Page 79 Reference DSP Name Module 1 Module 2 Module 3 Module 4 (Display) PitchModAmp Drive Amp Cab Pitch Shifter Delay Drive Rotary Drive Rotary DrvRotaryEQ Drive Rotary Stereo 3-Band EQ DrvRotaryPan Drive Rotary Auto Pan PhaserAmpPan Drive Amp Cab Phaser Auto Pan FlangrAmpPan Drive Amp Cab...
-
Page 80: Dsp Module List
Reference DSP Module List Module Module Name Display Description Number Mono 1-Band EQ Mono 1EQ This is a single-band monaural equalizer. Mono 2-Band EQ Mono 2EQ This is a dual-band monaural equalizer. Mono 3-Band EQ Mono 3EQ This is a three-band monaural equalizer. -
Page 81: Dsp Parameter List
Reference DSP Parameter List Module Name Description Settings Display Parameter Data Mono 1-Band EQ This is a single-band monaural equalizer. EQ Freq EQ Frequency Adjusts the center frequency of Equalizer. EQ Gain EQ Gain Adjusts the gain of Equalizer. –12 to 00 to 12 In Level Input Level... - Page 82 Reference Module Name Description Settings Display Parameter Data Stereo 2-Band EQ This is a dual-band stereo equalizer. EQ1 Freq EQ1 Frequency Adjusts the center frequency of Equalizer 1. EQ1 Gain EQ1 Gain Adjusts the gain of Equalizer 1. –12 to 00 to 12 EQ2 Freq EQ2 Frequency Adjusts the center frequency of Equalizer 2.
- Page 83 Reference Module Name Description Settings Display Parameter Data Tremolo Shifts the volume of the input signal using an LFO. Rate LFO Rate Adjusts the LFO rate. 000 to 127 Depth LFO Depth Adjusts the LFO depth. 000 to 127 Waveform LFO Waveform Selects the LFO waveform.
- Page 84 Reference Module Name Description Settings Display Parameter Data Limiter Limits the input signal level so it does not rise above a preset level. Limit Limit Adjusts the volume level of the limit at which limiting is applied. 000 to 127 Attack Attack Adjusts the time until the compression effect starts.
- Page 85 Reference Module Name Description Settings Display Parameter Data Chorus Gives notes depth and breadth. Rate LFO Rate Adjusts the LFO rate. 000 to 127 Depth LFO Depth Adjusts the LFO depth. 000 to 127 Waveform LFO Waveform Selects the LFO waveform. Sine, Triangle Feedback Feedback...
- Page 86 Reference Module Name Description Settings Display Parameter Data Drive Rotary This is a rotary speaker simulator that makes overdrive possible. Type Type Selects the rotary speaker type. 0 to 3 OD Gain Overdrive Gain Adjusts overdrive gain. 000 to 127 OD Level Overdrive Level Adjusts the overdrive output level.
- Page 87 Reference Module Name Description Settings Display Parameter Data Reflection Simulates the initial reflection of reverberation. Applies acoustic presence to notes. WetLevel Wet Level Adjusts the level of the effect sound. 000 to 127 Feedback Feedback Adjusts the repeat of the reflected sound. 000 to 127 Tone Tone...
- Page 88 Reference Module Name Description Settings Display Parameter Data LFO Wah This is a “wah” effect that can automatically affect the frequency using an LFO. In Level Input Level Adjusts the input level. The input signal can become distorted 000 to 127 when the level of the sound being input, the number of chords, or the Resonance value is large.
- Page 89 Reference Module Name Description Settings Display Parameter Data Modeling Wah Simulates various types of wah pedals. This effect can automatically shift the frequency in accordance with the level of the input signal. OutLevel Level Adjusts the wah level. 000 to 127 Type Type Selects the wah type.
- Page 90 Reference Module Name Description Settings Display Parameter Data Drive Simulates the drive of a musical instrument amplifier. Type Drive Type Selects the drive type.* 1 to 20 Gain Gain Adjusts the driver input signal gain. 000 to 127 OutLevel Level Adjusts the drive output level.
- Page 91 Reference *5 (V: Number of variations) Settings Display Settings Display Settings Display Settings Display 1 FD-PRNST 2 DZ-V4 4 MB-TX+DI 2 VH-SP6 1 FD-TWRV1 2 DZ-HA 4 MS-VS80 3 VX-A15 1 RL-J12 4 EG-TWK 4 MS-J800 2 VX-A15TB 1 FD-TWD 3 EG-VEN 2 MS-J2401 3 VX-A30...
- Page 94 PXS3000-E-3A MA1903-A...
Need help?
Do you have a question about the Privia PX-S3000 and is the answer not in the manual?
Questions and answers