Table of Contents
Advertisement
Quick Links
Advertisement
Table of Contents

Subscribe to Our Youtube Channel
Related Manuals for VeEX FX80 PON


Summary of Contents for VeEX FX80 PON
- Page 1 FX86 CWDM Quad Laser Source User Manual Page 1 of 38...
-
Page 2: Table Of Contents
Uploading Measurement Results to Fiberizer Cloud ........34 10.0 Warranty and Software ................... 36 11.0 Product Specifications ................... 37 12.0 Certifications and Declarations ................37 13.0 About VeEX ......................38 FX80 PON Optical Power Meter User Manual Page 2 of 38... -
Page 3: About This User Manual
VeEX, VePAL, Sunrise Telecom, Agizer, Optixsoft, Sunlite, Sunset, RXT, MTT, OPX, Fiberizer, FX, TX and OPX, are trademarks of VeEX, Inc. and/or its affiliates in the USA and certain other countries. All trademarks or registered trademarks are the property of their respective companies. -
Page 4: Safety Information
Do not operate the instrument in the presence of flammable gases or fumes or any other combustible environment. VeEX Inc. assumes no liability for the customer's failure to comply with safety precautions and requirements. -
Page 5: Introduction
The operator is assumed to have received basic training in fiber optics and related testing and measurement practices. FX80 PON power meters are configured by the manufacturer according to customer requirements. A single device can be configured with optional VFL or BB-OPM. -
Page 6: Overview
|Power|: Turn device ON/OFF. Press and hold the button for 3 seconds. The display will initially show the VeEX logo, current date and time, and current mode of operation. |MODE|: Select the mode of operation: PON Burst, PON CW, Read, optional PM1, optional VFL (default is PON Burst). -
Page 7: Fx80 Test Ports
The FX80 can be configured with either optional OPM or VFL, but not both. Service Port 4.2.2 The service port (micro-USB) located on the left side of the device is used for charging and communication with a PC using the LTSync software. FX80 PON Optical Power Meter User Manual Page 7 of 38... -
Page 8: Getting Started
Getting Started Before using the FX80 PON power meter for the first time, fully charge the battery and set the local date and time. Battery Charging The unit is equipped with a built-in, rechargeable Li-Polymer 3A, smart charge battery and it is partially charged upon delivery. -
Page 9: Setting Date And Time
4. Press |MODE| to select the field to edit, then change the value, if necessary, by pressing |Up| and |Down|. 5. Press |Shift/Enter| to save the date and time settings. FX80 PON Optical Power Meter User Manual Page 9 of 38... -
Page 10: Resetting Test Device
For more information, see Sections 6.2.1 Setting ZERO Level, 6.2.2 Pass/Fail Thresholds, and 6.3.1 Setting Power Reference Level. The reset DOES NOT erase any previously stored measurement data. FX80 PON Optical Power Meter User Manual Page 10 of 38... -
Page 11: Optical Power Measurements
1. Press the |MODE| button to enter the necessary PON measurement mode (PON Burst or PON CW). 2. Press |F2| (ZERO). The ZERO notification shows briefly on the display. FX80 PON Optical Power Meter User Manual Page 11 of 38... -
Page 12: Pass/Fail Thresholds
The FX80 is now ready for measurements. Pass/Fail Thresholds 6.2.2 In addition to measuring the downstream and upstream signal levels, the FX80 PON can also be configured to provide Pass/Fail (P/F) notifications for each wavelength. 6.2.2.1 Creating User-Defined P/F Thresholds To create P/F thresholds: 1. - Page 13 3. Press the |Up| and |Down| arrow button to select the wavelength. 4. Press |Shift/Enter| to start setting the threshold. The corresponding value then starts flashing. 5. Set the necessary value pressing |Up| and |Down|. FX80 PON Optical Power Meter User Manual Page 13 of 38...
-
Page 14: 6.2.2.2 Creating Threshold Profiles For Measurements
To load the default threshold profile, press |Down| until Load Default is selected, then press |Shift/Enter|. The values from the default profile appear immediately on the screen. Selecting the Default profile FX80 PON Optical Power Meter User Manual Page 14 of 38... -
Page 15: 6.2.2.3 Itu-T G.984-2 Standard Pass/Fail Thresholds
Class B Class C Class A Class B Class C Min Avg Power (dBm) Max Avg Power 155 Mbs DS direction 1310nm ONT/ONU Launch Power 1310 ONU Receive Power FX80 PON Optical Power Meter User Manual Page 15 of 38... -
Page 16: 6.2.2.4 Loading The Saved Profile Or The Default Profile
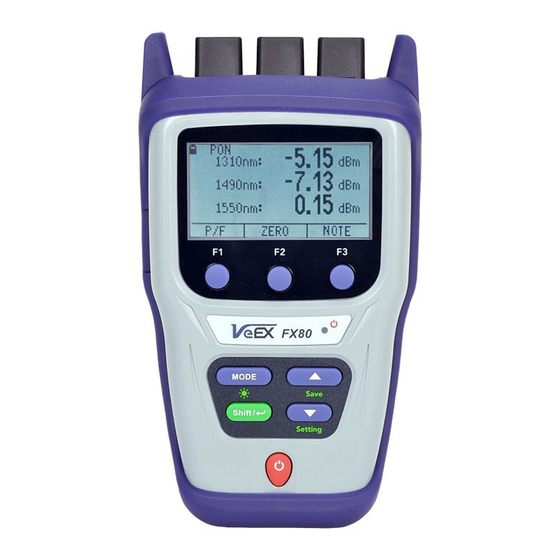
3. Press |Up| and |Down| to get the necessary command (Load Profile or Load Default), then press the |Shift/Enter| button to execute the command. Performing Optical Power Measurements in PON 6.2.3 Clean the fiber before connecting it to the device. FX80 PON Optical Power Meter User Manual Page 16 of 38... - Page 17 The measurement results are then shown on the screen. The example below shows typical values one might expect when connected at the ONU (location C) and no P/F thresholds have been set. FX80 PON Optical Power Meter User Manual Page 17 of 38...
- Page 18 If P/F thresholds have been set, the measurement results are presented as Pass or Fail (see example below). PON Burst mode measurement results as P/F thresholds To switch back to actual values for the same measurement, press the |F1| (P/F) button. FX80 PON Optical Power Meter User Manual Page 18 of 38...
-
Page 19: Broadband Power Measurements (Optional)
OPM test port and press |MODE| until the PM1 or PM2 test mode appears at the upper left corner of the display. Results of PM measurement FX80 PON Optical Power Meter User Manual Page 19 of 38... -
Page 20: Setting Power Reference Level
Setting Power Reference Level 6.3.1 To measure the fiber under test span loss, first set a reference level for each test wavelength. Set the reference level by pressing the |F3| (OPTION) button. FX80 PON Optical Power Meter User Manual Page 20 of 38... - Page 21 |Shift/Enter| button. The value onscreen then changes to -- .—dB. The current reference level value is shown on the second row to the left (-6.86dBm in the example below). Current power value set as the reference level FX80 PON Optical Power Meter User Manual Page 21 of 38...
-
Page 22: Visual Fault Locator (Vfl)
To test a fiber line for continuity: 1. Connect the fiber to the VFL port. 2. Press the |MODE| button until get the VFL mode appears (see the Figure below). FX80 PON Optical Power Meter User Manual Page 22 of 38... - Page 23 4. To modulate the light (1 or 2 Hz), press |F2| (1Hz) or |F3| (2Hz), respectively. The pressed button then changes to CONT. Press it to return to continuous light (see example below). FX80 PON Optical Power Meter User Manual Page 23 of 38...
- Page 24 VFL testing, modulated light 5. To switch from the VFL mode to another mode, press the [MODE] button. FX80 PON Optical Power Meter User Manual Page 24 of 38...
-
Page 25: Viewing Measurement Results
1. From the Read mode screen, press the |F3| (MORE) button and then |F1| (NOTE) button. The screen shown below then appears and the cursor in the set of symbols starts flashing. FX80 PON Optical Power Meter User Manual Page 25 of 38... - Page 26 7. To save the note for the next measurement and exit the NOTE mode, press the |F3| (EXIT) button. Once the note is saved with measurement results, it cannot be edited. FX80 PON Optical Power Meter User Manual Page 26 of 38...
-
Page 27: Downloading Measurement Results To Pc
2. Download the driver from the VeEX web site at www.veexinc.com. 3. Go to Windows Device Manager, right-click the FX80 item, and then click Update driver (see an example below). - Page 28 4. Define the path to the previously saved downloaded driver and click [ Next]. The driver installation starts. After the installation is complete, a window appears indicating the driver has been installed successfully (see below). Press Close. FX80 PON Optical Power Meter User Manual Page 28 of 38...
-
Page 29: Transferring Measurement Results Via Cable
1. Launch LTSync and connect the FX80 to the PC via the micro-USB cable provided. The FX-Series devices window appears (example shown below), with the device and its serial number recognized by the program. FX80 PON Optical Power Meter User Manual Page 29 of 38... - Page 30 2. To view the measurement results on the PC, click the [ Download] button . (example below). The measurement results are presented in a table. Use the scroll bar to view all results. FX80 PON Optical Power Meter User Manual Page 30 of 38...
-
Page 31: Preparing Measurement Results For Report
To download results for a specific time period, select the Hardware tab, and then select the [ Load results for period] checkbox. The Filter box appears (see below). Filtering measurement results by time FX80 PON Optical Power Meter User Manual Page 31 of 38... -
Page 32: Transferring Measurement Results Via Bluetooth
2. Launch LTSync on the PC. 3. Power on the FX80 and enter the [Read] mode. The Bluetooth sign appears at the top right corner of the screen (see below). FX80 PON Optical Power Meter User Manual Page 32 of 38... - Page 33 The time it takes to transfer results is dependent on the amount of data. To prepare results reports from the downloaded measurements, see Section 8.3 Preparing Measurement Results Report. FX80 PON Optical Power Meter User Manual Page 33 of 38...
-
Page 34: Uploading Measurement Results To Fiberizer Cloud
1. On the Cloud Storage tab, select a project from the Fiberizer Cloud account (see below). 2. In the Results tab, select the Use VeEX workspace checkbox. This ensures that the measurement results are uploaded to a dedicated VeEX folder in the Fiberizer Cloud account. - Page 35 FX82 7654321) to which it uploads the results. The results saved in the Fiberizer Cloud account will be accessible to other compatible VeEX devices. • The status bar at the bottom left shows the status of the current operation.
-
Page 36: Warranty And Software
• Replace hardware which prove to be defective provided that the products that the customer elects to replace are returned to VeEX Inc. by the customer, along with Proof of Purchase, within thirty (30) days of the request by the customer, freight prepaid. -
Page 37: Product Specifications
Product Specifications 11.0 The most recent product specifications can be found on the VeEX web site at www.veexinc.com. Certifications and Declarations 12.0 What is CE? The CE marking is a mandatory European marking for certain product groups to indicate conformity with the essential health and safety requirements set out in European Directives. -
Page 38: About Veex
VeEX Inc., an innovative, customer-focused communications test and measurement company, develops next-generation test and monitoring solutions for telecommunication networks and services. With a blend of advanced technologies and vast technical expertise, VeEX has developed products that diligently address all stages of network deployment, maintenance,...
Need help?
Do you have a question about the FX80 PON and is the answer not in the manual?
Questions and answers