Advertisement
Advertisement

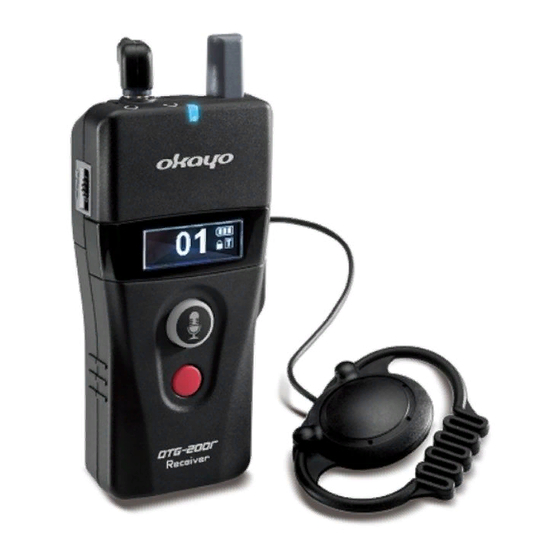
Related Manuals for Okayo OTG-200


Summary of Contents for Okayo OTG-200
- Page 2 nufacturer r’s Declara ation This p product me ets the follo owing stand dards: Federal Com mmunicatio ons Commis sion Interfe erence State ement Notice: The ch hanges or modific cations not expres ssly approved by the party respon nsible for complia ance could void th he user’s authori...
-
Page 3: Table Of Contents
Table of Contents System components…….……………...……………………...……………….…………………………………………….………..…..1-2 Quick start…………………………….…...……………………...……………….………………………………………………………..…..3-7 Interface……………………………………...……………………...……………….………………………………………………………..….8-9 General operation…………………….…………..…………………..………………………………………..…………………………..10-11 Advanced operation….……………………………………………………………………………………………….……………..…….…12-18 Troubleshooting..……..………………………………………..………………………………………………………………..……….…..19-20 Specifications……………………………………………….…………..…………………………………………………………………………21... -
Page 4: System Components
OmniTour Receiver OTG‐200R will be worn by group members and work respectively upon communication mode assigned by group leader. OmniTour Transmitter OTG‐200T OmniTour Transmitter OTG‐200T will be worn by group leader or assistant leader and is equipped with 3 communication modes for different applications. Stationary Transmitter DST‐OTG (optional) Digital stationary transmitter DST‐OTG for installed long‐range transmission and professional conferencing market. Desktop Charger C5 5‐slot desktop charger for intelligent channel sync and availability of channel configuration via okayo’s proprietary software OK‐OTG‐SW. Portable Charger CHG‐25 25‐slot portable charger for intelligent channel sync and availability of channel configuration via okayo’s proprietary software OK‐OTG‐SW. 1 ... - Page 5 OmniTour Guiding System OTG‐200 Wall‐mounted Charger C50 50‐slot wall‐mounted charger for intelligent channel sync and availability of channel configuration via okayo’s proprietary software OK‐OTG‐SW. Proprietary Software OK‐OTG‐SW (optional) Okayo’s proprietary software for channel and setting configuration for OTG‐200 series. Ear‐Mics (optional) Various ear microphones are available for OTG‐200 series. Instruction Manual Detailed instruction manual included in each package for operation advice. 2 ...
-
Page 6: Quick Start
OmniTour Guiding System OTG‐200 Quick start Mode Guiding The group leader (OTG‐200T) can freely talk during the tour. Any one (1) of group members is able to talk back or raise a question in a way of FIFT (first‐in‐first‐talk) when the group leader permits. Power transmitter on and change its communication mode Press both (○ ) and power (○ ) button to turn the transmitter on. Default mode T EACHING shows up. Press the or button (○ ) to select GUIDING mode. Press the power button (○ ) to confirm (underline) the selection and leave the setting. The transmitter will then be turned on automatically. Assign your group channel Press both and buttons (○ ) simultaneously to unlock the channel when transmitter is on. Symbol disappears and press or button (○ ) to select another preferred channel. ... - Page 7 OmniTour Guiding System OTG‐200 G will show up on the screen to indicate correct connection with the transmitter. Note both transmitter and receiver need to be set at same channel to have correct communication mode (G, T or D) shown on receiver’s screen. Talkback by receiver Any one (1) group member (receiver) is allowed to talk back (FIFT) with a press of PTT button (○ ) if the group leader (transmitter) tunes its master/slave switch (○ ) to “s”. Power off To turn transmitter/receiver off, press and hold the power button (○ ○ ) till OFF shows up on the screen. Mode Teaching In addition to the lecturer (OTG‐200T, master), either the assistant (OTG‐200T, slave) or any one (1) participant (OTG‐200R) is allowed to talk in the room in a way of FIFT (first‐in‐first‐talk). (Master) (Slave) (Muted) ...
- Page 8 OmniTour Guiding System OTG‐200 Tune master/slave switch on transmitter correctly The lecturer (master transmitter) tunes its master/slave switch (○ ) to “m” whereas “s” is tuned by the assistant (slave transmitter). Note slave transmitter can work only when master transmitter exists. Assign your group channel Press both and buttons (○ ) simultaneously to unlock the channel when transmitter is on. Symbol disappears and press or button (○ ) to select another preferred channel. To confirm newly selected channel, press the power button (○ ) or leave the transmitter idled for 1 second to leave the setting automatically. Power receiver on Now, press and hold the power button (○ ) for 1 second to turn the receiver on. Press both and buttons (○ ) simultaneously to unlock the channel. Symbol disappears and press or button (○ ) to select same channel as that on transmitter. To confirm newly selected channel, press the power button (○ ) or leave the receiver idled ...
- Page 9 OmniTour Guiding System OTG‐200 Mode Discussing Any 2 discussion members (OTG‐200T) are allowed to talk freely. Other listeners (OTG‐200R) can only be in listen mode at this occasion. … … Power transmitter on and change its communication mode Press both (○ ) and power (○ ) button to turn transmitter on. Default mode T EACHING shows up. Press the or button (○ ) to select D ISCUSSING mode. Press the power button (○ ) to confirm (underline) the selection and leave the setting. Transmitter will then be turned on automatically. Assign your group channel Press both and buttons (○ ) simultaneously to unlock the channel when transmitter is on. Symbol disappears and press or button (○ ) to select another preferred channel. ...
- Page 10 OmniTour Guiding System OTG‐200 transmitter and receiver need to be set at same channel to have correct communication mode (G, T or D) shown on receiver’s screen. When receivers are at communication mode “Discussing”, they do not have the talk right via the talk/mute button (○ ). Power off To turn transmitter/receiver off, press and hold the power button (○ ○ ) till OFF shows up on the screen. 7 ...
-
Page 11: Interface
OmniTour Guiding System OTG‐200 Interface Transmitter ○ ○ ○ ○ ○ ○ ○ ○ ○ ○ ○ ○ 7. Belt clip 1. Whip antenna 8. Up/Down button ... - Page 12 OmniTour Guiding System OTG‐200 Receiver ○ ○ ○ ○ ○ ○ ○ ○ ○ ○ ○ 13. Antenna 19. Belt clip 14. Volume control 20.
-
Page 13: General Operation
OmniTour Guiding System OTG‐200 General operation Power on ○ Press and hold the power button (○ ) for 1 second to transmitter/receiver on. Change communication mode on transmitter Press and hold both (○ ) and power (○ ) buttons simultaneously to turn transmitter on. Default mode T EACHING shows up. Press the or button (○ ) to change your preferred mode. Press the power button (○ ) to confirm (underline) the selection and leave the setting. Transmitter will then be turned on automatically. Detect communication mode on receiver Receiver will automatically detect the signal from transmitter when it is turned on. T , G or D will then show up on receiver’s screen for mode differentiation and indicating correct connection with the transmitter. Note both transmitter and receiver need to be set at same channel, then communication mode will show up automatically. To change your mode, simply turn receiver off and then re‐turn it on to acquire new signal from another transmitter. Both transmitter and receiver can work together only when their channel and communication mode are same. - Page 14 OmniTour Guiding System OTG‐200 Adjust transmitter’s or receiver’s volume Transmitter Press or button (○ ) to adjust the headphone volume on transmitter. If channel‐lock function is deactivated (see paragraph of “Adjust default settings” on page 16), volume adjustment will be invalid and default volume will be fixed at level 5. Receiver Tune the volume control (○ ) on the side of receiver for adjustment. Total 11 volume levels are available and default level is set at 5. When level 0 is set, the device will be muted. Kindly note listening at highly volume for long periods may damage your hearing. Connect external audio (Transmitter) Transmitter is available for 3.5 mm audio connection via aux‐in jack (○ ). “Audio priority (default: OFF)” can be pre‐set upon preference as advised in the paragraph of “Adjust default settings” on page 16. To release the talk right of 2 transmitter when it is at communication mode “Teaching (slave)” or “Discussing”, make sure it is ○ ...
-
Page 15: Advanced Operation
Flashing red light No light Flashing red light Steady green light Develop bespoke ID Additional okayo’s proprietary software is available for developing bespoke ID number (max. 4 digits) on OTG‐200. To know more about this, please reference additional instruction manual of the software OK‐OTG‐SW. Unify your group channel automatically (Successful channel unification) Last channel shows up ... - Page 16 OmniTour Guiding System OTG‐200 for 5 seconds for auto‐confirmation. After selected channel is confirmed, signal indicator (○ ) starts to flash quickly and the talk/mute button (○ ) lights up in green. Transmitter is ready to send signal of channel unification. Now, turn receiver on and it will automatically be channel unified. New channel and correct communication mode (G, T or D) will show up on its screen. Indication of successful or failed channel unification is shown above. Turn receiver off and then re‐turn it on if failed channel unification happens. To release the transmitter from channel unification, simply short press the talk/mute button (○ ) again. Communication mode (G, T or D) shown on receiver’s screen varies upon transmitter from which receiver acquires the signal. Pair and unify your group channel To complete following advanced functions, including roll‐call, calling/gathering alarm or out‐of‐range alarm, prior pairing for all transmitters/receivers in the group is a must. When the transmitter is at communication mode “Teaching”, only master transmitter, ○ whose master/slave switch ( ) is set at “m”, can execute following advanced functions, including roll‐call and calling alarm. (Successful pairing) ...
- Page 17 OmniTour Guiding System OTG‐200 for 5 seconds for auto‐confirmation. Channel number stops flashing. Signal indicator (○ ) starts to flash quickly which means the transmitter is ready for pairing. Now, turn receiver on. It will be paired and channel unified. Indication of successful or failed pairing is shown above. Turn receiver off and then re‐turn it on if failed pairing happens. Pairing quantity shown on transmitter will gradually increase until pairing is completed. To release the transmitter from group pairing, simply short press the call button (○ ) again to have it at standby screen or press the power button (○ ) to turn it off directly. Send pairing data to another transmitter (Successful acquirement of pairing data) (Failed acquirement of pairing data) Keep 1 transmitter on after it has paired all group members (receivers). Note this transmitter cannot release itself from pairing mode at this step. Now, press both call (○ ) and power (○ ) buttons to turn 2 transmitter on in order to obtain ...
- Page 18 OmniTour Guiding System OTG‐200 Roll‐call 10s 10s Expected group member Actual group member Short press the call button (○ ) when transmitter is on. Roll‐call symbol ( ) shows up and signal indicator (○ ) starts to flash quickly which means the transmitter is sending the signal of roll‐call. If receiver acquires roll‐call signal from the transmitter, its signal indicator (○ ) will flash quickly for 10 seconds and then in steady blue light again. The number shown on transmitter will gradually increase until roll‐call is completed. To release the transmitter from roll‐call, simply short press the call button (○ ) again. Calling alarm ...
- Page 19 OmniTour Guiding System OTG‐200 To release receivers from being alarmed, simply press the alarm‐release button (○ ). To release the transmitter from calling alarm, simply short press the call button (○ ) again. Receivers will automatically be turned off if the alarm keeps on for 20 minutes. Out‐of‐range alarm Receivers will automatically start to vibrate and beep if they are out of transmitter’s range for 3 minutes. Out‐of‐range symbol ( ) shows up and PTT button (○ ) starts to flash quickly in red light. The alarm can only be released when receivers are within the operation range of the transmitter again or the alarm‐release button (○ ) on receivers is short pressed. Receivers will automatically be turned off if the alarm keeps on for 20 minutes. Out‐of‐range alarm can be deactivated upon preference as advised in the paragraph of “Adjust default settings” on page 16. Adjust default settings Transmitter Press both (○ ) and power (○...
- Page 20 OmniTour Guiding System OTG‐200 Mic Gain 1~5 (default: 3) RF Power Hi Low Audio Priority ON OFF Simultaneous transmission for both AUDIO and MIC. If this function is activated (ON), only audio will be transmitted (MIC message will be muted). To confirm (underline) each selection, press the power button (○ ) and enter next setting. When final selection is completed, the transmitter will exit the menu and automatically be turned on afterwards. Receiver Press both (○ ) and power (○ ) buttons to turn receiver on. Following settings will show up in sequence for selection via or button (○ ). Channel Lock ON ...
- Page 21 OmniTour Guiding System OTG‐200 Back to default ○ Settings on both transmitter and receiver can be back to default at any time if , (○ ) and ○ power (○ ) buttons are pressed simultaneously when transmitter/receiver is off. Followings are default settings for transmitter/receiver. Transmitter Channel: 01 Channel Lock: ON Talk: PTB Mic. Gain: 3 RF Power: Low Audio Priority: OFF Mode: T EACHING Receiver Channel: 01 Channel Lock: ON Auto Power‐Off: ON Auto Power‐On: OFF Alarm: ON Earphone Output: Regular ...
-
Page 22: Troubleshooting
OmniTour Guiding System OTG‐200 Troubleshooting NO DATA shows up on transmitter This screen might show up on transmitter and it means no prior pairing was completed. Please pairing before requested operation is done. NOT APPLICABLE shows up on transmitter This screen might show up on transmitter and it means the function is not applicable. BUSY shows up on transmitter This screen might show up on transmitter and it means the talk right is occupied, please ask that occupied transmitter/receiver to release this talk right. DATA ERROR shows up on transmitter or receiver Transmitter Pairing data fails to acquire. Please turn the transmitter off and re‐turn it on again for successful acquirement of pairing data. Note same communication mode and channel need to be set on ○ both transmitters (if the communication mode is “Teaching”, the master/slave switch ( ) on both transmitters needs to be tuned at “m”). Receiver Pairing fails to complete. Please turn the receiver off and re‐turn it on again for successful ... - Page 23 OmniTour Guiding System OTG‐200 If the receiver is set at T EACHING mode, make sure slave transmitter or any other receiver does not occupy the talk right. Receivers do not have the function of talkback if D ISCUSSING mode is set. Channel unification failed to proceed on Transmitter If the transmitter is set at T EACHING mode, make sure its master/slave switch (○ ) is tuned to be “m” not “s”. If the transmitter is set at D ISCUSSING mode, make sure any 2 transmitter does not occupy the talk right. ...
-
Page 24: Specifications
OmniTour Guiding System OTG‐200 Specifications Transmitter OTG‐200T Frequency range 748 ~ 938 MHz (region dependent) Modulation 4 GFSK Channels Various upon countries Latency 18 ms T.H.D. < 7 % RF output power Hi: 13 dBm (region dependent) Low: 10 dBm Built‐in Microphone Electrical condenser Power requirements 2 x 1.2 V NiMH rechargeable battery or 2 x 1.5 V Alkaline battery Operation time 16 ~ 18 hours @ 2,100 mAh (Alkaline) Charging time 4 ~ 6 hours @ 1,600 mAh (NiMH) Operation range 70 ~ 100 meters (line of sight) Dimensions (W x D x H) 46.5 x 33 x 95 mm (with belt clip but without antenna) Weight 105 g (with batteries) Receiver OTG‐200R RF output power ...
Need help?
Do you have a question about the OTG-200 and is the answer not in the manual?
Questions and answers