Sign In
Upload
Download
Table of Contents
Contents
Add to my manuals
Delete from my manuals
Share
URL of this page:
HTML Link:
Bookmark this page
Add
Manual will be automatically added to "My Manuals"
Print this page
×
Bookmark added
×
Added to my manuals
Manuals
Brands
ZKTeco Manuals
Scanner
SpeedFace Series
General user manual
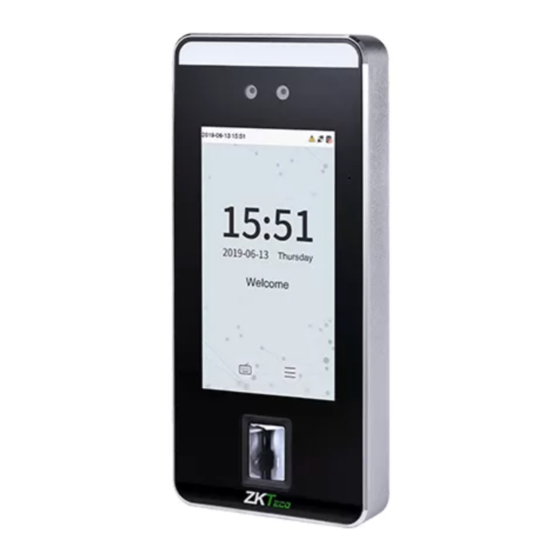
ZKTeco SpeedFace Series General User Manual
Visible light face recognition
Hide thumbs
Also See for SpeedFace Series
:
Quick start manual
(12 pages)
1
2
3
Table Of Contents
4
5
6
7
8
9
10
11
12
13
14
15
16
17
18
19
20
21
22
23
24
25
26
27
28
29
30
31
32
33
34
35
36
37
38
39
40
41
42
43
44
45
46
47
48
49
50
51
52
53
54
55
56
57
58
59
60
61
62
63
64
65
66
67
68
69
70
71
72
73
74
75
76
77
78
79
80
81
82
83
84
85
86
87
88
89
90
91
92
93
94
95
96
97
98
99
100
101
102
103
104
105
106
107
108
109
110
111
112
113
114
115
116
117
118
119
120
121
122
123
124
125
126
127
128
129
130
131
132
133
134
135
136
137
138
139
140
141
142
143
144
145
146
147
148
149
150
151
152
153
154
155
156
157
page
of
157
Go
/
157
Contents
Table of Contents
Bookmarks
Table of Contents
Table of Contents
1 Instruction for Use
Using Your Fingerprints
Startup Screen
Virtual Keyboard
Change the Theme and Wallpaper
Verification Methods
Facial Verification
Fingerprint Verification
Password Verification
Card Verification
Combined Verification
2 Main Menu
3 User Management
Add an Employee
Register Basic Employee Information
Register Employee Photo
Registration Comparison Methods
Permission Settings
Verification Mode Setting
Access Level
Searching for an Employee
Edit an Employee
Delete Employee
4 Attendance Events
Add Attendance Events
Edit Attendance Events
Delete Attendance Events
5 Access Settings
Access Control Parameters
Time Rule Setting
Holiday Setting
6 Log
Search for Attendance Records
Search for Attendance Photos
Search for Blacklist Photos
7 Data Management
8 USB Disk Management
Upload to Usb Drive
Download to Ausb Drive
Usb Disk Settings
9 Alarm Management
Add Alarms
Edit Alarms
Delete Alarms
10 System Settings
Network Settings
Ethernet Settings
Comm Connection Settings
Date and Time
Date and Time Settings
Date and Time Format Settings
Att/Access Record Parameters
Status Mode
Plugin Function Rules
Capture Photo Settings
Verification Settings
Validity Period of User Information
Cloud Service Settings
Wiegand Settings
Wiegand in
Wiegand out
Display Settings
Sound Settings
Biometric Parameters
Auto-Testing
Advanced Settings
About the Device
11 USB Upgrade
Statement on the Right to Privacy
Eco-Friendly Use
Advertisement
Quick Links
1
Using Your Fingerprints
2
Advanced Settings
Download this manual
General User Manual
Visible Light Face Recognition
Version: 1.0
Date: December 2018
Table of
Contents
Previous
Page
Next
Page
1
2
3
4
5
Advertisement
Table of Contents
Need help?
Do you have a question about the SpeedFace Series and is the answer not in the manual?
Ask a question
Questions and answers
Related Manuals for ZKTeco SpeedFace Series
Security System ZKTeco SpeedFace Series Quick Start Manual
(12 pages)
Scanner ZKTeco FaceDepot-7A Quick Start Manual
(6 pages)
Scanner ZKTeco K Series User Manual
Economic models (53 pages)
Scanner ZKTeco VF Series User Manual
(46 pages)
Scanner ZKTeco F18 Quick Start Manual
2.4 inch color screen (19 pages)
Scanner ZKTeco QRM10 User Manual
(19 pages)
Scanner ZKTeco Horus TL1 Fast Manual
Visible light linux 2.8 ”facial recognition equipment (7 pages)
Scanner ZKTeco Green Label Elite Series Quick Start Manual
(20 pages)
Scanner ZKTeco QR10M User Manual
(19 pages)
Scanner ZKTeco PV10M User Manual
Near-infrared palm device (26 pages)
This manual is also suitable for:
Facedepot-7a
Facedepot-7b
Table of Contents
Print
Rename the bookmark
Delete bookmark?
Delete from my manuals?
Login
Sign In
OR
Sign in with Facebook
Sign in with Google
Upload manual
Upload from disk
Upload from URL


Need help?
Do you have a question about the SpeedFace Series and is the answer not in the manual?
Questions and answers