Table of Contents
Advertisement
Change for life
AIR CONDITIONER
Owner's Manual
Original Instructions
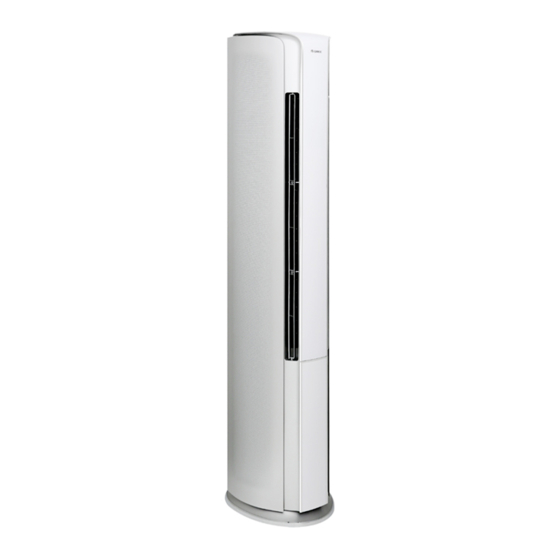
Split Type Floor-standing Air Conditioner
GVH24AK-K3DNC6A
Thank you for choosing commercial air conditioners.Please read
this Owner' s Manual carefully before operation and retain it for
future reference.
If you have lost the Owner's Manual, please contact the local agent
or visit www.gree.com or send an email to global@gree.com.cn for
the electronic version.
Advertisement
Table of Contents

Related Manuals for Gree GVH24AK-K3DNC6A


Summary of Contents for Gree GVH24AK-K3DNC6A
- Page 1 Thank you for choosing commercial air conditioners.Please read this Owner’ s Manual carefully before operation and retain it for future reference. If you have lost the Owner's Manual, please contact the local agent or visit www.gree.com or send an email to global@gree.com.cn for the electronic version.
-
Page 2: Table Of Contents
Content Operation Notices Precautions......................1 Screen Operation Guide Parts name ......................6 Function buttons and display ................... 7 Buttons on remote controller ................. 11 Introduction for icons on display screen..............11 Introduction for buttons on remote controller ............12 Special Function Introduction ................16 Replacement of batteries in remote controller ............ -
Page 3: Precautions
Precautions WARNING Operation and Maintenance This appliance can be used by children aged from 8 years and above and persons with reduced physical, sensory or mental capabilities or lack of experience and knowledge if they have been given supervision or instruction concerning use of the appliance in a safe way and understand the hazards involved. - Page 4 Precautions WARNING Maintenance must be performed by qualified professionals. Otherwise, it may cause personal injury or damage. Do not repair air conditioner by yourself. It may cause electric shock or damage. Please contact dealer when you need to repair air conditioner. Do not extend fingers or objects into air inlet or air outlet.
- Page 5 Precautions WARNING Attachment Installation must be performed by qualified professionals. Otherwise, it may cause personal injury or damage. Must follow the electric safety regulations when installing the unit. According to the local safety regulations, use qualified power supply circuit and circuit break. Do install the circuit break.
- Page 6 Precautions WARNING Do not put through the power before finishing installation. If the supply cord is damaged, it must be replaced by the manufacturer, its service agent or similarly qualified persons in order to avoid a hazard. The temperature of refrigerant circuit will be high, please keep the interconnection cable away from the copper tube.
- Page 7 Precautions WARNING For the air conditioner with plug, the plug should be reachable after finishing installation. For the air conditioner without plug, an circuit break must be installed in the line. If you need to relocate the air conditioner to another place, only the qualified person can perform the work.
-
Page 8: Parts Name
Parts name Indoor Unit Decorative board Air outlet grille Wrapping tape Front door Chassi (Display content or position may be different from above graphics, please refer to actual products) Outdoor Unit Air in Handle Connection wire Air outlet for indoor unit grille and outdoor unit Drainage pipe... -
Page 9: Function Buttons And Display
Function Buttons and Displayer Left&right swing button Press this button to turn on or turn ● off left&right swing. Up&down swing button display Press this button to turn on or turn ● off up&down swing. Cool button Press this button turn on the cooling mode. ●... - Page 10 Function Buttons and Displayer Function button Under unit off status, press Function button ● to turn off the unit in X-fan running status; when the unit is off and without X-fan running, press Function button to set timer. When the timer icon is blinking, touch slide bar to set timer.
- Page 11 Function Buttons and Displayer Slide bar Under function setting status, press ● function button to select the function. That function’s character will flash and then confirm or cancel it. When timer function is being set by ● display Function button, timer time can be set within the range of 0.5-24h by touching slide bar.
- Page 12 Function Buttons and Displayer Function Buttons and Displayer (Display) Left&right Swing Display left and right swing status. ● E-heater Function When this icon is bright, it means ● E-heater function is activated. Timer Function When this icon is bright, it means ●...
-
Page 13: Buttons On Remote Controller
Buttons on remote controller ON/OFF button Fan button +/- button Quiet button Cool button Purify button Heat button Sleep button Eco-wind button X-Fan/E-heater button E-joy button Light button button Wifi button Timer button button Mode button Turbo button Introduction for icons on display screen set fan speed send signal Fan Auto... -
Page 14: Introduction For Buttons On Remote Controller
Introduction for buttons on remote controller The remote controller adopts radio-frequency technology. It can be operated only after matching successfully with air conditioner. The matching method is as below: After energization, press X-Fan/E-heater button for more than 3s within 2m from the air conditioner, and remote controller and air conditioner will enter into matching status automatically. - Page 15 Introduction for buttons on remote controller E-joy button ● Press this button to enter into E-joy mode. “EY” is displayed and it defaulted at “Comfort” mode. Press “+” button and then the mode will change as below: Cold →Cool→Comfort→Warm→Hot (The mode will change in reverse direction if press “-“ button) ●...
- Page 16 Introduction for buttons on remote controller ● Under fixed-angle swing mode, press this button and the left and right swing status will change in the sequence as below: Mode button Press this button and the mode will change in the sequence as below: AUTO COOL HEAT...
- Page 17 Introduction for buttons on remote controller Purity button ● When the unit is turned on, press this button to set purify function. ● If turn off the unit with remote controller, the purify function is defaulted OFF. Under Eco-wind mode, if turn on the unit again after turning off the unit with remote controller, the previous purify function will be kept.
-
Page 18: Special Function Introduction
Special Function Introduction Child lock function Press "-" and "+" buttons simultaneously for 6s can lock or unlock the keyboard. After locking keyboard, remote controller displays the icon of " ". Meanwhile, locking icon will flash 3 times when pressing any buttons, while the status has no change. -
Page 19: Replacement Of Batteries In Remote Controller
Replacement of batteries in remote controller 1. Press the back side of remote controller marked with slightly and then push out the cover of battery box along the arrow direction. 2. Replace two 7# (AAA 1.5V) dry batteries, and make sure the position of "+"... -
Page 20: Operation Method
Operation Method Basic Operation 1. Turn ON/OFF unit After putting through the power, press "ON/OFF" on control panel or "ON/OFF" on remote controller. 2. Selection of operation mode Press "Cool" button or "Heat" button on control panel to select cooling mode or heating mode. - Page 21 Operation Method Up&down wind direction adjustment ● Press " " button on remote controller or " " on control panel can select up&down swing method, and control the operation and stop of up&down swing motor to let swing blade rotate up&down or stop at a certain angle to blow wind.
-
Page 22: Clean And Maintenance
Clean and maintenance Note: ■ Turn off the air conditioner and disconnect the power before cleaning the air conditioner to avoid electric shock. ■ Do not wash the air conditioner with water to avoid electric shock. ■ Do not use volatile liquid to clean the air conditioner. Clean the Air Conditioner 1. - Page 23 Clean and maintenance Please pat on the filter gently or use an electric dust catcher to clean the filter. In case the filter is very dirty (oily), clean it with warm water (below 45°C) mixed with mild detergent. Then dry it by placing it in cool place. Note: Do not clean it with water that is over 45°C to prevent it from colorless or deformation.
- Page 24 PM2.5 Purifier (1) Make sure air conditioner is not working, then turn it off and disconnect power; (2) Take off the purifier at the rear side of indoor unit by hand according to the direction of arrow; (3) Press hard on the left and right clasps in the "PM2.5 Removal Module".
-
Page 25: Malfunction Analysis
Malfunction analysis Warning: Do not repair the air conditioner by yourself in order to avoid electric shock or fire hazard due to improper repair. Please contact appointed maintenance center for repair. Please check the following items before asking for maintenance in order to save your time and money. - Page 26 Malfunction analysis Phenomenon Analysis When turning on or turning off the unit, there is cracking noise ●This is the sound of friction caused by expansion and/or contraction of temperature Cracking panel or other parts due to the change noise? change of temperature. ●...
- Page 27 Malfunction analysis Phenomenon Analysis ● The unit is affected by severe inter- Remote controller has no action ference or switch function frequently. Sometimes the remote controller can't be operated. In this case, you within signal just need to disconnect the plug and receiving obstacle then reinsert it.
- Page 28 Malfunction analysis Phenomenon Analysis ● The case is stuck by a finger or other FC is displayed foreign object during rotation. ● After FC malfunction is displayed, press ON/OFF button to eliminate this malfunction. The unit will operate in previous setting after the case becomes normal.
-
Page 29: Precautions Of Installation
Precautions of Installation Important notes ■ All electric work must be performed by a licensed technician according to local regulations and the instructions given in this manual. ■ If the air conditioner is to be moved to other place, please contact appointed maintenance center in advance. - Page 30 Precautions of Installation ● The location should be able to withstand the weight and vibration of outdoor unit and ensure the safety during installation. ● The location should be dry, in which the outdoor unit won't be exposed directly to sunlight or strong wind. ●...
- Page 31 Precautions of Installation bend the pipe with your thumb 1. The flexible pipe should be applied in the indoor side. 2. The bended angel shall not exceed 90°. 3. The bended part shall be located in the pipe center. Bigger bended radius will be better. minimum radius 4.
- Page 32 Precautions of Installation Requirement of electric safety Disposal of electric wire grounding device of building. An electricity leakage protection switch and air 2. The power must adopt rated voltage and specialized circuit of air conditioner. 3. The diameter of power cord must accord with related requirement. 4.
- Page 33 Precautions of Installation Pay attention to the following items when connecting wires: 1. Please do the wiring according to the wiring diagram. The screws must be tightly fastened, the slippery screws must be changed, the tapping screw cannot be used for electric wiring. 2.
- Page 34 Precautions of Installation Grounding requirements ● The air conditioner is first class electric appliance. Please take reliable ground- ing measure. ● The yellow-green wire in the air conditioner is grounding wire. Do not use it for other purposes or cut it off. Do not fix it by the tapping screw. Otherwise, it may cause the electric shock.
-
Page 35: Safety Precautions For Installing And Relocating The Unit
Safety precautions for installing and relocating the unit To ensure safety, please be mindful of the following precautions. Warning When installing or relocating the unit, be sure to keep the refrigerant circuit free from air or substances other than the specified refrigerant. Any presence of air or other foreign substance in the refrigerant circuit will cause system pressure rise or compressor rupture, resulting in injury. -
Page 36: Installation Of Indoor Unit
Installation of indoor unit Installation dimension diagram of indoor unit... - Page 37 Installation of indoor unit Step one: Install drainage hose and connection pipe ● When connecting pipeline and wires, please remove top cover and left&right side plates. 1.Remove the fixing screws (three screws) on the top cover and then draw out the top cover (see fig A). 2.Before removing left &right side plates, please loose four screws under the top cover.
- Page 38 Installation of indoor unit 8.The indoor part of drainage pipe should be wrapped with heat insulating materials (thickness should be 9mm as least). The drainage pipe should tilt outwards so that the condensate water can be drained smoothly. 9.After connecting indoor unit and connection pipe and wrapping them, move the indoor unit next to the wall or to the corner.
- Page 39 Installation of indoor unit Step two: Wiring of indoor unit 1. Remove the left and right support plate. electric box is in the left of the unit, wiring board press the screw at the electric box cover, screw take off the electric box cover. 2.
- Page 40 Installation of indoor unit Step three: Installation of rear cover 1. Bind the connection pipe, connection wire and drainage pipe together with binder. ● Fix some positions for convenient binding ● Do not bind too tightly. ● Leave the joint of connection pipe for leakage test. ●...
-
Page 41: Installation Of Outdoor Unit
Installation of outdoor unit Installation dimension diagram of outdoor unit Space to the covering Step one: open piping hole indoor outdoor 1. Confirm the position of pipe hole wall pipe sealing and drill a hole inclined to outside. (see fig at the right) 2. - Page 42 Installation of outdoor unit Step two: Pipe connection of outdoor unit Fix the outdoor unit on the selected position 1. Match the flared port of connection pipe to the valve, and then tighten them with hand. 2. Tighten them with torque wrench. Note: welding the pipes when lengthening the connection pipe.
- Page 43 Installation of outdoor unit Use vacuum pump 1. Remove the valve caps on the liquid valve and gas liquid valve piezometer valve and the nut of refri- gas valve gerant charging vent. refrigerant charging valve cap 2. Connect the charging hose vent of piezometer to the refri- nut of refrigerant...
-
Page 44: Check After Installation
Check after installation ● Check according to the following requirement after finishing installation. Items to be checked Possible malfunction The unit may drop, shake or emit noise. Have you done the refrigerant leakage test? (heating) capacity. It may cause condensation and water dripping. -
Page 45: Installation Of Anti-Tilting Chain
Installation of anti-tilting chain ● In order to prevent tilting due to an accident, please install the anti-tilting chain. Installation steps: 1. Remove the screw in the anti-tilting hole at the top cover of indoor unit (see Figure 1). 2. Take out the anti-tilting chain from the accessories; put it into the anti-tilting hole and then fix it with screw (see Figure 2). - Page 46 1. Standard length of connection pipe ● 5m, 7.5m, 8m. 2.Min. length of connection pipe is 3m. 3.Max. length of connection pipe and max. high difference. Max length Max length Cooling Max height Cooling Max height of connec- of connec- capacity difference capacity...
- Page 47 Additional refrigerant charging amount for R22, R407C, R410A and R134a Diameter of connection pipe Outdoor unit throttle Liquid pipe(mm) Gas pipe(mm) Cooling only(g/m) Cooling and heating(g/m) Φ6 Φ9.52 or Φ12 Φ6 or Φ9.52 Φ16 or Φ19 Φ12 Φ19 or Φ22.2 Φ16 Φ25.4 or Φ31.8 Φ19...
-
Page 48: Pipe Expanding Method
Pipe expanding method Note: Improper pipe expanding is the main cause of refrigerant leakage. Please expand the pipe according to the following steps: A: Cut the pipe E: Expand the port ● Confirm the pipe length according to ● Expand the port with expander. the distance of indoor unit and hard outdoor unit. - Page 49 GREE ELECTRIC APPLIANCES, INC. OF ZHUHAI Add: West Jinji Rd, Qianshan, Zhuhai,Guangdong, China, 519070 Tel: (+86-756) 8522218 Fax: (+86-756) 8669426 E-mail: gree@gree.com.cn www.gree.com 66160000561...
Need help?
Do you have a question about the GVH24AK-K3DNC6A and is the answer not in the manual?
Questions and answers