
Related Manuals for Gree GWHN09AANK3A1A


Summary of Contents for Gree GWHN09AANK3A1A
- Page 1 Artful Introduction and Features Model Remarks Downloaded from AC-Manual.com Manuals...
- Page 2 Model Remarks Downloaded from AC-Manual.com Manuals...
- Page 3 Artful Model Remarks Downloaded from AC-Manual.com Manuals...
-
Page 4: Specifications And Technical Parameters
Rated Current (A) Air Flow Volume (m /h) (H/M/L) Dehumidifying Volume (l/h) EER / C.O.P (W/W) 3.21 / 3.61 Energy Class GWHN09AANK3A1A/ I Model of Indoor Unit Fan Motor Speed (r/min) 1250/1150/1000/900 (H/M/L) Output of Fan Motor (w) Input of Heater (w) - Page 5 Artful Model of Outdoor Unit GWHN09AANK3A1A/O Compressor Hitachi Manufacturer/trademark Compressor Model ASG102CV-B7AT Compressor Type Rotary L.R.A. (A) Compressor RLA(A) 4.05 Compressor Power Input(W) Overload Protector KA-172-LYGN914 Throttling Method Capillary Starting Method Capacitor Working Temp Range ( ℃ ) 16-30ºC/-7-48ºC Condenser...
- Page 6 Model GWHN12ABNK3A1A Function COOLING HEATING Rated Voltage 220-240V~ Rated Frequency 50Hz Total Capacity (W/Btu/h) 3500W / 12000(Btu/h) 3800W / 12800(Btu/h) Power Input (W) 1090 1052 Rated Input (W) 1450 1500 Rated Current (A) Air Flow Volume (m /h) (H/M/L) Dehumidifying Volume (l/h) EER / C.O.P (W/W) 3.21 / 3.61 Energy Class...
- Page 7 Artful Model of Outdoor Unit GWHN12ABNK3A1A/O Compressor LANDA Manufacturer/trademark Compressor Model QXA-133uB030 Compressor Type Rotary L.R.A. (A) Compressor RLA(A) Compressor Power Input(W) 1160 Overload Protector B250-150-141E Throttling Method Capillary Starting Method Capacitor Working Temp Range ( ℃ ) 16-30ºC/-7-48ºC Condenser Aluminum fin-copper tube Pipe Diameter (mm) Ø7...
- Page 8 Model GWHN18ACNK3A1A Function COOLING HEATING 220V ~ 240V Rated Voltage Rated Frequency 50Hz Total Capacity (W/Btu/h) 18000Btu/h 19500Btu/h Power Input (W) 1640W 1675 Rated Input (W) 2100 2100 Rated Current (A) 11.3 11.3 Air Flow Volume (m /h) (H/M/L) Dehumidifying Volume (l/h) EER / C.O.P (W/W) 3.2/3.4 Energy Class...
- Page 9 Artful GWHN18ACNK3A1A /O Model of Outdoor Unit Compressor Shanghai Hitachi Manufacturer/trademark ASH210SV-C8LU Compressor Model Compressor Type ROTARY L.R.A. (A) Compressor RLA(A) Compressor Power Input(W) 1725 Overload Protector PUT-IN Throttling Method Capillary Starting Method Capacitor Working Temp Range ( ℃ ) -7 ≤...
- Page 10 Model GWHN24ACNK3A1A Function COOLING HEATING Rated Voltage 230V~ Rated Frequency 50HZ Total Capacity (W/Btu/h) 6150 6400 Power Input (W) 2098 1939 Rated Input (W) 2525 2459 Rated Current (A) 10.15 9.88 1030 Air Flow Volume (m /h) (H/M/L) Dehumidifying Volume (l/h) EER / C.O.P (W/W) 2.93/3.3 Energy Class...
- Page 11 Artful Model of Outdoor Unit GWHN24ACNK3A1A/O Compressor PANASONIC WANBAO COMPRESSOR (GUANGZHOU) CO,.LTD Manufacturer/trademark 5VS245EAA21 Compressor Model 转子式 Compressor Type L.R.A. (A) 45.5 Compressor RLA(A) Compressor Power Input(W) 2125 Overload Protector Internal Throttling Method Capillary Starting Method Capacitor Working Temp Range ( ℃ ) -15~54 铝箔铜管...
-
Page 12: Parts Name
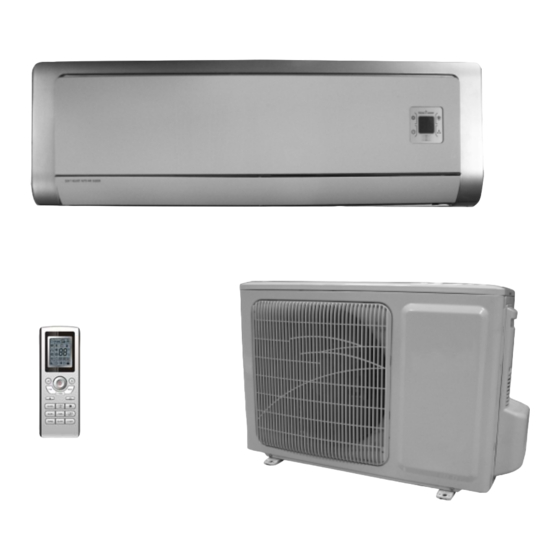
Parts name Indoor Unit Air in Displayer Power plug Front panel Wrapping tape Wall pipe Filter Guide louver Air out Remote controller Setting Temp. Displayer Heat Cool Power/Run Reciver window Air in Outdoor Unit Big handle Drainage pipe Air out Note: This photo is about the models of 9K, 12K, the appearance of model of 18K and 24K are a little different from this picture. -
Page 13: Applicable Models
Artful Outline and Installing Dimension Outline and Installing Dimension of Indoor Unit Left Tube-exit Sign Right Tube-exit Sign Unit:mm Dimension Applicable models Ceiling Wall-mounted plate Downloaded from AC-Manual.com Manuals... - Page 14 Outline and Installing Dimension of Outdoor Unit (1) Applicable to Handle Unit:mm Over 600 Over 600 Over 600 Over 600 Bolt Wrench Downloaded from AC-Manual.com Manuals...
- Page 15 Artful Outline and Installing Dimension of Outdoor Unit (2) Applicable to Unit:mm Over 600 Over 600 Over 600 Bolt Over 1000 Wrench Downloaded from AC-Manual.com Manuals...
- Page 16 Outline and Installing Dimension of Outdoor Unit (3) Applicable to Unit:mm Over 100 Over 600 Over 600 Over 100 Bolt Wrench Downloaded from AC-Manual.com Manuals...
- Page 17 Artful Electrical Diagram Downloaded from AC-Manual.com Manuals...
- Page 18 Downloaded from AC-Manual.com Manuals...
-
Page 19: Basic Functions
Artful 6 6 6 6 6 Manual of functions of remote controller and operation method Manual of functions of remote controller This function manual is for: Temperature parameter The room setting temperature(Tpreset) The room ambient temperature (Tamb) Basic Functions Once energized, the compressor should in no way be restarted unless after 3-minute time interval at least. For the first energization, the compressor will be started without 3-minute lag. - Page 20 Up\Down swing fan control Swing for timer setting/fully swing/swing stop, the user can set up swing by wireless remteo control or adjust the position of swing stop. Buzzer The air conditioner will send out "Hua" alert when it is energized or receives a control command. Press key After powered on, unit runs with auto mode when you press this key.
- Page 21 Artful Manual of functions of remote controller This function manual is for: Temperature parameter The room setting temperature(Tpreset) The room ambient temperature (Tamb) Basic Functions Once energized, the compressor should in no way be restarted unless after 3-minute time interval at least. For the first energization, the compressor will be started without 3-minute lag.
- Page 22 Dehumidifying Conditions and Process When T amb. Tpreset 2 , the unit will run under dehumidifying and cooling mode, in which case the compressor, outdoor fan will run, and indoor fan will run at low speed. When Tpreset 2 Tamb. Tpreset , the unit will run under dehumidifying mode, in which case the compressor and outdoor fan will be stopped after running 6 minutes,After 4 minutes, the compressor and outdoor fan will be restarted.
-
Page 23: Timer Function
Artful If it is detected that the evaporator tube temperature is too high, the outdoor fan will be stopped. When the tube temp. resumes to normal, the outdoor fan will be restarted. Noise Sliencing Protection If the unit is stopped by pressing ON/OFF, or mode switching, the reversal valve will be stopped after 2-minute lag. Over current protection It is the same as that under cooling mode (only indoor fan will run at low speed for 60 seconds before it is stopped). - Page 24 1hr. 2hrs. 2hrs. above Tpreset Tpreset Setting temp. Tpreset Tpreset Turbo function The turbo function is available in Cool and Heat modes. Dry function Dry function is available in Cool and Dehumidifying modes. Automatic Control of Fan Speed Under this mode, the indoor fan will automatically select high, medium or low speed with the change of ambient temperature.
-
Page 25: Disassembly Process
Artful Disassembly Process 7 7 7 7 7 Disassembly Process of Indoor Unit Operating Procedures/Photos Applicable to Disassemble Front Panel Push the convex parts in the left and right sides Front Panel of the front panel, and then lift the front panel. Unscrew the screws fixing the display cover and pull out the plug. - Page 26 Operating Procedures / Photos Disassemble Front Case Unscrew the 7 tapping screws fixing the front case, and turn the front case backwards to remove it. Screw Disassemble Water Tray Ground Screw Electric Box Cover Unscrew the ground screw on the electric box cover and loose the clasps to remove electric box cover.Pulll out the wiring terminal.Unscrew the 2 screws fixing the water tray to remove the...
- Page 27 Artful Operating Procedures / Photos Disassemble Evaporator Unscrew the screws fixing the clamp plate of rear Clamp Plate of Rear Pipe pipe at the back of evaporator to remove the plate. Screw Unscrew the 2 screws in the right of evaporator. Screw Unscrew the 2 screws in the left of evaporator Turn the evaporator at certain angle to remove it.
- Page 28 Operating Procedures / Photos Disassemble Motor and Cross Flow Fan Unscrew the screws fixing the press plate of motor and connecting motor and cross flow fan to remove the motor and cross flow fan. Screw Screw Downloaded from AC-Manual.com Manuals...
- Page 29 Artful Disassembly procedure of indoor unit (2) Operating Procedures / Photos Applicable to Disassemble Front Panel Push the convex parts in the left and right sides Front Panel of the front panel, and then lift the front panel. Unscrew the screws fixing the display cover and pull out the plug.Forcibly lift the front panel upwards from the clasps to take it out.
- Page 30 Operating Procedures / Photos Disassemble Front Case Unscrew the 7 tapping screws fixing the front case, and turn the front case backwards to remove it. Screw Disassemble Water Tray Electric Box Cover Ground Screw Firstly screw off the earth screw on the electric box cover, loosen clasp, screw off electric box cover, then pull out the wire terminal on air guide motor, unscrew 2 screws fixing the water...
- Page 31 Artful Operating Procedures / Photos Disassemble Evaporator Clamp Plate Unscrew the screws fixing the clamp plate of rear of Rear Pipe pipe at the back of evaporator to remove the plate. Screw Unscrew the 1 screw in the right of evaporator. Screw Unscrew the 2 screws in the left of evaporator Turn the evaporator at certain angle to remove it.
- Page 32 Operating Procedures / Photos Disassemble Motor and Cross Flow Fan Unscrew the screws fixing the press plate of motor and connecting motor and cross flow fan to remove the motor and cross flow fan. Screw Screw Downloaded from AC-Manual.com Manuals...
-
Page 33: Disassembly Procedure Of Outdoor Unit
Artful Disassembly Procedure of Outdoor Unit (1) Operating Procedures / Photos Applicable to Disassemble Big Handle Unscrew the screw fixing the big handle,and then remove it downwards to take it out. Screw Big Handle Disassemble Top Cover Unscrew the 2 screws fixing left side of top cover and the 1 screw fixing the right side to remove the top cover. - Page 34 Operating Procedures / Photos Disassemble Front Panel Unscrew the 5 screws fixing the panel and dextro- rotate the front panel to pull it out from groove. Screws Disassemble Right Side Plate Right Side Unscrew the 2 screws fixing electric box ,and then Plate unscrew the 5 screws fixing the right side plate to remove it.
- Page 35 Artful Operating Procedures / Photos Disassemble Axial Flow Fan Loosen the fastening nut fixing the axial flow fan with Axial Flow a spanner ,and then take out the nut,spring gasket and flap gasket in turn. Disassemble Motor and Motor Support Unscrew the 4 screws fixing the motor to take out the motor,and then unscrew the 2 screws fixing the motor support to take it out.
- Page 36 Operating Procedures / Photos Disassemble Capillary Respectively unsolder the weld spots of main capillary and auxiliary capillary to take off the capillary. Capillary Disassemble Gas and Liquid Valves Unscrew the two bolts fixing gas valve and liquid valve.Unsolder weld spots between gas valve and and air-return pipe to remove the gas valve.
- Page 37 Disassembly Procedure of Outdoor Unit(2) Operating Procedures / Photos Applicable to Disassemble Top Cover Top Cover Unscrew the screws fixing the top cover, and then lift the top cover to remove it. Screws Disassemble Handle Unscrew the screw fixing the handle,and then push it downwards to take it out.
- Page 38 Operating Procedures / Photos Disassemble Front Grill Unscrew the screws fixing the front grill ,and then lift it upwards to remove it. Front Grill Screw Disassemble Cabinet Unscrew the screws fixing the cabinet to remove it. Cabinet Screw Screw Disassemble Electric Box Sub-assy Unscrew the screws fixing electric box to pull out the connection line between fan motor and electric Electric box...
- Page 39 Artful Operating Procedures / Photos Disassemble Gas and Liquid Valves Unsolder the pipeline connecting with valves ( to prevent soldering gun from burning out the chassis).Unscrew 2 bolts fixing gas valve ,and then unsolder the weld spot between pipeline and gas valve to remove gas valve.
- Page 40 Operating Procedures / Photos Disassemble Four-way Valve Weld spots Only for cooling and heating unit Unscrew the fastening nut of the four-way valve coil and remove the coil. Wrap the four-way valve with wet cotton and unsolder the 4 weld spots connecting Four-way valve the four-way valve to take it out.
- Page 41 Artful Disassembly Procedure of Outdoor Unit- 3 Operating Procedures / Photos Top Cover Disassemble Top Cover Screws Unscrew the screws fixing the top cover, and then lift the top cover to remove it. Disassemble Front Side Plate Unscrew the 3 screws fixing the front side plate to remove it.
- Page 42 Operating Procedures / Photos Screw Disassemble Cabinet Unscrew the screws fixing the cabinet to remove it. Cabinet Disassemble Electric Box Sub-assy Unscrew the 2 screws fixing electric box to pull out the connection line between fan motor and electric Electric box ,and then lift the electric box to take it out.
- Page 43 Artful Operating Procedures / Photos Disassemble Axial Flow Fan Unscrew the nut fixing the fan with a spanner to Axial Flow take out the fan . Disassemble Outdoor Motor Unscrew the screws fixing the motor support ,and Motor Clapboard then lift it upwards to remove it. Unscrew the screws Terminal Screw fixing the motor and pull out the connection line between Wire-passing...
- Page 44 Operating Procedures / Photos Disassemble Capillary Unsolder the weld spots of capillary,valve and outlet tube of condenser to remove the capillary.Prevent Capillary welding slag from blocking the capillary. Disassemble Compressor Unsolder the pipeline connecting the compressor, and then unscrew the 3 foot-nuts fixing conpressor to remove it.
- Page 45 Artful Exploded View and Components and Parts List Exploded View of Parts of Indoor Unit (1) Downloaded from AC-Manual.com Manuals...
- Page 46 Parts List of Indoor Unit (1) Part Code Description GWHN12ABNK3A1A/I Wall-Mounting Frame 01252008 Rear Case 22202081 Evaporator Assy 0100254401 Evaporator Support 24212076 Cross Flow Fan 10352023 Ring of Bearing 76512203 Drainage Pipe 0523001401 Water Tray 20182080 Swing Louver 10512099 Swing Linkage 1 10582450 Swing Linkage 2 None...
- Page 47 Artful Part Code Description GWHN18ACNK3A1A/I Wall-Mounting Frame 01252218 Rear Case 22204002 Evaporator Assy 0100208801 Evaporator Support 24214080 Cross Flow Fan 10352016 Ring of Bearing 76512203 Drainage Pipe 0523001401 Water Tray 20184074 10512099 Swing Louver 10584085 Swing Linkage none —— Swing Linkage 2 Swing Louver 10512097 Axile Bush...
- Page 48 Part Code Description GWHN18ACNK3A1A/I Wall-Mounting Frame 01252218 Rear Case 22204002 Evaporator Assy 0100208801 Evaporator Support 24214080 Cross Flow Fan 10352016 Ring of Bearing 76512203 Drainage Pipe 0523001401 Water Tray 20184074 10512099 Swing Louver 10584085 Swing Linkage none —— Swing Linkage 2 Swing Louver 10512097 Axile Bush...
- Page 49 Artful Exploded View of of Indoor Unit (2) Downloaded from AC-Manual.com Manuals...
- Page 50 Parts List of Indoor Unit (2) Part Code Description GWHN24ACNK3A1A/I Wall-Mounting Frame 01252229 Rear Case 22202094 Evaporator Assy 0100254601 Evaporator Support 24214082 Cross Flow Fan1 10354002 Cross Flow Fan2 10354003 Ring of Bearing 76512203 Ring of Bearing 76712017 0523001404 Drainage Pipe 20182099 Water Tray 10512099...
- Page 51 Artful Exploded View of of Outdoor Unit (1) Applicable to Downloaded from AC-Manual.com Manuals...
- Page 52 Parts List of Outdoor Unit (1) Part Code Description GWHD09ABNK3A1A/O Front Grill 22413431 Nut M6 70310131 Axial Flow Fan 10333004 Front Plate 01533012 Metal Base 01203622P 4-way Valve 430004022 4-way Valve Coil 43000400 Compressor 00120136 Overload Protector 00180084 Compressor Gasket 76710205 Nut with Washer 70310014...
- Page 53 Artful Part Code Description GWHN12ABNK3A1A/O Front Grill 22413431 Nut M6 70310131 Axial Flow Fan 10333004 Front Plate 01533012 Metal Base 012032292 4-way Valve 430004032 4-way Valve Coil 43000400 Compressor 00120223 Overload Protector 00183001 Compressor Gasket 76710247 Nut with Washer 70310011 Valve Support 01713041 Right Side Plate...
- Page 54 Exploded View of of Outdoor Unit (2) Applicable to Downloaded from AC-Manual.com Manuals...
- Page 55 Artful Parts List of Outdoor Unit (2) Part Code Description GWHN18ACNK3A1A/O Handle 26235401 Axial Flow Fan 10333426 M otor LW48B 15013070 M otor Support 01705107 Condenser Assy 01103994 Condenser Clamp 01175202 Top Cover 01255001 Rear grill 01473005 Electrical Box 01405039 33010010 Capacitor CBB61 3.5uF/450V Capacitor Clamp...
-
Page 56: Exploded View Of Outdoor Unit
Exploded View of Outdoor Unit (3) Applicable to Downloaded from AC-Manual.com Manuals... -
Page 57: Rear Grill
Artful Parts List of Outdoor Unit (3) Part Code Description GWHN24ACNK3A1A/O 22265251 Front Grill 01433017P Front Plate Axial Flow Fan 10335257 Motor LW68B 15015057 Motor Support 01703027 Condenser Assy. 01113054 Temp Sensor Support 24215101 Temp Sensor 390002063 Top Cover 01255262 Rear Grill 01473028 Electric Box Top Plate... - Page 58 Failure and analysis 9 9 9 9 9 Note: When replacing the controller, make sure insert the wire jumper into the new controller, otherwise the unit display C5 Measure insulation resistance to ground to see The breaker trips at once when it if there is any leakage.
- Page 59 Artful Improper set of temperature Adjust set temperature If cooling (heating) load is Check the forecasted load of cooling (heating) proper Check and fill the leakage, then The refrigerant has leakage or is vacuumize it and supplement the re- insufficient frigerant as required Leakage between the high pres- Replace the compressor...
- Page 60 The indoor fan motor is burned or breaks Replace the fan motor or the defective part. or has the heat protector malfunction. The built-in heat protector of the motor Replace the fan motor breaks frequently because the motor is abnormal. The fan does not run when it is set Make the correction connection based on the...
- Page 61 Artful Controller malfunction (IC2003 broken, Change controller creepage of parallel capacitor of relay loop, relay is broken etc.) In cool,heat mode, the outdoor unit and Wire loose or wrong connection Correctly wire according to the drawing compressor will not Improper setting of temperature Adjust setting temperature Blockage or breakage of drainage hose Replace the drainage hose...
- Page 62 PG motor locked protection H6: Probable reasons: 1. Air vents were blocked which may cause the fan speed is too slow; 2. Fan blade locked; 3. Motor locked; 4. Fan motor capacitor damaged; 5. Motor damaged (ordors, winding, open circuit or shortcircuit are not normal, when testing the winding, pls distinguish whether the motor body cause temperature is too high so that bring on the thermal protector starts up) 6.
Need help?
Do you have a question about the GWHN09AANK3A1A and is the answer not in the manual?
Questions and answers