Soyer BMS-9 ACCU Operating Instructions Manual
Stud welding device stud welding gun
Hide thumbs
Also See for BMS-9 ACCU:
- Operating instructions manual (39 pages) ,
- Operating instructions manual (104 pages) ,
- Operating instructions manual (53 pages)

Subscribe to Our Youtube Channel
Related Manuals for Soyer BMS-9 ACCU


Summary of Contents for Soyer BMS-9 ACCU
- Page 1 Operating Instructions Stud welding device BMS-9 ACCU Stud welding gun PS-9K ACCU...
- Page 2 BMS-9 ACCU Stud welding gun PS-9K ACCU Operating Instructions Document no.: P00162, 04-2019, translation of the original instructions (English: P00262) All information in this document is the property of Heinz Soyer Bolzenschweißtechnik GmbH. Revision status Document created/amended Editor Date Original...
-
Page 3: Table Of Contents
7.2.1 Displaying the operating states 7.2.2 Indication of the battery charging status on the device display 7.3. Charging and inserting the battery 7.4. Technical data of the BMS-9 ACCU stud welding device 7.5. Permitted stud welding guns Operating Instructions Soyer Bolzenschweißtechnik... - Page 4 15. Warranty conditions ..........51 Operating Instructions Soyer Bolzenschweißtechnik...
-
Page 5: General Information
The devices are designed and constructed in accordance with the general accepted codes of practice. Please note that significant changes to the device will cause the declaration of conformity to become void. Furthermore, the manufacturer's warranty may be rendered invalid. Operating Instructions Soyer Bolzenschweißtechnik... - Page 6 General information Stud welding device Heinz Soyer Bolzenschweißtechnik GmbH Inninger Straße 14 82237 Wörthsee CE - Declaration of Conformity We herewith declare that the design of the machine described below as well as in the version marketed by us meets the safety and health requirements of the stated guidelines and standards.
-
Page 7: Manufacturer
Fax: 0049-8153-8030 Mail: info@soyer.de Web: www.soyer.de, www.soyer.com 1.4 Instruction, training Soyer offers optional and individual instruction in the operation of the devices. Moreover, Soyer offers training for customer-specific use of the devices. The tutorial is available at: https://youtu.be/QrYjCVNdRZk. Information on the scope and costs of instruction and training can be obtained from Soyer GmbH. -
Page 8: Important Safety Instructions
Do not touch or open, danger to unauthorised per- sons. Danger to persons with medical implants such as pacemakers. The information sign is not a warning sign. It indi- cates important and useful information on the sub- ject. Operating Instructions Soyer Bolzenschweißtechnik... -
Page 9: General Safety Instructions
• Starting the device with faulty protection devices is not permitted. Faulty protective devices must be repaired or replaced immediately. Unintentional operation by third parties must be prevented. Operating Instructions Soyer Bolzenschweißtechnik... - Page 10 • Work on electric or electronic components may only be performed by trained electrotechnical personnel of Soyer Bolzenschweißtechnik. • Before performing any work on the stud welding device, the mains switch of the device must be turned off and the mains plug must be disconnected.
- Page 11 WARNING Danger of fire from hot welding spatters Welding spatters or hot workpieces occurring during the welding process may cause danger of fire. • Do not store combustible or highly flammable materials in the welding area. Operating Instructions Soyer Bolzenschweißtechnik...
-
Page 12: Personal Protective Equipment
Welding spatters occur during the welding process. Wear appropriate, incombustible, heat-resistant safety footwear. Hearing protection Relatively loud welding noises may occur, depending on the welding device and the welding application. In that case, wear appropriate hearing protection. Operating Instructions Soyer Bolzenschweißtechnik... -
Page 13: Intended Use Of The Stud Welding Device
Important safety instructions 2.4 Intended use of the stud welding device With the SOYER® BMS-9 ACCU capacitor discharge stud welding device, pins and threaded studs from M3 to M8 as well as many different weld fasteners made of steel, stainless steel, aluminium and brass can be welded in accordance with DIN EN ISO 13918 (capacitor discharge). -
Page 14: Operating Company Prerequisites
This work must be performed in accordance with the applicable technical personnel rules for electrotechnical devices. All devices of Soyer Bolzenschweißtechnik GmbH must only be opened by personnel of Soyer or personnel authorised by Soyer. Operating Instructions Soyer Bolzenschweißtechnik... -
Page 15: Important Safety Instructions For Battery Operation
Do not charge batteries for an extended period if they are not used. • Do not charge batteries at temperatures below 0 °C. • The batteries may only be used in the SOYER® devices for which they are in- tended. Operating Instructions Soyer Bolzenschweißtechnik... - Page 16 • Never dispose of batteries in household waste. • Do not dispatch batteries. If a battery is defective, please contact co. Soyer. • Do not touch any leaking fluid with bare hands. Collect the fluid and dispose of it in the correct manner. Wear goggles and protective gloves.
- Page 17 In case of respiratory tract irritation, consult a physician. • Do not fight battery fire with water. Powder extinguishers and fire blankets only serve to extinguish surrounding fires but are not an effective method to fight the battery fire. Operating Instructions Soyer Bolzenschweißtechnik...
-
Page 18: Transport
Water-endangering as well as environmentally hazardous substances are to be disposed of in accordance with legal regulations. If applicable, materials must be separated according to regulations. For the disposal of the battery, please observe chapter “3. Important safety instructions for battery operation” on page 15. Operating Instructions Soyer Bolzenschweißtechnik... -
Page 19: Description Of The Bms-9 Accu Stud Welding
The welding power is output exclusively by the welding capacitors. With the SOYER® BMS-9 ACCU stud welding device, pins and threaded studs from M3 to M8 as well as many different weld fasteners made of steel or stainless steel can be welded in accordance with DIN EN ISO 13 918 (capacitor discharge). -
Page 20: Product Features
Monitoring of all functions via a clear function display field 7.1.2 Capacitor discharge stud welding The SOYER® BMS-9 ACCU stud welding device operates according to the principle of capacitor discharge with tip ignition. This system uses the sudden discharge of a capacitor bank to generate arc energy. -
Page 21: Overview Of The Controls
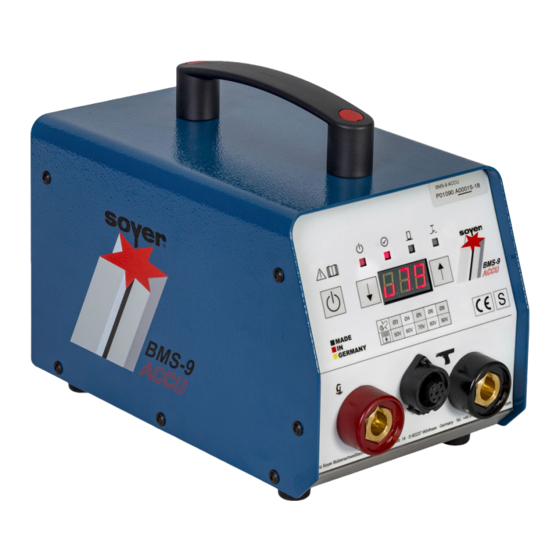
Ø5 Ø6 Ø8 GERMANY Heinz Soyer Bolzenschweißtechnik GmbH · Inninger Str. 14 · D-82237 Wörthsee · Germany · Tel.: +49 8153 885-0 · www.soyer.com Figure 2: Overview of the front panel Item Designation Power key button for turning the device on/off Selection table with reference values for easy matching of the required charging voltage to the stud diameter. -
Page 22: Displaying The Operating States
Description of the BMS-9 ACCU stud welding device 7.2.1 Displaying the operating states Figure 3: Operating states Item Designation Ready In normal operation, the LED lights up when the stud welding device is ready for operation in normal mode. When the LED flashes, the device is in standby mode to save battery power. -
Page 23: Indication Of The Battery Charging Status On The Device Display
Description of the BMS-9 ACCU stud welding device 7.2.2 Indication of the battery charging status on the device display Figure 4: Indication of the battery charging status (70% in the example) On the device display, the charging status of the battery is displayed. -
Page 24: Charging And Inserting The Battery
Description of the BMS-9 ACCU stud welding device 7.3 Charging and inserting the battery The BMS-9 ACCU is operated exclusively by a battery. Please ensure that the device battery is always charged and ready for operation. To charge the battery, you need the dedicated original charger (SOYER® article number F07051/FA). - Page 25 Description of the BMS-9 ACCU stud welding device Removing, charging and inserting the battery To remove the battery, pull the cover flap up to open it. Step 1: Step 2: Pull out the battery. Operating Instructions Soyer Bolzenschweißtechnik...
- Page 26 Description of the BMS-9 ACCU stud welding device Removing, charging and inserting the battery Step 3: Place the battery on the charging station. Ensure that the battery is positioned correctly on the charging contacts (a). Charge the battery until the 100% charging status indicator (a) of Step 4: the charger is illuminated.
- Page 27 Description of the BMS-9 ACCU stud welding device Removing, charging and inserting the battery Step 5: Push the charged battery into the device to the stop. Ensure correct orientation so that the device contacts can engage with the battery. If the labelling on the battery is properly oriented to be read (a), the position is correct.
-
Page 28: Technical Data Of The Bms-9 Accu Stud Welding Device
Description of the BMS-9 ACCU stud welding device 7.4 Technical data of the BMS-9 ACCU stud welding device Stud welding device: Designation BMS-9 ACCU stud welding device Welding procedure Capacitor discharge stud welding Standard gun PS-9K ACCU Welding area M3 - M8 or Ø 3 - 8 mm for steel, stainless steel,... - Page 29 Description of the BMS-9 ACCU stud welding device Battery: Designation Battery for BMS-9 ACCU stud welding device Type Lithium-ion Rated voltage 25.2 V Rated capacity 7800 mAh Minimum capacity 7500 mAh Energy 196.5 Wh Dimensions 89 x 77 x 142 mm (w x h x d) Weight approx.
-
Page 30: Permitted Stud Welding Guns
Description of the BMS-9 ACCU stud welding device 7.5 Permitted stud welding guns Permitted stud welding gun: PS-9K ACCU WARNING WARNING Hazards due to wrong gun Hazards for the operator may occur when a wrong welding gun is used. •... - Page 31 Description of the BMS-9 ACCU stud welding device CAUTION CAUTION Damage to the device due to incorrect cleaning Incorrect cleaning may cause damage to the device. • Make sure that no liquids get into the device. • Do not use aggressive detergents for cleaning the device.
-
Page 32: Description Of The Ps-9K Accu Stud Welding Gun
(contact gun). The stud is not lifted before welding. The PS-9K ACCU stud welding gun may only be operated with the stud welding devices specified in the technical data. Operating Instructions Soyer Bolzenschweißtechnik... -
Page 33: Technical Data Of The Ps-9K Accu Stud Welding Gun
Stud length Adjustable stud chuck up to a maximum of 35 mm Longer stud lengths with optional accessory possible Stud welding device The gun is approved for operation on the following SOYER® stud welding device: • BMS-9 ACCU Weight 2.3 kg Subject to technical changes Operating Instructions Soyer Bolzenschweißtechnik... -
Page 34: Cleaning Of The Stud Welding Gun
• Please switch off or disconnect the stud welding device before cleaning the stud welding gun. We recommend the use of SOYER® separating spray in order to prevent impurities from welding spatters and slag and to simplify the cleaning process. -
Page 35: Description Of The Stud Chuck
Adjusting the Adjusting an adjustable stud chuck stud chuck Step 1: Select the stud chuck according to the required stud diameter. Step 2: Insert the stud into the stud chuck. Operating Instructions Soyer Bolzenschweißtechnik... - Page 36 Switch off the stud welding device when the gun is connected to it. Step 2: Set the stud chuck to the required stud. Step 3: Remove the gun support tube. It is not mandatory to remove the support tube, however this makes use easier. Operating Instructions Soyer Bolzenschweißtechnik...
- Page 37 If there is still a stud chuck in the gun, remove it. Step 6: Slide the stud chuck up to the stop into the spring piston of the gun. Step 7: Hand-tighten the union nut. Step 8: Plug the support tube onto the gun. Operating Instructions Soyer Bolzenschweißtechnik...
- Page 38 1.5 - 3 mm from the support tube. If applicable, correct the setting of the stud chuck (see chapter “ Adjusting the stud chuck” on page 35). 1.5 - 3 mm The assembly is complete. Operating Instructions Soyer Bolzenschweißtechnik...
-
Page 39: Setup And Connection
Mobile use is not permissible. CAUTION CAUTION Danger from welding vapours Vapours that are dangerous to health may occur, depending on the material of the workpiece and/or the welding stud. • Ensure suitable suction of welding vapours, if necessary. Operating Instructions Soyer Bolzenschweißtechnik... -
Page 40: Connection Of The Stud Welding Device And The Stud Welding Guns
(ensure a conductive connection). Then attach the earth clamps to the work- Heinz Soyer Bolzenschweißtechnik GmbH · Inninger Str. 14 · D-82237 Wörthsee · Germany · Tel.: +49 8153 885-0 · www.soyer.com piece so that the welding gun is positioned in the centre of the connecting line of the two earth clamps. - Page 41 Ideal condition, stud is located in the centre of the two earth connections. Asymmetrical earth connection The arc is deflected to the side where there is a lower current density. Workpiece geometry Additional workpiece masses disturb the arc symmetry. Operating Instructions Soyer Bolzenschweißtechnik...
-
Page 42: Connecting The Stud Welding Gun
Plug the control cable into the control cable BMS- socket (b) and tighten the union nut. MADE Ø3 Ø4 Ø5 Ø6 Ø8 GERMANY Heinz Soyer Bolzenschweißtechnik GmbH · Inninger Str. 14 · D-82237 Wörthsee · Germany · Tel.: +49 8153 885-0 · www.soye Operating Instructions Soyer Bolzenschweißtechnik... -
Page 43: Settings
40. Step 2: Use the table at the stud welding device to determine the required charging MADE Ø3 Ø4 Ø5 Ø6 Ø8 voltage for the rele- GERMANY vant stud diameter. Operating Instructions Soyer Bolzenschweißtechnik... - Page 44 ↑↓ Use the arrow keys to increase or decrease the value, if required. The charging voltage is adjusted. The adjusted value is saved and remains unchanged even after switching the device off and back on again. Operating Instructions Soyer Bolzenschweißtechnik...
-
Page 45: Welding Operation
“8. Description of the PS-9K ACCU stud welding gun” on page 32 and chapter “9. Description of the stud chuck” on page 35). Only use SOYER® welding studs. Step 4: Check the charging voltage (see chapter chapter “11.1 Adjusting the charging voltage on the stud welding device”... -
Page 46: Notes On Checking The Quality Of The Weld
The welding process is finished. 12.2 Notes on checking the quality of the weld If the SOYER® stud welding equipment is handled correctly and the correct materials are selected, the strength of the welding joint (welding zone) is always higher than the strength of the stud or the base material. - Page 47 Poor welding joint, e.g. due to a blow effect or a welding gun that was shaken or applied at a slant. The stud flange is not welded completely and has visible imperfections. Undercuts are visible. Operating Instructions Soyer Bolzenschweißtechnik...
-
Page 48: Welding Defects And Their Causes
Welding operation 12.3 Welding defects and their causes In the following, the most common welding errors, possible causes and trouble- shooting are described. Please contact Heinz Soyer Bolzenschweißtechnik GmbH if a problem cannot be solved. Error Possible cause and troubleshooting Device does not weld, Stud welding device is not switched on or battery is empty. -
Page 49: Malfunctions With An Error Message
• All devices of Soyer GmbH must only be opened by personnel of Soyer or personnel authorised by Soyer. • For troubleshooting, the device must be disconnected from the main power supply and secured against accidental switch-on. The battery of battery- operated devices must be removed. -
Page 50: Maintenance And Repair
Phone: 0049-8153-885-0 Fax: 0049-8153-8030 Email: info@soyer.de Please have the serial number ready during service requests. Alternatively, you can also contact your respective Soyer agent. Contact informa- tion can be found on our website at www.soyer.de or www.soyer.com (English) Operating Instructions Soyer Bolzenschweißtechnik... -
Page 51: Warranty Conditions
When using welding studs from external manufacturers, we do not assume any warranty for proper function of the stud welder and the quality of the welding joint. Operating Instructions Soyer Bolzenschweißtechnik... - Page 52 Heinz Soyer Bolzenschweißtechnik GmbH Inninger Straße 14 82237 Wörthsee Tel.: 0049-8153-885-0 Mail: info@soyer.de...
Need help?
Do you have a question about the BMS-9 ACCU and is the answer not in the manual?
Questions and answers