
Subscribe to Our Youtube Channel
Related Manuals for Vertiv NetSure 5100


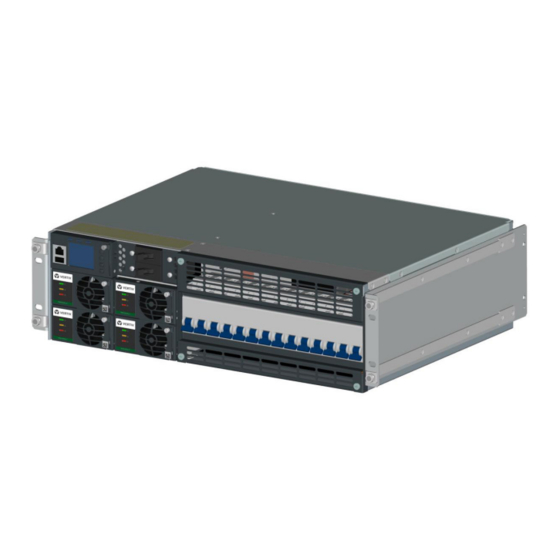
Summary of Contents for Vertiv NetSure 5100
- Page 1 NetSure™ 5100 SERIES -48 VDC Power System Installation Manual (IM582137100), Revision Q Specification Number: 582137100 Model Number: 5100...
- Page 2 Vertiv Group Corporation is strictly prohibited. Vertiv and the Vertiv logo are trademarks or registered trademarks of Vertiv Co. All other names and logos referred to are trade names, trademarks or registered trademarks of their respective owners.
-
Page 3: Table Of Contents
Switch Settings on the SM-DU (List 60 Hybrid Connection Cabinet) ..48 Procedure ..................................48 Making Electrical Connections ................52 Important Safety Instructions ........................ 52 Wiring Considerations ............................ 52 Relay Rack / Cabinet Frame Grounding Connection............53 Vertiv | NetSure 5100 Series Installation Manual (IM582137100) | Rev. Q... - Page 4 Load Connections to an Optional GMT Fuse Block............... 112 Load Connections to a List KG Distribution Panel ..............113 Connections to an Optional List 60 Hybrid Connection Cabinet .....114 Vertiv | NetSure 5100 Series Installation Manual (IM582137100) | Rev. Q...
- Page 5 Initially Starting the System ........................134 NCU Controller Initialization ........................134 Verifying and Setting the NCU Controller as Required for Your Application ................................136 Checking System Status .......................... 140 Final Steps ................................141 Vertiv | NetSure 5100 Series Installation Manual (IM582137100) | Rev. Q...
-
Page 6: Admonishments Used In This Document
(ISO) SAFETY! Informs the reader of general safety information, reminders, precautions, or policies not related to a particular source of hazard or to fire safety. (ISO, ANSI, OSHA) Vertiv | NetSure 5100 Series Installation Manual (IM582137100) | Rev. Q... -
Page 7: Important Safety Instructions
DO NOT apply DC input power to the system until all electrical connections have been completed and checked. Vertiv | NetSure 5100 Series Installation Manual (IM582137100) | Rev. Q... -
Page 8: Dc Output And Battery Voltages
• Dispose of used batteries according to the instructions provided with the batteries. Do not dispose of batteries in a fire. They may explode. • ALWAYS FOLLOW THE BATTERY MANUFACTURER’S RECOMMENDATIONS AND SAFETY INSTRUCTIONS. Vertiv | NetSure 5100 Series Installation Manual (IM582137100) | Rev. Q... -
Page 9: Personal Protective Equipment (Ppe)
Permits as required by the local authority, per NFPA 70E “Standard for Electrical Safety in the Workplace”. Hazardous Voltage DANGER! HAZARD OF ELECTRICAL SHOCK. More than one disconnect may be required to de-energize the system before servicing. Vertiv | NetSure 5100 Series Installation Manual (IM582137100) | Rev. Q... -
Page 10: Handling Equipment Containing Static Sensitive Components
NOTE! When performing any step in procedures that requires removal of existing hardware, retain all hardware for use in subsequent steps, unless otherwise directed. Vertiv | NetSure 5100 Series Installation Manual (IM582137100) | Rev. Q... -
Page 11: Static Warning
If necessary to repair equipment containing static sensitive components, wear an appropriately grounded wrist strap, work on a conductive surface, use a grounded soldering iron, and use grounded test equipment. Vertiv | NetSure 5100 Series Installation Manual (IM582137100) | Rev. Q... - Page 12 This page is intentionally blank. Vertiv | NetSure 5100 Series Installation Manual (IM582137100) | Rev. Q...
-
Page 13: Customer Documentation Package
• -48 VDC to +24 VDC Converter Instructions: UM1C48241500 • Engineering Drawings • Also provided on the USB drive is a controller configuration drawing and the controller configuration files loaded into the controller as shipped. Vertiv | NetSure 5100 Series Installation Manual (IM582137100) | Rev. Q... -
Page 14: Installation Acceptance Checklist
Relay Rack / Cabinet Frame Grounding Connection Made Assemblies Comprising the Power System Frame Grounding Connection Made Central Office Ground Connection Made Rectifier AC Input and AC Input Equipment Grounding Connections Made Vertiv | NetSure 5100 Series Installation Manual (IM582137100) | Rev. Q... - Page 15 Internal Batteries Installed and Connected in an Optional Battery Tray Installing the Modules Rectifier, Solar Converter, and Converter Modules Installed Initially Starting the System System Started, Configured, and Checked Vertiv | NetSure 5100 Series Installation Manual (IM582137100) | Rev. Q...
-
Page 16: Installing The System
• Front door and top / rear covers must be removed in cabinet applications above +40 °C (+104 °F). See SAG582137100 for temperature ratings. Securing the Relay Rack to the Floor All equipment ordered is factory mounted to the relay rack or shipping rails specified when ordered. Vertiv | NetSure 5100 Series Installation Manual (IM582137100) | Rev. Q... - Page 17 0.875 Dia. (8 Places) 3.750 17.500 15.031 12.531 9.871 Masked for Frame Ground Lug 0.281 Dia. Holes on 0.625 Centers (Top of Rack, 1 Place) 1.250 Part No. 543160 2.580 Vertiv | NetSure 5100 Series Installation Manual (IM582137100) | Rev. Q...
- Page 18 12.34 Masked for Frame Ground Lug 0.334 Dia. Holes on 0.625 Centers (Top of Rack, 2 Places) 1.50 Part No. 563922 2.83 Notes: 1. All dimensions are in inches. Vertiv | NetSure 5100 Series Installation Manual (IM582137100) | Rev. Q...
-
Page 19: Mounting The System In A Relay Rack Or An Equipment Rack
Figure 3 or Figure 4 for recommended torque. Mount the module mounting assembly(s) to the rack using hardware as shown in Figure 3 or Figure 4. Refer to Figure 3 or Figure 4 for recommended torque. Vertiv | NetSure 5100 Series Installation Manual (IM582137100) | Rev. Q... - Page 20 Figure 3: Mounting a System with a 1-Row Distribution Cabinet (List 20, 25, 27) Figure 4: Mounting a System with a 2-Row Distribution Cabinet (List 21, 26) Vertiv | NetSure 5100 Series Installation Manual (IM582137100) | Rev. Q...
- Page 21 Mount the distribution cabinet with module mounting assembly to the rack using hardware as shown in Figure 3. Refer to Figure 3 for recommended torque. Vertiv | NetSure 5100 Series Installation Manual (IM582137100) | Rev. Q...
- Page 22 P/N 564299 Orient with Notch Located at Top P/N 564298 Orient with Notch Located at Bottom 582137100 System Consisting of a 1-Row Distribution Cabinet and a 588705400 Rectifier Shelf Vertiv | NetSure 5100 Series Installation Manual (IM582137100) | Rev. Q...
- Page 23 Mount the 6RU power system with the mounting bracket kit installed to the 23” relay rack using hardware as shown in Figure 6. Refer to Figure 6 for recommended torque. Vertiv | NetSure 5100 Series Installation Manual (IM582137100) | Rev. Q...
- Page 24 Install 6RU Power System (with bracket kit) to 23” Wide Relay Rack MOUNTING HARDWARE 12-24 x 3/4" Thread Forming Hex Head Screw No. 10/12 Ground Washer Torque: 65 in-lbs. Front Vertiv | NetSure 5100 Series Installation Manual (IM582137100) | Rev. Q...
-
Page 25: Installing A List 93, 94 Battery Tray
DANGER! The relay rack must be securely anchored to the floor before a battery tray is installed. Battery Tray Installation Procedure To install a battery tray, perform the procedure detailed in Figure 7. Figure 7: Installing a List 93, 94 Battery Tray Vertiv | NetSure 5100 Series Installation Manual (IM582137100) | Rev. Q... - Page 26 Battery tray wiring is shown in “Installing and Connecting Batteries in an Optional List 93 or 94 Battery Tray (if furnished)” on page 127. Figure 8: Installing Optional Battery Disconnect Circuit Breaker onto a List 93, 94 Battery Tray Vertiv | NetSure 5100 Series Installation Manual (IM582137100) | Rev. Q...
-
Page 27: Installing Optional 4-Post Flush Mounting Kit For Data Cabinets, P/N
4-post flush mounting kit for data cabinets. Mounts to the inside surfaces of the data cabinet’s vertical rails. NOTE! Installation instructions for the Field Expansion Module Mounting Assembly Spacer Kit, P/N 560075 is provided in the User Instructions (UM582137100). Vertiv | NetSure 5100 Series Installation Manual (IM582137100) | Rev. Q... - Page 28 Figure 9: Installing Optional 4-Post Flush Mounting Kit for Data Cabinets, P/N 559801 (cont’d on next page) Vertiv | NetSure 5100 Series Installation Manual (IM582137100) | Rev. Q...
- Page 29 Figure 9: Installing Optional 4-Post Flush Mounting Kit for Data Cabinets, P/N 559801 (cont’d from previous page, cont’d on next page) Vertiv | NetSure 5100 Series Installation Manual (IM582137100) | Rev. Q...
- Page 30 Figure 9: Installing Optional 4-Post Flush Mounting Kit for Data Cabinets, P/N 559801 (cont’d from previous page) Vertiv | NetSure 5100 Series Installation Manual (IM582137100) | Rev. Q...
-
Page 31: Changing Orientation Of Load Return Busbars Located In A List
When performing any step in this procedure that requires removal of existing hardware, retain all hardware for use in subsequent steps. Procedure Perform the procedure detailed in Figure 10. Vertiv | NetSure 5100 Series Installation Manual (IM582137100) | Rev. Q... - Page 32 Figure 10: Changing Orientation of Load Return Busbars Located in a List 20, 21, 25, or 26 Distribution Cabinet Vertiv | NetSure 5100 Series Installation Manual (IM582137100) | Rev. Q...
-
Page 33: Installing Optional Lug Adapter Busbar Kits
List 20, 21, 25, or 26 distribution cabinet. Load Load Return Bus List 21, 26 Return List 20, 25, 27 Front Front 559803 559804 534449 559805 514714 545412 Vertiv | NetSure 5100 Series Installation Manual (IM582137100) | Rev. Q... -
Page 34: Installing Circuit Breakers, Fuses, And Optional Transient Voltage Surge Suppressor (Tvss) Device(S)
Bottom of Fuse Carrier Alarm Fuse Longer Side (Replacement to the Bottom Fuseholder Assembly (P/N 117201) includes P/N 248610301) body & carrier, alarm fuse, and alarm fuse safety cover. Vertiv | NetSure 5100 Series Installation Manual (IM582137100) | Rev. Q... - Page 35 Push distribution device in firmly until fully seated in the distribution panel. Record all circuit breaker sizes on the label provided on the shield. Figure 13: Installing a Bullet Nose Type Circuit Breaker Vertiv | NetSure 5100 Series Installation Manual (IM582137100) | Rev. Q...
- Page 36 Figure 14: Installing an Optional Transient Voltage Surge Suppressor (TVSS) Device Shorter Side to the Top Insert these terminals into corresponding sockets on distribution panel. Longer Side to the Bottom Vertiv | NetSure 5100 Series Installation Manual (IM582137100) | Rev. Q...
- Page 37 Record all fuse sizes installed in the GMT fuse block on the label provided on the GMT fuse block. Figure 15: Installing an Optional Bullet Nose Type 6-Position GMT Distribution Fuse Block (P/N 559737 or 549017) in a List 20, 21, 25, 26, 27 Distribution Cabinet Vertiv | NetSure 5100 Series Installation Manual (IM582137100) | Rev. Q...
- Page 38 GMT fuse. Install a dummy fuse in all unused fuse positions. See to Figure 16. Figure 16: Installing GMT Load Distribution Fuses in a List KG GMT Fuse Safety Cover Vertiv | NetSure 5100 Series Installation Manual (IM582137100) | Rev. Q...
- Page 39 DANGER! The bolts being installed in the following step may be at system potential. Use insulated tools. Install the circuit breaker into its mounting position and secure with the provided hardware. Torque to 60 in-lbs. Replace front cover panels. Vertiv | NetSure 5100 Series Installation Manual (IM582137100) | Rev. Q...
- Page 40 Figure 17: Installing/Removing a Circuit Breaker in an Optional List 60 Hybrid Connection Cabinet Vertiv | NetSure 5100 Series Installation Manual (IM582137100) | Rev. Q...
- Page 41 Snap circuit breaker into position (between standoffs). Snap circuit breaker into Front position (between standoffs). Snap on to Install on DIN Rail Release DIN Rail Clip to Remove from DIN Rail Vertiv | NetSure 5100 Series Installation Manual (IM582137100) | Rev. Q...
-
Page 42: Setting Jumper And Switch Options
Circuit Cards with Jumpers and Switches in a List 20, 21, 25, 26, 27 Distribution Cabinet Refer to Figure 19, Figure 20, and Figure 21. Figure 19: Circuit Cards with Jumpers and Switches in a List 20, 25 Distribution Cabinet Vertiv | NetSure 5100 Series Installation Manual (IM582137100) | Rev. Q... - Page 43 Figure 20: Circuit Cards with Jumpers and Switches in a List 21, 26 Distribution Cabinet Vertiv | NetSure 5100 Series Installation Manual (IM582137100) | Rev. Q...
- Page 44 Front (Controller USB-B Port Interface Board) (Factory connected to NCU Controller backplane.) 10M Ethernet Port (RJ-45) Optional IB4 Board LAN Connection USB-A Port (not used) System Interface Board Rear Vertiv | NetSure 5100 Series Installation Manual (IM582137100) | Rev. Q...
-
Page 45: Jumper Settings On The System Interface Circuit Card
Wire Strip Length: 0.32 inch. J2 Controller Recommended Torque: 2.3 in-lbs. CAN Port (RJ-45) RS485 Connection J3-1: RS485+ J3-2: RS485- System Interface Board P/N 555484 System Interface Board List 21, 26 Rear Vertiv | NetSure 5100 Series Installation Manual (IM582137100) | Rev. Q... -
Page 46: Switch Settings On The Ib2 (Controller Interface Board)
Ensure SW1 is set per Table 1. Refer to Figure 23 for location. Table 1: IB2 Interface Board Switch Settings DIP Switch SW1 Setting Figure 23: IB2 Interface Board Switch Location and Settings Vertiv | NetSure 5100 Series Installation Manual (IM582137100) | Rev. Q... -
Page 47: Board)
(Controller Extended Interface Board) ON OFF Shunt Voltage Inputs Inputs Relays Sh2 Sh3 V4 V6 RLY13 RLY10 RLY12 V3 V5 V7 V8 RLY9 RLY11 Sh1 Sh2 Sh3 Voltage Inputs Relays Terminal Blocks Vertiv | NetSure 5100 Series Installation Manual (IM582137100) | Rev. Q... -
Page 48: Switch Settings On The Sm-Du (List 60 Hybrid Connection Cabinet)
Shunt Current: 200 A Shunt Current: 300 A Shunt Current: 400 A Shunt Current: 1000 A Shunt Current: 1500 A Shunt Current: 2000 A Note 1: Setting for this system. Vertiv | NetSure 5100 Series Installation Manual (IM582137100) | Rev. Q... - Page 49 OFF OFF Shunt 4 is Disabled Shunt 4 is Used for Battery Shunt 4 is Used for Load Set via Software (Note 1) Note 1: Setting for this system. Vertiv | NetSure 5100 Series Installation Manual (IM582137100) | Rev. Q...
- Page 50 Shunt 5 is Used for Battery (Note 1) Shunt 5 is Used for Load Shunt 5 is Set via Software Operation Mode (Note 1) Calibration Mode Note 1: Setting for this system. Vertiv | NetSure 5100 Series Installation Manual (IM582137100) | Rev. Q...
- Page 51 8 7 6 5 4 3 2 1 8 7 6 5 4 3 2 1 8 7 6 5 4 3 2 1 Green Indicator (Operation) Yellow Indicator (Alarm) Red Indicator (Alarm) RS232 RS485 Power Vertiv | NetSure 5100 Series Installation Manual (IM582137100) | Rev. Q...
-
Page 52: Making Electrical Connections
YA29L-4TCG1 T & B: 256-30695-1880 514873 15514 Burndy: YA31L-4TCG1 The lugs should be crimped to the specifications given in the manufacturer’s instructions furnished with the crimp tool or lug. Vertiv | NetSure 5100 Series Installation Manual (IM582137100) | Rev. Q... -
Page 53: Relay Rack / Cabinet Frame Grounding Connection
79, Figure 83, Figure 84, , or Figure 88). For central office grounding requirements, refer to the current edition of the American National Standards Institute (ANSI) approved National Fire Protection Association's (NFPA) National Electrical Code (NEC), applicable local codes, and your specific site requirements. Vertiv | NetSure 5100 Series Installation Manual (IM582137100) | Rev. Q... - Page 54 Figure 26: Relay Rack Frame Grounding Connection Points Vertiv | NetSure 5100 Series Installation Manual (IM582137100) | Rev. Q...
-
Page 55: Rectifier Nominal 120 Vac / 208 Vac / 240 Vac Input And Ac Input Equipment Grounding Connections
Write R for rectifier, C for converter, and S for solar converter. See Figure 30. Vertiv | NetSure 5100 Series Installation Manual (IM582137100) | Rev. Q... - Page 56 Rectifier AC Input Connections to Rectifier AC Input / Solar Converter DC Input Panel (List 40) (Nominal 120 VAC / 208 VAC / 240 VAC, Single Phase, 50 Hz / 60 Hz) Vertiv | NetSure 5100 Series Installation Manual (IM582137100) | Rev. Q...
- Page 57 Rectifier AC Input Connections to Rectifier AC Input / Solar Converter DC Input Panel (List 45) (Nominal 120 VAC / 208 VAC / 240 VAC, Single Phase, 50 Hz / 60 Hz) Vertiv | NetSure 5100 Series Installation Manual (IM582137100) | Rev. Q...
- Page 58 #2, #3 L2 / N L2 / N L2 / N L2 / N L2 / N L2 / N L2 / N L2 / N L2 / N Vertiv | NetSure 5100 Series Installation Manual (IM582137100) | Rev. Q...
-
Page 59: To Individual Module Mounting Assembly(S) Equipped With Molex
Write R for rectifier, C for converter, and S for solar converter. See Figure 30. Vertiv | NetSure 5100 Series Installation Manual (IM582137100) | Rev. Q... -
Page 60: Connections
Write R for rectifier, C for converter, and S for solar converter. See Figure 30. Vertiv | NetSure 5100 Series Installation Manual (IM582137100) | Rev. Q... - Page 61 Figure 31: Solar Converter DC Input Connections to Rectifier AC Input / Solar Converter DC Input Panel (List 40) (140 VDC to 200 VDC / 200 VDC to 400 VDC) Vertiv | NetSure 5100 Series Installation Manual (IM582137100) | Rev. Q...
- Page 62 Figure 32: Solar Converter DC Input Connections to Rectifier AC Input / Solar Converter DC Input Panel (List 45) (140 VDC to 200 VDC / 200 VDC to 400 VDC) Vertiv | NetSure 5100 Series Installation Manual (IM582137100) | Rev. Q...
-
Page 63: To 23" Solar Connection Cabinet (List 61)
Write R for rectifier, C for converter, and S for solar converter. See Figure 30. Vertiv | NetSure 5100 Series Installation Manual (IM582137100) | Rev. Q... - Page 64 Figure 33: Solar Converter DC Input Connections to Solar Connection Cabinet (List 61) (140 VDC to 200 VDC / 200 VDC to 400 VDC) Vertiv | NetSure 5100 Series Installation Manual (IM582137100) | Rev. Q...
- Page 65 Figure 34: Interconnections between a List 61 Solar Connection Cabinet and a List 45 Rectifier AC Input / Solar Converter DC Input Panel Vertiv | NetSure 5100 Series Installation Manual (IM582137100) | Rev. Q...
-
Page 66: Connection Cabinet
-48 VDC system connections to the List 60 Hybrid Connection Cabinet is factory made with system busbars attached to the input terminals. Refer to Figure 35 for terminal location. Figure 35: System Connections to an Optional List 60 Hybrid Connection Cabinet Vertiv | NetSure 5100 Series Installation Manual (IM582137100) | Rev. Q... -
Page 67: External Alarm, Reference, Monitoring, And Control Connections
1 RS485A Interface Board) 2 RS485B CONNECTION 3 CGND Optional IB4 Board (Controller Interface Board) 10M Ethernet Port (RJ-45) LAN Connection USB-A Port (not used) System Interface Board Rear Vertiv | NetSure 5100 Series Installation Manual (IM582137100) | Rev. Q... - Page 68 RS485 MODBUS 1 RS485A 2 RS485B CONNECTION 3 CGND (Controller Interface Board) 10M Ethernet Port (RJ-45) Optional IB4 Board LAN Connection USB-A Port (not used) System Interface Board Rear Vertiv | NetSure 5100 Series Installation Manual (IM582137100) | Rev. Q...
- Page 69 3 CGND (Controller USB-B Port Interface Board) (Factory connected to NCU Controller backplane.) 10M Ethernet Port (RJ-45) Optional IB4 Board LAN Connection USB-A Port (not used) System Interface Board Rear Vertiv | NetSure 5100 Series Installation Manual (IM582137100) | Rev. Q...
-
Page 70: System Interface Circuit Card Connections (If Required)
Jumper J3 on System Interface Board Wire Size Capacity: 16 AWG to 30 AWG. Wire Strip Length: 0.32 inch. Recommended Torque: 2.3 in-lbs. RS485 Connection J3-1: RS485+ J3-2: RS485- Vertiv | NetSure 5100 Series Installation Manual (IM582137100) | Rev. Q... -
Page 71: Rs485 Modbus Connection (If Required)
(LOW). Refer to the NCU Instructions (UM1M830BNA) for programming information. Digital Input Ratings: Refer to the following. Maximum Voltage Rating: 60V DC. Active High: > 19V DC. Active Low: < 1V DC. Vertiv | NetSure 5100 Series Installation Manual (IM582137100) | Rev. Q... - Page 72 BTRM (Battery Thermal Runaway Management) should also be mounted on the negative post of a battery cell. A temperature probe programmed to monitor ambient temperature should be mounted in a convenient location, away from direct sources of heat or cold. Vertiv | NetSure 5100 Series Installation Manual (IM582137100) | Rev. Q...
- Page 73 Figure 40: IB2 (Controller Interface Board) Connections Vertiv | NetSure 5100 Series Installation Manual (IM582137100) | Rev. Q...
- Page 74 The output relay configuration may not be set according to the factory default setting. Refer to the configuration drawing (C-drawing) supplied with your system for your system’s specific configuration. Vertiv | NetSure 5100 Series Installation Manual (IM582137100) | Rev. Q...
- Page 75 The controller’s seven (7) remaining relays energize during an alarm condition, closing the contacts between the C and NO terminals, and opening the contacts between the C and NC terminals. Vertiv | NetSure 5100 Series Installation Manual (IM582137100) | Rev. Q...
- Page 76 Figure 41: External Interface Connections to External Battery Disconnect Unit(s) (cont’d on next page) Vertiv | NetSure 5100 Series Installation Manual (IM582137100) | Rev. Q...
- Page 77 Figure 41: External Interface Connections to External Battery Disconnect Unit(s) (cont’d from previous page and on next page) Vertiv | NetSure 5100 Series Installation Manual (IM582137100) | Rev. Q...
- Page 78 Figure 41: External Interface Connections to Disconnect Circuit Breakers on Battery Tray(s) (cont’d from previous page) Vertiv | NetSure 5100 Series Installation Manual (IM582137100) | Rev. Q...
-
Page 79: Required)
The alarm is issued when the difference between any block voltage and a reference voltage is greater than the value of the block voltage difference setting. Vertiv | NetSure 5100 Series Installation Manual (IM582137100) | Rev. Q... - Page 80 Temperature Probes Temperature probes can be connected to the EIB (NCU Extended Interface Board) mounted inside the distribution cabinet. Refer to “Temperature Probes” on page 72. Vertiv | NetSure 5100 Series Installation Manual (IM582137100) | Rev. Q...
-
Page 81: Optional Eib (Controller Extended Interface Board) Connections
(582137100 List 70) SH3- SH2+ SH2- SH1+ SH1- J5-J9 Wire Size Capacity: 16 AWG to 26 AWG. Wire Strip Length: 0.20 inch. Recommended Torque: 2.2 in-lbs. IC2 TEMP4 TEMP3 Vertiv | NetSure 5100 Series Installation Manual (IM582137100) | Rev. Q... - Page 82 Figure 43: Sample Battery Block or Battery Midpoint Monitoring Connections Vertiv | NetSure 5100 Series Installation Manual (IM582137100) | Rev. Q...
- Page 83 The output relay configuration may not be set according to the factory default setting. Refer to the configuration drawing (C-drawing) supplied with your system for your system’s specific configuration. Vertiv | NetSure 5100 Series Installation Manual (IM582137100) | Rev. Q...
- Page 84 NOTE! The relays energize during an alarm condition, closing the contacts between the C and NO terminals, and opening the contacts between the C and NC terminals. Vertiv | NetSure 5100 Series Installation Manual (IM582137100) | Rev. Q...
-
Page 85: Circuit Breaker Alarm And Shunt Monitoring Connections To An Optional List 60 Hybrid Connection Cabinet
Breaker #4 Alarm Jumper: Red Breaker #5 Alarm Jumper: Red Connects to Alarm Connections Wire Size Capacity: on Back of Circuit Breakers 24 AWG to 14 AWG. Recommended Torque: 9 in-lbs. Vertiv | NetSure 5100 Series Installation Manual (IM582137100) | Rev. Q... - Page 86 + - + - + - + - + - Shunt 5 Shunt 4 Shunt 3 Shunt 2 Shunt 1 Connects to Shunt Connections on Back of Circuit Breakers Shunt+: Red Wire Shunt-: Black Wire Vertiv | NetSure 5100 Series Installation Manual (IM582137100) | Rev. Q...
-
Page 87: Optional Customer Fuel Sensor Input
A customer fuel sensor input connector is located in the wire harness in front of the bottom row distribution panel. See Figure 46 for location and connection details. Figure 46: Customer Fuel Sensor Input Vertiv | NetSure 5100 Series Installation Manual (IM582137100) | Rev. Q... -
Page 88: Connecting A Device Or System To The Ncu Can Bus (If Required)
Refer to Figure 47 and for location and Table 12 for pin outs. Use shielded Ethernet cable (grounded at both ends). Note that the NCU RJ-45 jack is connected to chassis ground. Refer to the NCU Instructions (UM1M830BNA) for operational details. Vertiv | NetSure 5100 Series Installation Manual (IM582137100) | Rev. Q... - Page 89 Controller’s front panel can ONLY be used to connect a computer directly to the NCU. The Ethernet port located on the IB4 board can be used to connect the NCU to your Local Area Network (LAN). Vertiv | NetSure 5100 Series Installation Manual (IM582137100) | Rev. Q...
- Page 90 Primary Protectors is not sufficient protection in order to connect these interfaces metallically to OSP wiring. The intra-building port (RJ-45) of the equipment or subassembly must use shielded intra-building cabling/wiring that is grounded at both ends. Vertiv | NetSure 5100 Series Installation Manual (IM582137100) | Rev. Q...
-
Page 91: Control Bus Connections Between Controller And Module Mounting
These connections are factory made for module mounting assemblies factory installed. For field expansion, the new module mounting assembly must be tied into the interconnect scheme as shown in Power System User Instructions UM582137100. Vertiv | NetSure 5100 Series Installation Manual (IM582137100) | Rev. Q... - Page 92 Figure 49: Control Bus Connections between Controller and Module Mounting Assemblies Vertiv | NetSure 5100 Series Installation Manual (IM582137100) | Rev. Q...
-
Page 93: Optional Transient Voltage Surge Suppressor (Tvss) Device
Connect cable P/N 565296 (provided with P/N 565281 TVSS device) from the TVSS position on the distribution panel to the return bar. Refer to Figure 50, Figure 51, and Figure 52. Vertiv | NetSure 5100 Series Installation Manual (IM582137100) | Rev. Q... - Page 94 Distribution Device Installed installed, either a Distribution Device (load lead connection) TVSS (+Ground) Connection or a TVSS Device (ground when TVSS Device Installed connection). Vertiv | NetSure 5100 Series Installation Manual (IM582137100) | Rev. Q...
- Page 95 1/4-20 Studs on 5/8” Centers (Customer must supply or order hardware) Maximum Lug Width: 0.625 inches. Busbar Hardware: 1/4-20 Hex Nut 1/4" Lock Washer 1/4" Flat Washer Recommended Torque: 75 in-lbs. Vertiv | NetSure 5100 Series Installation Manual (IM582137100) | Rev. Q...
-
Page 96: Ground Connection
Distribution Panel to Return Bar) DANGER Ensure leads are connected to proper polarity for the device installed, either a Distribution Device (load lead connection) or a TVSS Device (ground connection). Vertiv | NetSure 5100 Series Installation Manual (IM582137100) | Rev. Q... -
Page 97: Load Connections
Figure 54). Refer to Figure 55 through Figure 59 for illustrations of the available distribution panels. Torque connections as shown in the illustrations. Figure 53: Load Side Connections in a List 20, 25 Distribution Cabinet Vertiv | NetSure 5100 Series Installation Manual (IM582137100) | Rev. Q... - Page 98 Figure 54: Load Return Side Connections in a List 20, 25 Distribution Cabinet Vertiv | NetSure 5100 Series Installation Manual (IM582137100) | Rev. Q...
- Page 99 List AN Load Connections in a List 20 Distribution Cabinet (19) -48 VDC Load Bullet/TPS/TLS Circuit Breaker/Fuse Positions Figure 56: List AA Load Connections in a List 25 Distribution Cabinet (24) -48 VDC Load Bullet/TPS/TLS Circuit Breaker/Fuse Positions Vertiv | NetSure 5100 Series Installation Manual (IM582137100) | Rev. Q...
- Page 100 Figure 58: List BA Load Connections in a List 25 Distribution Cabinet (18) -48 VDC Load Bullet/TPS/TLS Circuit Breaker/Fuse Positions and (6) -48 VDC Battery Disconnect Bullet/TPS/TLS Circuit Breaker/Fuse Positions Vertiv | NetSure 5100 Series Installation Manual (IM582137100) | Rev. Q...
- Page 101 Figure 59: List BC Load Connections in a List 25 Distribution Cabinet (16) -48 VDC Load Bullet/TPS/TLS Circuit Breaker/Fuse Positions and (8) -48 VDC Battery Disconnect Bullet/TPS/TLS Circuit Breaker/Fuse Positions Vertiv | NetSure 5100 Series Installation Manual (IM582137100) | Rev. Q...
-
Page 102: Load Connections To A List 21, 26 Distribution Cabinet
Figure 61). Refer to Figure 62 through Figure 71 for illustrations of the available distribution panels. Torque connections as shown in the illustrations. Figure 60: Load Side Connections in a List 21, 26 Distribution Cabinet Vertiv | NetSure 5100 Series Installation Manual (IM582137100) | Rev. Q... - Page 103 3-pole - 559805 3-pole - 563193 Recommended Torque: 75 in-lbs. You could also use the “Special Application Crimp Lug/Strap Combination” listed in SAG582137100 and connect to either return bar. Vertiv | NetSure 5100 Series Installation Manual (IM582137100) | Rev. Q...
- Page 104 List AO Load Connections in a List 21 Distribution Cabinet (21) -48 VDC Load Bullet/TPS/TLS Circuit Breaker/Fuse Positions Figure 63: List AB Load Connections in a List 26 Distribution Cabinet (26) -48 VDC Load Bullet/TPS/TLS Circuit Breaker/Fuse Positions Vertiv | NetSure 5100 Series Installation Manual (IM582137100) | Rev. Q...
- Page 105 Figure 65: List BB Load Connections in a List 26 Distribution Cabinet (6) -48 VDC Load Bullet/TPS/TLS Circuit Breaker/Fuse Positions and (20) -48 VDC Battery Disconnect Bullet/TPS/TLS Circuit Breaker/Fuse Positions Vertiv | NetSure 5100 Series Installation Manual (IM582137100) | Rev. Q...
- Page 106 Figure 67: List DA Load Connections in a List 26 Distribution Cabinet (21) -48 VDC Load Bullet/TPS/TLS Circuit Breaker/Fuse Positions and (4) +24 VDC Load Bullet/TPS/TLS Circuit Breaker/Fuse Positions Vertiv | NetSure 5100 Series Installation Manual (IM582137100) | Rev. Q...
- Page 107 Figure 69: List DC Load Connections in a List 26 Distribution Cabinet (13) -48 VDC Load Bullet/TPS/TLS Circuit Breaker/Fuse Positions and (12) +24 VDC Load Bullet/TPS/TLS Circuit Breaker/Fuse Positions Vertiv | NetSure 5100 Series Installation Manual (IM582137100) | Rev. Q...
- Page 108 Figure 71: List DE Load Connections in a List 26 Distribution Cabinet (5) -48 VDC Load Bullet/TPS/TLS Circuit Breaker/Fuse Positions and (20) +24 VDC Load Bullet/TPS/TLS Circuit Breaker/Fuse Positions Vertiv | NetSure 5100 Series Installation Manual (IM582137100) | Rev. Q...
-
Page 109: Load Connections To A List 27 Distribution Cabinet
-48 VDC distribution positions. When using converter modules, you MUST change the last four (4) positions to +24 VDC distribution positions in the field. Refer to UM582137100 for a procedure. Vertiv | NetSure 5100 Series Installation Manual (IM582137100) | Rev. Q... - Page 110 1/4-20 Studs on 5/8” Centers (Customer must supply or order hardware) Maximum Lug Width: 0.625 inches. Busbar Hardware: 1/4-20 Hex Nut 1/4" Lock Washer 1/4" Flat Washer Recommended Torque: 75 in-lbs. Vertiv | NetSure 5100 Series Installation Manual (IM582137100) | Rev. Q...
- Page 111 -48 VDC distribution positions. When using converter modules, you MUST change the last four (4) positions to +24 VDC distribution positions in the field. Refer to UM582137100 for a procedure. Vertiv | NetSure 5100 Series Installation Manual (IM582137100) | Rev. Q...
-
Page 112: Load Connections To An Optional Gmt Fuse Block
Refer to Figure 75 if an optional “Bullet Nose Type 6-Position GMT Distribution Fuse Block” is furnished. Torque connections as shown in the illustration. Figure 75: Load Connections to an Optional GMT Fuse Block Vertiv | NetSure 5100 Series Installation Manual (IM582137100) | Rev. Q... -
Page 113: Load Connections To A List Kg Distribution Panel
Connections are made to screw compression terminal blocks. Wire size range is 26 AWG to 14 AWG. Recommended Torque: 5 in-lbs WARNING! Observe proper polarity when making load connections. Vertiv | NetSure 5100 Series Installation Manual (IM582137100) | Rev. Q... -
Page 114: Connections To An Optional List 60 Hybrid Connection Cabinet
WARNING! Observe proper polarity when making output connections. Refer to Figure 77 for terminal location and torque information. Figure 77: Connections to an Optional List 60 Hybrid Connection Cabinet Vertiv | NetSure 5100 Series Installation Manual (IM582137100) | Rev. Q... -
Page 115: Input Battery Connections
Refer to Figure 79 for connection details. Refer to Figure 80 through Figure 82 for illustrations of the available distribution panels. Torque connections as shown in the illustrations. Vertiv | NetSure 5100 Series Installation Manual (IM582137100) | Rev. Q... - Page 116 3/8-16” Studs on 1” Centers (Customer must supply or order hardware) Maximum Lug Width: 1.062 inches. Hardware: Battery Return Bus 3/8" Hex Nut 3/8" Lock Washer 3/8" Flat Washer Torque to 300 in-lbs. Vertiv | NetSure 5100 Series Installation Manual (IM582137100) | Rev. Q...
- Page 117 1/4-20 Studs on 5/8” Centers (Customer must supply or order hardware) Maximum Lug Width: 0.625 inches. Busbar Hardware: 1/4-20 Hex Nut 1/4" Lock Washer 1/4" Flat Washer Front Recommended Torque: 75 in-lbs. Vertiv | NetSure 5100 Series Installation Manual (IM582137100) | Rev. Q...
- Page 118 Figure 81: List BA Battery Connections in a List 25 Distribution Cabinet (18) -48 VDC Load Bullet/TPS/TLS Circuit Breaker/Fuse Positions and (6) -48 VDC Battery Disconnect Bullet/TPS/TLS Circuit Breaker/Fuse Positions Vertiv | NetSure 5100 Series Installation Manual (IM582137100) | Rev. Q...
- Page 119 Figure 82: List BC Battery Connections in a List 25 Distribution Cabinet (16) -48 VDC Load Bullet/TPS/TLS Circuit Breaker/Fuse Positions and (8) -48 VDC Battery Disconnect Bullet/TPS/TLS Circuit Breaker/Fuse Positions Vertiv | NetSure 5100 Series Installation Manual (IM582137100) | Rev. Q...
-
Page 120: Input Battery Connections To List 21, 26 Distribution Cabinet
Refer to Figure 84 for connection details. Refer to Figure 85 through Figure 87 for illustrations of the available distribution panels. Torque connections as shown in the illustrations. Vertiv | NetSure 5100 Series Installation Manual (IM582137100) | Rev. Q... - Page 121 3/8-16” Studs on 1” Centers (Customer must supply or order hardware) Maximum Lug Width: 1.062 inches. Hardware: 3/8" Hex Nut 3/8" Lock Washer 3/8" Flat Washer Torque to 300 in-lbs. Battery Return Bus Vertiv | NetSure 5100 Series Installation Manual (IM582137100) | Rev. Q...
- Page 122 1/4-20 Studs on 5/8” Centers (Customer must supply or order hardware) Maximum Lug Width: 0.625 inches. Busbar Hardware: 1/4-20 Hex Nut 1/4" Lock Washer 1/4" Flat Washer Recommended Torque: 75 in-lbs. Vertiv | NetSure 5100 Series Installation Manual (IM582137100) | Rev. Q...
- Page 123 Figure 86: List BB Battery Connections in a List 26 Distribution Cabinet (6) -48 VDC Load Bullet/TPS/TLS Circuit Breaker/Fuse Positions and (20) -48 VDC Battery Disconnect Bullet/TPS/TLS Circuit Breaker/Fuse Positions Vertiv | NetSure 5100 Series Installation Manual (IM582137100) | Rev. Q...
- Page 124 Figure 87: List BD Battery Connections in a List 26 Distribution Cabinet (16) -48 VDC Load Bullet/TPS/TLS Circuit Breaker/Fuse Positions and (10) -48 VDC Battery Disconnect Bullet/TPS/TLS Circuit Breaker/Fuse Positions Vertiv | NetSure 5100 Series Installation Manual (IM582137100) | Rev. Q...
-
Page 125: Input Battery Connections To List 27 Distribution Cabinet
List 27 Distribution Cabinet Remote Distribution Unit (DU) input leads are connected to the remote DU input busbar and battery return busbar. Refer to Figure 88 for connection details and recommended torque. Vertiv | NetSure 5100 Series Installation Manual (IM582137100) | Rev. Q... - Page 126 1/4-20 Hex Nut 3/8" Flat Washer 1/4" Lock Washer 1/4" Lock Washer Torque to 300 in-lbs. 1/4" Flat Washer 1/4" Flat Washer Recommended Torque: 75 in-lbs. Recommended Torque: 75 in-lbs. Vertiv | NetSure 5100 Series Installation Manual (IM582137100) | Rev. Q...
-
Page 127: Installing And Connecting Batteries In An Optional List 93 Or
Remove sleeving from and connect one cable at a time. Do not allow a cable end to contact the battery tray or equipment rack. Vertiv | NetSure 5100 Series Installation Manual (IM582137100) | Rev. Q... - Page 128 If Battery Trays Are Equipped With a Circuit Breaker: To connect the batteries to the power system, turn ON the battery disconnect circuit breaker located on all battery trays. Vertiv | NetSure 5100 Series Installation Manual (IM582137100) | Rev. Q...
- Page 129 Spacer (3 Places) (1 Place) 1/4-20 x 5/8" Hex Head Screw (4 Places) 1/4-20 Lock Washer (3 Places) 1/4-20 Flat Washer (3 Places) DETAIL A Alternate Orientation of Retention Bracket Vertiv | NetSure 5100 Series Installation Manual (IM582137100) | Rev. Q...
-
Page 130: Installing Rectifier, Solar Converter, And Converter Modules
Repeat the above steps for each module being installed in the system. After the modules are physically installed in the mounting module mounting assembly(s), they are ready for operation immediately after power is supplied to them. Vertiv | NetSure 5100 Series Installation Manual (IM582137100) | Rev. Q... - Page 131 Figure 90: Installing Rectifier and Solar Converter Modules (List 20, 25) Vertiv | NetSure 5100 Series Installation Manual (IM582137100) | Rev. Q...
- Page 132 List 21, 24, 25: Rectifier, Solar Converter Mounting Positions (See PD588705300) Captive Screw Handle Rectifier or Converter Module Model Number Label (R48-2000e3 Rectifier) (S48-2000e3 Solar Converter) (C48/24-1500 Converter) Latch Vertiv | NetSure 5100 Series Installation Manual (IM582137100) | Rev. Q...
- Page 133 List 21, 24, 25: Rectifier, Solar Converter Mounting Positions (See PD588705300) Captive Screw Handle Rectifier or Converter Module Model Number Label (R48-2000e3 Rectifier) (S48-2000e3 Solar Converter) (C48/24-1500 Converter) Latch Vertiv | NetSure 5100 Series Installation Manual (IM582137100) | Rev. Q...
-
Page 134: Initially Starting, Configuring, And Checking System Operation
Place each distribution circuit breaker (if furnished) to the ON position. NCU Controller Initialization Refer to the NCU Instructions (UM1M830BNA) for detailed instructions. Refer to Figure 93 for locations of the NCU local indicators and navigation keys. Vertiv | NetSure 5100 Series Installation Manual (IM582137100) | Rev. Q... - Page 135 Battery information. Press the U P and DOWN keys to highlight the desired Menu graphic in the Main Menu. Press the EN T key to enter the selected menu. Vertiv | NetSure 5100 Series Installation Manual (IM582137100) | Rev. Q...
-
Page 136: Application
With the Main Menu displayed, press ESC. A screen displays the NCU name, serial number, IP number, software version, and hardware version. DOWN Press the key. A screen displays the configuration version number, NCU file system, and MAC address. Vertiv | NetSure 5100 Series Installation Manual (IM582137100) | Rev. Q... - Page 137 (lowest serial number is Rect 1, next lowest is Rect 2, etc.). If you prefer the NCU to identify the rectifiers by position in the system, perform the following procedure. Vertiv | NetSure 5100 Series Installation Manual (IM582137100) | Rev. Q...
- Page 138 Under Voltage Alarm 1 Main Menu / Settings Icon / Other Settings / Under Voltage 1. Under Voltage Alarm 2 Main Menu / Settings Icon / Other Settings / Under Voltage 2. Vertiv | NetSure 5100 Series Installation Manual (IM582137100) | Rev. Q...
- Page 139 • SOLAR: If you have only solar converters in the system, set Solar Mode to “SOLAR”. Also set the “Float Charge Voltage (Solar)” parameter to the desired float setting. Vertiv | NetSure 5100 Series Installation Manual (IM582137100) | Rev. Q...
-
Page 140: Checking System Status
Power (Green) Rectifier Protection (Yellow) Modules Alarm (Red) Power (Green) Solar Converter Protection (Yellow) Modules Alarm (Red) Power (Green) -48 VDC to +24 VDC Protection (Yellow) Converter Modules Alarm (Red) Vertiv | NetSure 5100 Series Installation Manual (IM582137100) | Rev. Q... -
Page 141: Final Steps
Verify all rectifier, solar converter, and converter modules and the controller are fully seated, latched, and the latch handle screws secured. Verify there are no external alarms and the local indicators are as shown in Table 14. Vertiv | NetSure 5100 Series Installation Manual (IM582137100) | Rev. Q... - Page 142 VertivCo.com | Vertiv Headquarters, 1050 Dearborn Drive, Columbus, OH, 43085, USA IM582137100 (RQ 09/18)
Need help?
Do you have a question about the NetSure 5100 and is the answer not in the manual?
Questions and answers