Table of Contents
Advertisement
FQG60T
Gas Fryer
Installation, Operation and Maintenance
Manual
This manual is updated as new information and models are released. Visit our website for the latest manual.
FOR YOUR SAFETY
Do Not Store or use gasoline
or other flammable vapors
and liquids in the vicinity of
this or any other appliance.
*8197703*
Part Number: FRY_IOM_8197703 05/2019
Original Instructions
FilterQuick
READ THE INSTRUCTIONS BEFORE USING THE FRYER.
Keep these instructions for future reference.
Your Growth Is Our Goal
™
easyTouch
CAUTION
®
Advertisement
Table of Contents
Troubleshooting

Related Manuals for Frymaster easyTouch FilterQuick FQG60T


Summary of Contents for Frymaster easyTouch FilterQuick FQG60T
- Page 1 Your Growth Is Our Goal FQG60T FilterQuick ™ easyTouch ® Gas Fryer Installation, Operation and Maintenance Manual This manual is updated as new information and models are released. Visit our website for the latest manual. FOR YOUR SAFETY Do Not Store or use gasoline or other flammable vapors CAUTION and liquids in the vicinity of...
- Page 2 EQUIPMENT OTHER THAN AN OEM UNMODIFIED NEW OR RECYCLED PART PURCHASED DIRECTLY FROM FRYMASTER OR ANY OF ITS AUTHORIZED SERVICERS, AND/OR THE PART BEING USED IS MODIFIED FROM ITS ORIGINAL CONFIGURATION, THIS WARRANTY WILL BE VOID. FURTHER, FRYMASTER AND ITS AFFILIATES WILL...
- Page 3 CAUTION No warranty is provided for any Frymaster fryer used in a mobile or marine installation or concession. Warranty protection is only offered for fryers installed in accordance with the procedures described in this manual.
- Page 4 Prior to movement, testing, maintenance and any repair on your Frymaster fryer; disconnect ALL electrical power cords from the electrical power supply. WARNING If the electrical power supply cord is damaged, it must be replaced by a Frymaster Factory Authorized Servicer or a similarly qualified person in order to avoid a hazard. WARNING Use caution and wear appropriate safety equipment to avoid contact with hot oil or surfaces that may cause severe burns or injury.
-
Page 5: Table Of Contents
FQG60T FilterQuick ™ easyTouch Series Gas Fryers ® Installation and Operation Manual TABLE OF CONTENTS CHAPTER 1: Introduction Applicability and Validity ....................1-1 Safety Information ......................1-1 Controller Information ....................... 1-2 European Community (CE) Specific Information ............. 1-2 Equipment Description ...................... 1-3 1.5.1 Principles of Operation .................. - Page 6 3.4.2 Routine Oil Changes ....................3-6 3.4.2.1 Routine Oil Changes (JIB only) ..............3-6 3.4.2.2 Routine Oil Changes (Saddle Oil Reservoir only) ......... 3-7 3.4.3 Bulk Oil Systems ........................ 3-7 CHAPTER 4: Filtration Instructions Introduction ......................... 4-1 Preparation for Use with Filter Paper or Filter Pad ............4-1 CHAPTER 5: Preventive Maintenance Cleaning the Fryer ......................
- Page 7 6.2.5 Auto Top Off Problems ................... 6-6 6.2.6 Bulk Oil System Problems ..................6-7 6.2.7 Error Log Codes ....................... 6-7 6.2.8 OQS (Oil Quality Sensor) Problems ............... 6-9 APPENDIX A: Bulk Oil Instructions...
-
Page 8: Applicability And Validity
™ ® FQG60T FILTERQUICK easyTouch SERIES GAS FRYER CHAPTER 1: GENERAL INFORMATION ® NOTE: The Frymaster FQG60T FilterQuick ™ easyTouch fryer requires a start-up, demonstration and training before normal restaurant operations can begin. Applicability and Validity ™ ® The FQG60T FilterQuick... -
Page 9: Controller Information
Controller Information FCC COMPLIANCE This equipment has been tested and found to comply with the limits for a Class A digital de- vice, pursuant to Part 15 of the FCC rules. While this device is a verified Class A device, it has been shown to meet the Class B limits. -
Page 10: Equipment Description
Installation, Operating, and Service Personnel Operating information for Frymaster equipment has been prepared for use by qualified and/or authorized personnel only, as defined in Section 1.7. -
Page 11: Shipping Damage Claim Procedure
Frymaster, L.L.C. to perform service on the equipment. All authorized service personnel are required to be equipped with a complete set of service and parts manu- als, and to stock a minimum amount of parts for Frymaster equipment. A list of Frymaster Factory... -
Page 12: Reading Model Numbers
1.11 Parts Ordering and Service Information In order to assist you quickly, the Frymaster Factory Authorized Servicer (FAS) or Service Department representative requires certain information about your equipment. Most of this information is printed on a data plate affixed to the inside of the fryer door. Part numbers are found in the Parts Manual. -
Page 13: Chapter 2: Installation Instructions
Failure to use qualified, licensed, and/or authorized installation or service personnel (as defined in Section 1.7 of this manual) to install, convert to another gas type or otherwise service this equipment will void the Frymaster warranty and may result in damage to the equipment or inju- ry to personnel. -
Page 14: National Code Requirements
For U.S. installation, NFPA standard No. 96 states, “A minimum distance of 18 in. (450 mm) should be maintained between the flue outlet and the lower edge of the grease filter.” Frymaster recommends that the minimum distance be 24 in. (600 mm) from the flue outlet to the bottom edge of the filter when the appliance consumes more than 120,000 BTU per hour. -
Page 15: Installation Standard
The appliance must be isolated from the gas supply piping system by closing its individual manual shutoff valve during any pressure testing of the gas supply piping system at test pressures equal to or less than ½ psi (3.5 kPa). 2.1.2.1 Installation Standards 1. -
Page 16: Australian Requirements
The equipotential grounding lug allows all the equipment in the same location to be electrically connected to ensure there is no electrical potential difference between the units, which could be hazardous. DANGER This appliance is equipped with a special (grounding) plug for your protection against electrical shock and must be plugged directly into a properly grounded receptacle. - Page 17 2. Level fryers by adjusting the casters so that the fryer is level and at the proper height in the exhaust hood. Frymaster recommends that the minimum distance from the flue outlet to the bottom edge of the hood be 24 in. (600 mm) when the appliance consumes more than 120,000 BTU per hour.
-
Page 18: Connection To Gas Line
Connection to Gas Line DANGER Before connecting new pipe to this appliance, the pipe must be blown out thoroughly to remove all foreign material. Foreign material in the burner and gas controls will cause improper and dangerous operation. DANGER The appliance and its individual shutoff valve must be disconnected from the gas supply piping system during any pressure testing of the system at test pressures in excess of ½... -
Page 19: Gas Specifications
2.4.1 Gas Specifications NON-CE (Altitudes of 2000 feet or less) EQUIPMENT PRESSURE INPUT ORIFICE ORIFICE MODEL (BTU) TYPE (MM) PART NO. MBAR INCH W.C. 2.26(#43) 810-2938 FQG60T 119000 1.40(#54) 810-2939 27.5 NOTE: Outlet gas pressure must be adjusted strictly within the above requirements 5 to 10 minutes after the appliance is operat- ing. - Page 20 CE Standard Required airflow for the combustion air supply is 2m /h per kW. 1. Connect the quick-disconnect hose to the fryer quick-disconnect under the fryer and to the building gas line. NOTE: Some fryers are configured for a rigid connection to the gas supply line. These units are connected to the gas supply line at the rear of the unit.
-
Page 21: Equipment Installed At High Altitudes
AUSTRALIA ONLY Burner Manifold Gas Pressures Natural Gas Propane Gas Orifice MJ/h Orifice MJ/h 2.92mm 73.8 Full Vat 1.0 kPa 1.95mm 73.8 2.05 kPa 36.9 each 36.9 each 2.84mm Split Vat 1.0 kPa 1.95mm 2.05 kPa 73.8 total 73.8 total WARNING Use a leak detection fluid to find potentially dangerous gas leaks when making new connections. -
Page 22: Positioning The Fryer
Change the orifices. b. Adjust the manifold pressure. 3. Remove the old rating plate and return to Frymaster. Affix the new rating plate included with the conversion kit in place of the old rating plate stating the gas has been converted. -
Page 23: Installing The Oil Saddle Reservoir
DANGER Adequate means must be provided to limit the movement of this appliance without depending on the connector and the quick-disconnect device or its associated piping to limit the appliance movement. 2. Close fryer drain-valve(s). 3. Clean and fill frypot(s) to the bottom oil level line with cooking oil. (See Equipment Setup and Shut- down Procedures in Chapter 3.) Installing the Optional Oil Saddle Reservoir Carefully cut the shipping strap around the oil saddle hose on the rear of the... -
Page 24: Chapter 3: Operating Instructions
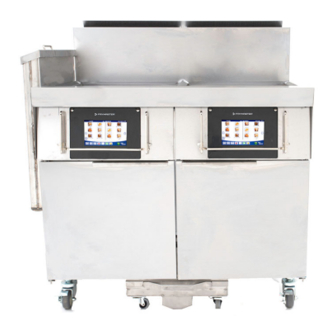
FQG60T FILTERQUICK ™ easyTouch ® SERIES GAS FRYER CHAPTER 3: OPERATING INSTRUCTIONS FINDING YOUR WAY AROUND THE FQG60T with FILTERQUICK™ SERIES GAS FRYER Oil Saddle Reservoir Fluecap FilterQuick FQ4000 Topcap easyTouch® Controller Bezel High Limit Reset JIB Reset Switch Reset Switch Bulk Pre-... -
Page 25: Controller Operation And Programming
Controller Operation and Programming This fryer is equipped with FilterQuick FQ4000 controller(s) (illustrated below). Refer to the FilterQuick ™ FQ4000 Controller Operation Manual for programming and operating procedures and for operating in- ™ structions for the built-in filtration system. FILTERQUICK ™... -
Page 26: Lighting The Fryer
The controller controls the fryer after ignition. All Frymaster fryers are tested, adjusted and calibrated to sea level conditions before leaving the factory. Adjustments to assure proper operation of pilot may be necessary on installation to meet local conditions, low gas pressure, differences in altitude and variations in gas characteristics. -
Page 27: Shutting The Fryer Down
These adjustments are the responsibility of the customer and/or the dealer and are not covered by the Frymaster warranty. The inlet pipe at the lower rear of the fryer brings incoming gas to the pilot safety control valve, then to the pilot and main burners. -
Page 28: Manual Top-Off, Automatic Top-Off And Jib/Oil Saddle Refill
When shutting the fryers down at closing time, filter the oil and clean the fryers. Place the con- troller ON/OFF switch in the OFF position. Then place the gas valve in the off position. See illus- tration below. Place the frypot covers on the frypots. 3.4 Manual Top-Off, Automatic Top-Off and JIB/Oil Saddle Refill The fryer can be configured for either man- ual top off or for both manual and auto-... -
Page 29: Adding Oil To The Oil Saddle Reservoir
3.4.1 Adding Oil to the Oil Saddle Reservoir Remove the Oil Saddle Reservoir lid (see Figure 2) and fill with oil. Once the reservoir is full ensure the lid is placed over the reservoir. Ensure the quick disconnect fitting with hose is fully seated to the fitting on the bottom of the oil saddle. -
Page 30: Routine Oil Changes (Saddle Oil Reservoir Only)
3. Put the tube in the new full container 4. Press and hold the orange JIB reset switch five (5) (see Figure 6). seconds to reset the top off system (see Figure 7). Figure 6 WARNING: Do not add HOT or USED oil to a JIB or Saddle Oil Reser- Figure 7 voir. -
Page 31: Chapter 4: Filtration Instructions
FQG60T FILTERQUICK ™ easyTouch ® SERIES GAS FRYER CHAPTER 4: FILTRATION INSTRUCTIONS Introduction The FQG60T with FilterQuick™ with fingertip filtration system allows the oil in one frypot to be safely and efficiently filtered while the other frypots in a battery remain in operation. Section 4.2 covers preparation of the filter system for use. - Page 32 2. Inspect the filter pan connection fitting to ensure Inspect the filter that both O-rings are in good condition (see Figure connection fitting O-rings. 3. Then in reverse order, place the metal filter screen in the center of the bottom of the pan, then lay a Figure 2 sheet of filter paper on top of the screen, overlapping on all sides (see Figure 1).
-
Page 33: Chapter 5: Preventive Maintenance
™ ® FQG60T FILTERQUICK easyTouch SERIES GAS FRYER CHAPTER 5: PREVENTATIVE MAINTENANCE Cleaning the Fryer DANGER The crumb tray in fryers equipped with a filter system must be emptied into a fireproof container at the end of frying operations each day. Some food particles can spontaneously combust if left soaking in certain shortening material. -
Page 34: Clean Filter Pan, Detachable Parts And Accessories
Daily clean the filter pan and associated components with a solution of hot water and detergent. If you notice that the system is pumping slowly or not at all, verify that the filter pan screen is on the bottom of the filter pan, with the paper on top of the screen. Verify that the two O- ring(s) on the fitting at the right front of the filter pan are present and in good condition. -
Page 35: Weekly Checks And Service
WEEKLY CHECKS AND SERVICE 5.3.1 Clean Behind Fryers - Weekly Clean behind fryers in accordance with store procedures. Shut the fryer off and disconnect power. MONTHLY CHECKS AND SERVICE 5.4.1 Drain and Clean Frypot DANGER Never operate the appliance with an empty frypot. The frypot must be filled to the fill line with water or oil before lighting the burners. -
Page 36: Check Filterquick ™ Controller Setpoint Accuracy
WARNING To prevent injury, ensure adjacent vats that contain oil are OFF and covered prior to performing a Hot Clean (Boil Out) or Cold Clean (Cold Soak). WARNING NEVER drain boil out or cleaning solution into a shortening disposal unit (SDU), a built- in filtration unit, a portable filter unit, or an OQS (Oil Quality Sensor). -
Page 37: Pre-Filter Maintenance
5.4.4 Pre-filter Maintenance The pre-filter requires regular maintenance. Every 30 days, or more frequently if the flow of oil slows, remove the cap and clean the attached screen. 1. Wearing protective gloves use the supplied wrench to remove the cap from the pre-filter (Figure 1). 2. -
Page 38: Semi-Annual Checks And Service
ANNUAL/PERIODIC SYSTEM INSPECTION This appliance should be inspected and adjusted periodically by qualified service personnel as part of a regular kitchen maintenance program. Frymaster recommends that this appliance be inspected at least annually by a Factory Authorized Servicer as follows: 5.8.1 Fryer Inspect the cabinet inside and out, front and rear for excess oil. -
Page 39: Built-In Filtration System
Verify that component box components (i.e. controller, transformers, relays, interface boards, etc.) are in good condition and free from oil and other debris. Inspect the component box wiring and verify that connections are tight, and that wiring is in good condition. -
Page 40: Stainless Steel Care
5.8.3 Stainless Steel Care DANGER DO NOT let water splash into the tank of hot oil. It will splatter and can cause severe burns. All stainless-steel fryer cabinet parts should be wiped regularly with hot, soapy water during the day, and with a liquid cleanser designed for stainless steel at the end of each day. A. -
Page 41: Chapter 6: Operator Troubleshooting
If you are in doubt as to the proper action to take, do not hesitate to call the Frymaster Technical Service Department or your local Frymaster Factory Authorized Servicer for assistance. -
Page 42: Troubleshooting Fryers
Troubleshooting Fryers 6.2.1 FQ4000 and Heating Problems PROBLEM PROBABLE CAUSES CORRECTIVE ACTION Verify that the fryer is plugged in and that the No power to fryer. circuit breaker is not tripped. No display on the FQ4000. Failed FQ4000 or another Call your FAS for assistance. -
Page 43: Error Message And Display Problems
PROBLEM PROBABLE CAUSES CORRECTIVE ACTION Ensure the oil level float switch is clean and moves Oil level float switch stuck. freely up and down. Gas valve is not turned on. Turn the gas valve knob to the ON position. Manual gas shut off valve closed. Verify that any in-line manual shut off and gas Fryer does not heat. -
Page 44: Basket Lift Problems
Problem Probable Causes Corrective Action FQ4000 displays Problem with the temperature measuring Shut the fryer down and call your FAS for TEMPERATURE PROBE circuitry including the probe or damaged assistance. FAILURE. controller wiring harness or connector. Verify that all power cord(s) are fully seated in Heating indicator is on, Three phase power cord unplugged, or circuit their receptacle(s), locked into place and that... -
Page 45: Incomplete Filtration
Problem Probable Causes Corrective Action Pull filter pan out and fully reinsert into fryer. Ensure controller does not display A. Filter pan is not fully set into fryer. Ensure the filter pan magnet is in place FQ4000 display shows B. Missing filter pan magnet. and replace if missing. -
Page 46: Clogged Drain Error
the pan has been out for 30 seconds the controller returns to idle cook mode. Ensure the pan is dry and assembled correctly. Push the filter pan back into the fryer. Ensure “P” is not displayed on the controller. Press the √ (check) button if the vat is full to continue. controller returns to idle cook mode. -
Page 47: Bulk Oil System Problems
PROBLEM PROBABLE CAUSES CORRECTIVE ACTION Clear filter error properly. If problem Filter error exists. persists, call your FAS for assistance. One vat doesn’t top off. Service required error exists Call your FAS for assistance. Solenoid, pump, pin issue, RTD or ATO issue. Call your FAS for assistance. -
Page 48: Error Log Codes
6.2.7 Error Log Codes See section 1.12.2.1 in the FQ4000 controller manual for instructions to access the Error Log. Code ERROR MESSAGE EXPLANATION TEMPERATURE PROBE FAILURE TEMP Probe reading out of range HIGH LIMIT 1 EXCEEDED High limit temperature is past more than 410°F (210°C), or in CE countries, 395°F (202°C) HIGH LIMIT 2 EXCEEDED High limit switch has opened. -
Page 49: Oqs (Oil Quality Sensor) Problems
Code ERROR MESSAGE EXPLANATION recipes. Replace controller with factory programmed controller. OQS TEMP HIGH Oil temperature is too high for a valid OQS reading. Filter at a temperature between 300ºF (149ºC) and 375ºF (191ºC). OQS TEMP LOW Oil temperature is too low for a valid OQS reading. Filter at a temperature between 300ºF (149ºC) and 375ºF (191ºC). -
Page 50: Appendix A: Bulk Oil Instructions
® FQG60T FILTERQUICK™ easyTouch SERIES GAS FRYER APPENDIX A: BULK OIL INSTRUCTIONS A.1.1 Bulk Oil Systems Bulk oil systems have large oil storage tanks, Waste Oil Fresh Oil typically located in the rear of the restaurant, Connection Connection that are connected to a rear manifold on the fryer. - Page 51 A.1.2 Bulk Oil Wiring WARNING The FilterQuick easyTouch fryer will ONLY operate with bulk oil systems that have a three- ™ pole float switch. If the float switch is the older two-pole switch, call the bulk oil provider. These float switches are polarity specific which may short to ground and damage an FIB board. A–2...
- Page 52 FRYMASTER 8700 LINE AVENUE, SHREVEPORT, LA 71106-6800 800-551-8633 318-865-1711 WWW.FRYMASTER.COM EMAIL: FRYSERVICE@WELBILT.COM *8197423* WWW.WELBILT.COM Welbilt provides the world’s top chefs, and premier chain operators or growing independents with industry leading equipment and solutions. Our cutting‐edge designs and lean manufacturing tactics are powered by deep knowledge, operator insights, and culinary expertise. All of our products are backed by KitchenCare® – our aftermarket, repair, and parts service. CLEVELAND DELFIELD® FRYMASTER® KOLPAK® MANITOWOC® MERRYCHEF® CONVOTHERM® FITKITCHEN™ GARLAND LINCOLN MERCO® MULTIPLEX® ©2019 Welbilt Inc. except where explicitly stated otherwise. All rights reserved. Continuing product improvement may necessitate change of specifications without notice. Part Number FRY_IOM_8197703 05/2019 ...
Need help?
Do you have a question about the easyTouch FilterQuick FQG60T and is the answer not in the manual?
Questions and answers