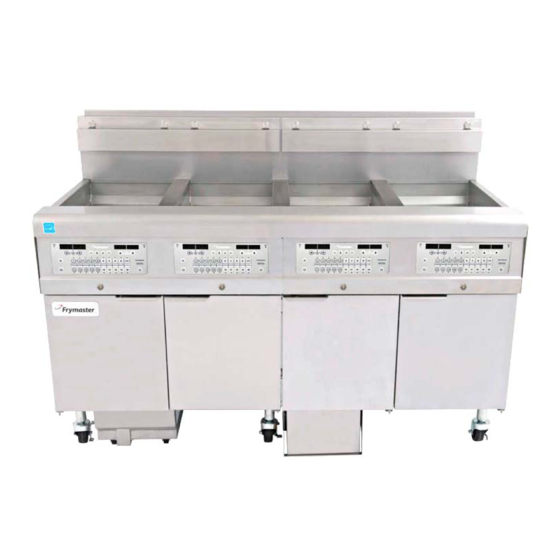
Frymaster FilterQuick FQG30 Instruction Sheet
Gas fryers
Hide thumbs
Also See for FilterQuick FQG30:
- Installation, operation and maintenance manual (54 pages) ,
- Service manual (80 pages) ,
- Installation, operation and maintenance manual (54 pages)
Advertisement
Quick Links
Instruction Sheet
Follow these instructions to install
the Bulk Oil Kits (Fresh and Waste).
1. Disconnect power and gas from the
fryer.
2. Remove the
fryer from
the hood to
gain access
to the rear
of the fryer.
Figure 1
3. Remove the
filter
pan
(see
Figure 1).
4. Remove the filter
pan lid by lifting
the
collar
up
around the drain
tube,
while
pulling the filter
pan lid forward
(see Figure 2).
5. Remove the lower back by removing
the eight (8) screws (see Figure 3). If a
four (4) battery or larger, remove both
lower backs.
Figure 3
Figure 2
Subject: 8263506 Gas Fresh/Waste Bulk Oil Kit
Installation Instructions (3-5 Vat Systems)
Models affected: FilterQuick FQG30 Gas Fryers
Part #
KIT17215
PLUMBING (1082796-1082196)
ATO ASSY (1085702-1085701) 2 Vat
KIT17216
only
ATO ASSY (1085703-1085704) 3-5 Vat
KIT17221
only
KIT17217
HARNESS (8074843-8074671)
FLT PUMP (1085816-1087385) 2 Vat
KIT17219
only
FLT PUMP (1085817-1087386) 3-5 Vat
KIT17220
only
1087394
PLUMBING ASSY, GL230 2 Vat only
1085907
PLUMBING FQ GAS BULK 3-5 Vat only
1082202
FILL ASSY, GL30 RTI
1084202
CONNECTION, GL30 RTI DISPOSE
1085784
BULK OIL DISPOSE, FLTQCK GAS
8238117
HANDLE, GAS BULK OIL 2 Vat only
1083387
LOCK, OCF GAS BULK 2 Vat only
1080686
HANDLE/LOCK ASSY GAS 3-5 Vat only
8022660
LABEL, LOV RTI WASTE HANDLE
BRIDGE WELD, PUMP MOTOR 2 Vat
8242325
only
8022608
TAG, FILL RTI
8022609
TAG, DISPOSE RTI
8158000
LOCTITE 567, TUBE 6ML
1087410
SOLENOID ASSY, BULK OIL SVC KIT
8122519
HARNESS, MIB TO RTI SVC KIT
8090256
NUT, KEPS 10-32 HX ZP
8091070
BOLT,1/4-20 X 5/8 SQ CONE LOCK
8090417
NUT, FLNG 1/4-20 SERR
8090412
SCRW, #10-1/2 HX WSHR HD N
8090194
WSHR, FLT 5/16 SAE ZP
8238991
WRENCH W/A, 1-1/16" CRWS F
8140015
TY WRAP
8160870
CLAMP,.870/.732 SNAP GRIP HOSE
8197535
INSTRUCTIONS
Document Number: FRY_INST_8197535 04/2018 1 of 14
FRYMASTER DEAN
8700 LINE AVENUE, SHREVEPORT, LA 71106
WWW.FRYMASTER.COM
EMAIL:
FRYSERVICE@WELBILT.COM
In This Kit
Description
*8197535*
318-865-1711
800-551-8633
Qty
1
1
1
1
1
1
1
1
1
1
1
1
1
1
1
6
1
1
4
6
8
6
5
1
8
1
1
Advertisement

Related Manuals for Frymaster FilterQuick FQG30


Summary of Contents for Frymaster FilterQuick FQG30
- Page 1 FRYSERVICE@WELBILT.COM Instruction Sheet Subject: 8263506 Gas Fresh/Waste Bulk Oil Kit Installation Instructions (3-5 Vat Systems) Models affected: FilterQuick FQG30 Gas Fryers Follow these instructions to install In This Kit the Bulk Oil Kits (Fresh and Waste). Part # Description...
- Page 2 6. Disconnect connectors, the front of the transformer box (or the left box on 3 battery or larger fryers, as Figure 5 viewed from the rear) (see Figure Figure 4 7. Using 7/16” inch wrench, remove the nuts securing transformer box Figure 8 (see Figure 5). ...
- Page 3 16. It necessary disconnect the filter pan switch and move any additional wires way, allow additional room to work. 17. On the outlet side of the ATO Figure 16 pump, push down on the quick disconnect lock clip, to unlock Figure 15 the fitting and remove the Figure 17...
- Page 4 25. Attach flexline 8101057 flexline adaptor in Figure 26 and the other end to the assembly below it (see Figure 27). 26. Attach the check valve and fitting removed in step 14 to the Figure 29 top of the assembly in Figure 26 (see Figure 28).
- Page 5 35. Locate the 16-pin connector on the rear of the ATO box and the two (2) wire harness (8122520). Insert the red wire into pin-1 and the black wire into pin-9 with the tabs up as shown (see Figure 38). 36.
- Page 6 46. Carefully remove the drain dump from the drain manifold and set aside (see Figure 48). 47. Use a 7/16” wrench to remove the two (2) nuts securing the female pick-up tube bracket (see Figure Figure 48 49). 48. Lower the pick-up tube assembly down out of the way (see Figure 50).
- Page 7 56. Remove the flexline disconnected from the manifold in step 40 (see Figure 57) and set aside. 57. Remove the flexline adaptor and check valve from the filter pump (see Figure 58). 58. Remove the check valve fittings and the 90° elbow from the filter pump (see Figures 59 and 60).
- Page 8 65. Locate the 1085907 Bulk Oil plumbing assembly. Facing the switch connectors, attach the harness BLACK GREEN (8122519) to the Bulk Oil Plumbing assembly. Beginning with the switch on the left, attach the red wire the the farthest left connector; next attach the green wire, to the connector directly to the right of the the red.
- Page 9 70. Reinsert entire dispose/filter pump assembly back into the fryer (see Figure 72). 71. Reverse steps 49-52 to reattach the filter pump motor bridge to the frame and reattach the motor electrical connections. 72. Reverse steps 47-48 to reattach the female pickup assembly.
- Page 10 81. Locate the individual red and black wires from the harness attached to the dispose outlet assembly in step 77 (see Figure 80). 82. Insert the red wire into pin 4 and the black wire into pin 7 of the C4 connector, unplugged in step 80 (see Figure 81).
- Page 11 91. .Insert the white wire into the position (pin 15) directly in front of the black wire inserted in step 90 (see Figure 88). 92. Gently tug on all wires to ensure they are locked into the connector (see Figure 89). 93.
- Page 12 107. Press and hold the CHECK button until the controller scrolls INFO MODE, changing to MAIN MENU and then PRODUCT SETUP. 108. With PRODUCT SETUP displayed, press the ► (right arrow) button to scroll to VAT SETUP and press ...
- Page 13 126. DRAINING is displayed followed by VAT EMPTY AND CLEAN? CONFIRM. Press the ▲ (up arrow) button to confirm. 127. OPEN DISPOSE VALVE is displayed. 128. Open the dispose valve by pulling the handle towards the front of the fryer (see Figure 100).
- Page 14 WARNING ™ The FilterQuick fryer will ONLY operate with bulk oil systems that have a three-pole float switch. If the float switch is the older two- pole switch, call the bulk oil provider. These float switches are polarity specific which may short to ground and damage an MIB board. ...
Need help?
Do you have a question about the FilterQuick FQG30 and is the answer not in the manual?
Questions and answers