Table of Contents
Advertisement
Quick Links
FQE60U
Electric Fryer
Installation, Operation and Maintenance
Manual
This manual is updated as new information and models are released. Visit our website for the latest manual.
FOR YOUR SAFETY
Do Not Store or use gasoline
or other flammable vapors
and liquids in the vicinity of
this or any other appliance.
*8197624*
Part Number: FRY_IOM_8197624 01/2019
Original Instructions
FilterQuick
READ THE INSTRUCTIONS BEFORE USING THE FRYER.
Keep these instructions for future reference.
Your Growth Is Our Goal
™
easyTouch
CAUTION
®
Advertisement
Table of Contents
Troubleshooting

Subscribe to Our Youtube Channel
Related Manuals for Frymaster FQE60U FilterQuick easyTouch


Summary of Contents for Frymaster FQE60U FilterQuick easyTouch
- Page 1 Your Growth Is Our Goal FQE60U FilterQuick ™ easyTouch ® Electric Fryer Installation, Operation and Maintenance Manual This manual is updated as new information and models are released. Visit our website for the latest manual. FOR YOUR SAFETY Do Not Store or use gasoline CAUTION or other flammable vapors READ THE INSTRUCTIONS BEFORE USING THE FRYER.
- Page 2 NOTICE IF, DURING THE WARRANTY PERIOD, THE CUSTOMER USES A PART FOR THIS FRYMASTER FOOD SERVICE EQUIPMENT OTHER THAN AN UNMODIFIED NEW OR RECYCLED PART PURCHASED DIRECTLY FROM FRYMASTER DEAN, OR ANY OF ITS FACTORY AUTHORIZED SERVICERS, AND/OR THE PART BEING USED IS MODIFIED FROM ITS ORIGINAL CONFIGURATION, THIS WARRANTY WILL BE VOID.
- Page 3 DANGER This fryer has a power cord (three-phase) for each frypot. Prior to movement, testing, maintenance and any repair on your Frymaster fryer; disconnect ALL electrical power cords from the electrical power supply. DANGER Keep all items out of drains. Closing actuators may cause damage or injury.
- Page 4 Do not use water jets to clean this equipment. WARNING If the electrical power supply cord is damaged, it must be replaced by a Frymaster Factory Authorized Servicer or a similarly qualified person in order to avoid a hazard. WARNING All wiring connections for this appliance must be made in accordance with the wiring diagram(s) furnished with the appliance.
- Page 5 DANGER Under all circumstances, oil must be removed from the fryer before attempting to move it to avoid spills, falls, and severe burns. Never attempt to transfer hot oil from one container to another. Fryers may tip and cause personal injury if not secured in a stationary position. DANGER Never operate the appliance with an empty frypot.
-
Page 6: Table Of Contents
™ FQE60U FilterQuick easyTouch Series Electric Fryers ® Installation and Operation Manual TABLE OF CONTENTS CHAPTER 1: Introduction General........................... 1-1 Safety Information ....................... 1-1 Controller Information ......................1-2 European Community (CE) Specific Information ............. 1-2 Installation, Operating, and Service Personnel ..............1-2 Definitions .......................... - Page 7 5.2.4 Clean Filter Pan, Detachable Parts and Accessories ..........5-2 5.2.5 Clean Around AIF and ATO Sensors ................ 5-2 5.2.6 Clean Basket Lift Rods ....................5-2 Weekly Checks and Service ....................5-2 5.3.1 Clean Behind Fryers ....................5-2 Monthly Checks and Service ....................5-2 5.4.1 Drain, Clean Frypot and Heating Elements............
-
Page 8: Chapter 1: Introduction
® FQE60U FILTERQUICK easyTouch SERIES ELECTRIC FRYER CHAPTER 1: INTRODUCTION ® NOTE: The Frymaster FQE60U FilterQuick ™ easyTouch fryer requires a start-up, demonstration and training before normal restaurant operations can begin. General Read the instructions in this manual thoroughly before attempting to operate this equipment. This manual covers all configurations of FQE60U FilterQuick ™... -
Page 9: Controller Information
Installation, Operating, and Service Personnel Operating information for Frymaster equipment has been prepared for use by qualified and/or authorized personnel only, as defined in Section 1.6. All installation and service on Frymaster equipment must be performed by qualified, certified, licensed, and/or authorized installation or... -
Page 10: Definitions
QUALIFIED SERVICE PERSONNEL Qualified service personnel are those who are familiar with Frymaster equipment and who have been authorized by Frymaster, L.L.C. to perform service on the equipment. All authorized service personnel are required to be equipped with a complete set of service and parts manuals, and to stock a minimum amount of parts for Frymaster equipment. -
Page 11: Reading Model Numbers
Service and Parts Manual. Parts orders may be placed directly with your local FAS or distributor. A list of Frymaster Factory Authorized Servicers (FAS’s) is located on the Frymaster website at www.frymaster.com. If you do not have access to this list, contact the Frymaster Service Department at 1-800-551-8633 or 1-318-865-1711 or by email at fryservice@welbilt.com. -
Page 12: Chapter 2: Installation Instructions
167°F (75°C). NOTICE If the electrical power supply cord is damaged, it must be replaced by a Frymaster Authorized Servicer or a similarly qualified person in order to avoid a hazard. -
Page 13: Clearance And Ventilation
DANGER This appliance must be connected to a power supply having the same voltage and phase as specified on the rating plate located on the inside of the appliance door. DANGER All wiring connections for this appliance must be made in accordance with the wiring diagram(s) furnished with the appliance. -
Page 14: Power Requirements
Power Requirements The optional three phase supply plug for 208v and 240v delta configuration fryers are rated at 60 amps, 250 VAC and is NEMA configuration 15-60P. Three (3) Phase Requirements MINIMUM WIRE WIRE AMPS MODEL VOLTAGE SIZE SERVICE (per leg) (mm) FQE60U 14kW (4.11) -
Page 15: Positioning The Fryer
No structural material on the fryer should be altered or removed to accommodate placement of the fryer under a hood. Questions? Call the Frymaster Dean Service Hotline at 1-800-551-8633. 1. Once the fryer has been positioned at the frying station, use a carpenter’s level placed across the top of the frypot to verify that the unit is level, both side-to-side and front-to-back. -
Page 16: Installing The Oil Saddle Reservoir
Installing the Oil Saddle Reservoir (Applicable to fryers with side oil saddle reservoir only) Carefully cut the shipping strap around the oil saddle hose on the rear of the fryer. Attach the hose to the oil saddle reservoir quick disconnect on the bottom of the reservoir. -
Page 17: Chapter 3: Operating Instructions
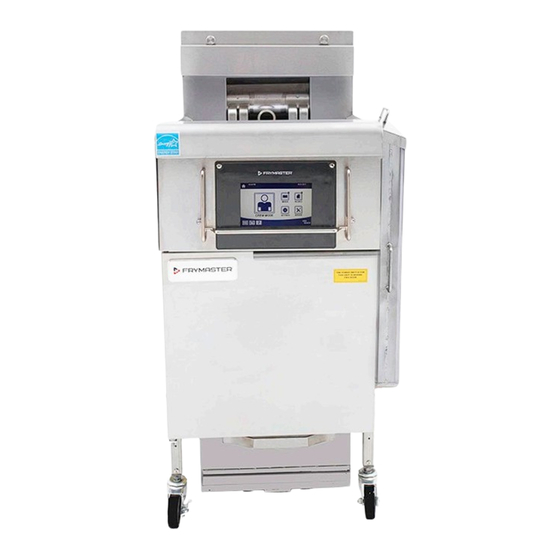
FQE60U FILTERQUICK™ easyTouch SERIES ELECTRIC FRYER ® CHAPTER 3: OPERATING INSTRUCTIONS ® FINDING YOUR WAY AROUND THE 1814E FILTERQUICK™ easyTouch SERIES ELECTRIC FRYER Tilt Housing Lift Rod Elements Basket Holder Top Cap FilterQuick Oil Saddle FQ4000 ® Reservoir easyTouch Controller Power Bezel Switch... -
Page 18: Equipment Setup And Shutdown Procedures
3.1 Equipment Setup and Shutdown Procedures Setup DANGER Never operate the appliance with an empty frypot. The frypot must be filled to the fill line with water or oil before energizing the elements. Failure to do so will result in irreparable damage to the elements and may cause a fire. -
Page 19: Operation
3.2 Operation This fryer is equipped with FilterQuick ™ FQ4000 controller(s) (illustrated below). Refer to the FilterQuick FQ4000 ™ Controller Operation Manual for programming and operating procedures and for operating instructions for the built-in filtration system. FILTERQUICK FQ4000 CONTROLLER ™ Refer to Chapter 5 of this manual for operating instructions for the built-in filtration system. -
Page 20: Adding Oil To The Fryer
ATO Reset Switch: 3.3.1 Adding Oil to the Fryer Resets the ATO system after oil 3.3.1.1 Install the JIB (Jug In Box) Oil change. Reservoir (JIB units only) Saddle Reservoir: Has Remove the original lid from the oil plumbing attached to draw container and foil liner. - Page 21 3.3.2.1 Routine Oil Changes (JIB only) 1. Open the cabinet and slide the JIB from 2. Remove the cap and pour any remaining oil in the the cabinet (see Figure 5). container into all fry vats equally (see Figure 6). Figure 6 Figure 5 3.
-
Page 22: Chapter 4: Filtration Instructions
® FQE60U FILTERQUICK™ easyTouch SERIES ELECTRIC FRYERS CHAPTER 4: FILTRATION INSTRUCTIONS Introduction The FQE60U FilterQuick™ easyTouch ® filtration system allows the oil in one frypot to be safely and efficiently filtered while the other frypots in a battery remain in operation. Section 4.2 covers preparation of the filter system for use. - Page 23 2. Inspect the filter pan connection fitting to ensure that Inspect the filter both O-rings are in good condition (see Figure 2). connection fitting O-rings. 3. Then in reverse order, place the metal filter screen in the center of the bottom of the pan, then lay a sheet of filter paper on top of the screen, overlapping on all Figure 2 sides (see Figure1).
-
Page 24: Chapter 5: Preventive Maintenance
® FQE60U FILTERQUICK™ easyTouch SERIES ELECTRIC FRYER CHAPTER 5: PREVENTATIVE MAINTENANCE Cleaning the Fryer DANGER The crumb tray in fryers equipped with a filter system must be emptied into a fireproof container at the end of frying operations each day. Some food particles can spontaneously combust if left soaking in certain shortening material. -
Page 25: Clean Filter Pan, Detachable Parts And Accessories
If you notice that the system is pumping slowly or not at all, verify that the filter pan screen is on the bottom of the filter pan, with the paper on top of the screen. Verify that the two O-ring(s) on the fitting at the right front of the filter pan are present and in good condition. -
Page 26: Deep Cleaning (Boiling Out/Cold Clean) The Frypot
5.4.2 Deep Cleaning (Boiling Out/Cold Clean) the Frypot – Minimally Monthly During normal usage of your fryer, a deposit of carbonized oil will gradually form on the inside of the frypot. This film should be periodically removed by following the Clean (boil-out) procedure. Refer to sections 2.1.11 and 2.1.12 of the FQ4000 Controller Operation Manual) for specific details on setting up the controller for clean (boil-out) operation. -
Page 27: Pre-Filter Maintenance
ANNUAL/PERIODIC SYSTEM INSPECTION This appliance should be inspected and adjusted periodically by qualified service personnel as part of a regular kitchen maintenance program. Frymaster recommends that this appliance be inspected at least annually by a Factory Authorized Servicer as follows: 5–4... -
Page 28: Fryer
5.6.1 Fryer Inspect the cabinet inside and out, front and rear for excess oil. • • Verify that the heating element wires are in good condition and that leads have no visible fraying or insulation damage and that they are free of oil. •... -
Page 29: Chapter 6: Operator Troubleshooting
In such instances, the Frymaster Technical Services staff will make every effort to help you identify and resolve the problem. When troubleshooting a problem, always use a process of elimination starting with the simplest solution and working through to the most complex. -
Page 30: Troubleshooting
Troubleshooting 6.2.1 Controller and Heating Problems Problem Probable Causes Corrective Action A. Verify that the fryer is plugged in A. No power to fryer. No display on the and that the circuit breaker is not B. Failed controller or another controller. -
Page 31: Error Message And Display Problems
6.2.2 Error Messages and Display Problems Problem Probable Causes Corrective Action Failed controller, failed transformer, Call your FAS for assistance. FQ4000 displays E19 failed SIB board, open high-limit HEATING FAILURE. thermostat. Toggle between F° to C° by entering FQ4000 display is in Manager settings, temperature and wrong temperature toggling the temperature scale. -
Page 32: Filtration Problems
6.2.3 Filtration Problems Problem Probable Causes Corrective Action Change or overwrite the filter after setting by re-entering the filter after Fryer filters after Filter after setting incorrect. value in Manager Settings, Filter each cook cycle. Attributes in section 1.8 of the FQ4000 controller manual. -
Page 33: Incomplete Filtration
Problem Probable Causes Corrective Action A. Ensure the filter is not clogged. If so replace the filter. B. Remove the oil from the filter replace filter pad/paper, ensuring that the A. Clogged filter pad/paper. filter screen is in place under Filter Pump runs, but B. -
Page 34: Clogged Drain Error
10. If a filtration error occurs six consecutive times, the return SERVICE REQUIRED valve closes. Press the √ (check) button to silence alarm and continue. 11. The system detects oil is not returning to the vat and ERROR PUMP NOT FILLING service is required. -
Page 35: Auto Top Off Problems
6.2.5 Auto Top Off Problems PROBLEM PROBABLE CAUSES CORRECTIVE ACTION Frypots top off cold. Incorrect setpoint. Ensure setpoint is correct. A. Clear filter error properly. If A. Filter error exists. problem persists, call your FAS One vat doesn’t top B. Service required error exists for assistance. -
Page 36: Error Log Codes
PROBLEM PROBABLE CAUSES CORRECTIVE ACTION A. Power cycle fryer by disconnecting and reconnecting 5-pin bulk oil control power cord on rear of fryer. B. If a filtration or any other filter menu A. Incorrect setup procedure. function is in process or FILTER NOW? B. - Page 37 Code ERROR MESSAGE EXPLANATION CHANGE FILTER PAD 25-hour timer has expired or dirty filter logic has activated. OIL IN PAN ERROR The system detects that oil may be present in the filter pan. CLOGGED DRAIN (Gas) Vat did not empty during filtration OIL SENSOR FAILURE - CALL SERVICE Oil level sensor may have failed.
-
Page 38: Oqs (Oil Quality Sensor)
Code ERROR MESSAGE EXPLANATION menu. The sensor may not be calibrated for the oil type. See oil type chart in instruction document 8197316. If issue continues contact a FAS. TPM RANGE HIGH The TPM reading is too high for a valid OQS reading. -
Page 39: Appendix A: Bulk Oil Instructions
® FQE60U FILTERQUICK™ easyTouch SERIES ELECTRIC FRYER APPENDIX A: BULK OIL INSTRUCTIONS A.1.1 Bulk Oil Systems Bulk oil systems have large oil storage tanks, Waste Oil Fresh Oil typically located in the rear of the restaurant, Connection Connection that are connected to a rear manifold on the fryer. - Page 40 A.1.2 Bulk Oil Wiring WARNING The FilterQuick easyTouch fryer will ONLY operate with bulk oil systems that have a three- ™ pole float switch. If the float switch is the older two-pole switch, call the bulk oil provider. These float switches are polarity specific which may short to ground and damage an FIB board. A–2...
- Page 41 THIS PAGE INTENTIONALLY LEFT BLANK...
- Page 42 FRYMASTER 8700 LINE AVENUE, SHREVEPORT, LA 71106-6800 800-551-8633 318-865-1711 WWW.FRYMASTER.COM EMAIL: FRYSERVICE@WELBILT.COM *8197423* WWW.WELBILT.COM Welbilt provides the world’s top chefs, and premier chain operators or growing independents with industry leading equipment and solutions. Our cutting-edge designs and lean manufacturing tactics are powered by deep knowledge, operator insights, and culinary expertise.
Need help?
Do you have a question about the FQE60U FilterQuick easyTouch and is the answer not in the manual?
Questions and answers