Table of Contents
Advertisement
Quick Links
Advertisement
Table of Contents

Related Manuals for Danfoss MP1


Summary of Contents for Danfoss MP1
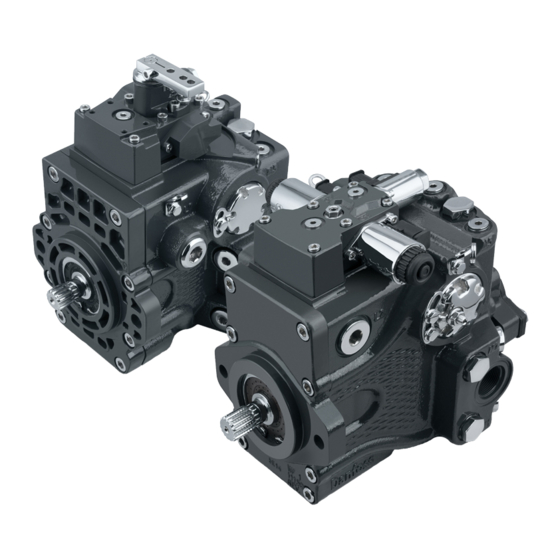
- Page 1 Service Manual Variable Displacement Pumps www.danfoss.com...
- Page 2 January 2018 update control current table 0106 November 2017 Add NFPE 0105 October 2017 Remove HDC 0104 July 2017 update ports and plugs 0103 April 2017 Add HDC 0102 August 2016 First edition 0101 © Danfoss | April 2019 AX00000244en-000201...
-
Page 3: Table Of Contents
MP1 design specifications................................9 MP1 technical data...................................9 MP1 operating parameters.................................10 MP1 fluid specifications................................10 Operation MP1 high pressure relief valve (HPRV) and charge check....................11 Bypass Function....................................11 MP1 charge pressure relief valve (CPRV) function......................12 Loop flushing valve..................................13 Electrical displacement control (EDC)............................ 14 EDC principle....................................14... - Page 4 Mechanical/Hydraulic Neutral Adjustment..........................49 Servo Adjustment..................................49 Verify neutral setting................................50 Servo Adjustment Side M4..............................50 Minor repair MP1 standard procedures and pump removal........................52 EDC Control......................................52 MP1 EDC control removal..............................52 Controls inspection..................................53 MP1 EDC control assembly..............................53 MP1 control solenoids/actuator housing replacement....................54 MDC Control....................................
- Page 5 HPRV valve inspection................................59 HPRV Valve Reassembly................................. 59 Charge Pressure Relief Valve (CPRV)............................59 MP1 CPRV removal...................................59 CPRV inspection..................................60 MP1 CPRV assembly.................................60 MP1 loop flushing removal (28/32)............................61 MP1 loop flushing spool inspection..........................62 Reassembly....................................62 Shaft Removal....................................62 Inspection....................................63 Shaft Reassembly..................................63 Fastener size and torque chart Fastener size and torque................................
-
Page 6: Hydrostatics Servicing Overview
A worldwide network of Danfoss Global Service Partners is available for major repairs. Danfoss trains and certifies Global Service Partners on a regular basis. You can locate your nearest Global Service Partner using the distributor locator at http://www.danfoss.com. -
Page 7: Safety Precautions
Hydraulic fluid contains hazardous material. Avoid prolonged contact with hydraulic fluid. Always dispose of used hydraulic fluid according to state, and federal environmental regulations. Symbols used in Danfoss literature WARNING may result in injury Tip, helpful suggestion CAUTION may result in damage to product or... -
Page 8: Danfoss | April
In most instances, the appearance of the symbol itself denotes its meaning. The legend above defines each symbol and explains its purpose. © Danfoss | April 2019 AX00000244en-000201... -
Page 9: Technical Specifications
Recommended mounting for a multiple pump stack is to arrange the highest power flow towards the input source. Consult Danfoss for non-conformance to these guidelines. Filtration configuration Suction or charge pressure filtration... -
Page 10: Mp1 Operating Parameters
Service Manual Technical specifications MP1 operating parameters Features Units 28/32 38/45 Input speed Minimum (rpm) Rated 3400 3300 Maximum 4000 3900 System pressure Maximum working pressure bar [psi] 350 [5000] 350 [5000] Maximum pressure 380 [5429] 380 [5429] Minimum low loop (above case) -
Page 11: Operation
Service Manual Operation MP1 high pressure relief valve (HPRV) and charge check All pumps are equipped with a combination high pressure relief and charge check valve. The high- pressure relief function is a dissipative (with heat generation) pressure control valve for the purpose of limiting excessive system pressures. -
Page 12: Mp1 Charge Pressure Relief Valve (Cprv) Function
The charge pressure relief valve setting is specified within the model code of the pump. pumps with charge pump have the CPRV set at 1800 rpm while MP1 pumps without charge pump have the CPRV set with 18.9 l/min [5.0 US gal/min] of external supply flow. The charge pressure rise rate, with flow, is approximately 1 bar/10 liter [5.4 psi/US gal]. -
Page 13: Loop Flushing Valve
When a pump is used with an external loop flushing shuttle valve, ensure that the charge setting of the pump matches the setting of the loop flushing shuttle valve. Contact your Danfoss representative for the availability of additional charge relief settings. -
Page 14: Electrical Displacement Control (Edc)
As hydraulic pressures in the operating loop change with load, the control assembly and servo/swashplate system work constantly to maintain the commanded position of the swashplate. 14 | © Danfoss | April 2019 AX00000244en-000201... -
Page 15: Control Signal Requirements, Edc
70 – 200 Hz Recommended 100 Hz IP Rating IEC 60 529 IP 67 DIN 40 050, part 9 IP 69K with mating connector Connector color Black PWM signal required for optimum control performance. © Danfoss | April 2019 AX00000244en-000201 | 15... -
Page 16: Control Response
Charge pressure = 20 bar [290 psi] Viscosity and temperature = 30 mm²/s [141 SUS] and 50 °C [122 °F] Speed = 1800 min (rpm) MP1 EDC response time Stroking direction 0.8 mm [0.03 in] 1.0 mm [0.04 in] 1.3 mm [0.05 in]... - Page 17 Service Manual Operation MOR and schematic F00B F00A Feedback from Swash plate P003 205E P003 204 © Danfoss | April 2019 AX00000244en-000201 | 17...
-
Page 18: Swash Plate Angle Sensor For Edc Controls
Strong magnetic fields in the proximity of the sensor can influence the sensor signal and must be avoided. Contact your Danfoss representative in case the angle sensor will be used for safety functions. Swash Plate Angle Sensor Parameters (EDC) Parameter... -
Page 19: Swash Plate Angle Sensor Connector
Differential pressure across the servo piston rotates the swash plate, changing the pump’s displacement. Simultaneously the swashplate movement is fed back to the control spool providing proportionality between shaft rotation on the control and swashplate rotation. © Danfoss | April 2019 AX00000244en-000201 | 19... - Page 20 Lever rotation "A" "0" "B" 100 % P301 752 MDC schematic diagram P005 701 Where: Deadband on B side – a = 3° ±1° Maximum pump stroke – b = 30° +2/-1° 20 | © Danfoss | April 2019 AX00000244en-000201...
-
Page 21: Mdc Operation
MDC shaft rotation Port A in (low) out (high) out (high) in (low) Port B out (high) in (low) in (low) out (high) Servo port high pressure As seen from shaft side. © Danfoss | April 2019 AX00000244en-000201 | 21... -
Page 22: Control Response
Δ p = 250 bar [3626 psi] Charge pressure = 20 bar [290 psi] Viscosity and temperature = 30 mm²/s [141 SUS] and 50 °C [122 °F] Speed = 1800 min (rpm) MP1 MDC response time Code Orifice description (mm) Stroking direction (sec) Tank (A... -
Page 23: Case Gauge Port M14
The drain port should be used when the control is mounted on the unit’s bottom side to flush residual contamination out of the control. MDC w/h drain port shown Case gauge port M14 P400344 © Danfoss | April 2019 AX00000244en-000201 | 23... -
Page 24: Lever
Under some circumstances, such as contamination, the control spool could stick and cause the pump to stay at some displacement. A 170 μm screen is located in the supply line immediately before the control porting spool. 24 | © Danfoss | April 2019 AX00000244en-000201... - Page 25 Service Manual Operation Forward-Neutral-Reverse electric control (FNR) P003 193 FNR hydraulic schematic F00B F00A P003 189 Pump displacement vs. electrical signal 100 % “0“ Voltage VDC 100 % P003 190E © Danfoss | April 2019 AX00000244en-000201 | 25...
-
Page 26: Control Response
Description Quantity Ordering data Mating connector DEUTSCH DT06-2S Wedge lock DEUTSCH W2S Socket contact (16 and 18 AWG) DEUTSCH 0462-201-16141 Danfoss mating connector kit K29657 Solenoid data Voltage 12 V 24 V 9.5 V 19 V Minimum supply voltage 14.6 V... -
Page 27: Response Time, Fnr
Under some circumstances, such as contamination, the control spool could stick and cause the pump to stay at some displacement. Non Feedback Proportional Electric Control NFPE schematic F00B F00A P003 188 P003 192 © Danfoss | April 2019 AX00000244en-000201 | 27... -
Page 28: Control Signal Requirements
For coil location see Installation drawings. Control Response MP1 controls are available with optional control passage orifices to assist in matching the rate of swashplate response to the application requirements (e.g. in the event of electrical failure). The time required for the pump output flow to change from zero to full flow (acceleration) or full flow to zero (deceleration) is a net function of spool porting, orifices, and charge pressure. -
Page 29: Response Time
Non-feedback proportional hydraulic control schematic Pump Flow Direction with NFPH control Input Shaft Rotation High pressure at port: © Danfoss | April 2019 AX00000244en-000201 | 29... -
Page 30: Control Response
Control Response MP1 controls are available with optional control passage orifices to assist in matching the rate of swashplate response to the application requirements (e.g. in the event of electrical failure). The time required for the pump output flow to change from zero to full flow (acceleration) or full flow to zero (deceleration) is a net function of spool porting, orifices, and charge pressure. -
Page 31: Response Time
Neutral to full 1.5 s 2.2 s 0.9 s 1.4 s 0.6 s 0.8 s flow Full flow to 0.9 s 1.1 s 0.6 s 0.7 s 0.4 s 0.5 s neutral © Danfoss | April 2019 AX00000244en-000201 | 31... -
Page 32: Control-Cut-Off Valve (Cco Valve)
The response time of the unit depends on the control type and the control orifices used. The CCO-valve is available with 12 V or 24 V solenoid. EDC with CCO Control Hydraulic logic Port X7 P400346 Schematic P400349 32 | © Danfoss | April 2019 AX00000244en-000201... -
Page 33: Cco Solenoid Data
300 mA Minimum 50-200 Hz 50-200 Hz PWM frequency Range 100 Hz 100 Hz Preferred IP67 / IP69K with mating connector Electrical protection class 28 V 53 V Bi-directional diode cut off voltage © Danfoss | April 2019 AX00000244en-000201 | 33... -
Page 34: Brake Gauge Port With Mdc
[0.18 in [0.20 in [0.22 in [0.26 in displacement limiter screw 4 mm Internal wrench size 13 mm External wrench size Torque for 23 N•m [204 lbf•in] external hex seal lock nut 34 | © Danfoss | April 2019 AX00000244en-000201... -
Page 35: Operating Parameters
Minimum low loop pressure (above case pressure) is the lowest pressure allowed to maintain a safe working condition in the low side of the loop. © Danfoss | April 2019 AX00000244en-000201 | 35... -
Page 36: Charge Pressure
The minimum temperature relates to the physical properties of component materials. Size heat exchangers to keep the fluid within these limits. Danfoss recommends testing to verify that these temperature limits are not exceeded. Ensure fluid temperature and viscosity limits are concurrently satisfied. -
Page 37: Viscosity
Viscosity For maximum efficiency and bearing life, ensure the fluid viscosity remains in the recommended range. The minimum viscosity should be encountered only during brief occasions of maximum ambient temperature and severe duty cycle operation. The maximum viscosity should be encountered only at cold start. © Danfoss | April 2019 AX00000244en-000201 | 37... -
Page 38: Fluid And Filter Maintenance
-ratio is a measure of filter efficiency defined by ISO 4572. It is defined as the ratio of the number of particles greater than a given diameter (“x” in microns) upstream of the filter to the number of these particles downstream of the filter. 38 | © Danfoss | April 2019 AX00000244en-000201... -
Page 39: Pressures Measurements
Service Manual Pressures measurements MP1 port locations and gauge installation The following table and drawing show the port locations and gauge sizes needed. When testing system pressures, calibrate pressure gauges frequently to ensure accuracy. Use snubbers to protect gauges. Port description... - Page 40 Service Manual Pressures measurements Port locations 28/32 38/45 40 | © Danfoss | April 2019 AX00000244en-000201...
-
Page 41: Initial Startup Procedure
Prior to installing the pump, inspect for damage that may have occurred during shipping. MP1 start-up procedure Follow this procedure when starting-up a new pump installation or when restarting an installation in which the pump has been removed and re-installed on a machine. - Page 42 Normal charge pressure fluctuation may occur during forward and reverse operation. 13. Check that the reservoir is full. Remove charge pressure gauge. The pump is now ready for operation. 42 | © Danfoss | April 2019 AX00000244en-000201...
-
Page 43: Troubleshooting
Filter switch may be bad Check/replace filter switch. Add gauge to filter bypass port to verify proper fluid flow and verify switch operation by measuring resistance. open resistance=510 ohms, closed resistance=122 ohms © Danfoss | April 2019 AX00000244en-000201 | 43... -
Page 44: System Operating Hot
Servo pressure Servo pressure low or decaying. Check for torn/missing servo seals. Replace and retest. Refer to AX00000303 MP1 Repair Instructions for seal locations. Only a Danfoss Global Service Partner may remove the servo piston without voiding the warranty. System Does Not Operate in Either Direction... -
Page 45: System Noise Or Vibration
Clean control orifices. orifices Pump inlet vacuum Inlet vacuum is too high resulting in reduced system Measure charge inlet vacuum. Inspect line for proper sizing. pressure. Replace filter. Confirm proper bypass operation. © Danfoss | April 2019 AX00000244en-000201 | 45... -
Page 46: Pump Adjustment
Listed pressures assume a pump speed of 1800 min-1 (rpm) and charge flow of 26.5 l/min [7 US gal/ min]. At higher pump speeds or higher charge flows the charge pressure will rise over the rated setting. 46 | © Danfoss | April 2019 AX00000244en-000201... -
Page 47: Displacement Limiter
2. Rotate the adjusting screw to achieve the desired displacement. 3. After establishing the desired maximum displacement setting, hold the adjusting screw while torquing the locknut to the value shown. Adjusting screw Locknut P108965 © Danfoss | April 2019 AX00000244en-000201 | 47... -
Page 48: Control Neutral Adjustment
P109037 4. Rotate the neutral adjusting screw clockwise until the pressure increases on the gauge. Note the angular position of the wrench. Then rotate the neutral adjusting screw counter clockwise until the 48 | © Danfoss | April 2019 AX00000244en-000201... -
Page 49: Mechanical/Hydraulic Neutral Adjustment
1. Run prime mover at 1800 min (rpm). 2. If using a PWM signal, ensure the signal is off. Check the servo pressure gauges. Ensure the differential between M4 and M5 is less than 1.5 bar [22 psi]. © Danfoss | April 2019 AX00000244en-000201 | 49... -
Page 50: Verify Neutral Setting
2. If using a PWM signal to set mechanical neutral, start with the electronic control testing tool off (no current/hydraulic pressure to either solenoid). Check to be sure the servo pressure differential is less 50 | © Danfoss | April 2019 AX00000244en-000201... - Page 51 Service Manual Adjustments than 1.5 bar [22 psi]. Reference Danfoss testing specifications TS-422 or Control Neutral Adjustment instructions. 3. Turn neutral adjusting screw (or supply current/hydraulic pressure to solenoid C2) until the servo pressure at port M5 is less than 1.5 bar [22 psi] greater than at port M4.
-
Page 52: Minor Repair
Service Manual Minor repair MP1 standard procedures and pump removal Before working on the pump, thoroughly clean the outside. If the pump has an auxiliary pump attached, remove both pumps as a single unit. Tag and cap all hydraulic lines as they are disconnected, and plug all open ports to ensure that dirt and contamination do not get into the system. -
Page 53: Controls Inspection
Service Manual Minor repair MP1 EDC control identification D250 D150 D300 (2x) F00B F00A Item Description Wrench size Torque D150 Control gasket D300 Dowel pins D250 Cap screw 5 mm internal hex 13 Nm [9.8 lbf•ft] F00B Servo orifice 3 mm internal hex 7.9 Nm [5.8 lbf•ft]... -
Page 54: Mp1 Control Solenoids/Actuator Housing Replacement
Torque sequence 4. Using a 5 mm internal hex wrench, torque the cap screws (D250) to 13.3 Nm [9.8 lbf ft]. MP1 control solenoids/actuator housing replacement 1. Disconnect electrical/hydraulic connection and remove the three cap screws (D050) using a 4 mm internal hex wrench. -
Page 55: Mdc Control
QD72 Actuator pin MDC Control MP1 MDC control removal Follow the steps to safely remove the MDC control. 1. Use a 5 mm internal hex wrench to remove the six cap screws (D250). 2. Remove the control module and gasket (D150) and discard the gasket. -
Page 56: Mdc Illustration
F00P supply orifice 1/4 inch hex 14 Nm [10.8 lbf•ft] F00T tank orifice 3 mm internal hex 2.5 Nm [1.8 lbf•ft] Y020 cap screw 5 mm internal hex 13.3 Nm [9.8 lbf•ft] 56 | © Danfoss | April 2019 AX00000244en-000201... -
Page 57: Controls Inspection
If the pump has an auxiliary pump attached, remove the auxiliary pump and connecting shaft before removing the auxiliary pad. MP1 charge pump removal 1. Position pump so end cover or auxiliary pad (K100) is on top. 2. Remove end cover/auxiliary pad screws (K300) using an 8 mm internal hex wrench. -
Page 58: Mp1 Charge Pump Inspection
Service Manual Minor repair MP1 charge pump torque information Charge pump removal (38/45 shown) K300 K100 K500 K400 K200 P108949 Identification and torque Item Wrench size Torque Screw (K300) 8 mm internal hex 111 N•m [81.9 lbf•ft] MP1 charge pump inspection Inspect the components for wear, scratches or pitting. -
Page 59: Mp1 Hprv Valve Removal
Service Manual Minor repair MP1 HPRV valve removal Follow these steps to safely remove the high pressure relief valves. 1. Using a 5/16 inch internal hex, remove the HPRV's (N100/M100). 2. Remove and discard the O-rings (M023) and backup rings (M022). -
Page 60: Cprv Inspection
Service Manual Minor repair MP1 CPRV torque information CPRV valve removal (38/45 shown) V100 QV110 V200 V300 P108951 Identification and torque Item Wrench size Torque CPRV Valve (V100) 1 inch 78.6 N•m [58.0 lbf•ft] CPRV inspection Inspect washer, spring, and seat. Replace charge pressure relief valve if damage is found. Inspect the sealing surfaces of the pump for nicks or scratches. -
Page 61: Mp1 Loop Flushing Removal (28/32)
Service Manual Minor repair MP1 loop flushing removal (28/32) 1. Using an 11/16 inch wrench, remove plug (L150). 2. Using a ¼ inch internal hex, remove plug (G115). 3. Remove and discard O-ring (9Q50A). 4. Remove loop flushing spool (L100) 5. -
Page 62: Mp1 Loop Flushing Spool Inspection
Service Manual Minor repair MP1 loop flushing spool inspection Inspect loop flushing spool and spring. If damage or wear is found, replace spool and spring. P109067 Reassembly 1. Lubricate and install loop flushing spool (L100). 2. Lubricate and install new O-ring (9Q50A). -
Page 63: Inspection
2. Install the shaft/bearing assembly into the pump. 3. Install first spring clip (J300). 4. Cover the shaft with a protective sleeve while installing the seal. Lubricate and install the seal. 5. Install the second spring clip (J300). © Danfoss | April 2019 AX00000244en-000201 | 63... -
Page 64: Fastener Size And Torque Chart
Service Manual Fastener size and torque chart MP1 fastener size and torque G040 28/32 G035 G030 G025 G015 G020 G010 G065 H130 G010 G075 G070 G060 G030 V100 G035 38/45 G040 D250 G025 G020 G065 G015 H130 H130 G010 E085... -
Page 65: Mp1 Plug Size And Torque
28/32 cc - 50 N•m [37 lbf•ft] 38/45 cc - 64 N•m [47 lbf•ft] K300 Rear cover/aux pad mounting bolt 8 mm internal hex 111 N•m [82 lbf•ft] MP1 plug size and torque Item O-ring plug Wrench size Torque G010/G035... - Page 66 Service Manual 66 | © Danfoss | April 2019 AX00000244en-000201...
- Page 67 Service Manual © Danfoss | April 2019 AX00000244en-000201 | 67...
- Page 68 Phone: +86 21 3418 5200 Danfoss can accept no responsibility for possible errors in catalogues, brochures and other printed material. Danfoss reserves the right to alter its products without notice. This also applies to products already on order provided that such alterations can be made without subsequent changes being necessary in specifications already agreed.
Need help?
Do you have a question about the MP1 and is the answer not in the manual?
Questions and answers