Danfoss PAH 50 Service Manual
Pah series tap water pump disassembling and assembling
Hide thumbs
Also See for PAH 50:
- Instructions manual (13 pages) ,
- Installation, operation and maintenance manual (80 pages) ,
- Instructions manual (12 pages)
Table of Contents
Advertisement
Advertisement
Table of Contents

Related Manuals for Danfoss PAH 50


Summary of Contents for Danfoss PAH 50
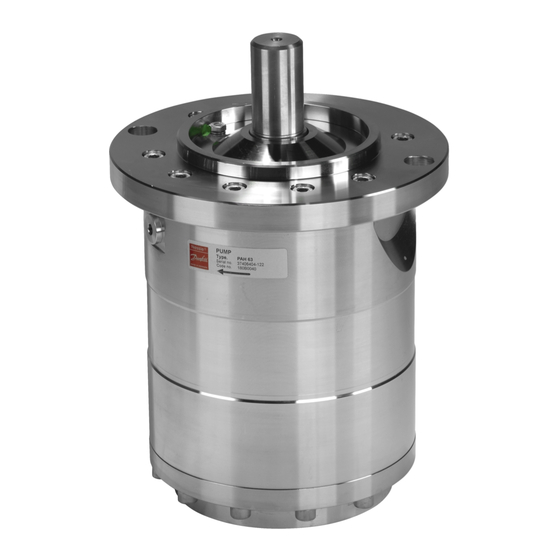
- Page 1 Service guide PAH pumps PAH 50-100 Disassembling and assembling hpp.danfoss.com...
-
Page 2: Table Of Contents
Service guide | Disassembling and assembling PAH 50-100 Table of Contents Disassembling the pump ........................3 Inspection .............................. 7 2.1. Port plate and thrust plate ......................... 7 2.2. Pistons ..............................7 2.3. Cylinder barrel ............................. 8 2.4. Housing ..............................8 2.5. -
Page 3: Table Of Contents 1. Disassembling The Pump
Service guide | Disassembling and assembling PAH 50-100 Disassembling the pump 2. Remove the parallel key and unscrew the 1. Tools required for dismantling. front cover. 3. Unscrew the screws in the front flange. 4. Remove the front flange. 4. Remove the shaft seal using two screw drivers. - Page 4 Service guide | Disassembling and assembling PAH 50-100 7. Remove the swash plate using the front 8. Remove the cylinder barrel from the screw. housing. 9. Unscrew the six screws in the end cover. 10. Separate the housing and the end cover.
- Page 5 Service guide | Disassembling and assembling PAH 50-100 13 Remove the pistons. 14. Remove the retaining plate. 16. Remove the the thrust plate using two 15.Remove the retaining ball. screwdrivers. 18. The ceramic ring removed from the front 17. Remove shaft sealing from front flange.
- Page 6 Service guide | Disassembling and assembling PAH 50-100 19. Wash all parts and replace all seals 20. Inspect all parts carefully (see ”Inspection”) (inclusive shaft seal). and replace any worn parts. 21. If the pump has failed, the reason for the failure must be found and fixed before the repaired pump is re-installed.
-
Page 7: Inspection
Service guide | Disassembling and assembling PAH 50-100 Inspection 2.1. Port plate and thrust plate 2. Hold a ruler against the surface of the 1. Neither port plate nor thrust plate must plates and check the tightness against a show any sign of wear. -
Page 8: Cylinder Barrel
Service guide | Disassembling and assembling PAH 50-100 2.3. Cylinder barrel 2. Check that the bushings are free from seizure and large scratches. 3. Ensure that the pistons can move freely in the bushings. 1. Check the outer bearing surface for large wear grooves (not critical). -
Page 9: Assembling
Service guide | Disassembling and assembling PAH 50-100 Assembling WARNING: Important: Do not use silicone when assembling the It is essential that the pump is serviced in pump. Do not reuse disassembled O-rings; conditions of absolute cleanliness. All parts they might be damaged. Always use new must be absolute clean before mounting. - Page 10 Service guide | Disassembling and assembling PAH 50-100 6. Place housing and port flange near table 5. Mount the housing using the pin as guide. edge and mount screws from below. 7. Mount the thrust plate with sealings on 8. Press the thrust plate into the cylinder the cylinder barrel.
- Page 11 Service guide | Disassembling and assembling PAH 50-100 11. Mount the retaining plate (smallest centre diameter pointing upwards). 12. Mount the pistons. 14. Mount the ceramic ring by pressing the tool as far down in the front flange as 13. Mount the ceramic ring on the tool.
- Page 12 Service guide | Disassembling and assembling PAH 50-100 17. Mount the swash plate on the front flange 18. Press the swash plate against the flange using the pins as guide. and screw the tools together. 20. Mount the washer and the screw in the 19.
- Page 13 Service guide | Disassembling and assembling PAH 50-100 Guide pin 23. Mount the front flange on the housing using the pin as guide. 24. Remove the tool. 25. Mount the screws in the front flange. 26. Tighten the screws to a torque of 30 Nm and mount the parallel key on the shaft.
-
Page 14: Service Kit List For Pah 50-100
Service guide | Disassembling and assembling PAH 50-100 Service kit list for PAH 50-100 Pos. Qty. Unit Designation Material Pcs. Shaft bush, torpedo Pcs. Press tool for 35 mm shaft Pcs. Mounting screw Pcs. Housing AISI 304 Pcs. AISI 304 Pcs. -
Page 15: Exploded View Pah 50-100
Service guide | Disassembling and assembling PAH 50-100 Exploded view PAH 50-100 180R9098 | 521B1072 | DKCFN.PI.011.NC5.02 | 06.2017... - Page 16 Danfoss A/S High Pressure Pumps Nordborgvej 81 DK-6430 Nordborg Denmark © Danfoss | DCS (im) | 2017.06 | 16 180R9098 | 521B1072 | DKCFN.PI.011.NC5.02...
Need help?
Do you have a question about the PAH 50 and is the answer not in the manual?
Questions and answers