Table of Contents
Advertisement
Quick Links
Advertisement
Table of Contents

Related Manuals for Rabe Kormoran PF 180


Summary of Contents for Rabe Kormoran PF 180
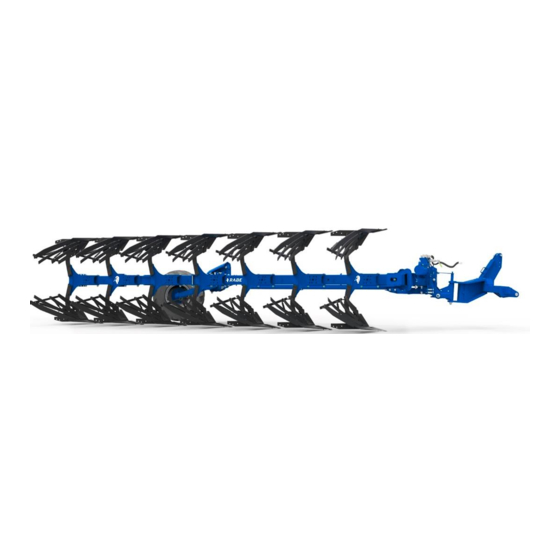
- Page 1 ( T R A N S L AT I O N O F T H E O R I G I N A L O P E R AT I N G I N S T R U C T I O N S F R ) Serial-No. KORMORAN PF 180 / PF HA 180 Semi-mounted reversible single wheel plough...
- Page 3 KORMORAN PF 180 / HA 180 UICK START Quick start KORMORAN PF 180 / HA 180 - Safety stop placed on the wheel unit. - With the implement lowered, check that there is no possibility of contact with the ground. Leave a clearance of 30 to 50 mm Preparing the tractor at the safety stop on the rear wheel.
-
Page 5: Table Of Contents
ABLE OF CONTENTS Top link............23 INT R OD U CTIO N Hitching and unhitching ....... 24 Hitching the implement to the tractor ....24 Instructions ..........7 5.1.1 Tractor equipped with link arms with fixed ball Product documentation ........7 joints ............24 Explanation of symbols ........7 5.1.2 Tractor equipped with link arms with removable... - Page 6 ABLE OF CONTENTS Adjustment of the disc coulter (optional) .....44 MA IN T EN A N CE 9.6.1 Set the working depth with the disc coulter. 44 Disc coulter - lateral overlap adjustment .....45 9.7.1 Adjustment - Flat leg .........45 9.7.2 Adjustment - Round leg ......45 Protection of the environment ......
-
Page 7: Introduction
KORMORAN PF 180 / HA 180 PERATOR S MANUAL INTRODUCTION 1.4.2 Location of type plate NSTRUCTIONS Product documentation This manual forms an integral part of the implement, and in the event of sale, it must be passed on with the implement in compliance with the applicable regulations. -
Page 8: Safety Instructions And Rules
KORMORAN PF 180 / HA 180 PERATOR S MANUAL AFETY INSTRUCTIONS AND RULES Safety instructions 2.1.4 Hydraulic circuit and couplings 2.1.1 General instructions CAUTION: CAUTION: The hydraulic circuit is subject to high pressures. The risks of accidents during use, maintenance or... -
Page 9: Transport On The Public Highway
KORMORAN PF 180 / HA 180 PERATOR S MANUAL 2.1.7 Maintenance CAUTION: If the implement is equipped with a hydraulic folding The maintenance area must be clean, dry, well ventilated and mechanism, only actuate this from the tractor cab. well lit. -
Page 10: Safety Stickers
KORMORAN PF 180 / HA 180 PERATOR S MANUAL 2.1.9 Safety stickers CAUTION: IMPORTANT: Take care not to damage the safety stickers when Replace damaged or missing stickers. washing the implement. Locations of the safety stickers. Legend "Crushing hazard zone" sticker "25"... - Page 11 KORMORAN PF 180 / HA 180 PERATOR S MANUAL Explanation of stickers Sticker Description Sticker Description Crushing hazard zone Never work in a zone where there is a risk of crushing while the parts are able to move. Crushed feet zone Maintain a safe distance from all moving parts.
-
Page 12: Description Of The Implement
KORMORAN PF 180 / HA 180 PERATOR S MANUAL ESCRIPTION OF THE IMPLEMENT General views Legend Coupling yoke Wheel unit, lifting cylinder and hydro-pneumatic suspension Locking handle Wheel alignment arm Turnover system 10 Implement frame Offset cylinder Stabilisation bar Ploughing elements... -
Page 13: Technical Specifications
KORMORAN PF 180 / HA 180 PERATOR S MANUAL Technical specifications Part Headstock Pivoting on cardan joint, 110° turning angle. Reinforced hitch Quick coupler cat. II-III. Reinforced hitch Quick coupler cat. III-IV. Rack and pinion turnover system. Frame or one rear). -
Page 14: Technical Characteristics - Slatted Body
KORMORAN PF 180 / HA 180 PERATOR S MANUAL Technical characteristics - Technical characteristics - accumulator 0.75L accumulator 3.5L Description Technical data Description Technical data Type E1, rechargeable Type E1, rechargeable Volume 3.5 Litres Volume 0.75 Litres Charging pressure 70 bar... -
Page 15: Rack And Pinion Assembly
KORMORAN PF 180 / HA 180 PERATOR S MANUAL Advantages of the system Rack and pinion assembly Smooth operation: - No jerks during turnover. Can be stopped and / or reversed at any time without any risk for the implement or the tractor. -
Page 16: Hydraulic Weight Transfer Control (Optional)
KORMORAN PF 180 / HA 180 PERATOR S MANUAL Principle of operation 3.10 Hydraulic weight transfer control When working with a semi-mounted plough, there is always a (optional) load passing through the top link (the pin is never loose). This Unhitched position lift and the front wheels slip. -
Page 17: Extensions (Optional)
KORMORAN PF 180 / HA 180 PERATOR S MANUAL 3.12 Extensions (optional) 3.13 The wheel unit The implement is available, as standard, in 5-, 6- or 7-furrow The wheel is overhanging, positioned opposite the front of the last body. Legend... -
Page 18: Working Width
KORMORAN PF 180 / HA 180 PERATOR S MANUAL 12’’, 14’’, 16’’, 18’’, or 20’’ on implements with an inter-body 3.14 Working width clearance of 1.00 m. 14’’, 16’’, 18’’, 20’’, or 22’’ on implements with an inter-body IMPORTANT: clearance of 1.14 m. -
Page 19: Ploughshare
KORMORAN PF 180 / HA 180 PERATOR S MANUAL 3.16 Ploughshare 3.19 Disc coulter [optional] Legend Ploughshare Reversible point Legend Spring secured version The ploughshares can be formed of just one piece or have a replaceable, reversible point. The disc coulter gives a clean cut to the furrow. -
Page 20: Hydro Avant" Hydraulic Safety Device (Optional)
KORMORAN PF 180 / HA 180 PERATOR S MANUAL 3.20.2 "Hydro Avant" hydraulic safety device 3.21 Lighting and signals (optional) IMPORTANT: The user is responsible for ensuring the compliance of the hitched assembly with the applicable regulations for transport on the public highway. -
Page 21: Preparing The Tractor
KORMORAN PF 180 / HA 180 PERATOR S MANUAL 4.2.2 Tyre spacing REPARING THE TRACTOR Required tractive power The power required to tow your implement varies according to (tyres, front ballast, etc.). For additional information, consult your dealer. Number Power for medium... -
Page 22: Length Of The Lifting Links
KORMORAN PF 180 / HA 180 PERATOR S MANUAL Length of the lifting links Legend We Tractor dead weight Front lifting capacity of unladen tractor Legend Rear lifting capacity of unladen tractor Raised position Lowered position Distance between centre of gravity of front-mounted implement... -
Page 23: Position Of The Stabilisers
KORMORAN PF 180 / HA 180 PERATOR S MANUAL Position of the stabilisers Top link. Legend Length A Length B Legend Operating clearance Before hitching the implement, make sure that the thread lengths Pins (1 and 2) on each side of the top link are identical. -
Page 24: Hitching And Unhitching
KORMORAN PF 180 / HA 180 PERATOR S MANUAL CAUTION: ITCHING AND UNHITCHING Before proceeding to connect the top link, make sure the space between the implement yoke and Hitching the implement to the there is no possibility of contact between the raised tractor position and the working position. -
Page 25: Hitching The Top Link
KORMORAN PF 180 / HA 180 PERATOR S MANUAL Once the lower link arms are properly hitched, raise the 5.1.7 Position of support legs headstock with the tractor lifting mechanism to release the Unhitched position latch. Once the latch is free in its hole, lift it and secure it i the up position (remove the spring pin then the pin, lift the latch, position). -
Page 26: Locking And Unlocking The Turnover Mechanism
KORMORAN PF 180 / HA 180 PERATOR S MANUAL Transport position Locking and unlocking the turnover mechanism CAUTION: The implement is equipped with a turnover locking mechanism. The mechanism must be unlocked plough. Once work is completed, lock the mechanism You... -
Page 27: Unhitching The Implement From The Tractor
KORMORAN PF 180 / HA 180 PERATOR S MANUAL 5.3.1 Decompression kit Unhitching the implement from the tractor CAUTION: Make sure that there is no-one in the vicinity of the implement before lowering it. IMPORTANT: Before detaching the implement, make sure moist ground, place wooden blocks to wedge the components and the support legs. -
Page 28: Hydraulic Connections
KORMORAN PF 180 / HA 180 PERATOR S MANUAL YDRAULIC CONNECTIONS Required hydraulic control valves Hydraulic connections 1 double-acting (DA) for turning over. Clean the couplings on the implement and the tractor before connecting the hydraulic circuits. 1 double-acting (DA) for the roller arm. -
Page 29: Function Selector (Optional)
KORMORAN PF 180 / HA 180 PERATOR S MANUAL Function selector (optional) 6.4.1 Installing the function selector on off Legend Suction cup with mechanical switch Cab power supply cable Solenoid valve connectors Extension Black cable IMPORTANT: IMPORTANT: If control malfunctions occur, check the power... -
Page 30: Using The Function Selector
KORMORAN PF 180 / HA 180 PERATOR S MANUAL 6.4.3 Using the function selector 6.4.4 Special characteristics of the selector Deactivating a function Press the key corresponding to the function to be deactivated. Switch off the function selector by pressing button A (section 7.4.3). -
Page 31: Preparation Of The Implement Before Work
KORMORAN PF 180 / HA 180 PERATOR S MANUAL REPARATION OF THE IMPLEMENT BEFORE WORK Locating the adjustment points Locate the various adjustment points. Make sure that they are functioning properly and that they are well lubricated. Perform the checks before setting out for the... -
Page 32: Adjustment Of The Working Width Of The 1St Body (Offset)
KORMORAN PF 180 / HA 180 PERATOR S MANUAL Adjustment Adjustment of the working width of the 1st body (offset) the ground). Undo the bolt at the front of the beam housing. Undo and remove the multi-position shoe angle adjustment bolt. -
Page 33: Calibration Of Non-Stop Hydraulic Safety Devices
KORMORAN PF 180 / HA 180 PERATOR S MANUAL Adjustment Calibration of non-stop hydraulic safety devices Adjustment tips Minimum pressure: 120 bar (factory setting) Maximum pressure: 170 bar Where there are differences of calibration between the bodies, gradually increase the pressure in the bodies of the implement. -
Page 34: Offset Adjustment
KORMORAN PF 180 / HA 180 PERATOR S MANUAL Adjust the cranked lever end stop Offset adjustment (width of 1 furrow) Legend Offset open Offset closed Legend Link arm When working, the offset must be open in such a way that... -
Page 35: Installing The Subsoiler (Optional)
KORMORAN PF 180 / HA 180 PERATOR S MANUAL Installing the subsoiler (optional) DANGER Risk of accidents when using the implement for farming operations. Always follow the safety instructions given in the original operator's manual. CAUTION Risk of injury through crushing when installing equipment items and making adjustments. -
Page 36: Transport And Working Depth Adjustment Wheel
KORMORAN PF 180 / HA 180 PERATOR S MANUAL HANGING BETWEEN Transport and working depth TRANSPORT AND WORKING adjustment wheel POSITION IMPORTANT: Check the general condition of the wheels daily. DANGER: Risk of electric shock. 7.7.1 Tyre pressures between the implement and live high voltage power... - Page 37 KORMORAN PF 180 / HA 180 PERATOR S MANUAL Raise the implement. Turn the implement through a quarter turn. Legend Cotter pin Legend Locking bolt IMPORTANT: Remove the cotter pin (Pos. 1) and take out the pin (Pos. 2). Manual locking is required in order to maintain Swing up the end stop (Pos.
-
Page 38: Changing To Working Position
KORMORAN PF 180 / HA 180 PERATOR S MANUAL Changing to working position Raise the implement. Lower the implement: this lowers its centre of gravity, increasing its stability for transport. Legend Cotter pin clearance will enable the accumulator to act as a damper on Retaining pin the lifting circuit. -
Page 39: Driving On The Road
KORMORAN PF 180 / HA 180 PERATOR S MANUAL Driving on the road CAUTION: Take account of the overhang when driving on the public highway. Risk of accidents involving other road users. Risk of damage to signposts, telephone poles, etc. -
Page 40: Field Adjustment
KORMORAN PF 180 / HA 180 PERATOR S MANUAL IELD ADJUSTMENT Do not make sharp turns when the implement is in the ground. CAUTION: Read this chapter in its entirety to properly Reduce speed when turning or when clearing obstacles understand all adjustments, the correct order and (ditches, bumps, stony patches, etc.). -
Page 41: First Pass
KORMORAN PF 180 / HA 180 PERATOR S MANUAL First pass Wheel height adjustment The working depth is set by the wheel using a screw. 9.2.1 Opening the offset compass Legend Adjusting screw Legend End stop Offset cylinder Offset compass When working, the screw (1) is touching the wheel support end Fully open the offset compass (2). -
Page 42: Second Pass
KORMORAN PF 180 / HA 180 PERATOR S MANUAL Second pass are polished and soil slides without sticking, otherwise clean them. accelerate the stripping of the mouldboards. 9.3.1 Longitudinal levelling As from the 2 pass, the tractor is in the furrow. The machine must be level in the longitudinal (front-to-back) direction so that all the bodies to work at the same depth. -
Page 43: Tractor Pressure Control Adjustment
KORMORAN PF 180 / HA 180 PERATOR S MANUAL Adjustments Adjusting the hydraulic compensation cylinder (optional) Legend Tilt angle adjustment screw HM 30x160 10.9 VI4701 Lock nut Legend Top link pin Turn-over the adjusting screws (1) located under the turnover... -
Page 44: Agricultural Work In The Field - Adjusting The Settings
KORMORAN PF 180 / HA 180 PERATOR S MANUAL Agricultural work in the field - Adjustment of the disc coulter adjusting the settings (optional) 9.5.1 Safety during operations 9.6.1 Set the working depth with the disc coulter. Adjustment tips DANGER Risk of accidents when using the implement for farming operations. -
Page 45: Disc Coulter - Lateral Overlap Adjustment
KORMORAN PF 180 / HA 180 PERATOR S MANUAL 9.7.2 Adjustment - Round leg Disc coulter - lateral overlap adjustment Adjustment Adjustment tips B = Factory overlap setting Once the overlap has been adjusted, check that the disc coulter can perform a rocking motion in the direction of travel. -
Page 46: Disc Coulter - Adjust The Pivot Arm End Stop
KORMORAN PF 180 / HA 180 PERATOR S MANUAL 9.7.3 Disc coulter - adjust the pivot arm end stop Adjustment of round leg skimmers (optional) Adjustment tips The swivelling of the disc coulter (1) is limited by the adjusting 9.8.1 Round leg Skimmer - adjusting the working ring (2). -
Page 47: Round Leg Skimmer - Adjusting Lateral Overlap
KORMORAN PF 180 / HA 180 PERATOR S MANUAL 9.8.2 Round leg skimmer - adjusting lateral Tightening torque (according to the item category) overlap Grade 8.8 Wrench size Dimensions Adjustment tips (DIN ISO 272) Ib-ft M 20 Grade 10.9 Dimensions... -
Page 48: Adjustment Of Vari-Fix Skimmer (Optional)
KORMORAN PF 180 / HA 180 PERATOR S MANUAL Adjustment of Vari-Fix skimmer (optional) 9.9.1 Vari-Fix - Adjusting working depth Setting instructions From the distance to the ploughshare edge (H) resulting in the Legend Set H in such a way that the blade (a) works in the soil over 1 Safety ring the entire width. -
Page 49: Adjusting The Vari Heavy Duty Skimmers
KORMORAN PF 180 / HA 180 PERATOR S MANUAL 9.10 Adjusting the Vari Heavy Duty skimmers 9.10.1 Vari Heavy Duty - adjusting the working depth Adjustment instructions The Vari Heavy Duty working depth is calculated from the gap to the blade tip (H) - 1. -
Page 50: Adjustment Of Deflector (Optional)
KORMORAN PF 180 / HA 180 PERATOR S MANUAL 9.11 Adjustment of deflector (optional) 9.12 Adjusting the sub-soiler (optional) Adjustment tips Adjustment tips Working depth when working. In ground with clods to be broken, the mould boards are supposed to only skim over the tops of the ridges. Adapt the working depth to the speed of the implement. -
Page 51: Addition Of Extra Plough Bodies
KORMORAN PF 180 / HA 180 AINTENANCE 11 C LEANING 9.13 Addition of extra plough bodies Clean the implement. When cleaning with a high pressure cleaner, do not direct the contact your dealer for any additional information. jet at joints, bearings etc. or at electrical components. -
Page 52: Identification Of A Hydraulic Hose
KORMORAN PF 180 / HA 180 AINTENANCE 12.1.1 sheath, wear etc.). Check that couplings, components, etc. are securely tightened. Drain the implement if you need to replace components in the hydraulic circuit. CAUTION: Never open, pierce, weld or perform work on the hydraulic reservoirs. -
Page 53: Lubrication And Greasing
KORMORAN PF 180 / HA 180 AINTENANCE 12.2 Lubrication and greasing IMPORTANT: The location of lubrication nipples depends on the various assemblies and options of your implement. IMPORTANT: Check the location of lubrication nipples using the spare parts catalogue supplied with your implement. - Page 54 KORMORAN PF 180 / HA 180 AINTENANCE Number Group Location Quantity 25 hrs. Lubrication nipples on 25 hrs. Pinion support turnover system 25 hrs. Pinion support 25 hrs. Hydraulic cylinder Lubrication nipple on offset 25 hrs. Arm pivot pin Lubrication nipples on frame 25 hrs.
- Page 55 KORMORAN PF 180 / HA 180 AINTENANCE Number Group Location Quantity 25 hrs. Central frame 25 hrs. Wheel arm pivot pin 25 hrs. Lubrication nipples on wheel Cradle horizontal pin unit 25 hrs. 25 hrs. Wheel arm pivot pin 25 hrs.
- Page 56 KORMORAN PF 180 / HA 180 AINTENANCE Number Group Location Quantity 60 hrs 60 hrs Hydraulic safety Link arm 60 hrs 150 hrs Disc coulter Bearing 1) Grease = Commercially available lubricating grease 2) Grease after each washing Regular lubrication of all moving parts ensures optimum implement operation and prolongs service life.
-
Page 57: Troubleshooting And Repair
KORMORAN PF 180 / HA 180 AINTENANCE 13 T Repair : ROUBLESHOOTING AND REPAIR CAUTION Risk of accidents when loosening the the pivot bolt. Risk of accidents when plough body swings back. 13.1 Tripping the mechanical stone safety Only approach the plough body from the rear. -
Page 58: Replacing The Vari Heavy Duty (Vhd) Shear Bolt
KORMORAN PF 180 / HA 180 AINTENANCE Tightening torque - shear bolt 13.3 Replacing the Vari Heavy Duty (VHD) shear bolt Shear bolt Link arm Dimensions Bolt dimensions Attachment strength 190 Nm 140 lb-ft 225 Nm 10.9 166 lb-ft 225 Nm 10.9... -
Page 59: Replacing The Sub-Soiler Shear Bolt (Optional)
KORMORAN PF 180 / HA 180 AINTENANCE 13.4 Replacing the sub-soiler shear bolt (optional) Attachment Repair tips Repair instructions: Systematically insert the shear bolt from the sub-soiler side. - 3. Insert the new shear bolt from the link arm side. -
Page 60: Adjust Undercut
KORMORAN PF 180 / HA 180 AINTENANCE 13.5 Adjust undercut Safety information Set-up information WARNING Risk of accident from crushing during set-up and adjustment work. Care must be taken during all work to ensure that the implement is stable and has been secured to prevent it rolling away. - Page 61 KORMORAN PF 180 / HA 180 AINTENANCE Set-up - Expanding the undercut Undercut - Check / adjust factory setting - 1. Position alignment rails (c) above coulter tips. - 1. Loosen beam screw (24). - 2. Loosen system screw (19).
-
Page 62: Replacing Wear Parts
KORMORAN PF 180 / HA 180 AINTENANCE - 3. If value deviates from factory setting, adjust distance to 14 R EPLACING WEAR PARTS alignment rail. Set all plough bodies uniformly. 14.1 Replacing mouldboards Fastening - 4. Loosen beam screw (24). -
Page 63: Replace The Stripes
KORMORAN PF 180 / HA 180 AINTENANCE 14.2 Replace the stripes Fastening Torque Quality grade 10.9 Size lb-ft (*DIN ISO 272) 19 (18*) 14.4 Replace the tines with reversible points Fastening Legend Note Do not tighten the tapered screw to the standard tightening torque. -
Page 64: Replace The Trash Board
KORMORAN PF 180 / HA 180 AINTENANCE 14.5 Replace the trash board 14.6 Replace the subsoiler Fastening Fastening Legend Washer Adjustment Legend For information on adjusting, see chapter "Adjustment of Tines Torque Sliding ring Adjustment Quality grade 10.9 Size lb-ft For information on adjusting, see chapter "Adjusting the sub-... -
Page 65: Replace The Skimmer Tines And Mouldboard
KORMORAN PF 180 / HA 180 AINTENANCE 14.7 Replace the skimmer tines and mouldboard Adjustment Fastening For information on adjusting, see chapter: Round rod skimmer "Adjustment of round leg skimmers (optional)", page 46 "Adjusting the Vari Heavy Duty skimmers", page 49 Torque Quality grade 8.8... -
Page 66: Replacing The Wheel
KORMORAN PF 180 / HA 180 AINTENANCE 15 R EPLACING THE WHEEL IMPORTANT: The implement must be hitched to the tractor and the hydraulic hoses connected. Work on level ground, preferably on a hard, compacted surface. Use only new original replacement parts approved by the manufacturer. -
Page 67: Spare Parts
KORMORAN PF 180 / HA 180 AINTENANCE Tighten the nuts. Return the implement to the transport position. IMPORTANT: IMPORTANT: Check the assembly of the nuts on the rim - The Check the tightening of the wheel studs after a few spherical bearing must be perfect. -
Page 68: Maintenance Of Plough Bodies
KORMORAN PF 180 / HA 180 AINTENANCE 16.1 Maintenance of plough bodies IMPORTANT: Protect the working surfaces of the mould boards and the shares against corrosion by applying a light coating of grease or oil. In particularly sticky soil conditions, apply a coat of liquid oil... -
Page 69: Precautions For Storage
KORMORAN PF 180 / HA 180 AINTENANCE 16.3 Precautions for storage Assembly CAUTION: Never allow children to play around an implement if it is hitched to a tractor or in its storage area. DANGER: Never store agricultural machinery under a power line. -
Page 70: Ce Declaration
DECLARATION 17 CE DECLARATION Semimounted-reversible plough (Aufsattel-Drehpflug) Designation: Type: Kormoran PF Serial no.: erial no.: 9901.00.21EN01 - 02/2017 - 70 -... - Page 72 RABE ZI Nord Les Gaudères 37130 Langeais Frankreich Tél. (+33) 2 47 96 72 61 Fax (+33) 2 47 96 71 85 info@rabe-gb.fr www.rabe-gb.fr RABE Am Rabewerk 1 49152 Bad Essen Deutschland Tél. +49 (0) 54 72 771 - 0 Fax +49 (0) 54 72 771 -195 info@rabe-gb.de...
Need help?
Do you have a question about the Kormoran PF 180 and is the answer not in the manual?
Questions and answers